You must be logged in to rate content!
8 minute(s) of a 124 minute read
10-30-2010
So for chits and giggles, I installed the front suspension and wheels/tires and dropped the car on some scales.
Now I know I am still missing quite a bit of stuff, like driveshaft, windshield, hood, fenders, front bumper, wiring and fluids, but I was shocked by the weight.
Here's what the car looked like when weighed...
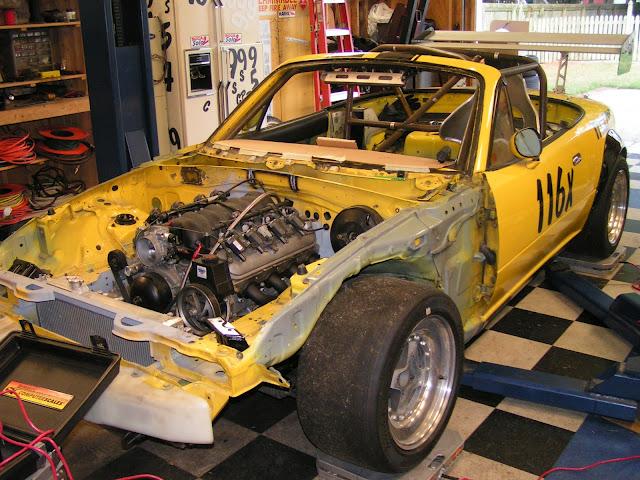
and the weight....

11/28/10
I was able to get out in the garage today and get something done.
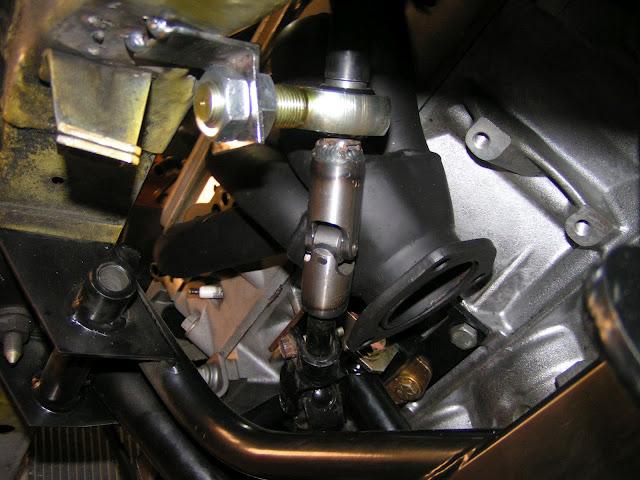
I added an additional universal joint to my steering shaft. This allows me to use off the shelf block hugger headers.
I bought a solid 1" universal and bored it to .575" for a slip fit onto the steering column. I also bought a .75" rod end to support the shaft. In order to use the rod end, I had to build a .75" OD, .575" ID sleeve.
I cut the smaller steering shaft and welded in the universal. I welded the sleeve onto the shaft and slipped the rod end into place. I then build a bracket to mount the rod end.
I still have to finish up the welding, but I think this is the final product.
This was a lot more tedious than I thought it would be. It took several iterations to get everything to line up.
Here's a couple pics...
12/25/10
I'm ready to get back out in the garage this week and get some work done. I have done quite a bit, but there is still a ton of stuff to do.
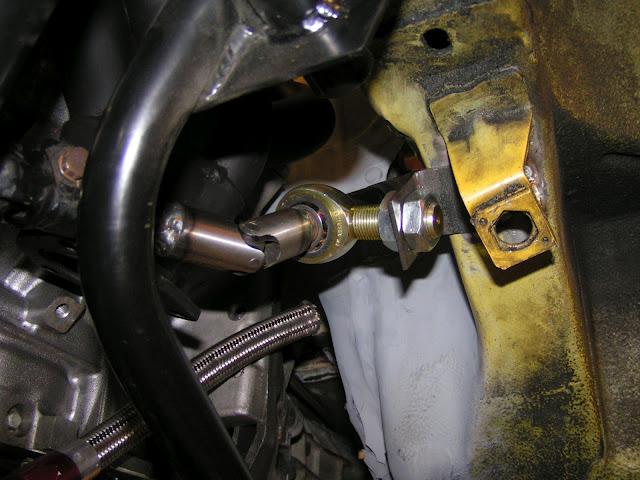
I will eventually build a triangulated strut tower brace that ties into the firewall where it is reinforced and then to the strut tower mounts that I saved from the MSM. The strut brace may extend forward and tie into the chassis also, but that is yet to be determined.
I wanted to tie the front of the car into the cage. I had to cut out the radius-ed supports at the rear of the engine bay to fit the engine. My thoughts were that without the supports I have created a shear point. With the added torque of the V8 twisting the car, I wanted every bit of stiffening I could get.
Will it work? I dunno? It will all be bolt in pieces, so I will be able to test it with and without the brace to see if it makes any difference.
12.27.10
Day 1 of "Get this project done" week.
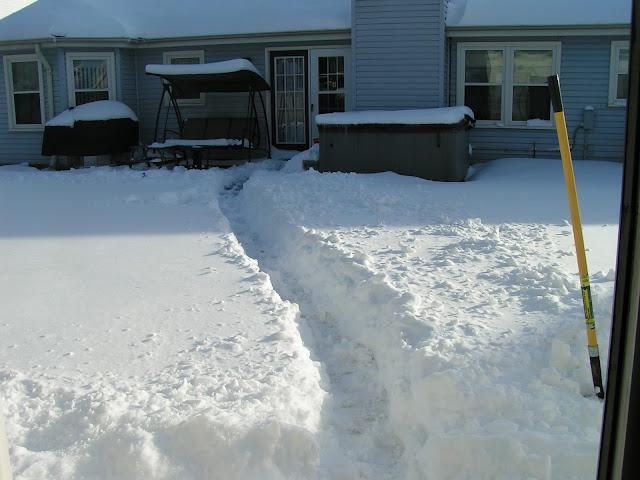
I had to start the day off digging out a trail to get to my garage. Here's a picture from the side door of my detached garage looking back at my house.
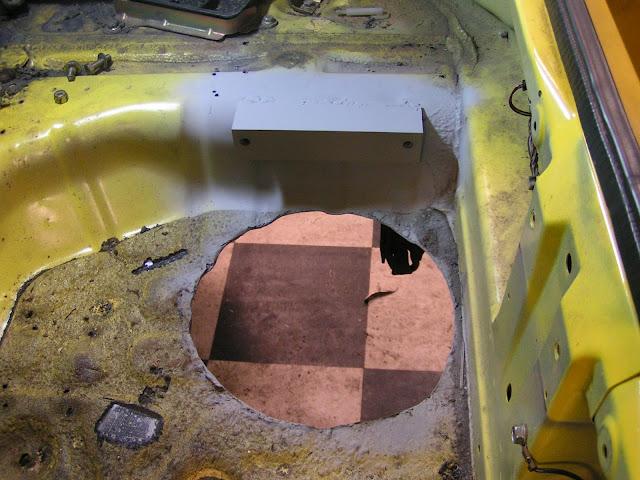
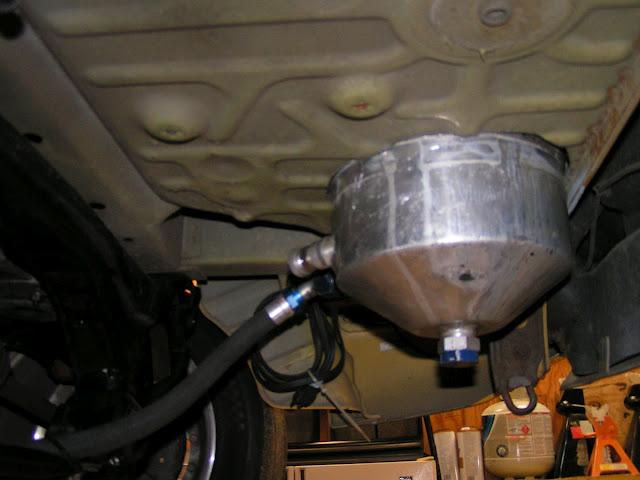
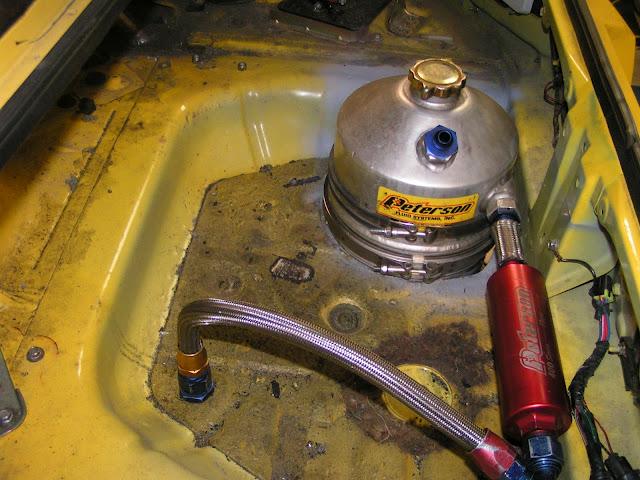
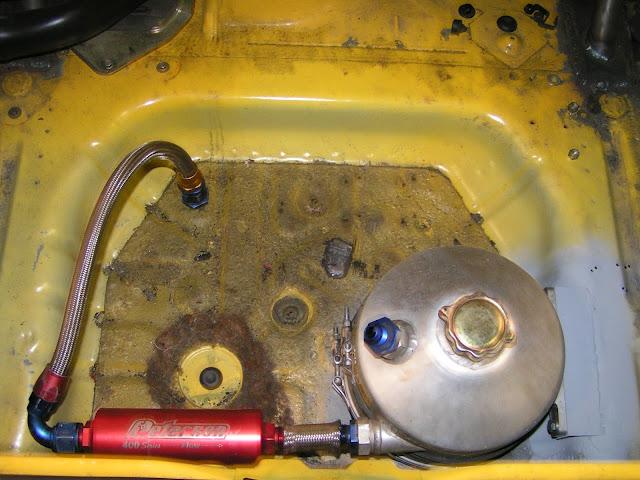
So I jumped into mounting the dry sump tank today. I wanted to get the tank as low as possible in the car so I decided to cut a hole in the trunk floor and mount the tank a little lower. This will also make accessing the drain plug much easier.
I welded some nuts to the back of a piece of angle, then welded the angle into the trunk.
Here's a couple shots from under the car. The cord is for the immersion heater for the oil. It's going to be nice to plug the car in overnight at cold track events.
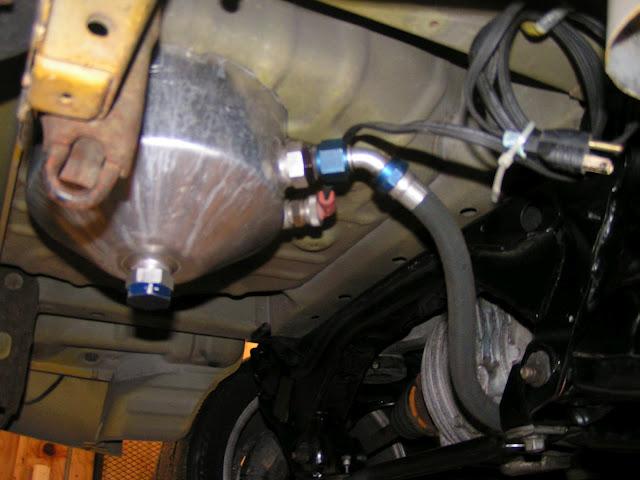
Here's a couple shots from above with the oil lines temporarily laid out. The red tube is a Peterson's 100 micron oil filter.
I had a -12AN bulkhead fitting laying around and decided to use that rather than just running the line through the trunk floor.
The line between the tank and the filter is just a place holder till I can get a female/female coupler.
More tomorrow....
12/28/10
Day 2 of "Get this project done" week does not have much to show in pictures.
Well maybe one:

I started off the day by taking the measurements for my drive shaft. I picked up a Camaro drive shaft a while back and finally got around to taking the measurements to have it modified.
I drew up some detailed sketches then headed off to the local drive shaft/machine shop to drop it off.
I also took them my aluminum flywheel and clutch pressure plate to have them balanced as an assembly.
I had to do some other running to do, but ended my day on a high note.
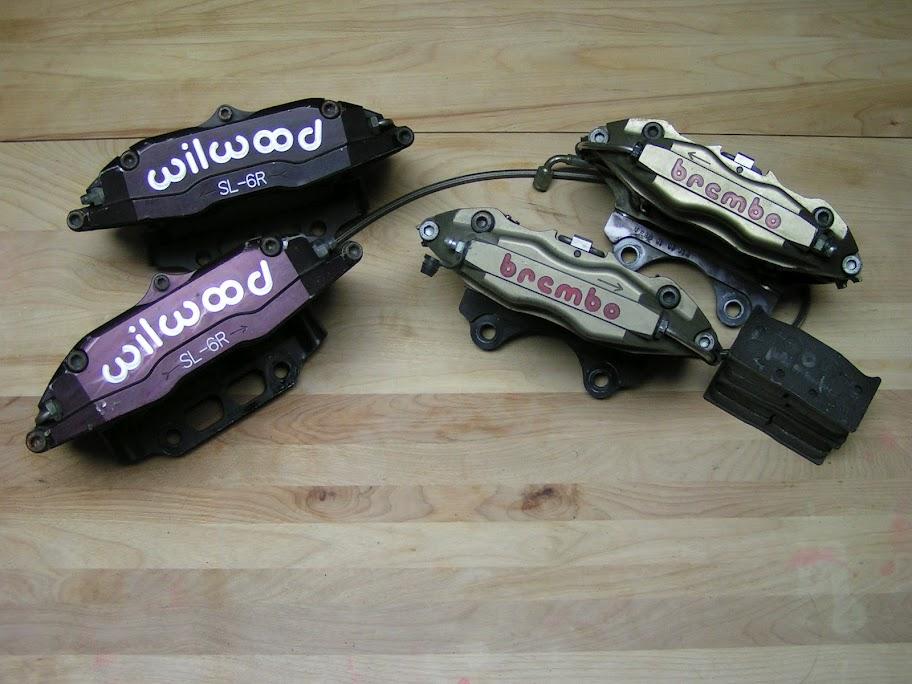
I stopped by and picked up my front and rear calipers. They came off the same car that I got my engine out of. I worked out the deal several months ago, I just never got over there to pick them up. Today I stopped by and handed over the cash and took them home.
The fronts are 6 Piston Wilwood SL-6Rs. The rears are 4-Piston Brembos.
They came with a fresh set of Performance Friction 03(F) and 01 (R) compound pads. Not sure if that's what I'll stay with, but it's a start.
I plan on running 11.75 x 1.25 rotors front and rear with custom rotor hats and caliper mounts. Probably overkill, but o'well.
12/30/10
Day 3 of "Get this project done" week did not happen. My relatives visiting for the holidays were kind enough to pass on stomach bug. I spent all day yesterday either sleeping or puking. Good Fun!
Day 4 of "Get this project done" was a good, but frustrating.
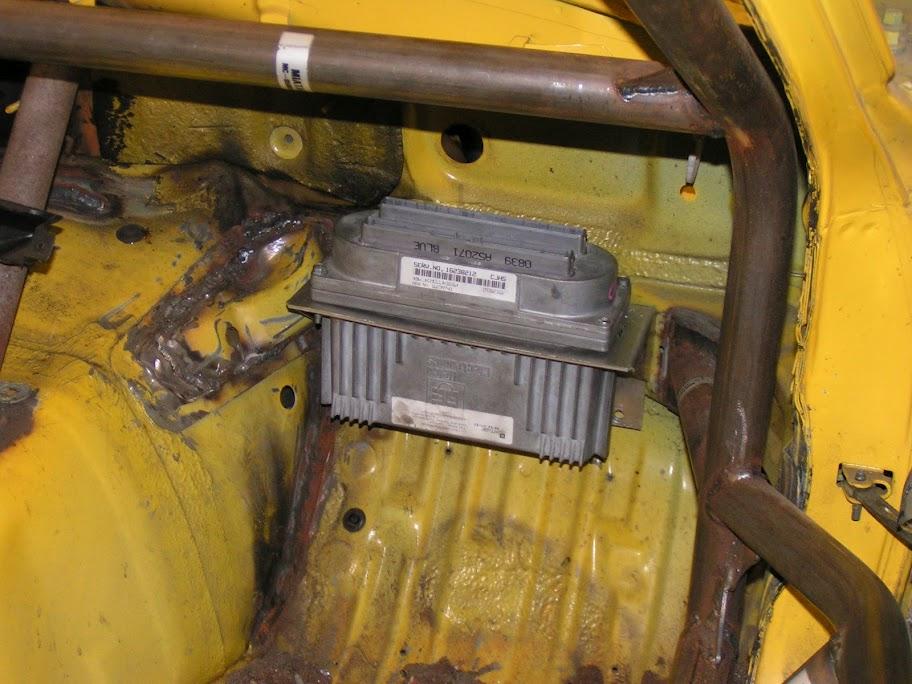
I started the day building a mount for my ECU. I bent up some aluminum, welded in some gussets and hacked out a hole for the ECU. It didn't turn out as nice as I had hoped, but it will do. It will be hidden by the dash anyway.
I drilled out 2 of the 4 ECU case screws and installed longer screws and nuts to mount the ECU to the mount. I intended on mounting the bracket from the bottom after the ECU was mounted, but that ended up being a less than ideal idea.
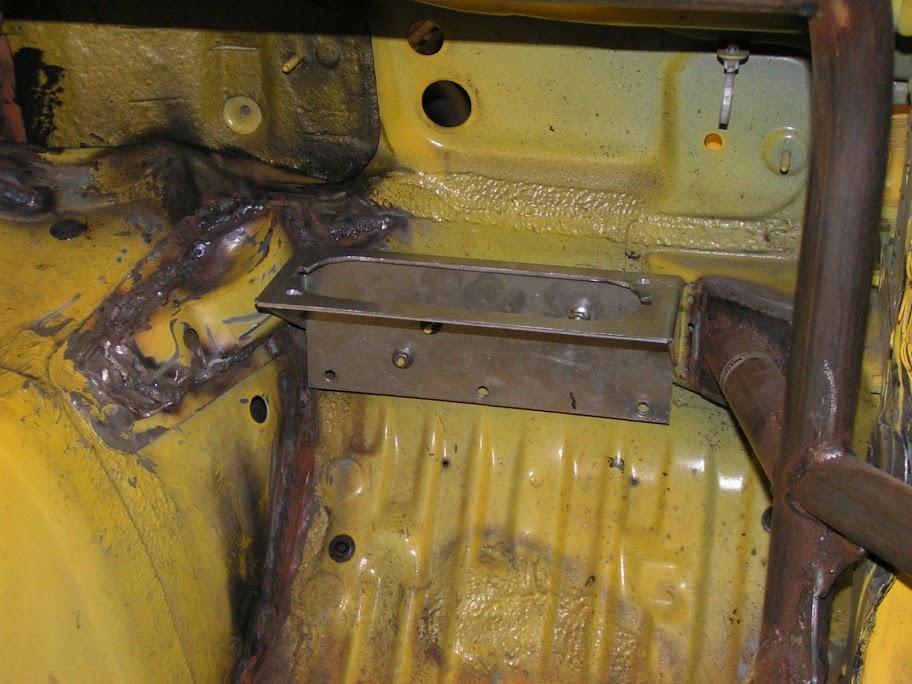
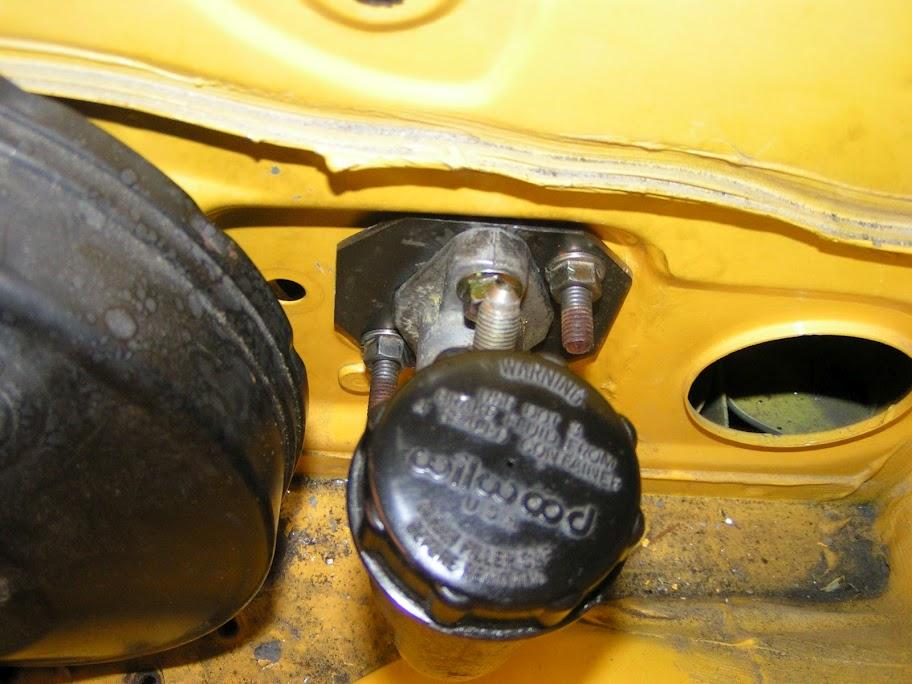
Then I jumped into building an adapter plate for the Wilwood clutch master cylinder. This is where the day got frustrating.
Note to anyone planning on building your own adapter plate: BUY THE ONE FROM V8 ROADSTERS!
I spent 3 if not 4 hours building this plate. It took me 3 different tries before I got it right. I started with aluminum, then realized there was no way for me to get to the nuts on the backside to mount the Wilwood CMC.
I then built it out of steel and thought it would be cool to weld in studs to mount the Wilwood CMC. Great concept, terrible execution. I ended up with the stud all out of wack, too far apart and less than perpendicular. I tried to remove the studs and ended up destroying the plate in the process.
Round 3.... I built it out of steel again and welded nuts to the back side of the plate. I then had to drill clearance holes in the firewall to give the nuts some room.
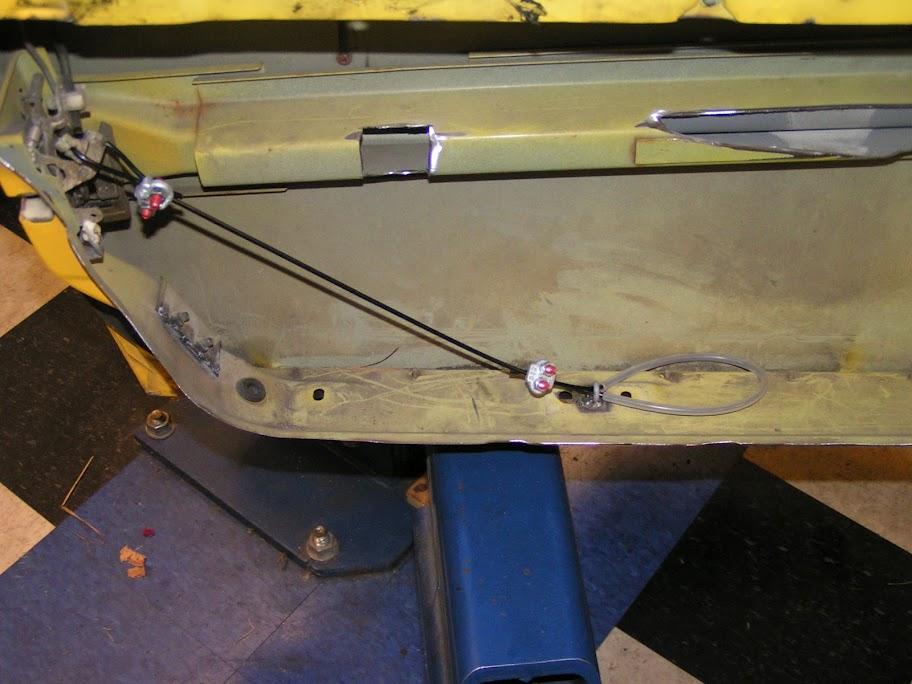
I couldn't end the day being frustrated, so I decided to build the inside door releases. Simple, functional, and perfectly placed when sitting in the car.
I may buy some crimp sleeves for the wire rope and bring home a crimper from work. This would eliminate the bulky wire rope clips.