You must be logged in to rate content!
3 minute(s) of a 127 minute read
6-3-2011
At this point in my build, I 'took advantage' of a 6MT Super Shift Kit group buy hosted by turninconcepts. I also bought every bonus option I could applicable to my car. Plus some cross member bushings that were out of stock and coming soon.
So, here is it all spread out on the table and notated. My photobucket editing skills are limited. If I was smart, I'd just edit them before uploading, but they are straight off my phone.
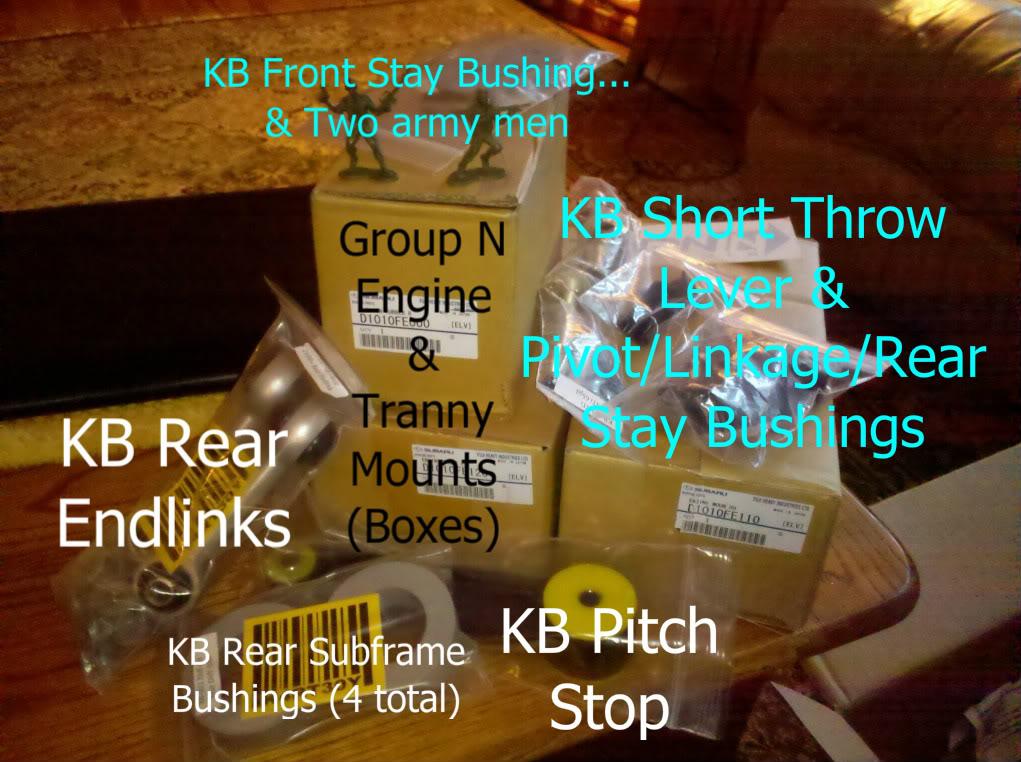
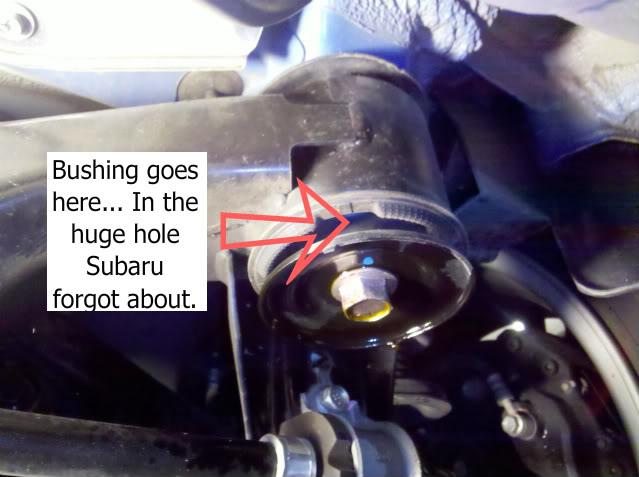
Kartboy Rear Subframe Bushings:
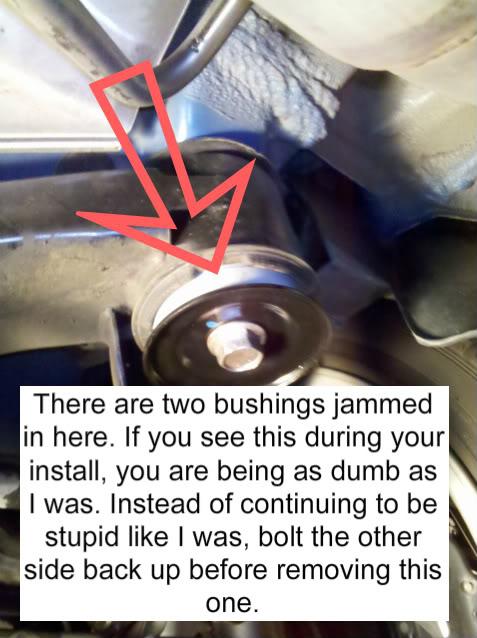
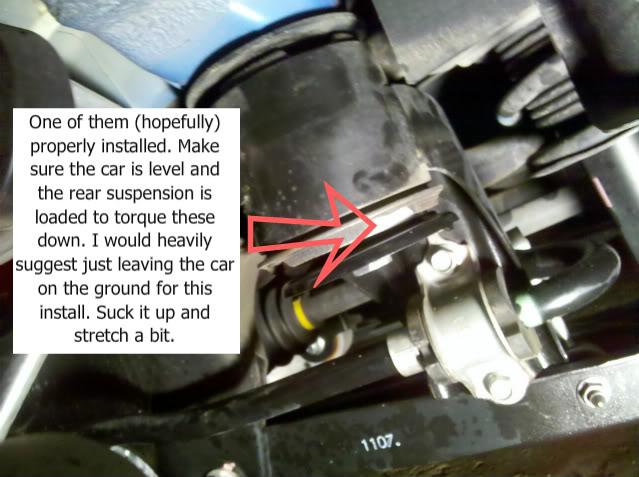
So funny story about these. I thought maybe TiC just sent me the very rear ones (the rear two of the rear subframe bushings.. confusing). I did not realize they were stuck together in pairs. I accidentally put both of them in before realizing I had put two in while doing the other side. I dropped the other side, fixed it, then realized I had to jack up the subframe to get the bolt to thread back in safely. I got it, was a bit nerve wracking though.
Make sure you do this install with the rear suspension loaded. I tried it on ramps, but I think the car needs to be level... might have luck if you jack up the front of the car to be even with the ramps. I just left it on the ground and did some squirming. It wasn't too bad once I realized this.
There are 4. This isn't an install guide, but I will post some pictures in case they are of any use.
Impressions: Took out some driveline slop when you start/stop. Hard to describe. No noise or vibration added or anything. Just less front to back bouncing. Considering the ease of the install and the low price, I would recommend these.
Whiteline makes ones that actually insert inside the bushings from the top and bottom. To install these, you need to drop the entire subframe and jack it back up to bolt it back together. I'm sure they would make more of a difference, but I had a discount on these, and they filled in those voids on the 2011s from what I gather anyhow.
Overall, two thumbs up =).
Kartboy Pitch Stop:
No pictures for this one. Install went as planned. Hardest part being wrestling the TMIC back into it's spot. If anybody has any suggestions to help maneuver that thing, I'd appreciate it. That turbo connection is evil. I will buy a spare silicon tube next time it's out, just in case I rip it.
Torque spec's were right out of the service manual. 38 or so on the engine side, and 43 or so on the firewall.
Impressions: Once again, less driveline slop. I also feel more connected to my engine =). It's not really much more noise, but there is noticeable (good) vibrations when you lay into the throttle. I'm really happy with it. It kind of reminded me of the bug eye I rode in a while ago. Less fluff and more 'raw'. I would probably suggest it, even if you don't like noise/vibration.