You must be logged in to rate content!
10 minute(s) of a 391 minute read
1-19-2009
Que paso Antonio?!
Yeah it was time to get her (the cabby) back online. Nothing really happened this weekend though... FalconFixer and I discovered that mi Bonita had never been to the junkyard before. So it became an adventure to the junkyard instead. She had fun going through everyones junk left in the cars...
FalconFixer and I discovered that old beetles have metal signal stalks and scored 1 1/2 sets. I think we have enough colum parts to make the swap work too. It turns out I only had ONE rabbit metal set (the ones I gave FalconFixer) and the ones on my car were plastic.
We got a bunch of other goodies, but for now I am keeping them under wraps. Borrowed her parents trailer though, and finally picked up the engine for the cabby. And it came with two cans of engine paint! Seems the colors will be black and red.
Most of the rest of he weekend was spent reorganizing mi casa and labeling piles of bolts for use on both cars. SO much fun...
January 21, 2009
The cabby isn't allowed to steal the thunder away from my bunny. Wanna see it? Well come on out here and help me throw the engine in!!! The sooner she is back together the sooner I am busting out the bunny!
Engine plans for the bunny? I want decent fuel economy, performance, and reliability. To all the “naysayersâ€Â out there this is actually easily accomplished with the right combination of parts, engine management, and proper tuning.
The head is a modified ABA crossflow for better flow and the ability to run the OE TD setup. Its already finished and just waiting for me to pay off the bribes on it. I choose this mainly for ease of access to the turbo. Reliability goes way up with this combination too since it will eliminate heat soak caused on the counterflow, and also has the sodium filled exhaust valves from the G-60. The G-60 valves are a little beefier too with 8mm stems instead of the ABA 7mm ones.
Actually Antonio (1.8T16vhead) and I were brainstorming tonight about the bottom end. Turns out the engine that was supposed to go into my cabby over the last weekend was a bit questionable anyways. So I have it all pulled apart and found out a few more tricks and parts interchangeability that I hadn't thought about before. I LOVE 8v engines. They are near indestructible. The 16v engine on the other hand while peppier out of the box, comes with a price. Its not as reliable and once you boost it and tweak it that reliability really falls. My plan was to put a relatively unmolested 16v into the cabby. A decent combination of power and reliability but without the cost and aggravation of setting up a boosted system.
The older 8v's (pre ABA) have horrible oil breather systems... Never having built a 16v, I hadn't realized that I could simply dump the 8v PG block, and use the 16v 1.8L block instead. The 16v block will give me a MUCH BETTER oil breather setup, still has the oil squirters, and should fit the PG internals.
I really want this bunny online and running soon though. I am tempted to throw the 1.6L engine into her that was sitting in the tire well. Setup with a solid lifter head and no boost temporarily so shes drivable and doesn't need to be trailered everywhere.
February 05, 2009
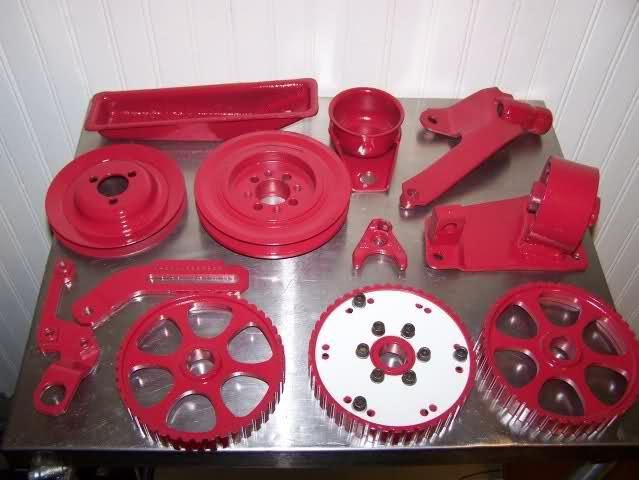
Progress is slow, but very steady. Right now I have been slowly cleaning and painting all the engine bay parts. First batch is now done and the second batch is ready for painting. First batch came out really nice!
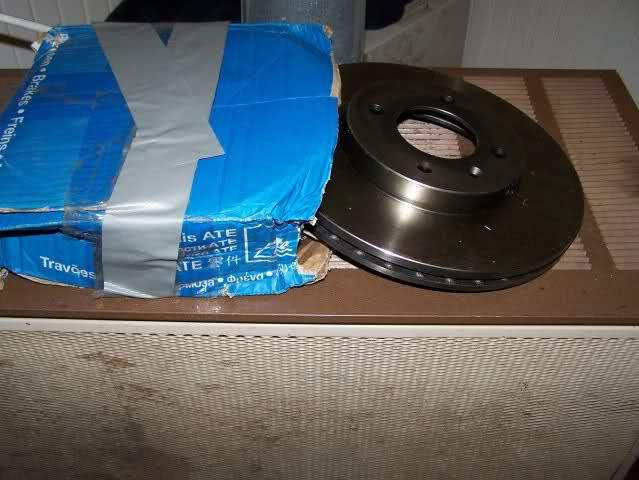
I have collected a lot more parts for the build. Braking system is complete except for a few small bits here and there. A week or so ago I got a heads up from one of my friends. Somebody was selling new VW rotors for $10 still in the box. Called up and got a little more info and cross referenced some numbers, turns out they were what I needed for my front discs!
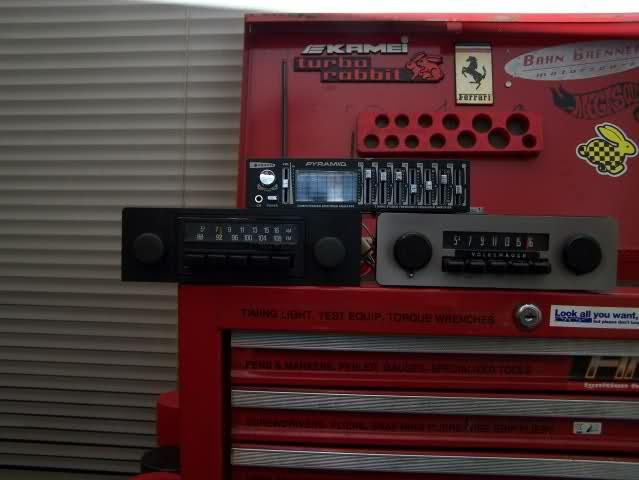
I now have another radio choice. The plan was to run the one on the right... But I just found the black one. While the Volkswagen badged one is way cooler, the FM reception on my MP-3 player sucks. I am going to use the early '90's tacky yet BRAND NEW Pyramid EQ to jack my MP3 player into the system. The black one will go with the rest of the theme slightly better also. And it is still an OEM VW radio.
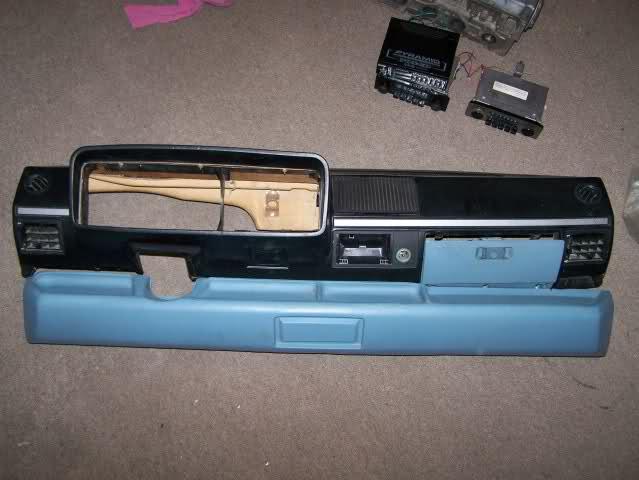
Got a few more goodies. Found the correct kneebar for the car and a spare glovebox. I wanted another box so I don't feel quite so guilty about having to cut out the back of it for the Pyramid EQ. As neat as it is, having it visible would defiantly detract from the rest of the interior concept. Obviously I will need to re-dye everything, but that was already going to have to be done anyways.
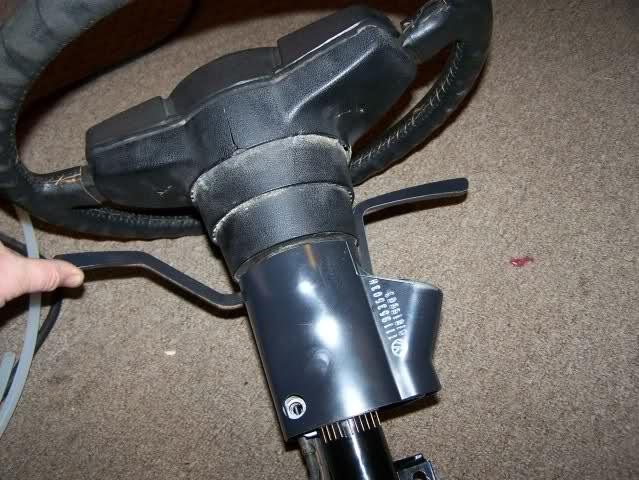
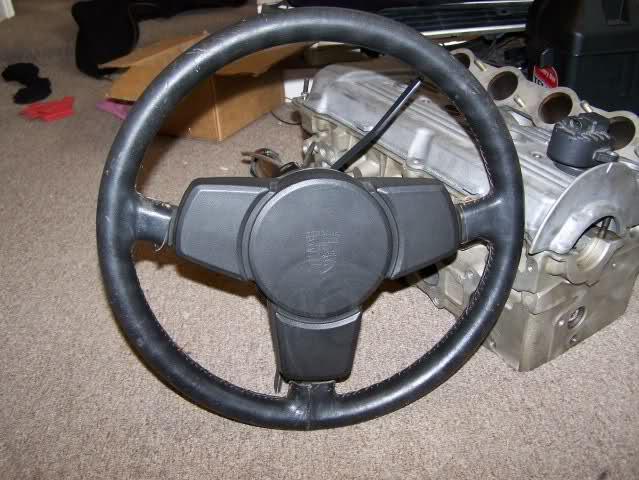
But the best I saved for last! The steering column will be pretty trick! Turns out that the 62 beetle stalks fit nicely onto the rabbit column. The trick was to use the ignition switch surround from the beetle setup. Nice because that is also metal and I can't wait to see it polished! And then there is the steering wheel, but we will leave that goodie for later...
So for the most part the progress has been in collections lol... We waited on the blasting due to bad weather and low temperatures. Need it to be warm enough within a couple days of blasting for the Por-15 to dry properly. We are about two weeks out on the blasting. By the time I get it back and painted, should be ready to drop the engine in!
February 06, 2009
No, but I WOULD for the GTI stripe setup with a red GTI in it.... MK1Autohaus sells the GTI stripe kits, but no red GTI in them. Originally the plan was to go with a full Kamei Widebody Racer setup. A lot of research finally found me a place that actually has true Kamei Widebody repo kits, not the Berg cup look alikes, but the original Kamei setup.
Unfortunately this company has some bad press in the forums and its questionable if I can actually obtain the kit from them. Cost is another big factor. To do the racer right I need three things that are all very pricey. Widebody kit. Appropriate wide wheels. And a rollcage. The wheels used on the original are BBS, no need to elaborate further there on how pricey that would be... The rollcage isn't too bad though. But dropping $500-600 on the widebody kit with no guarantee that I will get it worries me. To do the Kamei Widebody car at best would be setting me back $1500 plus paint. More like $2500-3500 though.
Anyways this build is about using the resources readily available to me that I have on hand. Looking at everything I have, I decided to go with a mixture of the early Euro GTI with a few small bits from the USA version. Especially the front spoiler. Our roads are crap here in Utah and they like sharp angles on the driveways so a duckbill was really a bad idea. I like the USA GTI spoiler anyways. And I think the bumperless look is super clean.
As for the Kamei bits? I have a small pile of goodies I am going to be using. Kamei was a name to mainly sell interior and some body accessories. They were successful because years later their widebody racers have burned a spot in our minds and we still will pay stupid amounts for old Kamei parts. With what I want to do for the interior, going full on racer is pointless anyways and wouldn't mesh well with the interior theme.
For a widebody racer I would go all out and not care about it looking a little outlandish with all the proper decals and such. With the Euro/GTI/Kamei theme I want the look to be a lot more subtle and clean.
Again I wanted to build this car inexpensively, so in the end cost was probably the biggest obstacle to building the full on Kamei Widebody. So far though we are well on track for doing this. As of now I have probally at least 75% of the needed parts. For amusement sake I went and added up my receipts. I only have one! Its $5.44 for a can of clear engine paint. As for the junkyard runs? I am always getting parts for friends and pay for mine out of those funds. Our local community is awesome too. Rarely more than a few days go by that a friend doesn't call in need of some random part. If I have it, its rare for money to change hands. It always comes back though cause its very common for friends to randomly stop by with parts I need. And most of my rare bits have been gifted to me by these same people. These were given to me a few days ago in fact!
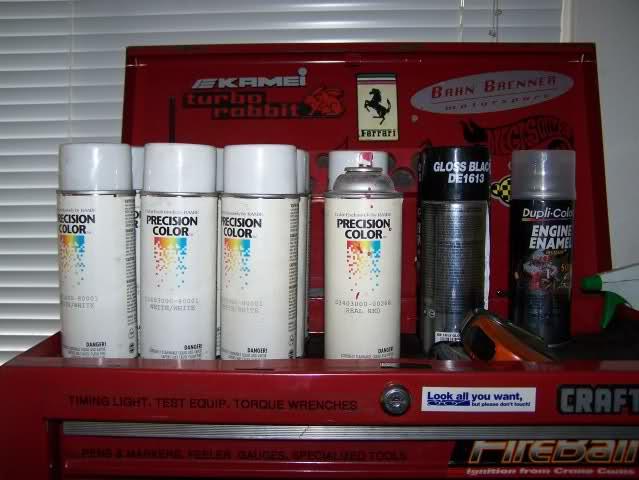
Nine cans of white, three of red, and two black high temp engine enamel. Theres a lot more where they came from too... Easily enough to do the whole car if I wanted to. For now they are just being used in the engine bay.
Last night a friend dropped this off for me. I had almost bought this same setup from a junkyard a couple weeks back, until the counter guy told me he wanted $200 for it and a valve cover...
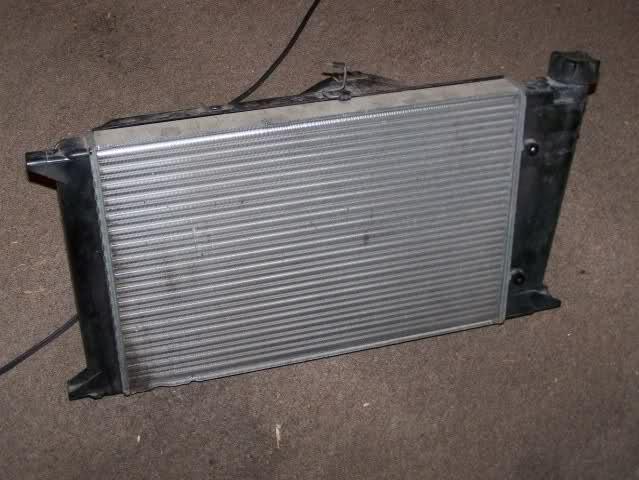
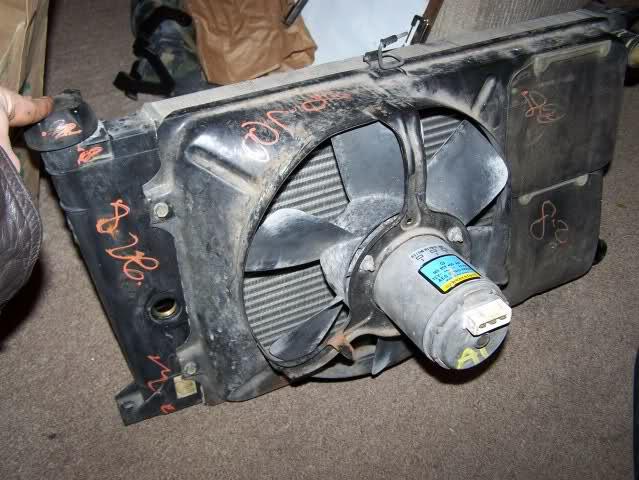
The practically brand new early radiator part is pretty obvious. Not so much is the MK2 fan setup. This price was much much cheaper. A couple weeks ago my buddy had stoped by needing a MK1 radiator setup for mocking up some insanity in his project and I happened to have it. Trading parts always works out well!
So I need to figure out how the MK2 setup originally worked. The main difference is it has a high and low fan speed. Since the car is being MegaSquirted, I will likely use the ECU to kick the high speed in. The big hurdle will be sorting out how I want it to operate in conjunction with the AC and Intercooler setup....
What can anyone tell me about how the OE MK2 fan setup originally worked?