You must be logged in to rate content!
11 minute(s) of a 391 minute read
2-23-2009
I seriously don't think I have ever heard a second speed kick in on my Etienne Cabby... Hence I forgot that car also has that. Still have a lot of questions about HOW exactly the setup works, but I can likely decipher that with a little study of the cabriolet Bentley wiring diagrams. I am pretty sure the AC was linked into the high fan speed operation also.
Progress has been very slow. Lots going on, but nothing easily shown in pictures. Unfortunately most of the real work has been happening on the Etienne. Her engine is finally ready to go in. I have actually been using her as a testbed to work out some ideas for the Kamei. I have learned so much from living with the Etienne Turbo Cabby setup for the past 5yrs. While shes going back to a much less extreme mode, I am using what I have learned to take the Kamei bunny to a much higher state.
So by now I am sure most of us know the trick the Honda boys use for repairing and upgrading their engine mounts... If not google “homemade poly mounts and you will come up with a couple DIY's on the subject. A couple months ago I used this repair for a friends project. He grabbed a poly adhesive and while it worked, it wasn't really what we were after. It looked horrible and while functional, was not something I would want to see in my own cars.
So I decided to try again. This time I used 3M Windo Weld urethane. It came out okay but kinda messy... I was cleaning up the paint with some mild 71% rubbing alcohol and decided to try it for smoothing out the urethane also. Poured a little on the partially cured urethane and was happily surprised with the results. It did WONDERS for smoothing it all out. While it doesn't look store bought, it came out good enough to use in any of my own builds.
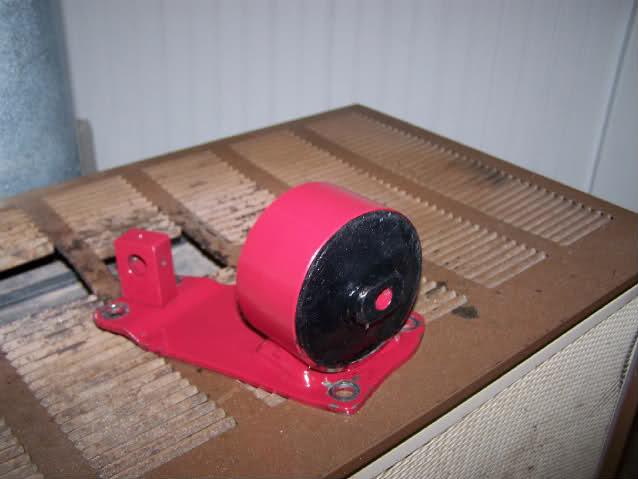
Yeah I know I stole one of the mounts for the bunny... I ended up snagging a few of the parts in that pile for the cabby.
Lots of progress is happening in sorting out the electrical for the Kamei. I managed to score the early rabbit Bentley on E-Bay. Shipped for $15!
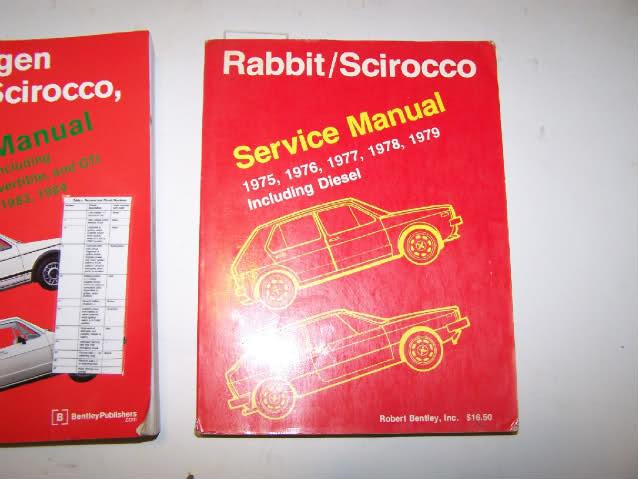
It has the fold out wiring diagrams in COLOR and is a way cool find. While the plan is to rewire the car from the ground up, likely using an '83 westmoreland harness, I still need to decipher the early instrument cluster wiring. I have a couple directions I can go with the instrument cluster setup, including a proper OE setup complete with tachometer.
Speaking of instrument clusters and speedometers, I have learned some new tricks in this department. In the past I have repaired many (read ALL of my cars..) speedometers with broken odometers. There was a lot not addressed in the write ups I have seen here on the tex though and so I decided to take some videos of the process. I had some questions I attempted to find answers for here, but couldn't come up with anything so I decided to tear into my pile of speedometers and see for myself. The biggest question I had was in regards to calibrating the speedo on reassembly.
The only references I had seen were to lift the needle over the stop peg before disassembly and to note where it rested. Well if anyone has taken enough of these apart to notice, the VDO ones (not sure about any other brands installed) actually have a couple tick marks along the bottom. I suspected that the one between 8-6 o'clock was the OE calibration point. Turns out I was right. But even more interesting... On closer examination I discovered something very very interesting. At the very least on the 85mph, 100mph and 120mph speedometers the spring assembly is the same. The difference is ONLY where the needle sits un-tensioned. So to make an early 85mph speedometer a 120mph speedo only requires swapping the face and pre-tensioning the needle correctly. This opens up a whole new interesting world of speedometer swaps. Custom gauge faces are nothing new, but until now I have never realized that most if not all of the speedometer assemblies BEHIND the faces were the same.
I really want to sort out a VSS setup in the back of one of these early speedometers. In the later cars these were available for cruise control. I am interested in using them for a different application.... I may have to resort to a homemade output flange VSS setup, but the back of the speedometer is so much cleaner.
As soon as I have some more time, I will post up the speedometer repair videos for anyone interested.
March 19, 2009
So I have been slacking horribly about posting up pictures, but we have LOTS of progress happening on the car. I have been slowed down somewhat by the cabby, but shes basically done now other than hooking everything up and some small parts needed.
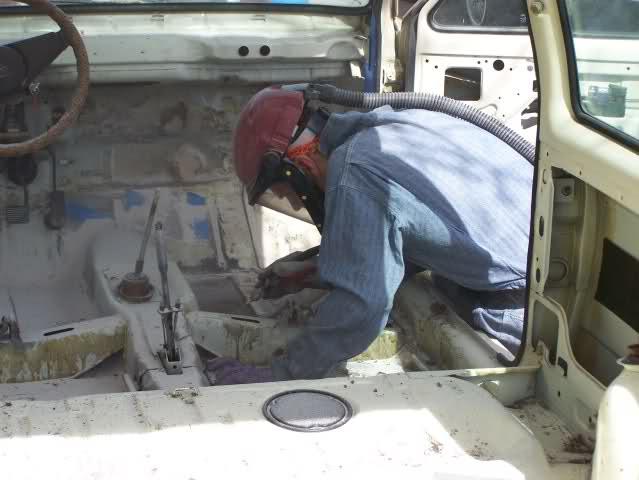
We finished prep for sandblasting yesterday. I am absolutly AMAZED at the condition of this car. So far only ONE small rust pinhole to be found on it. Everythign has cleaned up so so much better than I could have hoped for. The only depressing part is the tar covering up every bit of rust and the damn glue everywhere.
The dash area has cleaned up pretty nicely. Only real issue in there is the steering column bracketry. I really want one out of a cabriolet with cruise control as I need a brake and clutch bracket switch. I snagged one fron the JU but it wa missing the clutch switch bracket and turns out it was also missing the clutch cable bracket. Time for some welding it seems...
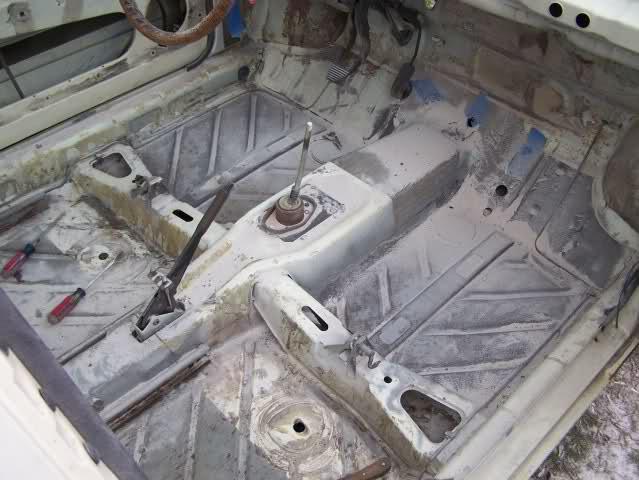
The biggest suprise so far is the floorpans. I knew they were pretty decent, but damn for a 77 they are MINT. The worst area was the passenger side and its cleaned up really really nicely.
We are ready to sandblast FINALLY!
March 20, 2009
So yesterday there were a couple VAG's in the driveway....

It was an eventful day that ended with my Audi deciding it hated its master cylinder. It was mad apparently at all the time we spent on the Bunny.
So after a lot of this:
We ended up with a lot of this:
There's sand everywhere.
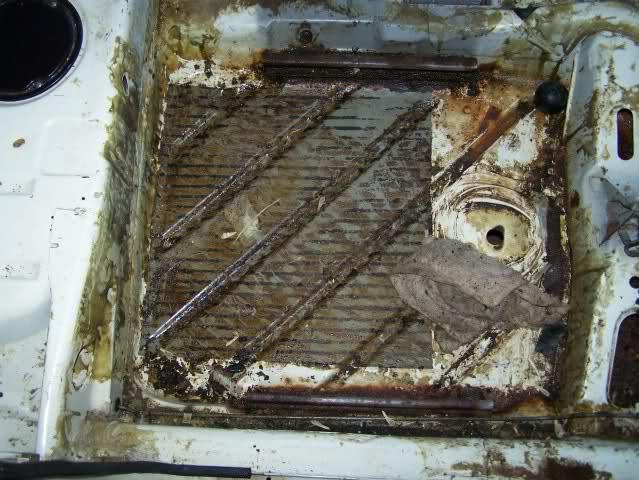
The floors looked horrible but they cleaned up super nicely. The pictures don't show a lot as the clean up process has barely begun, but you guys can probably get the idea. I was afraid the floors were going to be the one place that got us on this project. Nope. They are really solid and we only found a couple small pinholes here and there. We suspect they occurred during the scraping/blasting process.
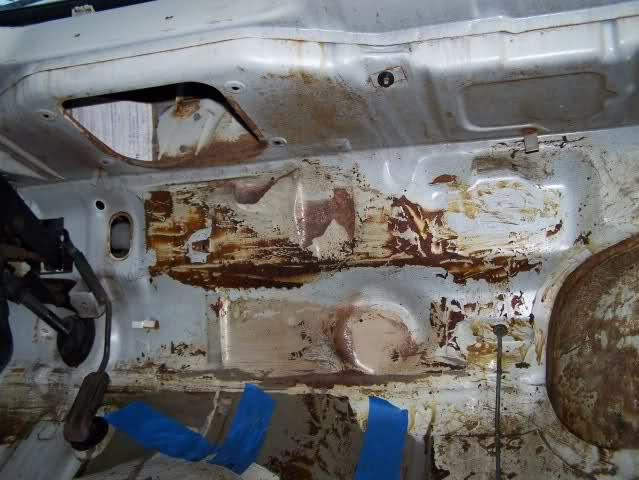
Only found one actual rust through hole up in the raintray. Its covered by the piece of cardboard in this picture. We are thinking of welding in the patch in such a way we can use this area to drop the engine management harness inside.
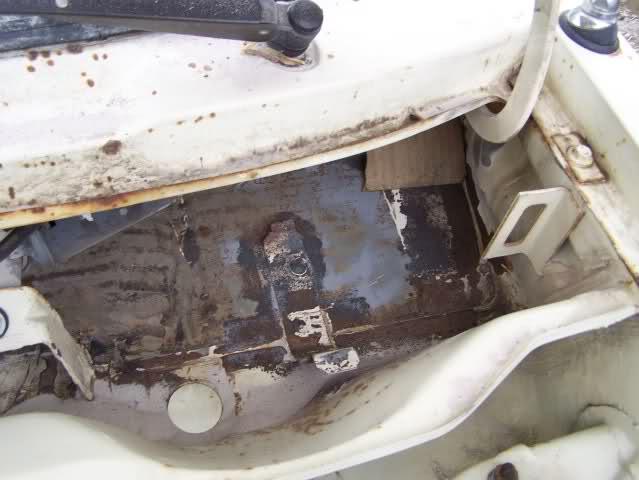
I finally got the rest of the OE wiring out f the car. Theres a lot of decisions to make about exactly what goes back into it, and how. I don't have a lot of room in here since I am planning on keeping the interior clean and minimal. So its possible I will be mounting the MegaSquirt in the raintray. I am a little hesitant on this idea as obviously it will need a waterproof case. I can mount in an OE VW case easily enough, but its a pain and limits future internal mods.
Anyways more thought on the whole electrical system revamping is defiantly required. By the time I am done I may not even be running a fusebox.
The other side of the raintray was pretty clean. Just scraped and blasted and all is well. When I got the car sadly one of the parts I really wanted and needed was missing. The early strut tops. I blow out a set of the later ones about every 6-8 months. The early tops had been taken off the car and resold before I got my hands on her. So either I am going to need to find another set to rebuild, something I haven't had much success in yet, or I will figure out a way to get a set of the Bonrath reproductions into the states.

Engine bay was really clean to begin with so again only minimal work was required here.
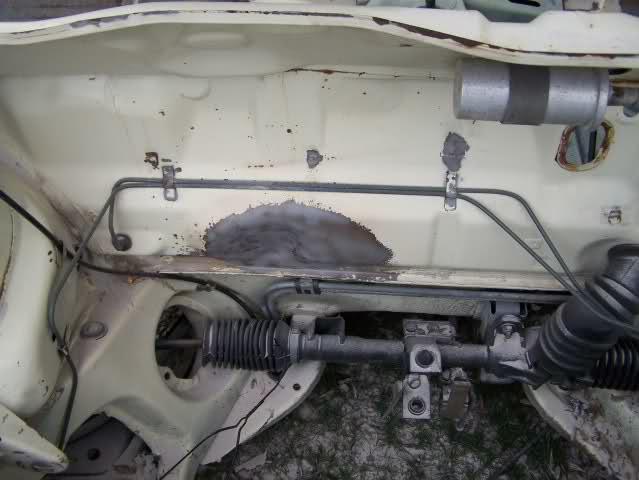
At the moment my biggest decision to make in the engine bay is what holes to fill in, and what steering rack to run. It seems the quiafe quick ratio internals fit inside the early style rack. But to do so means pulling both racks apart and trying to find some new seals. Since these never really go bad, thats likely to be a tall order. The easier course of action is updating the mounts so I can just bolt the later rack right in.
We have some more fun things going on. I have been working on a lot of little items for the interior while waiting for the weather to clean up enough for blasting and painting. In my winter junkyard adventures I found this little gem:
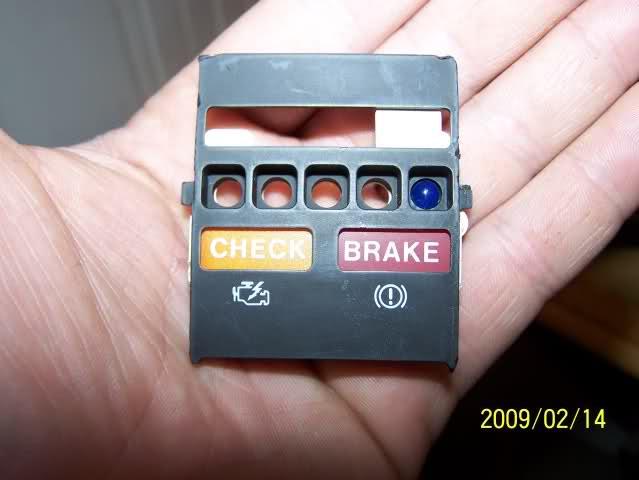
I am after the check engine light. I mean what VW can claim to be tuned if this light isn't on? But since I will never run any OBD system, I am thinking I will actually have to find some useful purposes for this light...
Heck yeah! I love the "base modle" ness of this car. Not that there was much left by the time I got it to tell it was a base modle.... The only clues were the single gauge pod cluster, the hoodlatch on the front, lack of swaybars (but not sure ANY of the bunnies back then had them), and a few other minor detailes. This car had no intermitant on the wiper. No rear wiper. Oh and the coolest is the blanked out glovebox lock!
The first thing I had to do when bulding this was to get rid of the single pod cluster. I am almost done with the first stage of rebuildign the dual pod I got. I will post up some pictures shortly.