You must be logged in to rate content!
8 minute(s) of a 214 minute read
6-1-2010
I guess it is time for some updates again. As expected the sandblasting discovered a few more spots of rust rust, so I had to take care of that before anything else. When that was done I brushed on an epoxy sealer on all the welds to seal them 100%. The stuff I use was made for the off shore oil industry, and it is really good stuff ![]() Then I painted the trunk floor, inside , and under the body with a good epoxy primer. After the epoxy primer had dried I used an acrylic sealer on all the body seams to prevent water to get into places where it can cause rust. Then it was time to paint the underside of the body with a red original looking primer.
Then I painted the trunk floor, inside , and under the body with a good epoxy primer. After the epoxy primer had dried I used an acrylic sealer on all the body seams to prevent water to get into places where it can cause rust. Then it was time to paint the underside of the body with a red original looking primer.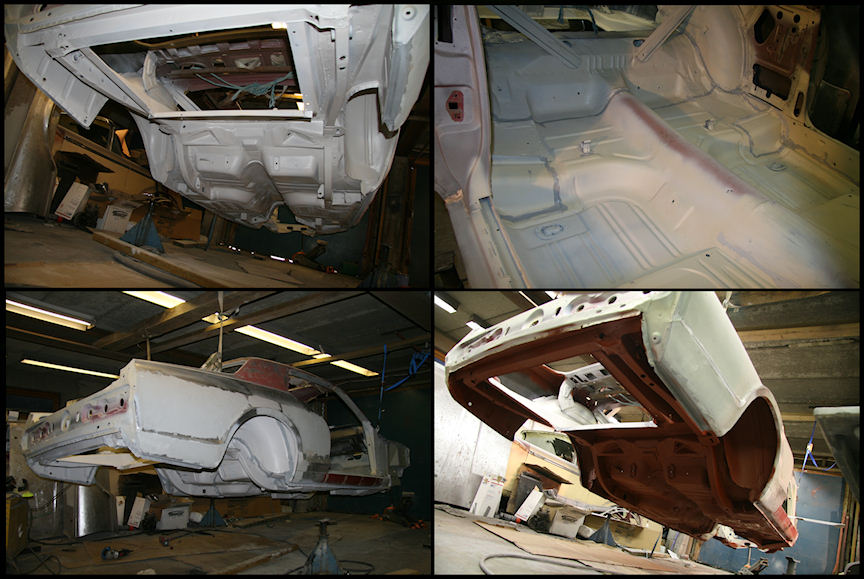
Both doors have been sandblasted here at home and while the drivers door was very solid, the passenger door had some common rust in the lower front corner. Both doors had lots of old dents that had to be taken care of and then I could start the paint prep work. I prefer to put the bondo directly on the steel and then paint the epoxy primer before the surfacer.
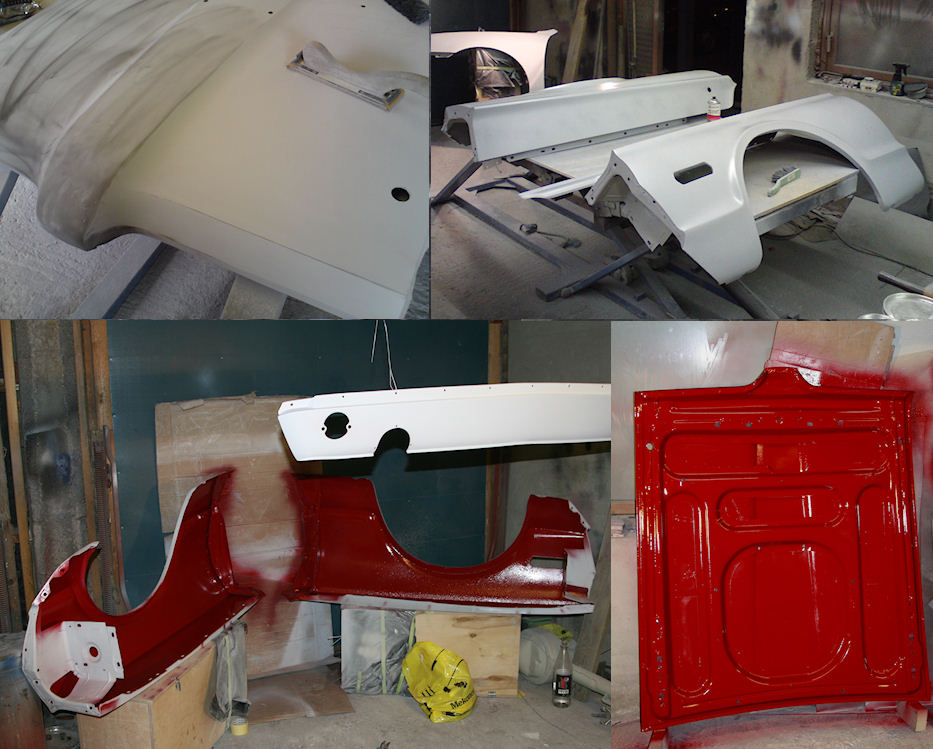
he trunk lid I found for my car is actually from a 69 Cougar that also had an Eliminator wing on it. As a result I had to relocate the key hole and wld the holes for the wing. Otherwise the lid was in good shape and just needed the regular paint prep work. 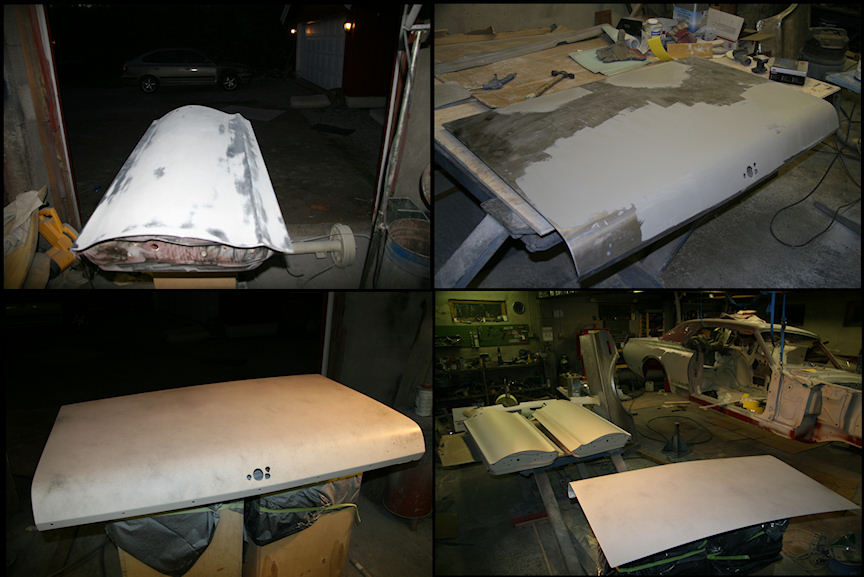
June 11th, 2010
Things are going fine on the project and at this point doors, fenders, hood, trunk lid and valances are ready for the paint shop. Unfortunately it seems like the car will have to wait until August before it is getting painted as the painter got trouble with his back and now he is way behind. At least I can paint the underside of some of the parts here in my garage, so that is what I did tonight ![]()
June 27th
I guess it is time for an update and a few new pictures of the restoration work on my cat. But first of all I would like to answer the question from my friend down the street; Finding another painter is easy. Finding a another painter as good as the one I use is impossible ![]()
Since I posted the last pictures I have finished the bondo work on the quarter panels. It took a lot of work to make them nice and straight again, but I think they came out pretty good.
The roof, and especially the sun roof lid and the area around the sun roof had some pitting. I don't like to sandblast the roof of a car, so I decided to remove all the deep rust with citrus acid. I made a mixture of acid and wall paper glue and got a pretty sticky goop that I brushed on the rust and then covered it with plastic to prevent it to dry up. I then left it there for about 12 hours before it was removed and I washed the steel with lukewarm water and could brush off the remaining rust. Not too surprising I found a few pits that were so deep that I needed to add some metal with my welder. Then I brushed the clean steel with the special epoxy before the roof and quarter panels got a nice layer of epoxy primer.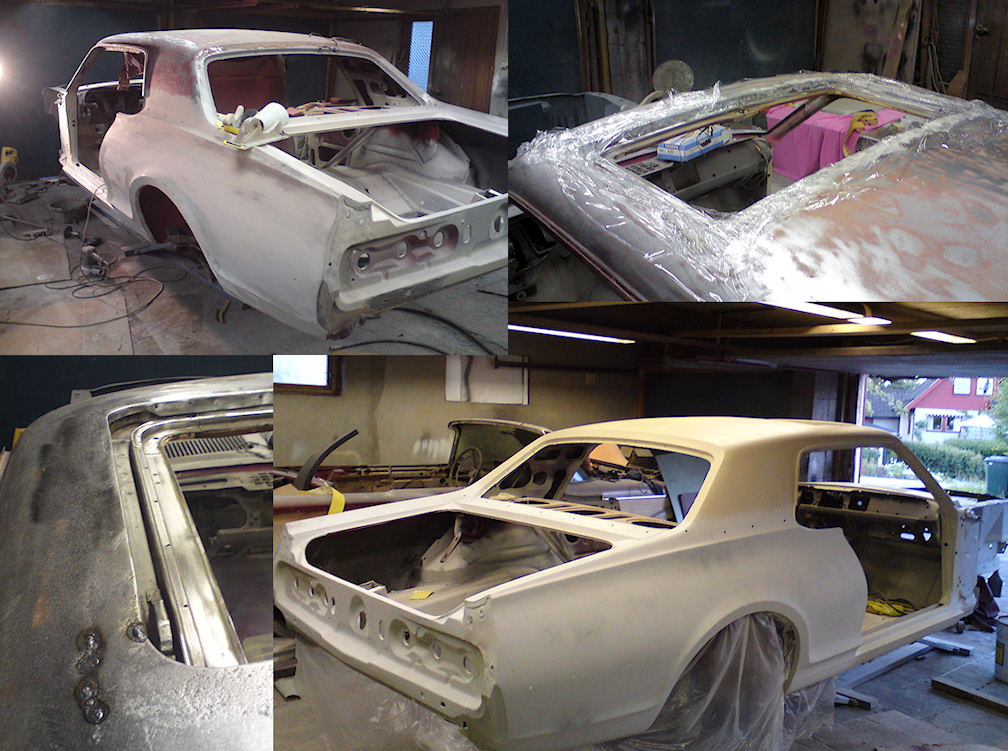
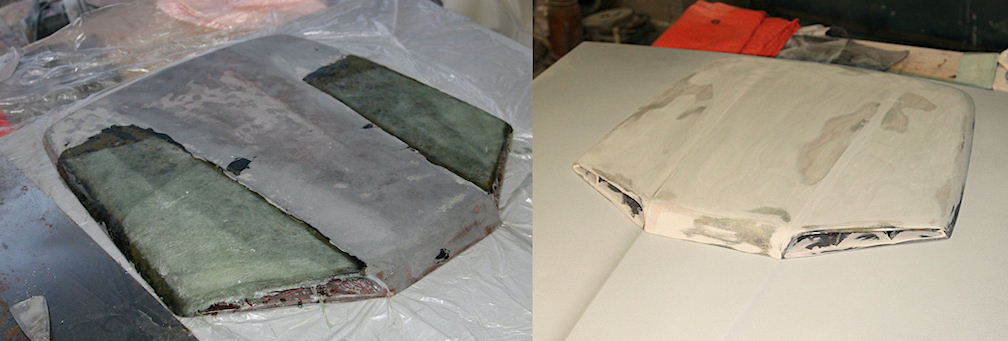
The hood scoop on my car was in miserable condition, and I have very little experience with fiberglass work. The problems was that it was heavily cracked and it was warped totally out of shape with most of the scoop sagging.
Some previous owners has tried to compensate for the sagging with a lot of bondo, which of course made the scoop more heavy and likely made it even worse in the end.
After a some thinking I decided to grind away most of the original fiber glass so the remains of the original scoop was a very thin shell of the scoop and the front simulated air intakes. Then I made some supports that I put inside of the scoop to press it back into shape and bolted the scoop to the hood. That way I had a perfect base for making an almost new scoop with fresh new fiberglass and resin. I used 4 layers of fiberglass mats and a quart of resin, and after it all cured (and a lot of sanding) I got a perfect looking scoop for my car ![]()
June 30th, 2010
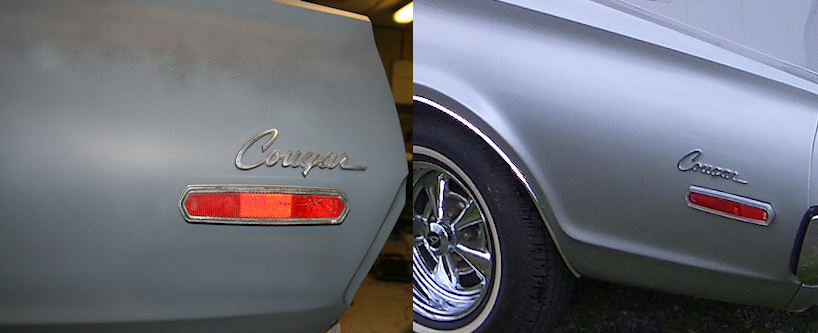
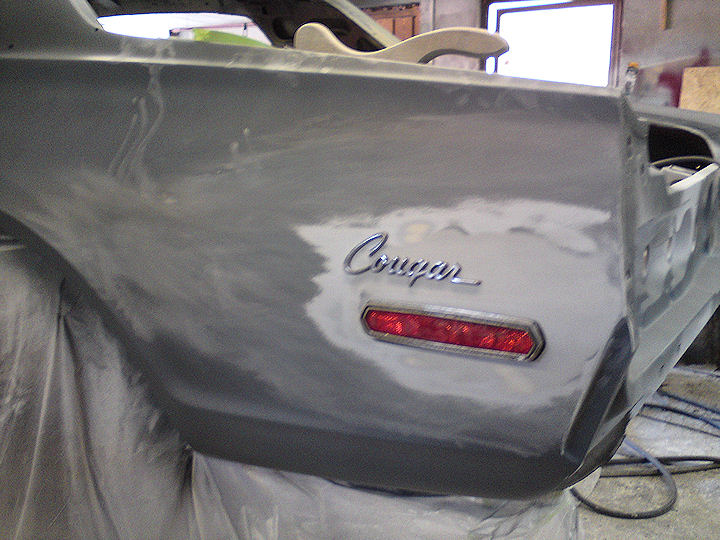
Well, nobody is perfect, and tonight I realized that I had overlooked one mistake that has been made on the car by the person who replaced the left hand quarter panel a long time ago. The emblem on the quarter panel isn't located where it is supposed to be. Of course I found this out after I put on the final primer coats. . . Now my dilemma is, should I weld the holes and relocate the emblem to the correct position (which will be a lot of work at this stage), or should I just leave it as it is and pretend that this is the way my car was built ![]()
July 1st, 2010
The first thing I was thinking about when I woke up this morning was the Cougar emblem... And I immediately knew I didn't want to wake up another day thinking about it being in a wrong place. Well, it turned out that the reflector also was misplaced so I had to move it 1/2" up on the quarter panel and about 1/4 inch backward.
Now I am happy again ![]()
July 2nd, 2010
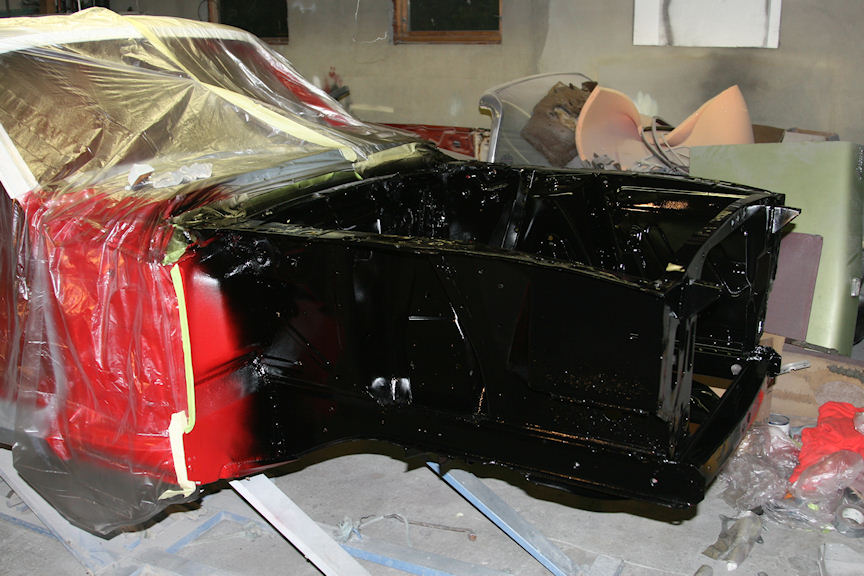
Finally time for some paint. Because I am so cheap I decided to paint the roof with some left over paint from my shelf, all the time it later will be covered by the vinyl anyways. Well, one thing often leads to another... Does anyone know if all the Hertz cars had a black top? Right now I am tempted to go for a white top as I think it looks a lot better than the black one. Unlike my other 68 Cougar where the Marty report says black vinyl top, the report says nothing about that on this one. 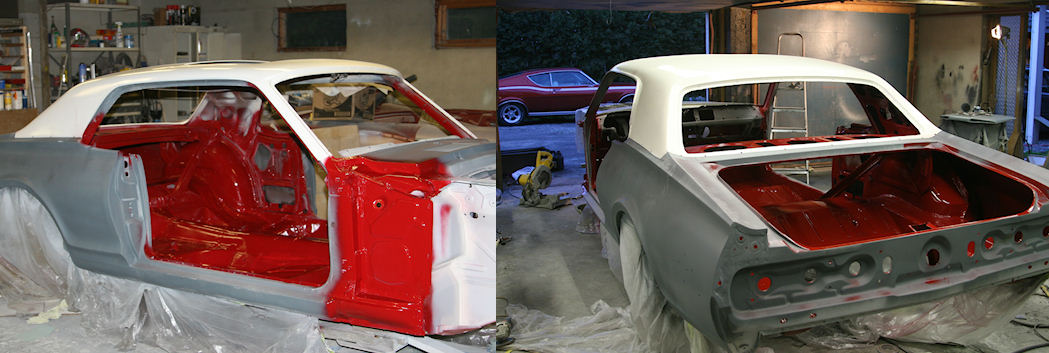
July 3rd, 2010
Here is the buck tag. I have a feeling that this car never came from the assembly line with a vinyl top as the drip rail moldings are the same as on cars without a vinyl top. My green 68 with sunroof has the other type moldings for cars with vinyl top. Or maybe the moldings something on cars from a specific date? :thinkuh: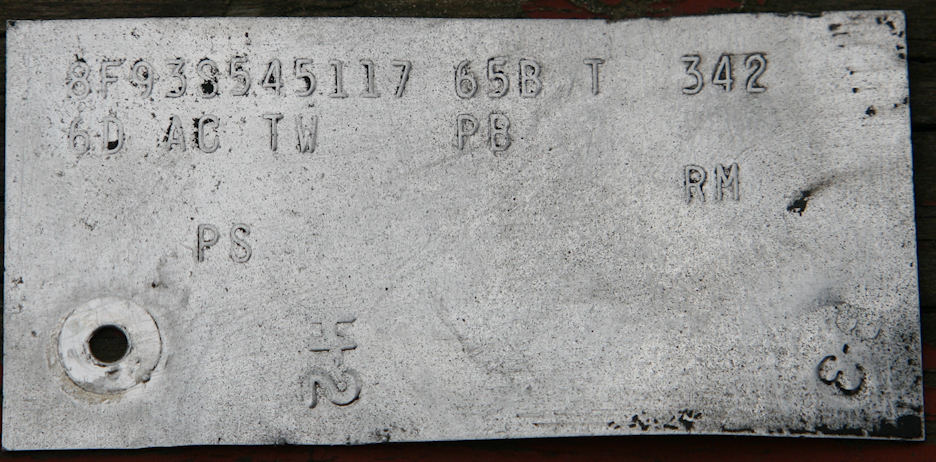
Painting is fun, and I started the day painting he underside of the trunk lid and to apply the red "overspray" under the car to kind of make it look like it did from the factory. Then I painted the front of the engine compartment semi gloss black. Finally I also had the rear axle painted, but before I did that I took it apart draining it from old oil and putting in new seals and gaskets. I believe that this is always needed as 40+ years old oil, seals and gaskets usually are no good and that it is just a matter of time before you get into problems which again might make some of you think your cat is cursed :1poke: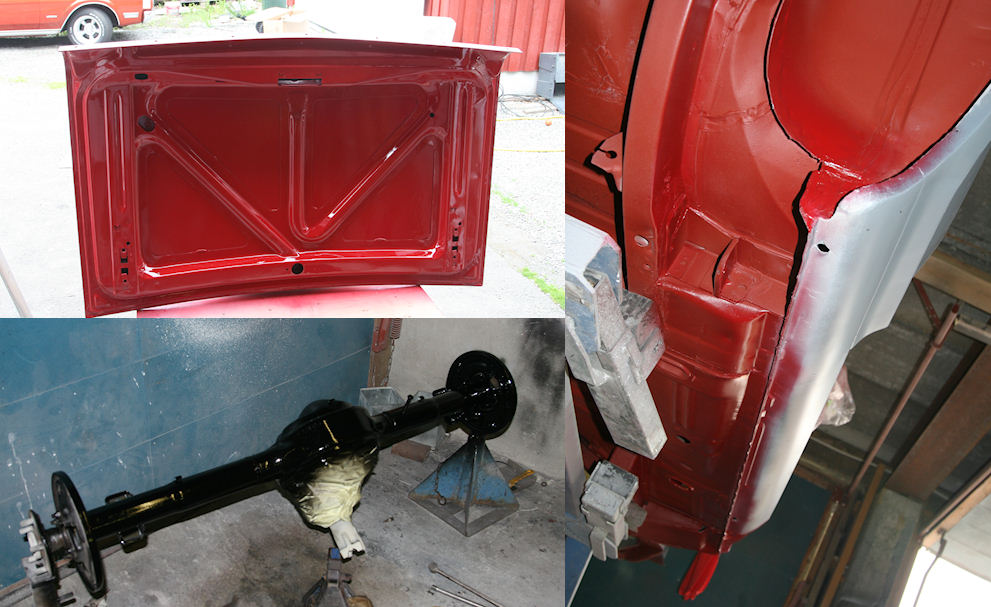
Nice build!
Posted by Diggymart on 10/11/20 @ 2:20:28 AM