You must be logged in to rate content!
13 minute(s) of a 214 minute read
7-11-2010
As you might have guessed, the Cougar XR7-G is not my first restoration ![]() I started to restore my first car, a 1961 Monterey convertible about 33 years ago. There has been a few since then, and this is my second Cougar.
I started to restore my first car, a 1961 Monterey convertible about 33 years ago. There has been a few since then, and this is my second Cougar.
Now for some updates. In the picture below you can see most of the suspension and steering parts with fresh paint and ready to be installed. The front suspension on the car was totally worn out when I bought the car, and everything is new except for the front springs. For the steering I have rebuilt the steering gear and the power steering. The tie rods are still the originals that were cleaned and painted before they got new grease and dust caps.
You can also see all the nuts and bolts on the pink sheet that I had restored and electro plated. This helps giving everything a more authentic new car look.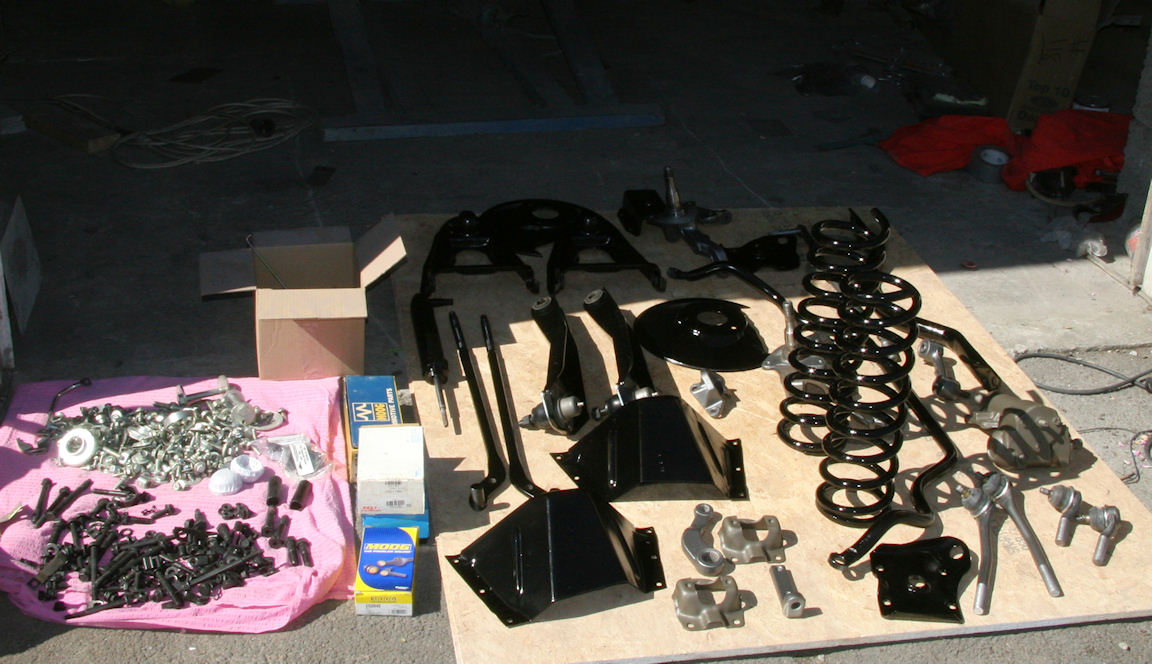
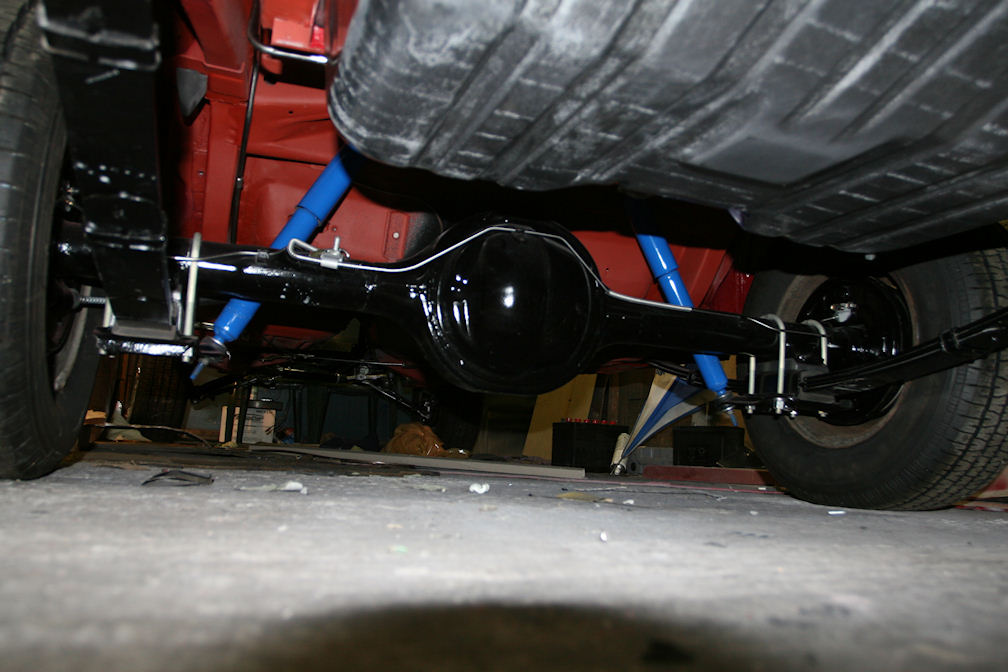
Here is the rear axle ready to be installed on the car.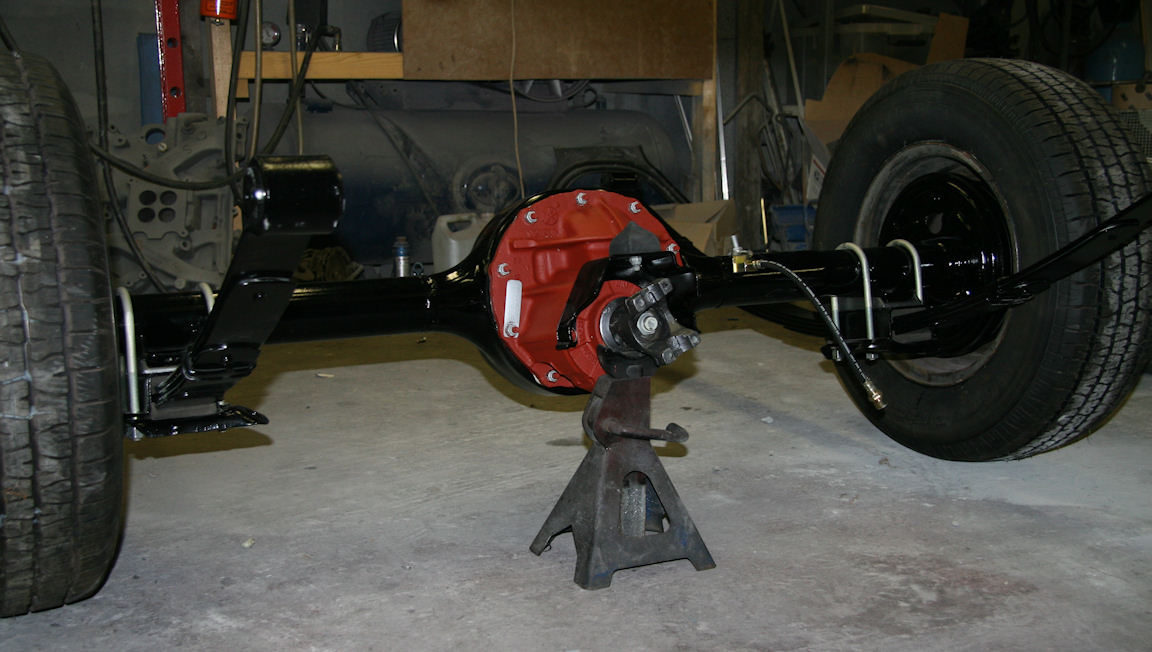
Here I am more or less done with the suspension, steering and front brakes.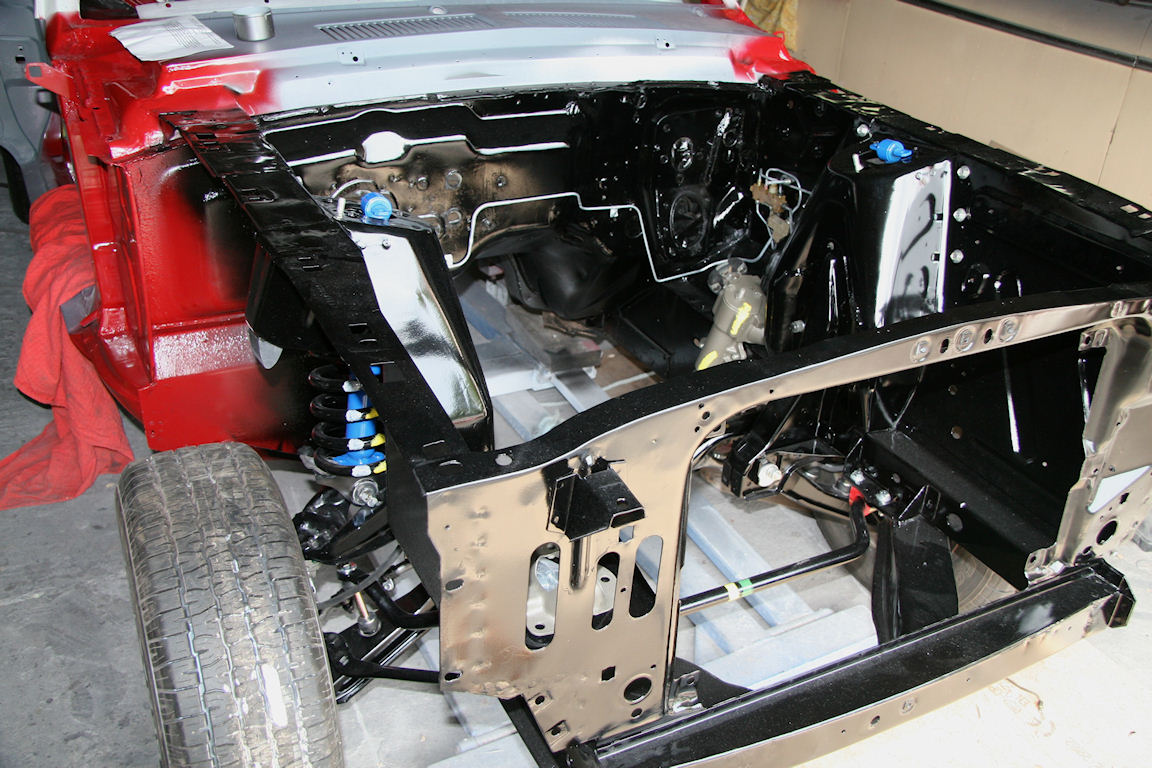
July 26th, 2010
Things are going rather slow on this project right now. I am waiting for the paint shop to get time to paint the Cougar and I am also waiting for parts like exhaust system, gas tank, side glass, fuel and brake lines, new parking brake cables and so on to arrive from the US. Here is a picture showing the boxes that is on their way to me by container freight. Living in Norway and restoring old cars takes a lot of patience as shipping of parts takes time.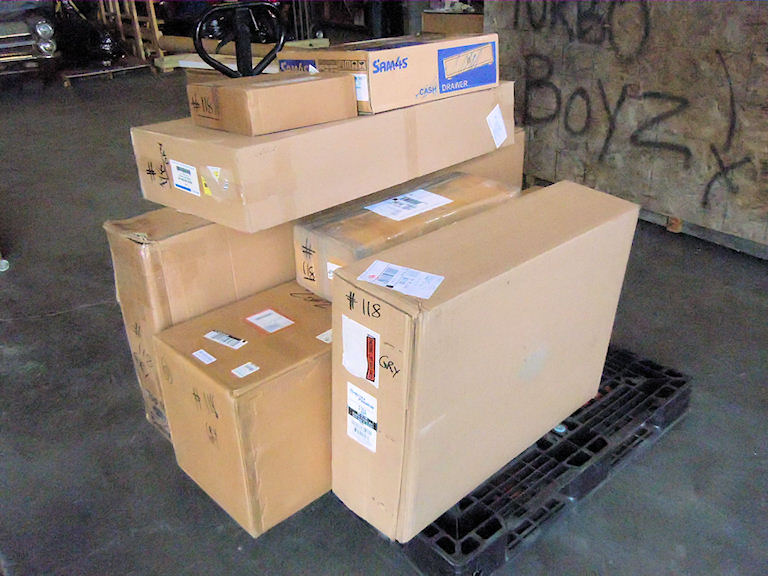
FFR428 asked what plans I have for the engine. Right now I am thinking about building a 428CJ for the Cougar. I will use the 390 GT heads, manifolds and probably also the original "light weight" ![]() intake , so when I open the hood it will look almost original. That is with one exception, I will not put on the smog system as I don't like the look of it at all. Some years ago I restored a 67 Mustang with a similar engine, and it was very fast and a very fun car to drive!
intake , so when I open the hood it will look almost original. That is with one exception, I will not put on the smog system as I don't like the look of it at all. Some years ago I restored a 67 Mustang with a similar engine, and it was very fast and a very fun car to drive!
To be honest, I am not really much into building engines, but I am trying to put something together based on advices and what I have read on the Internet. So far my plan looks like this:
TRW Speed Pro forged pistons.
Original rods with ARP High Performance Series Connecting Rod Bolt Kits
Clevite bearings
Melling HV oil pump
Cloyes timing chain.
So far I have not been able to figure out is what cam shaft to use. In fact I have found it extremely hard to find out what to go for, so maybe some of you guys have some great suggestions? I have been wondering about a Lunati Voodoo 62001 or something from Comp Cams. . . I need good vacuum and something that will work with the original converter, but I also want POWER... LOTS OF POWER :lolani:
So now you know pretty much what is going on here.
July 29th, 2010
I bought the 428 CJ block and crank yesterday. Royce suggested Comp Cams 268H or 260H. Unfortunately I don't have a ton of money right now as the restoration of the Cougar has become so much more than I planned in the beginning. Anyway, I am sure I will be able to build a nice engine that will bring the Cougar up to the speed limit in a timely manner. :lolani:
August 20th, 2010
Finally I can show you some new pictures. The car had now been resting since June and it was ready to be sanded until the surface is ready to be painted. Even if the Cougar is a rather small car, it takes some time to get it finished. I prefer to wet sand the primer using a block wherever it is possible. That gives me full control of the result and the perfect result a show condition paint job requires.
Here you can see the hood and the scoop done and ready to be painted.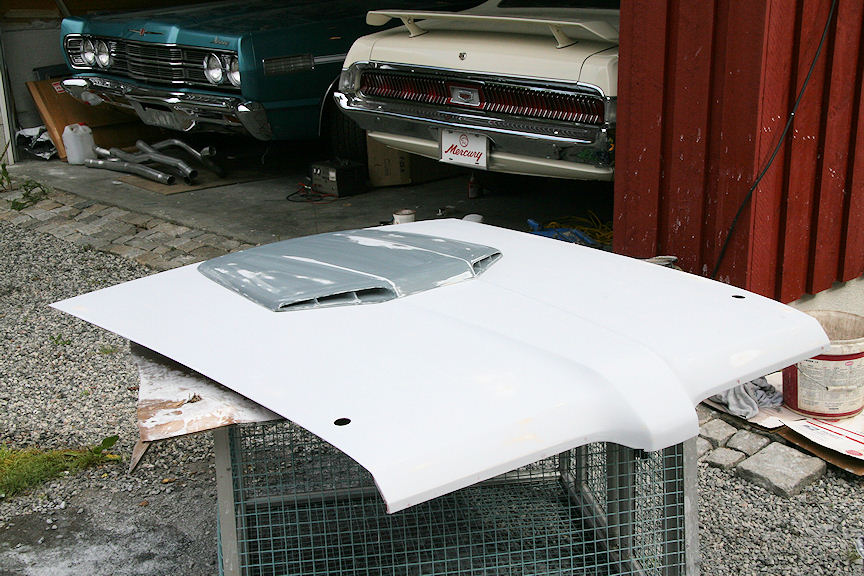
Then it was time for paint. For paint we decided to go for Dupont Centari 6000 base coat / clear coat system. Now the car and all the painted parts will be resting over the weekend before the clear coat will get block sanded and several new layers of clear will be sprayed to give it an even greater depth and shine.
So here is how it looks tonight (Norway time)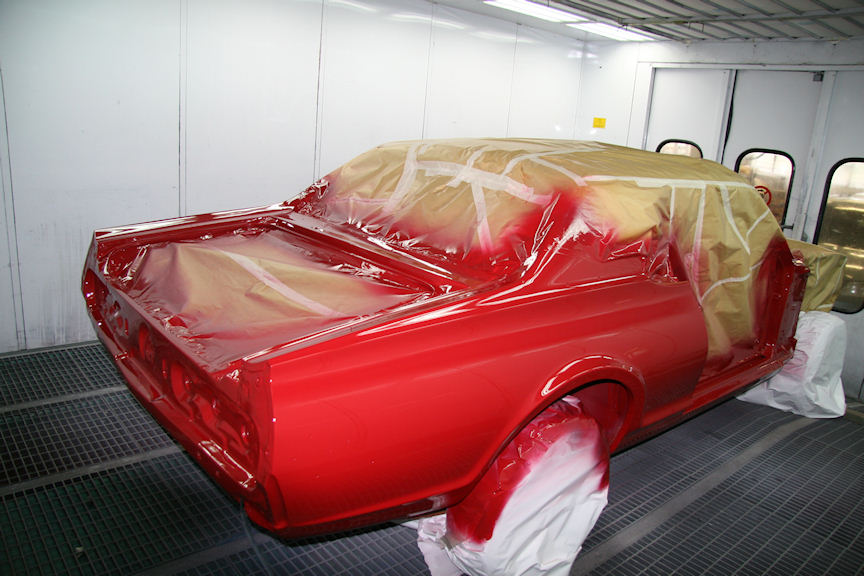
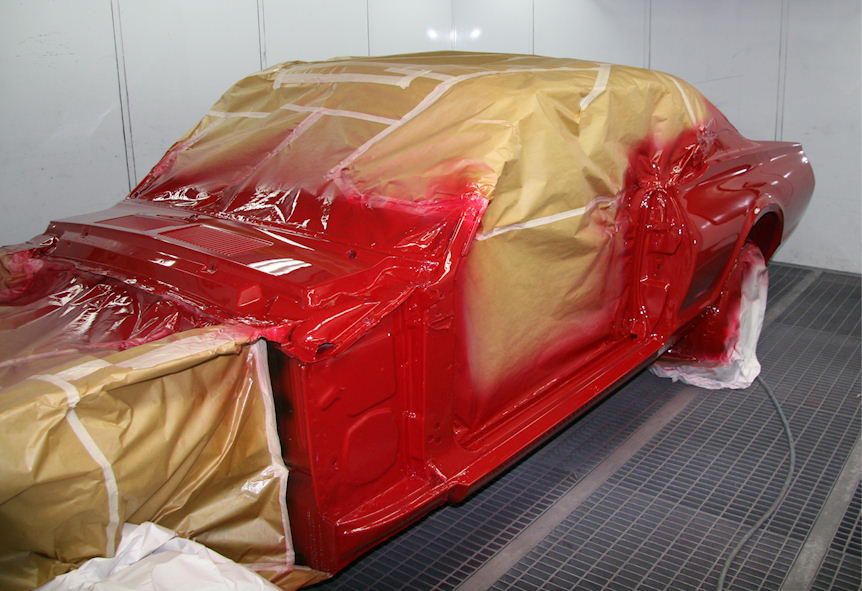
To see the cardinal red fresh and nice like this made me change my mind about the color. I was not too enthusiastic about in the beginning, but wow, it sure looks awesome.
I also forgot to mention that my 428 is being built at the engine shop right now. Now I will have to start to hunt some parts I am missing for the car. At least I need new wiring for the doors, new emblems, new front and rear side markers and also a far better looking grille. I think I also will have to find a set of NOS wheel opening moldings and new rocker panel moldings to match the shiny paint. Anyone here who can recommend a good place to print some fresh dollar bills? ![]()
November 17th, 2010
It has been a while since my last update, so I guess it is time to show you what I've done since August.
First of all, I went to the US for my much needed 3 weeks vacation together with a good friend and also Cougar owner. On our round-trip we visited Bill and Debbie Basore who has a nice collection of XR7-G's and a few other rare Cougars. It was extremely interesting to study these cars and I also want to say thank you to Bill for sharing of your vast knowledge and information about the 67/68 Cougars to me and the Cougar community in general.
The picture is showing, from left to right, XR7-G 428, Debbie , Bill, Me and finally the red Cougar GTE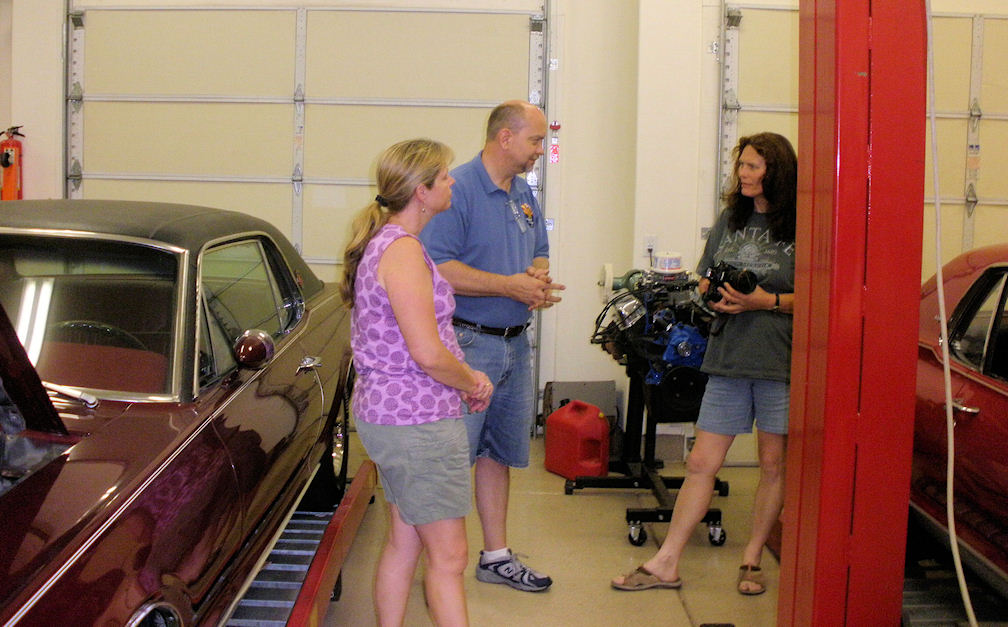
We also went to Kansas to see the shop that was building the 428 for my Cougar. At Walt's repair and Machine shop they were preparing to install the crank when I came there, and everything looked really good.
Back home again I decided to start with the heater and AC. After an inspection I found that it needed a new heater core and new gaskets before I could put it back in place under the dash.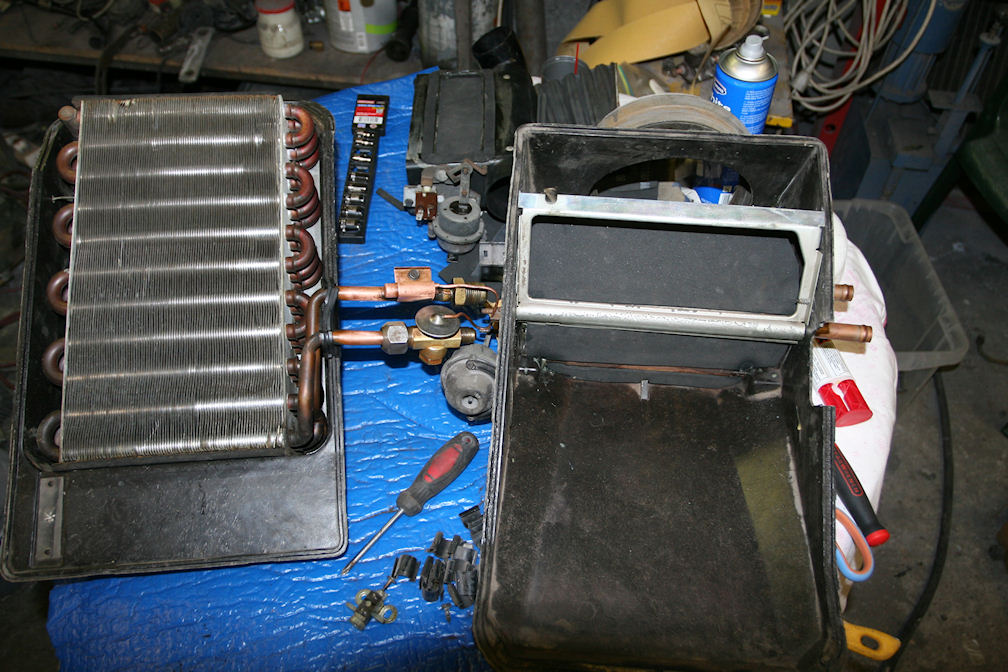
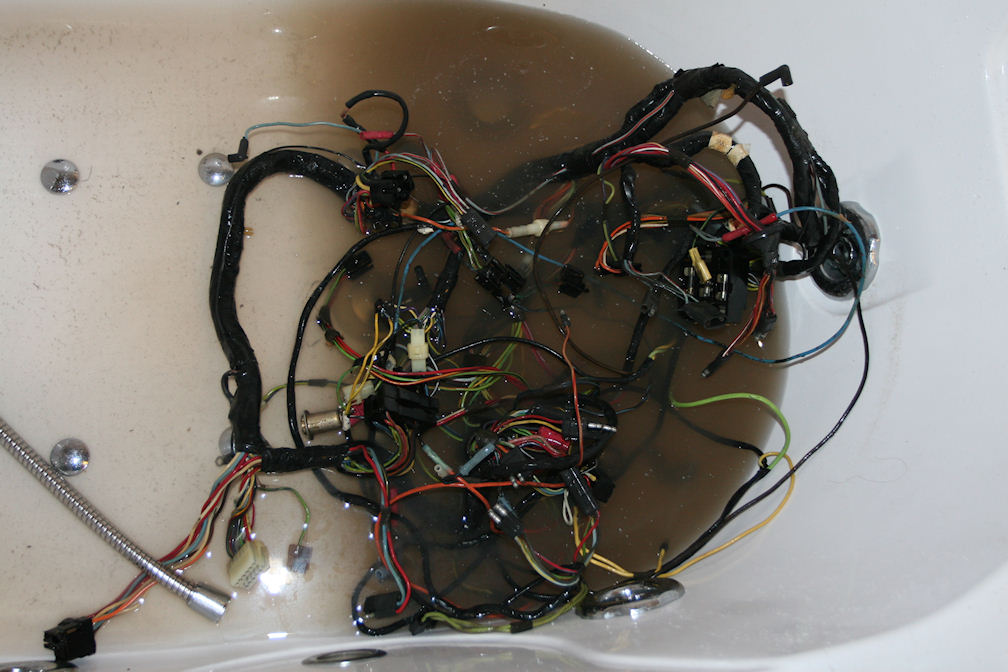
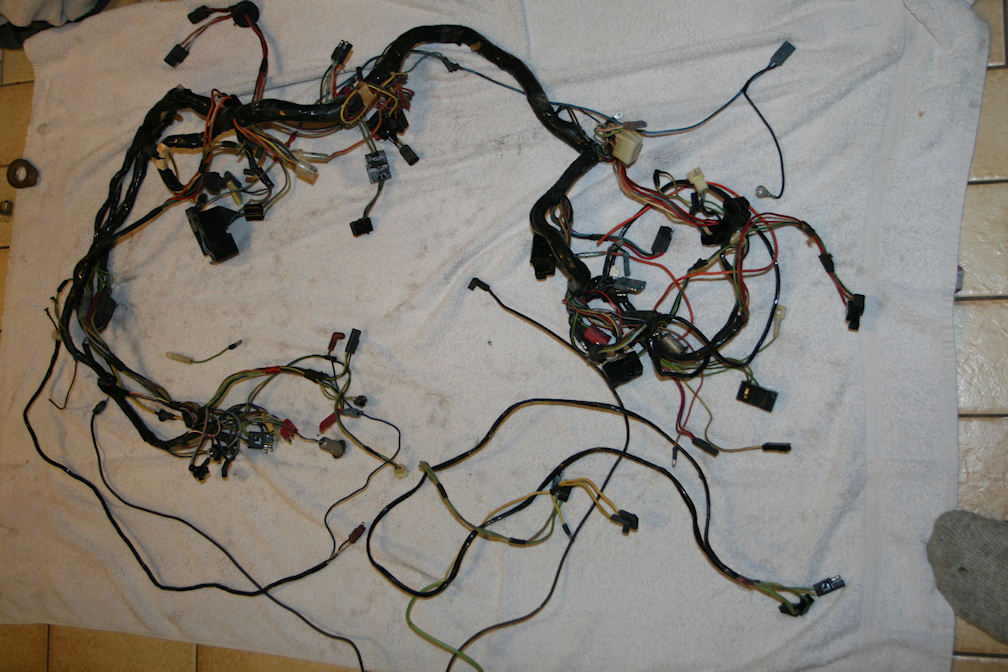
The under dash wiring was really dirty and greasy. In fact everything under the dash on the car looked like it had been covered with a thin coat of oil, probably oil damp from the engine coming through some holes in the fire wall. I decided the put the whole loom in my bath hub with hot water and detergent. Then I flushed it with warm water and dried it and it looked like brand new again ![]()
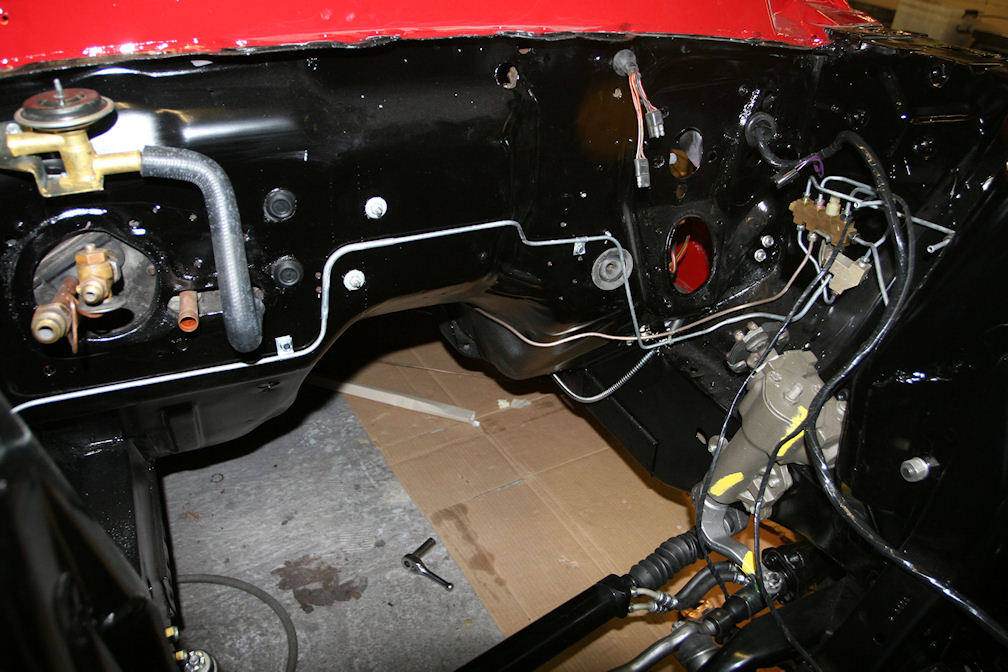
Here is the Heater and Air conditioner and the wiring back in the car. It sure takes some time to get everything right. BTW, I also had the dash painted the correct carcoal grey metallic before I installed everything.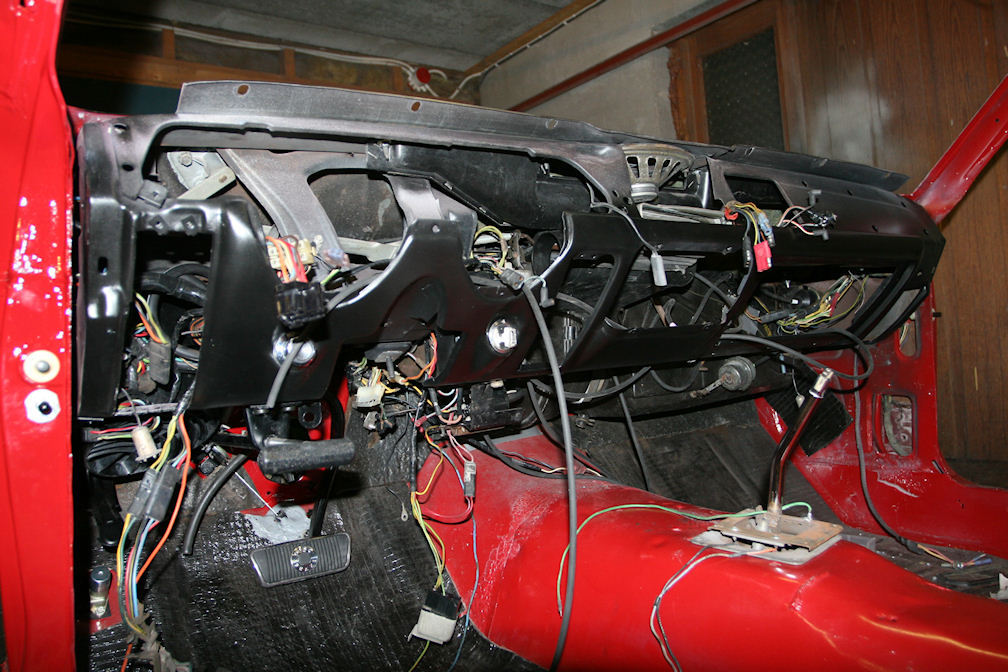
The head light switch turned out to be defective and I did not have any extra Cougar switches here. What I did have was a few new Mustang switches, so I just transplanted the switch part on to the Cougar switch plate with the vacuum switch. This is really easy and it is exactly the same (also waty cheaper than a Cougar switch ![]() ). All it takes is 3 small screws to replace the original rivets that I had to drill out.
). All it takes is 3 small screws to replace the original rivets that I had to drill out.
The picture is showing the rebuilt cougar headlight switch and an original Mustang switch.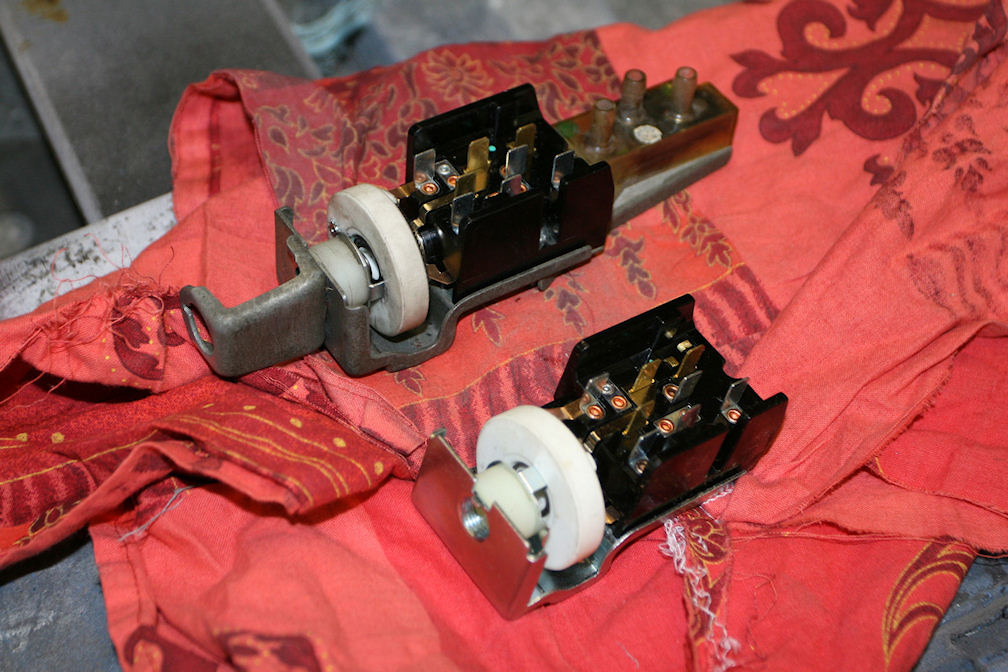
When I sent the car to the paint shop I had to put in a defective power steering valve to be able to steer the car. The original power steering valve housing was also worn out, so I bought a rebuild kit for it and had it rebuilt before it was installed.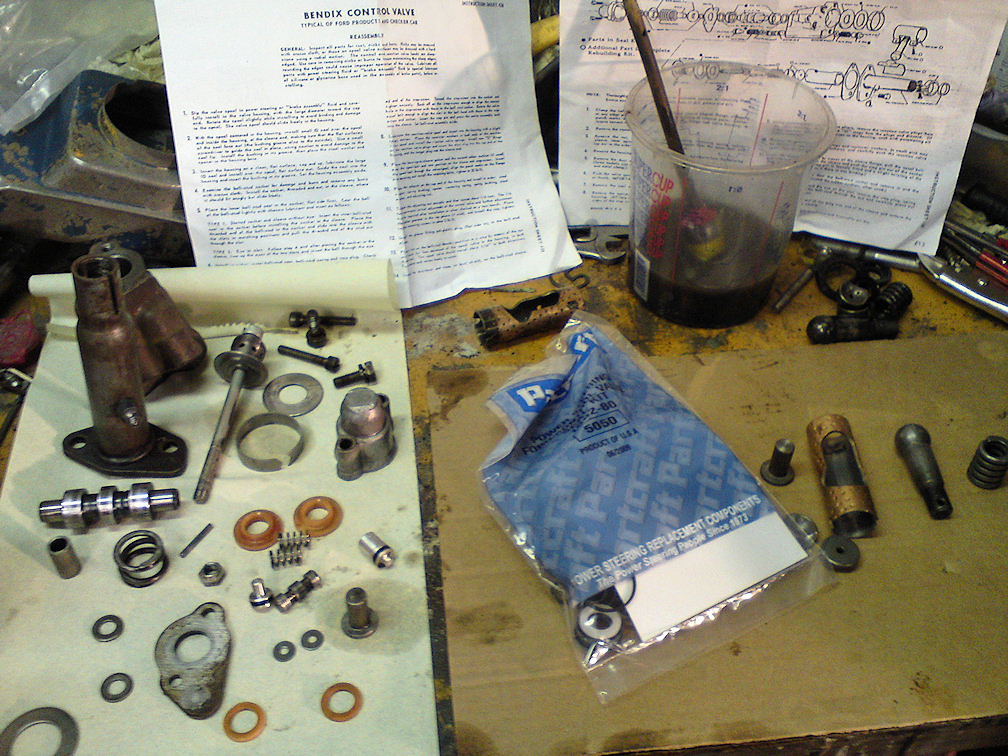
When I was playing with the wirings I decided to repaint the taillights and to polish the lenses. They came out good, but I will probably replace the lenses later. As you can see here I have also installed the deck lid and the lower valance. When I bought the car the original valance with the exhaust cut outs and chrome was missing. Now it is all there and it sure looks better this way ![]() The emblems on the trunk and the chrome for the lower valance are new excellent reproductions from WCCC.
The emblems on the trunk and the chrome for the lower valance are new excellent reproductions from WCCC.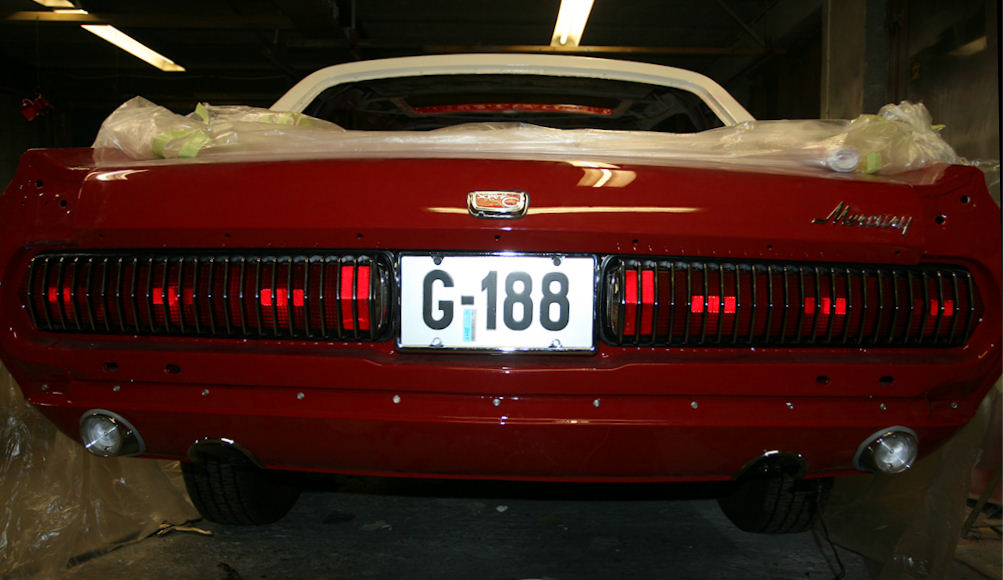
Under the car I have installed new original looking emergency brake wires. I really dislike the more common style with the black nylon housing and when I found a supplier for the original looking ones it made my day. The brake lines and new and made in stainless steel. Same thing with the fuel line. As you can see I also had a new gas tank installed.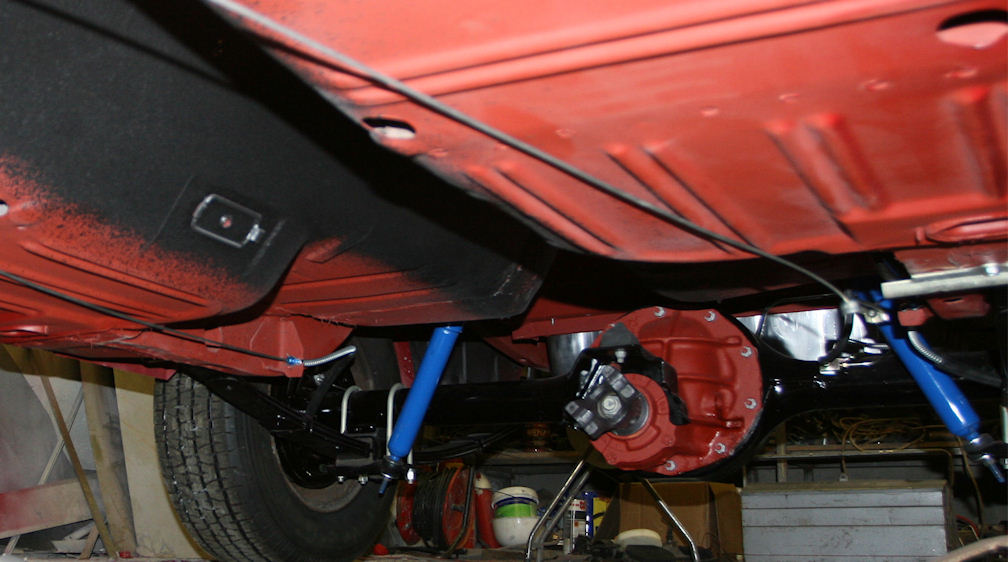
At the same time I had the rear brakes done. New wheel cylinders, shoes and installation kits should give me brakes good enough to stop the car.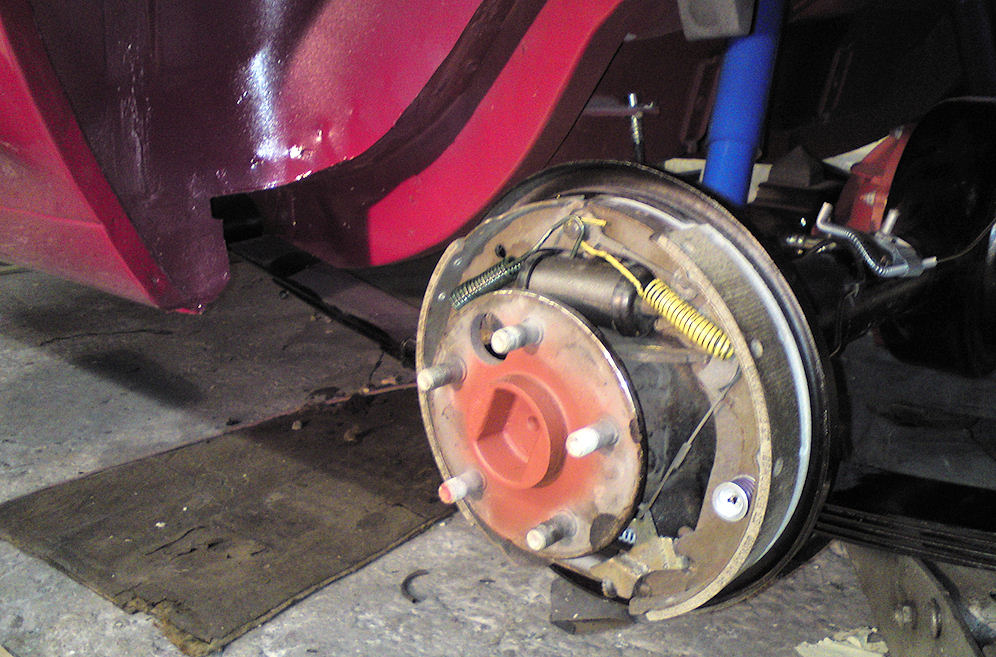
When I was going to install the reproduction parking lamps in the front valance I found that the wirings is totally different on the Mustang and Cougar. As a result I had to remove the bulb sockets from the lamps and install the sockets and wirings from the Cougar lamps. Small things like this makes it more challenging to restore a Cougar vs a Mustang.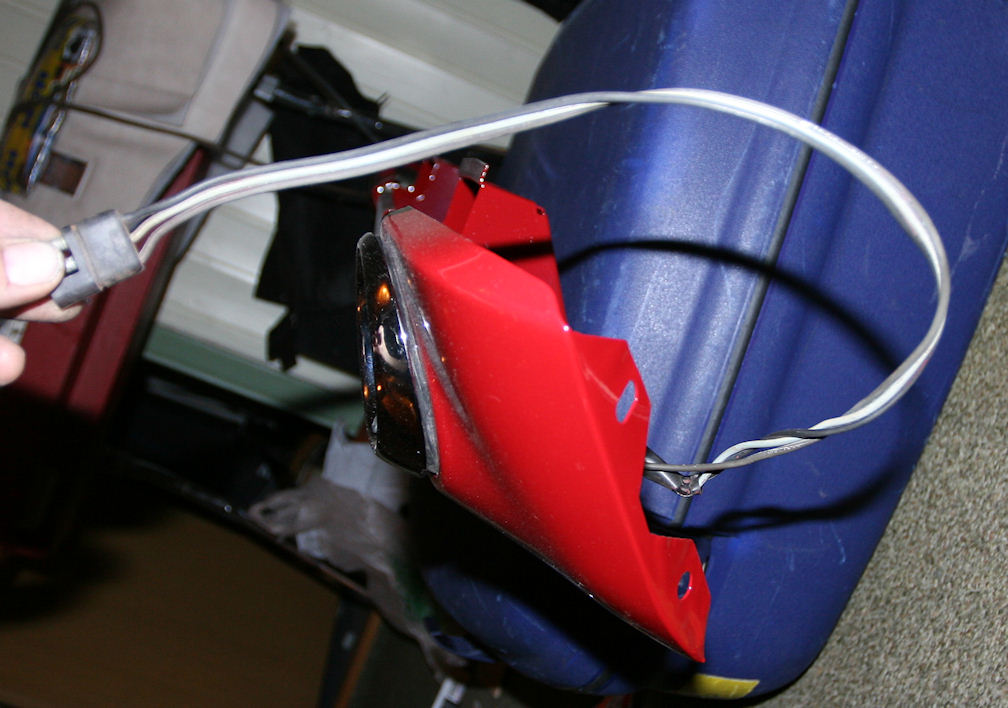
When I had the car painted there was a few parts I was not happy with. Both the quarter panel extensions I had were cracked and dented and the center grille piece was really twisted and out of shape. As a result I decided to put these parts on hold until I could find NOS parts. Finally I have them and they are going to the paint shop this week. Even NOS extension does not fit perfectly, (maybe because the car had been hit in the rear? ) so I made a few minor adjustments to make them line up perfect.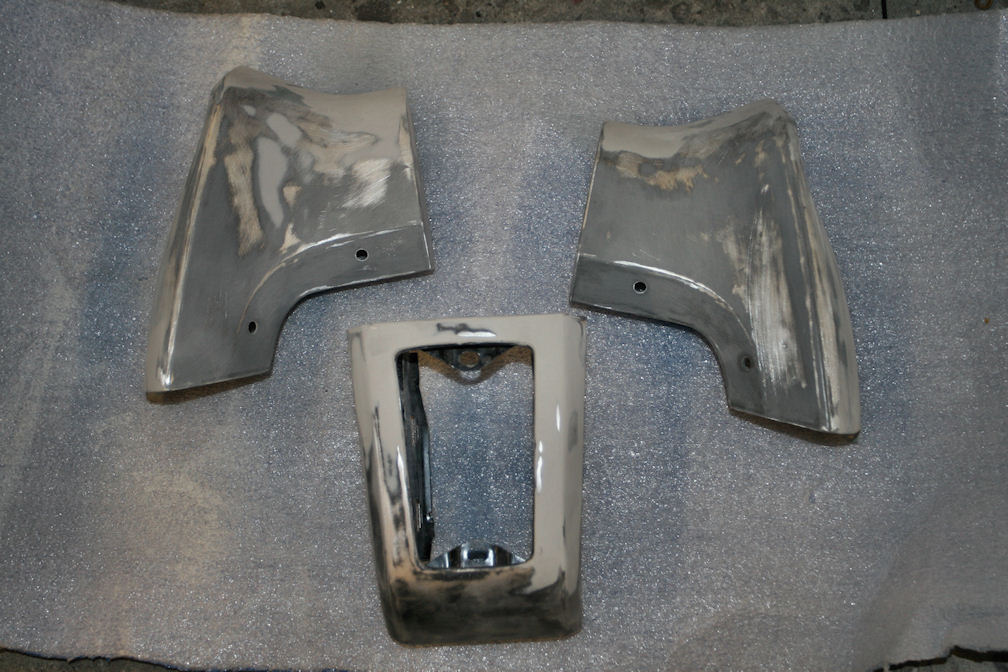
The paint shop forgot to paint the underside of the roof rails and the opening for the sun roof so I decided to do it myself. I also rebuilt my door hinges and had them painted at the same time.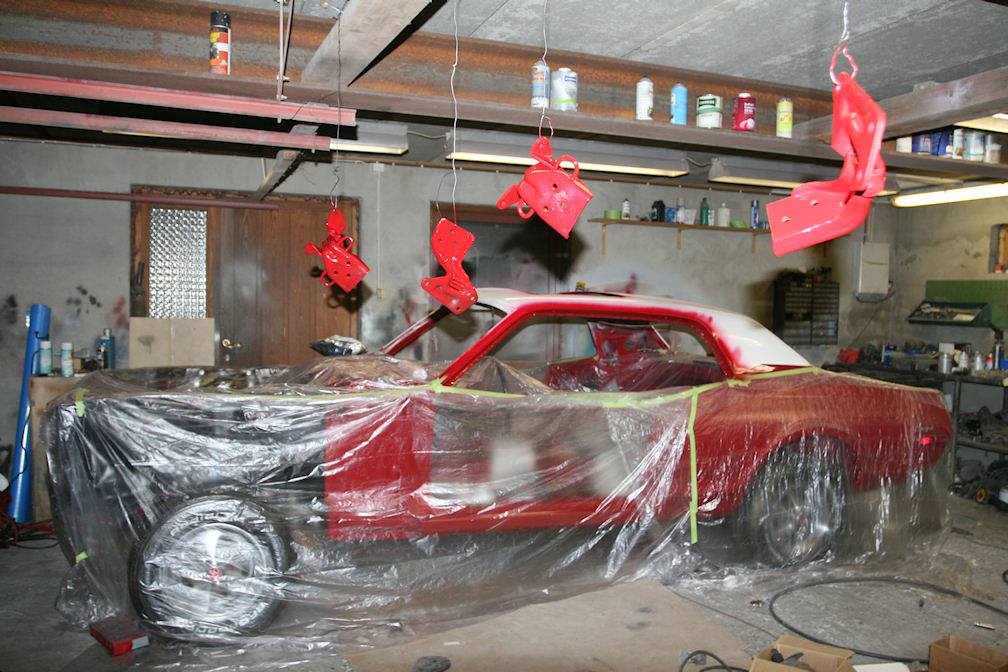
The tilt steering mechanism had seen better days and was more or less worn out. Luckily I had a spare tilt column so with the best parts from both I had a really nice working column to put in the car. Now I just wish I had a good steering wheel to use or restore. The one that was in the car was badly cracked and started to separate from the steel core after years in the southern California heat, so I consider it junk. Please let me know if you have one for sale.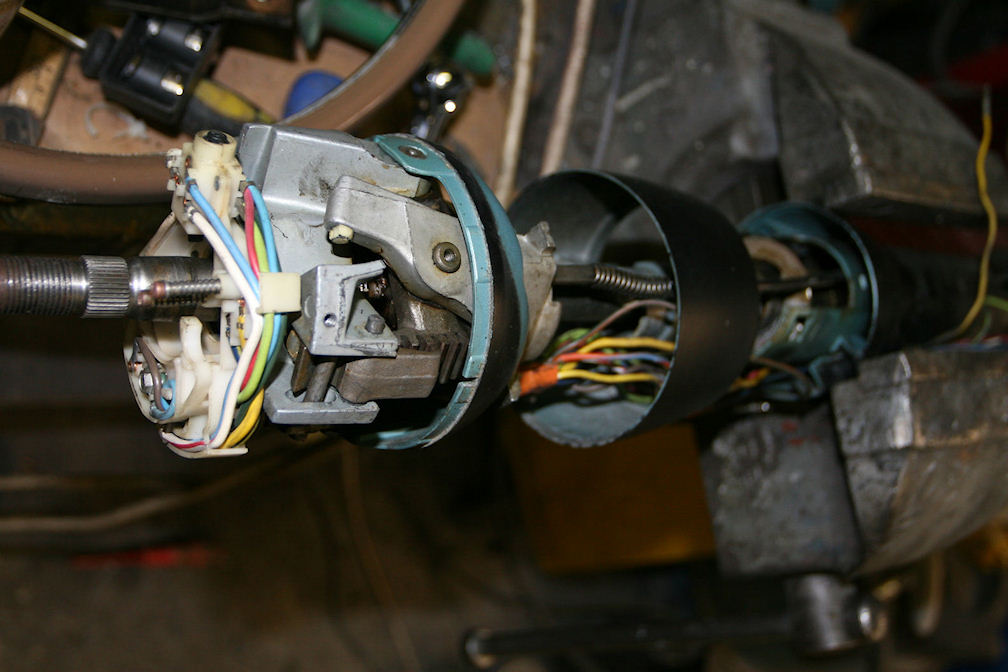
Nice build!
Posted by Diggymart on 10/11/20 @ 2:20:28 AM