You must be logged in to rate content!
5 minute(s) of a 242 minute read
5-13-2008
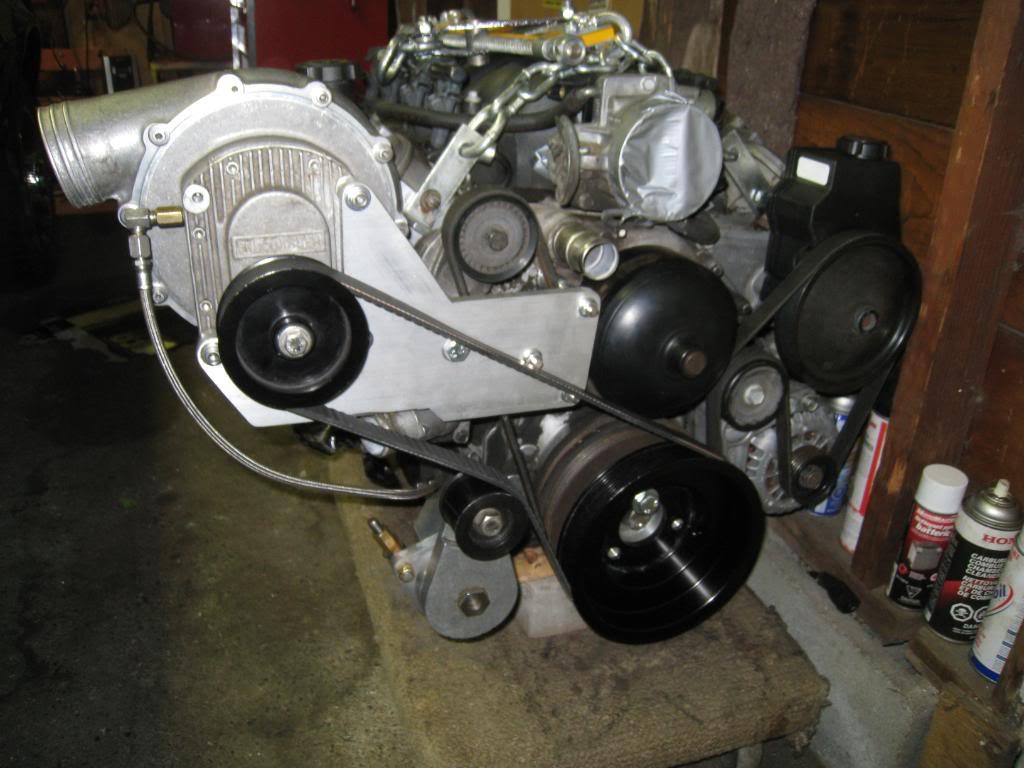
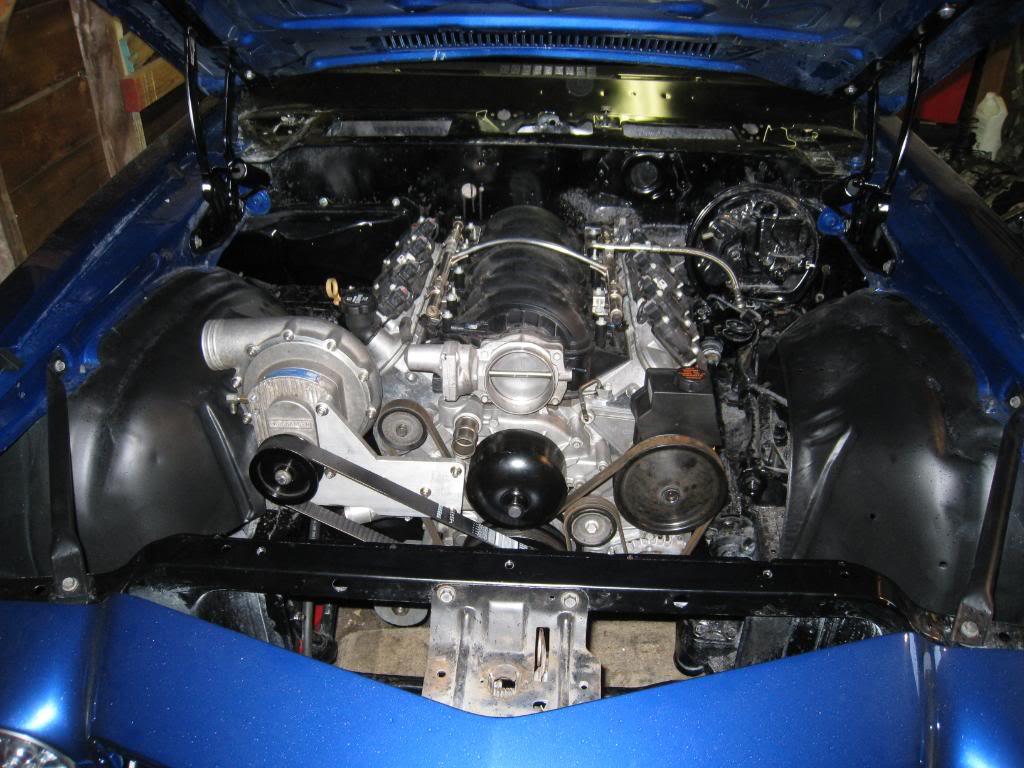
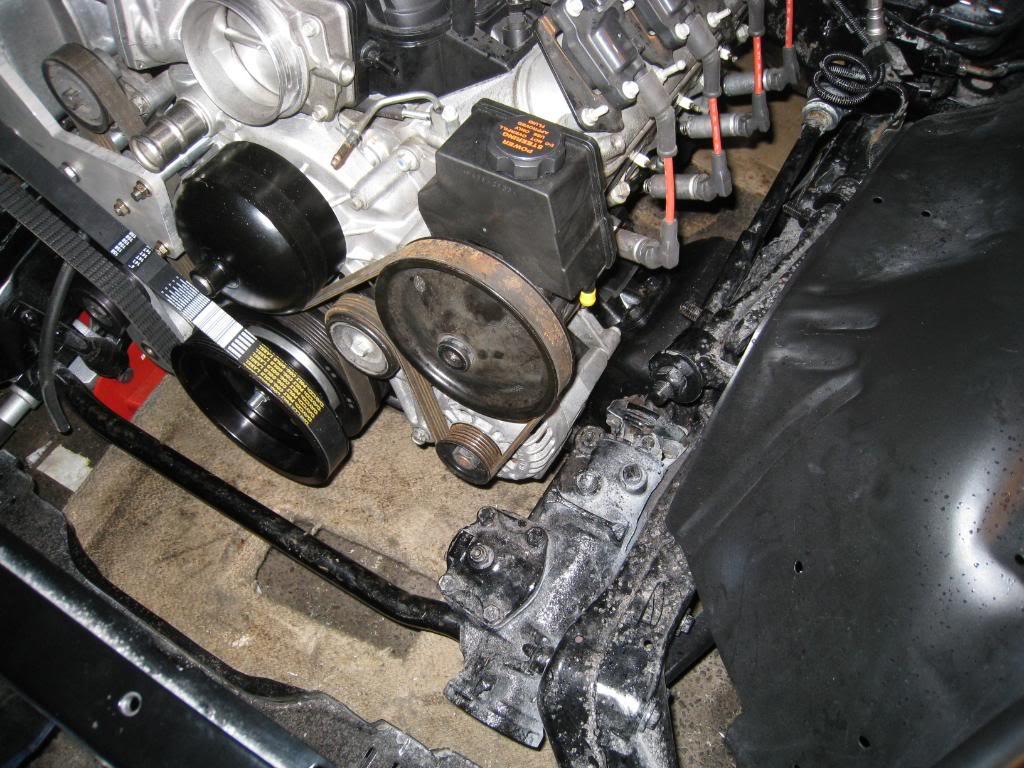
Peter, with the engine at a usable height, alternator and steering wise, there is roughly 2 inches between the throttle body and the hood, (stock hood) I think the brp mounts are even higher, from the looks of the pics anyway. There is lots of room at the back of the motor, but to move it back would cause issues with the shifter placement, plus the space between accesories and upper control arms. I am mounting my pro charger on the passenger side outboard of the stock belt tensioner, and am trying to keep it as low as possible, (no higher than the oil filler cap on the valve cover). I am currently using the stock booster, but plan on going to a hydro boost.
5/19/2008
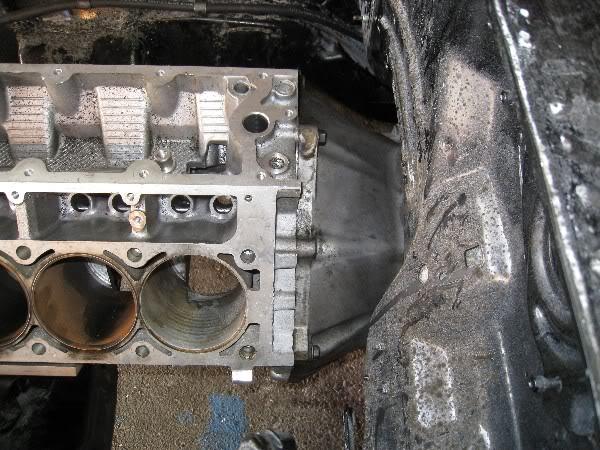
OK, so the LH8 pan was not ideal for my car. I posted it on craigslist and sold it the next day at only a $55 loss. The issue I had was steering interference. The LH8 pan may have worked if I jacked the motor up high enough, but the hood to throttle body clearance would have been limited. If you are following this thread then you know of my plans to pro-charge. This being said, I need all the space I can get to squeeze the charger under a stock hood.
SO...the mount set-up that works for me. I am using the trans-dapt ls1/sbc adapter plates, with a 1/2 inch spacer placed under the factory crossmember to mount plate. I am re-drilling the crossmember and shifting the mount rearward 1/4 to 1/2 inch. This allows good clearance for my F-body oil pan, steering , and alternator.
The LH8 Pan was better at the rear of the crossmember, but the sump sat lower than the crossmember (as low as 2" before jacking up the motor) and the front of the pan was deeper than the Fbody pan and hit the steering before being jacked up, and at that point I decided to use the F body pan as ground clearance is a big issue for me.
In conclusion, I recommend the F body pan. ( mine is from a '99 trans am )
7/5/2008
Well, I finally found someone to finish painting the car! Waiting for the flat deck right now to take it to his shop. After a bunch of research and emails, I got a hold of the guy who started the bodywork in the first place, and with a little begging, he decided to bench another project he was working on to complete mine! Yay.... continued....
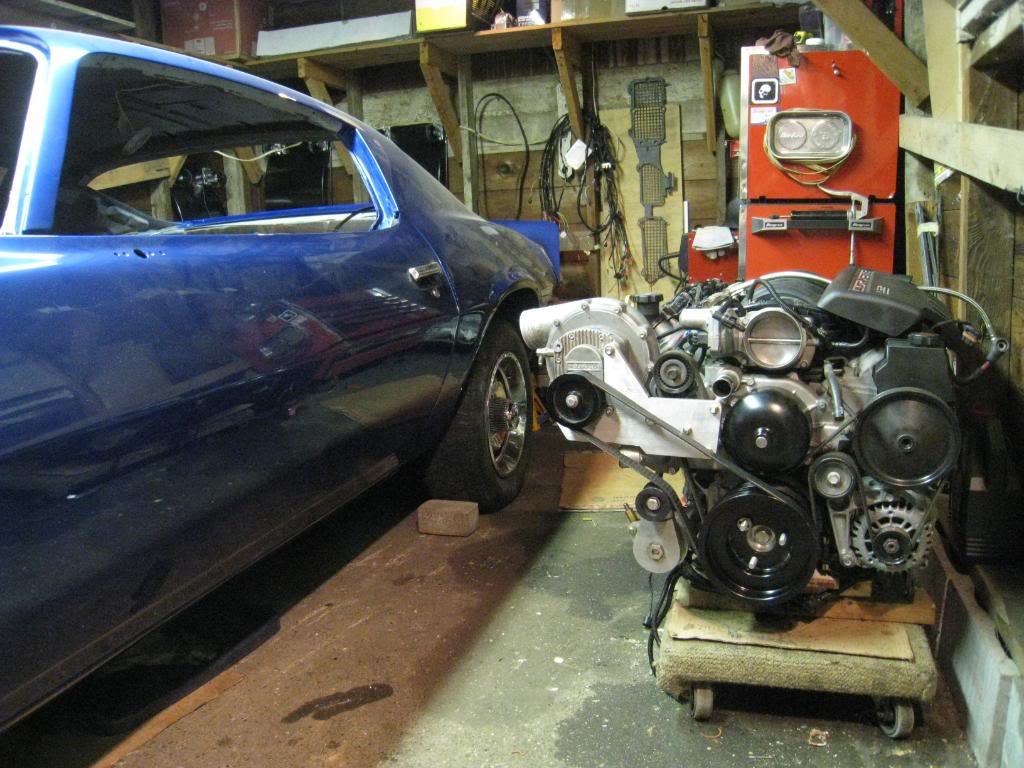
10/29/2008
things are coming together ever so slowly.... anyway, here's a pic! built my own procharger mount kit, and as you can see the car is fully painted!
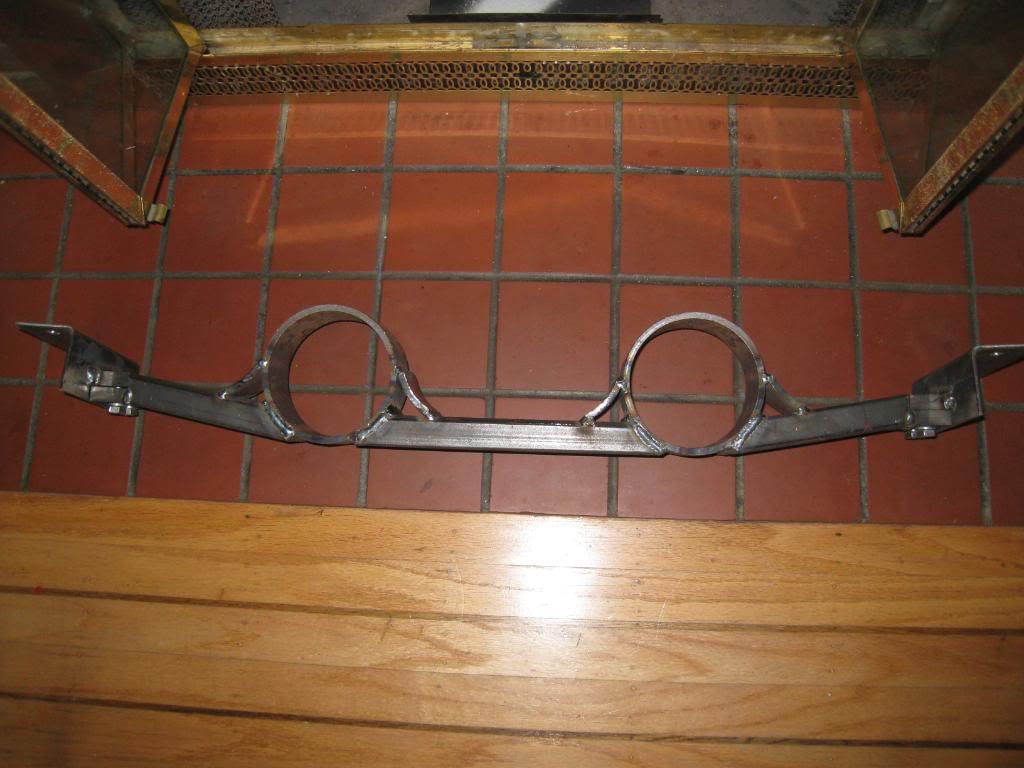
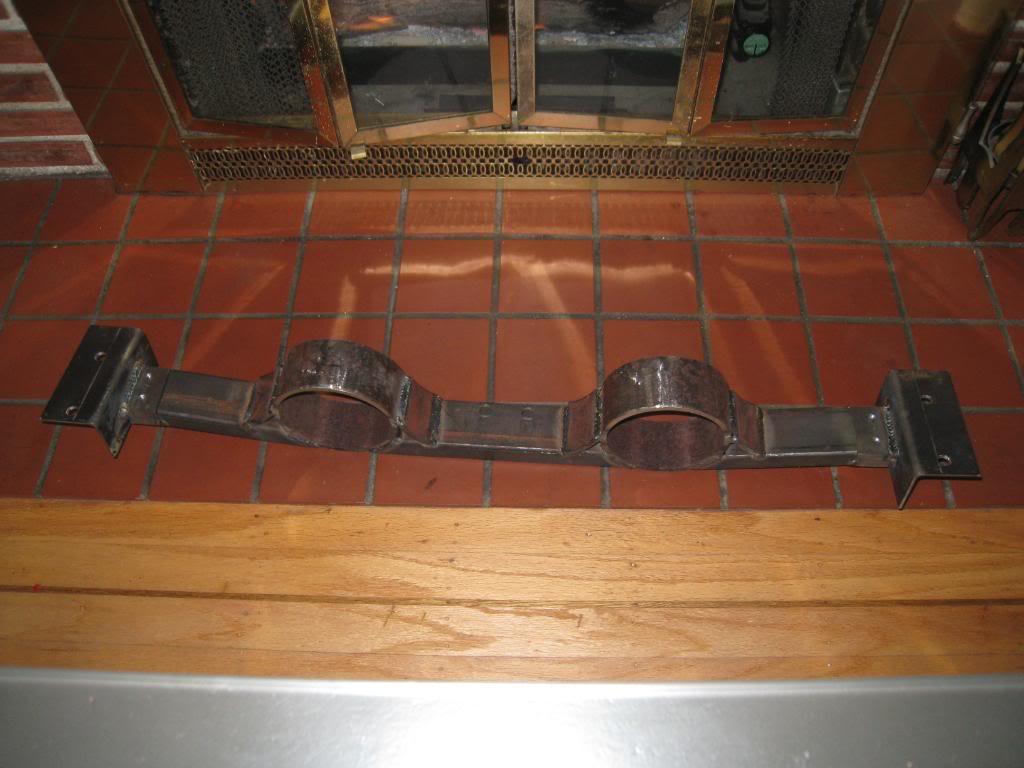
12/13/2008
Here'e my transmission crossmember. it's a 3 piece deal, took way too long to build, but thats the fun part, right?
2/18/2009
Since I am supercharging I had to 'pin' my harmonic balancer. Here's how that went.
1. Took a chunk of tool steel and 'spun up' a guide tool on a friends lathe.
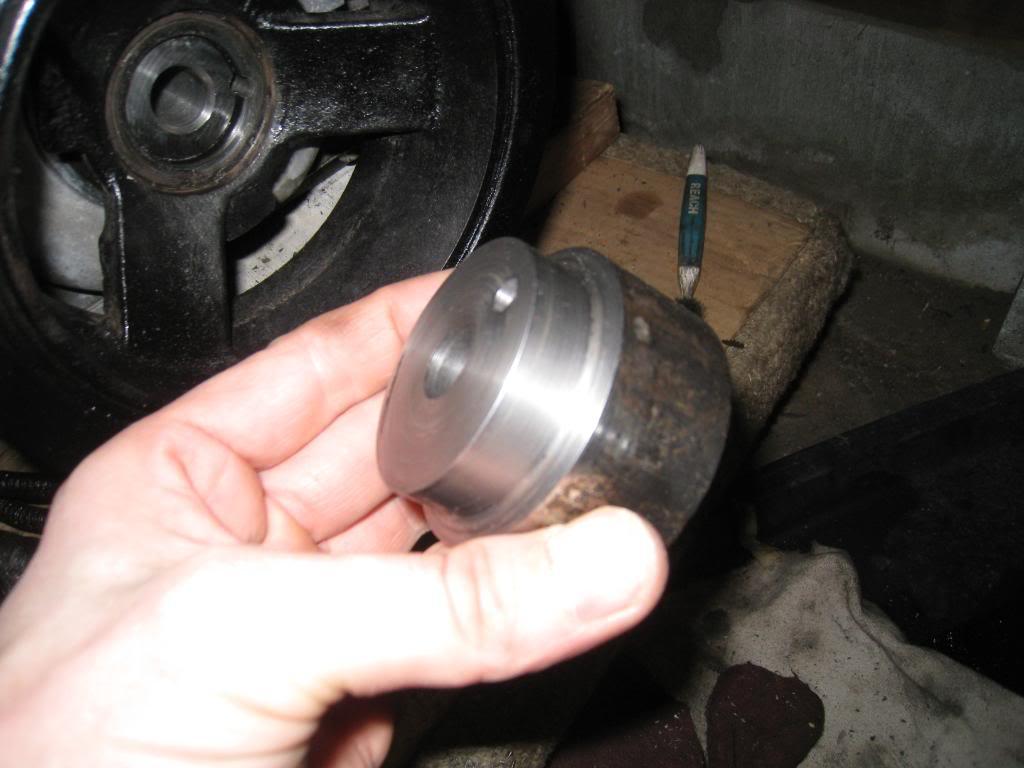
2. Bolted it to the balancer.
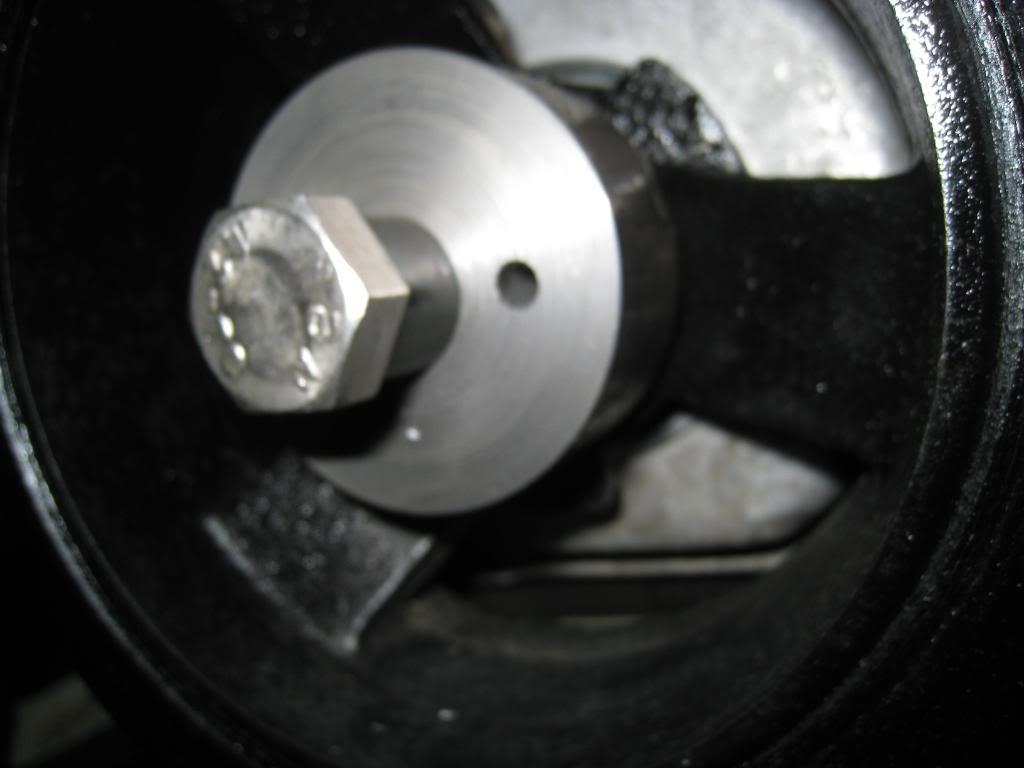
3. Took a brand new 1/4" drill bit and marked off with tape 5/8" depth.
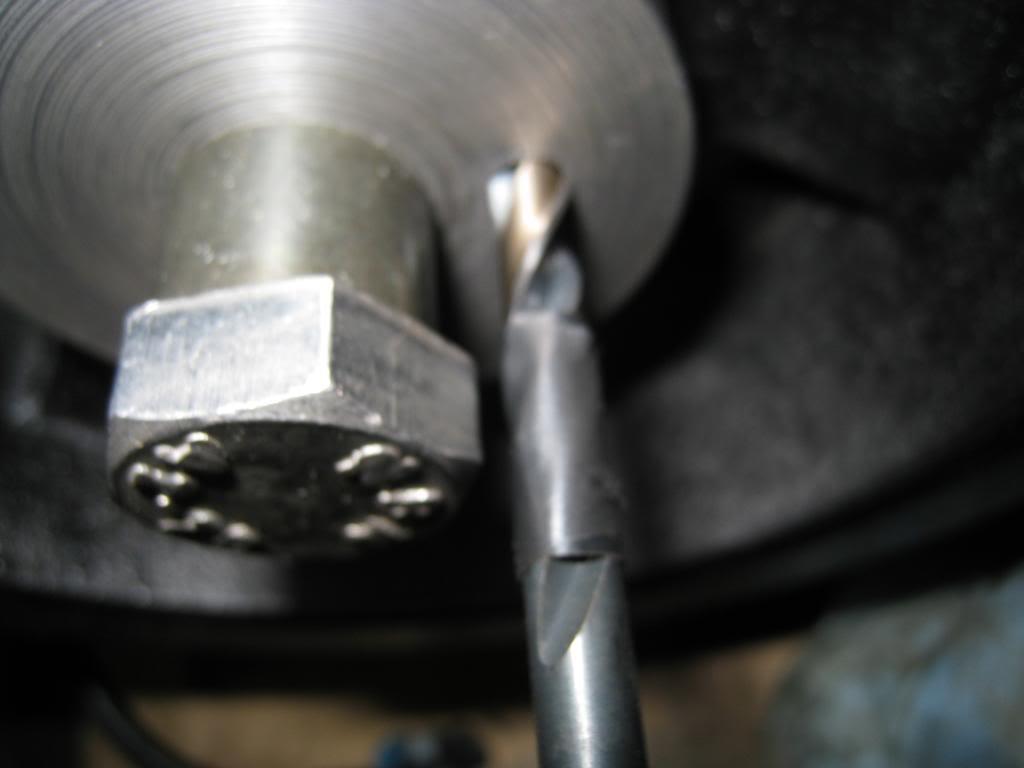
4. Drilled to depth, then removed Tool.
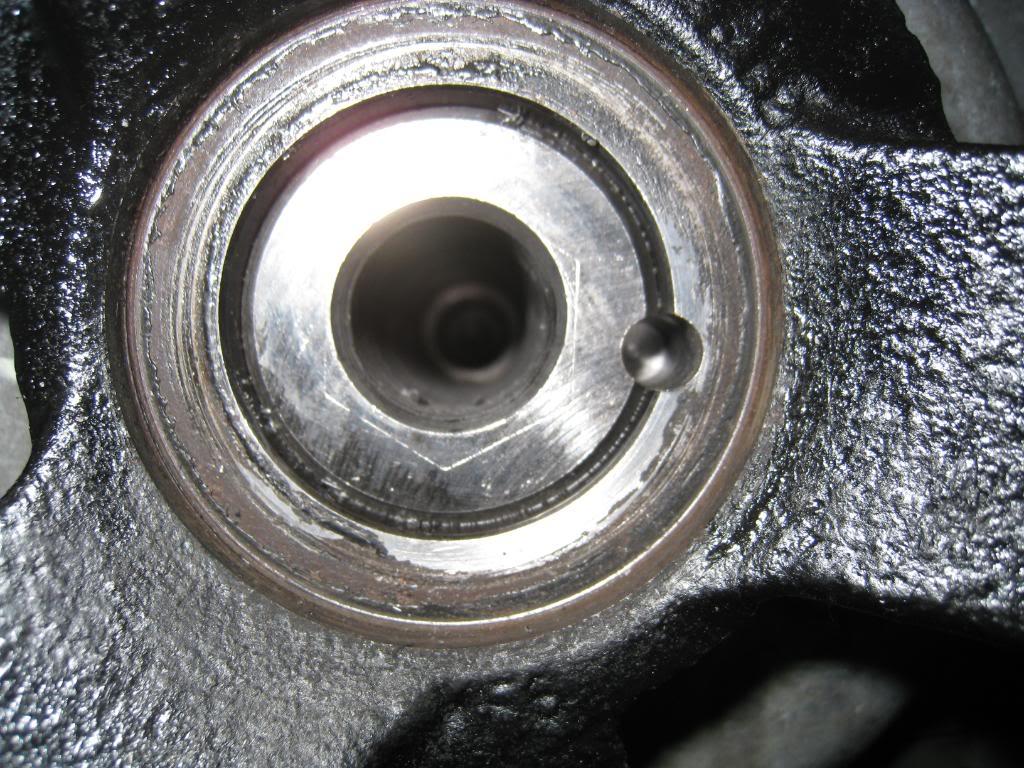
5. Cut 1/2" off of the chuck end of the 1/4" drill bit.
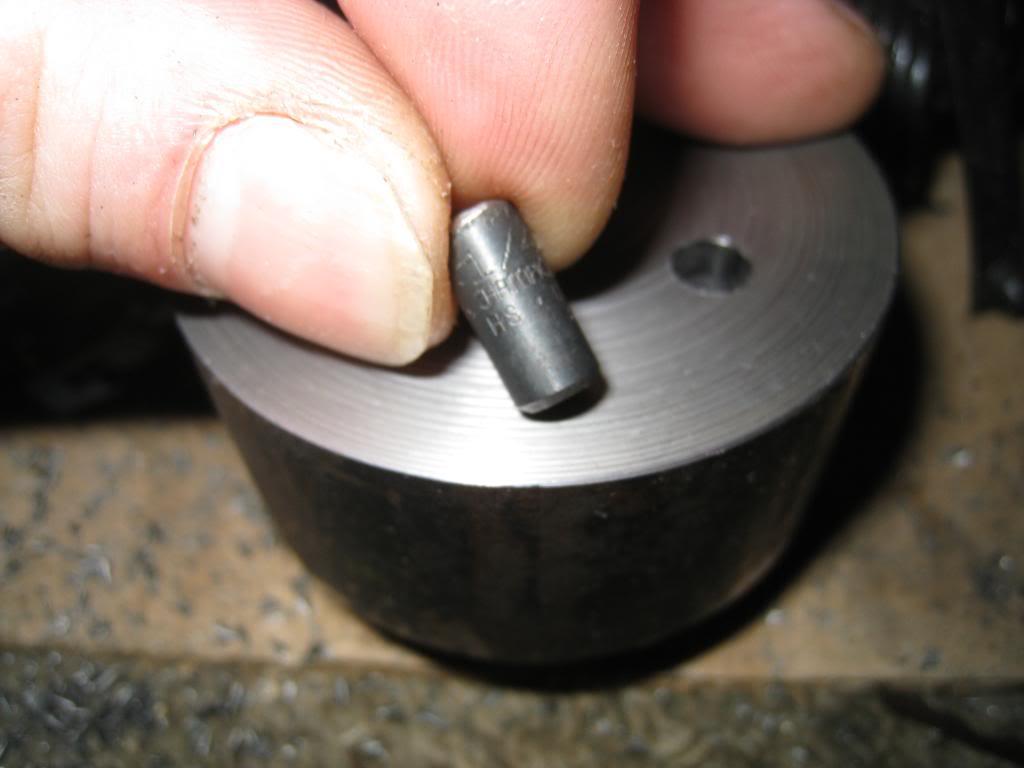
6. Inserted 1/2" drill bit piece into crank pin hole.
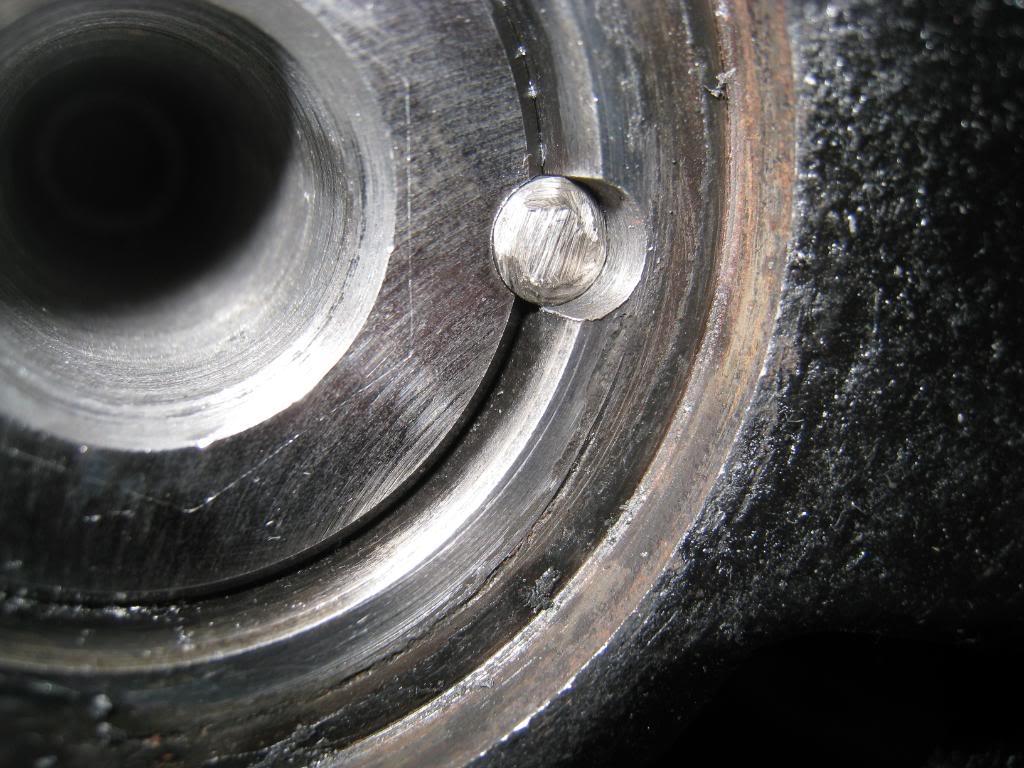
7. Re-assemble and enjoy!
The whole point of doing a project car is building it. I'm not rich either, so alot of it comes down to if I don't build it I can't buy it. Well, really, lets put it this way, if I could afford to buy the trick parts, I probably would. Until I win the Lotto, this is it. (Even if I was rich, I would still make my parts, only I wouldn't have a pesky day job to get in the way!)
2/22/2009
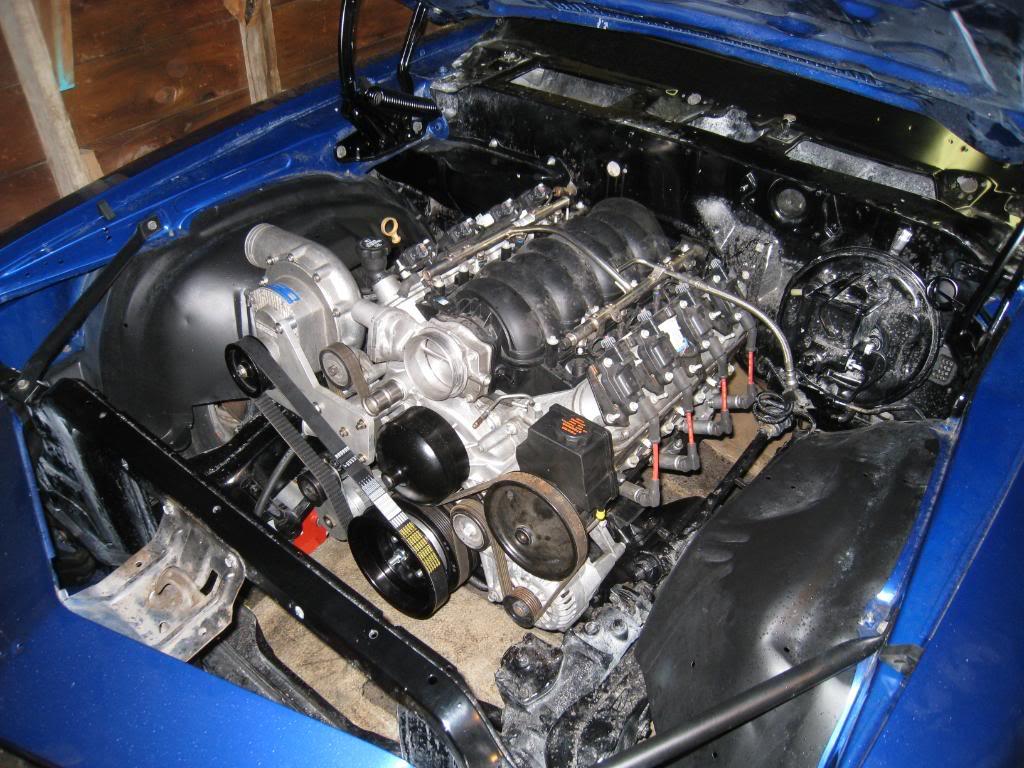
GOT IT IN!
Hopefully this isn't another test fitting! Got the LS2 into it's mount and all bolted up. It's a tight fit, especially between the 'charger and the upper control arm. But there is space. Time to start the plumbing.
Great build!
Posted by Diggymart on 2/14/20 @ 5:54:05 PM