You must be logged in to rate content!
83 minute(s) of a 209 minute read
4-7-2015
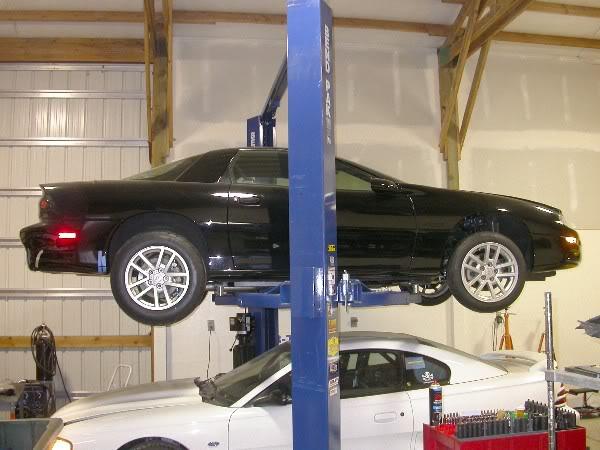
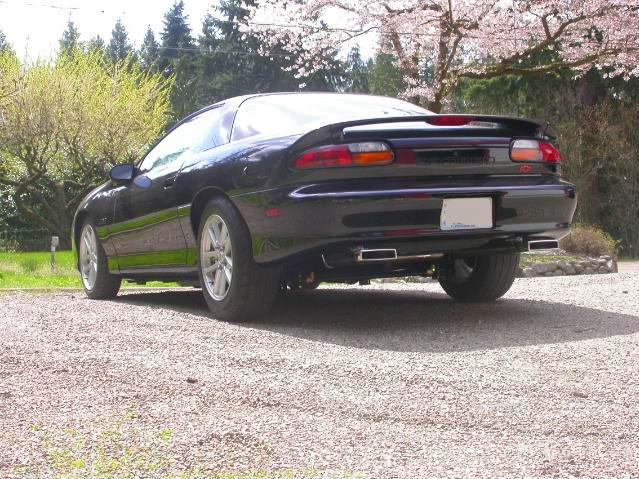
1SC Stripper Build
Compliments of Heyfred @ www.ls1tech.com
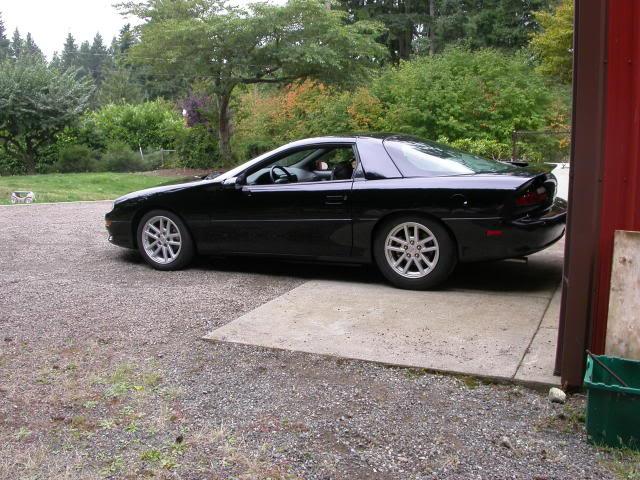
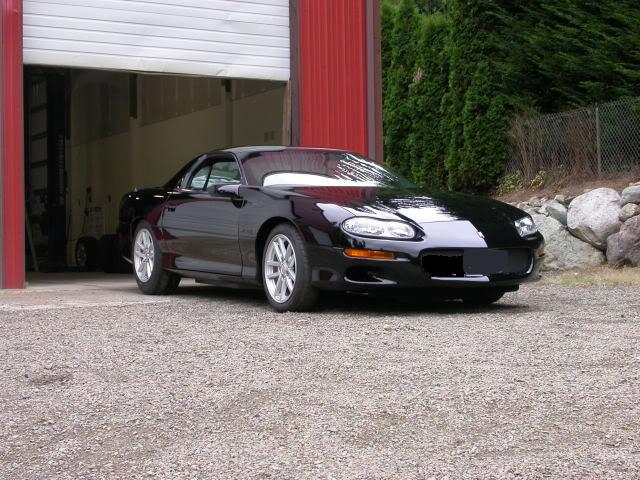
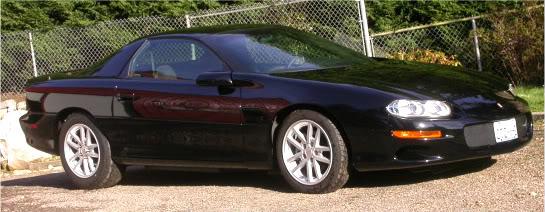
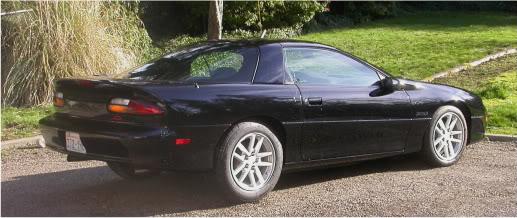
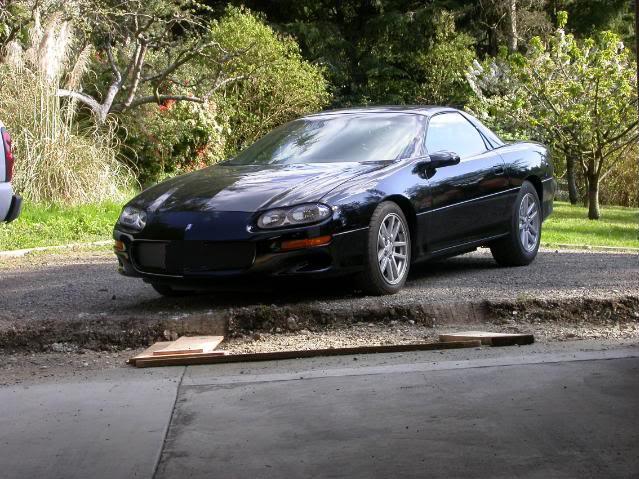
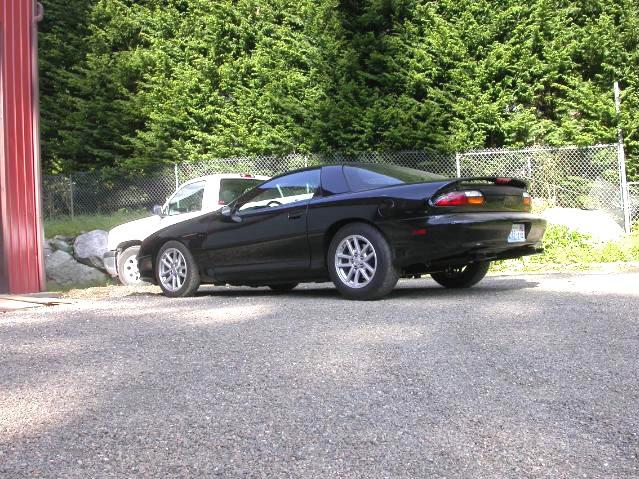
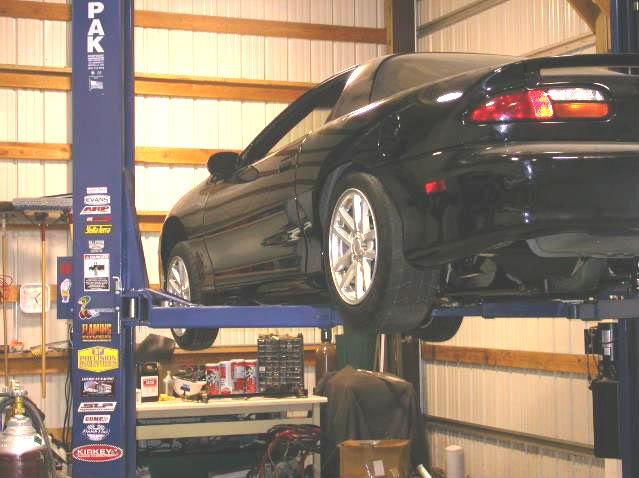
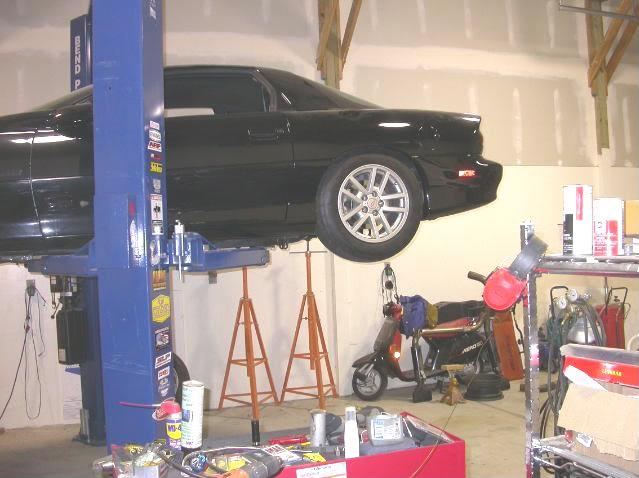
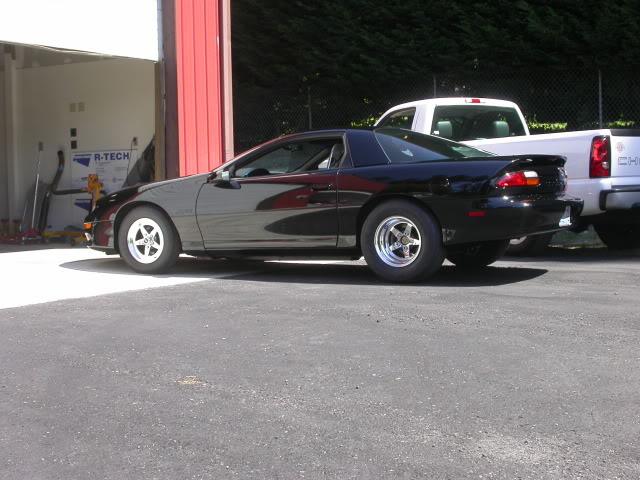
Finally starting to come together. Approximatly 6 months ago I purchased a low mile 2002 1sc Camaro w/auto. Hopefully we can go out and have some fun racing locally this next summer.
Did alot of reading on the site and so far this is what I bought:
http://www.neweraperformanceparts.co...=NEPSShtCamF|0
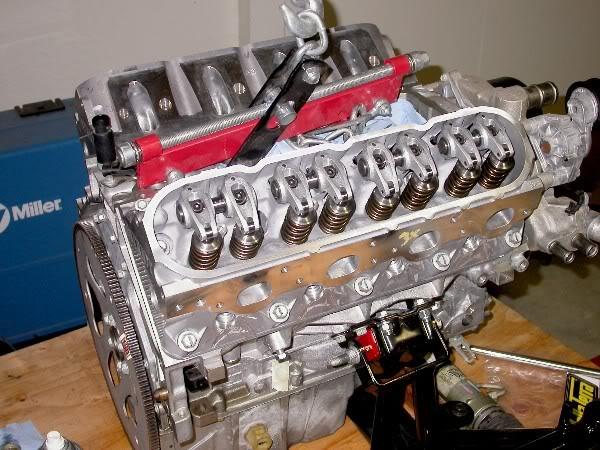
Cam
http://www.neweraperformanceparts.co...A=E&PKV=2013|0
Heads
http://www.neweraperformanceparts.co...&PKV=ytls1rr|0
Rocker arms
http://www.neweraperformanceparts.co...E&PKV=100221|0
Balancer
http://www.neweraperformanceparts.co...lanteTripleF|0
4000 converter
http://www.neweraperformanceparts.co...KV=LS19899-1|0
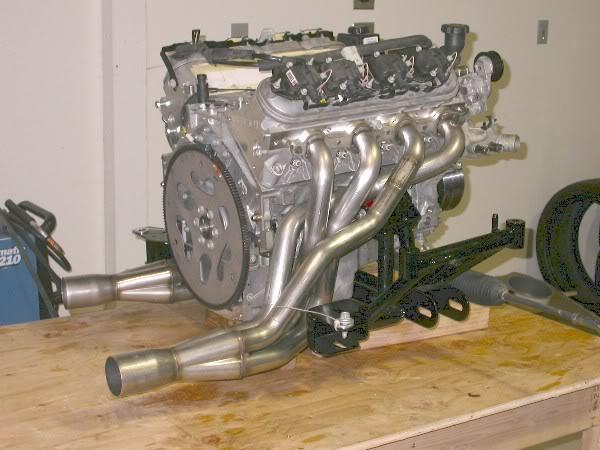
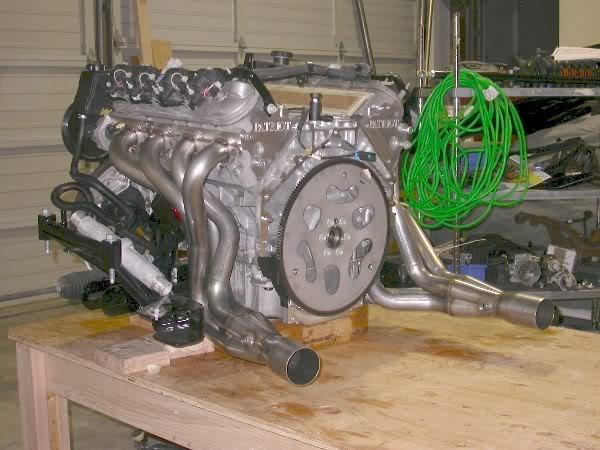
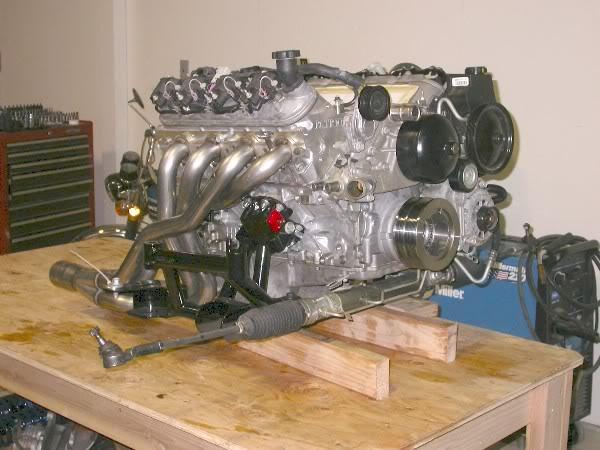
Headers
http://fuelinjectorconnection.com/sh...&productId=179
Injectors
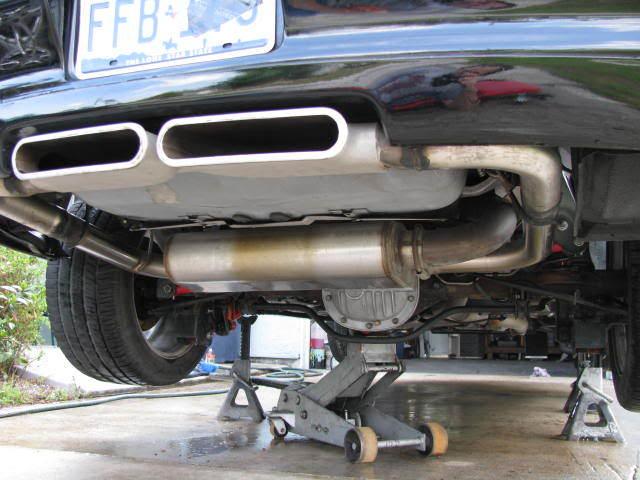
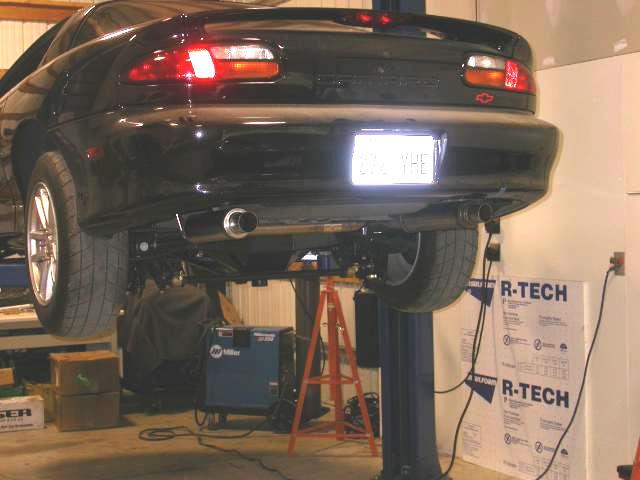
Exhaust CME (Example shown)
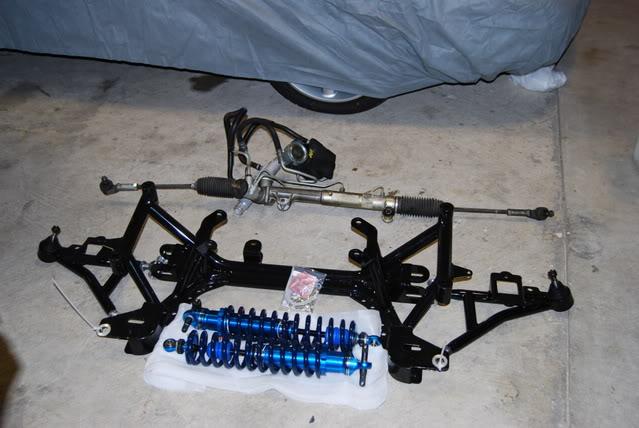
UMI Kmember
AFCO double adjustable on all 4 corners
http://www.mandhtires.com/store.php?...on=show_detail
http://www.mandhtires.com/store.php?...on=show_detail
M/H tires
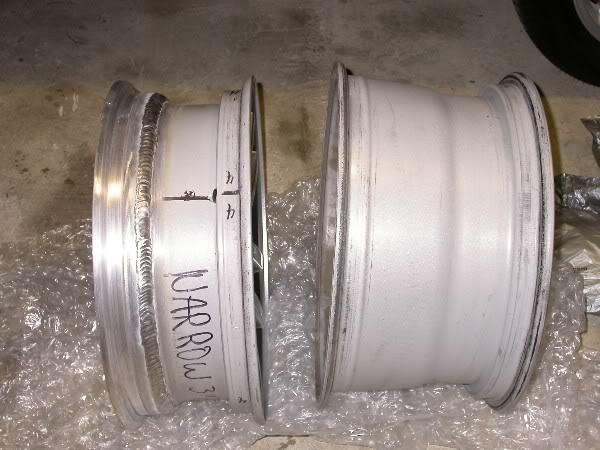
Wheels 2002 SS rims, fronts narrowed to 6" (weldcraft)
http://www.neweraperformanceparts.co...=E&PKV=70802|0
Subframe Connectors
Kenne Bell Boost-a-Pump
Prothane motor and trans mount
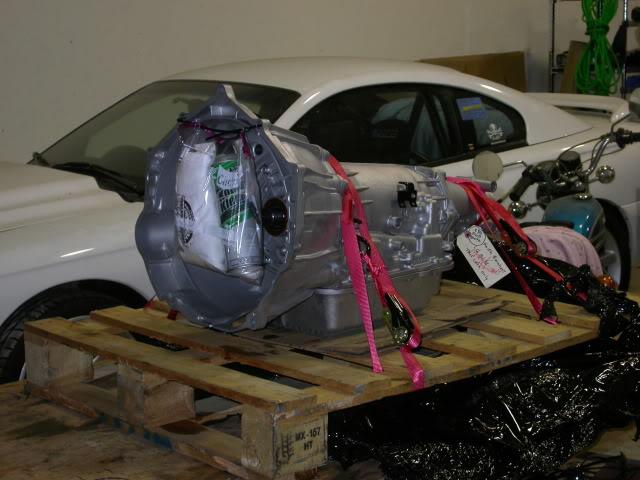
Tranny is in the shop gettiing upgraded.
http://www.ls1tech.com/forums/drag-r...-c-delete.html
A/C delete
Vendors I delt with and have had excellent service with
New Era Performance
Midwest Chassis
Patriot Performance
Fuel Injector Connection
2/5/2009
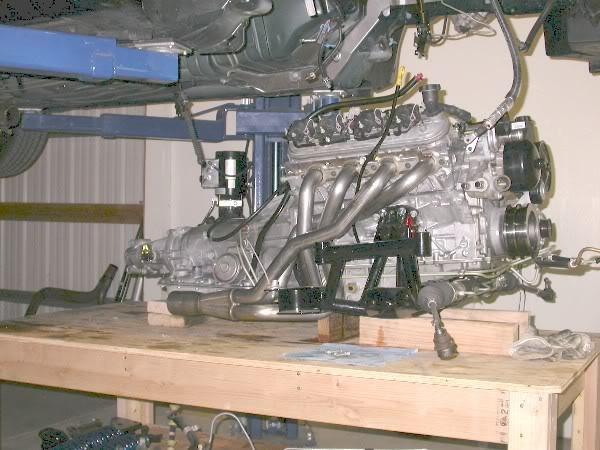
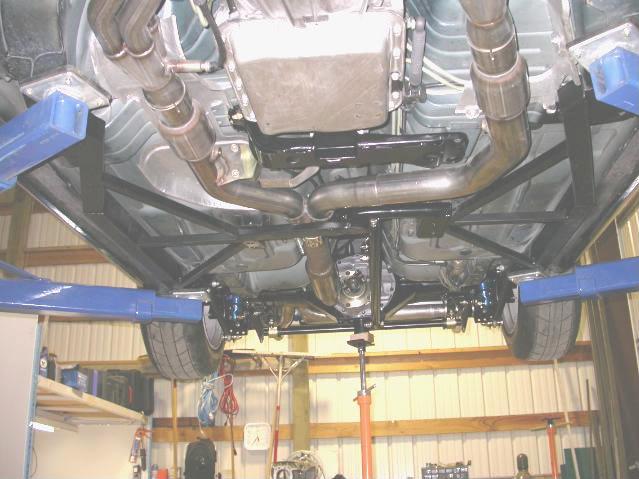
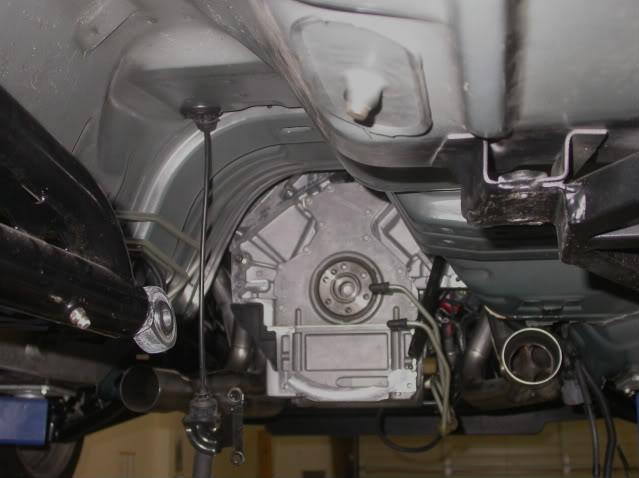
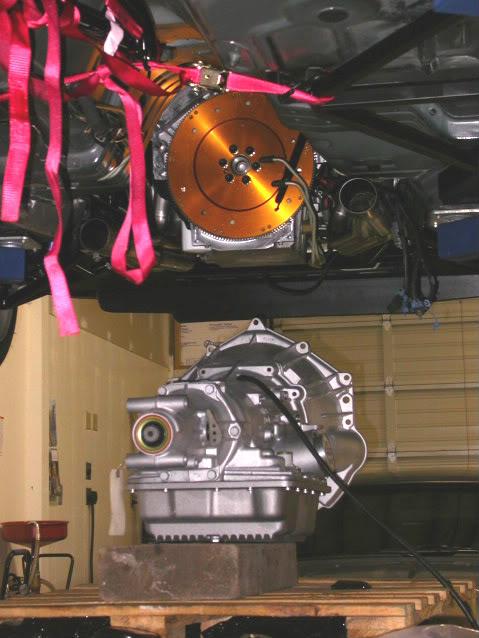
It's going back together. Sent the tranny out, had it upgraded and installed a Vigilante 4000 stall triple disc converter.
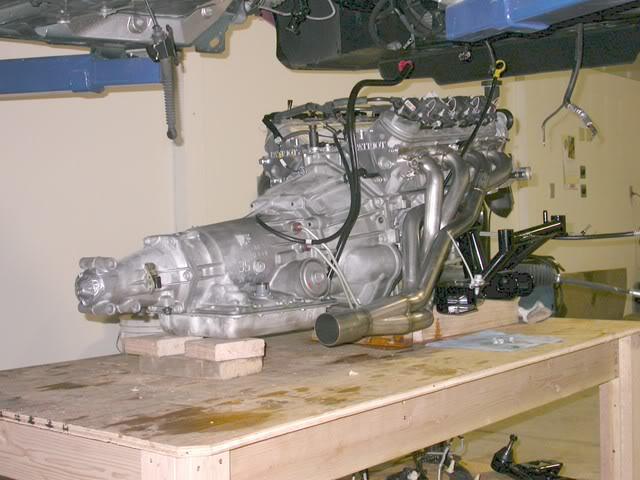
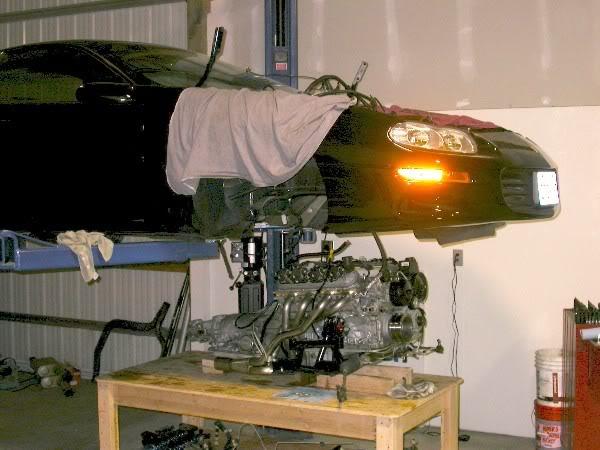
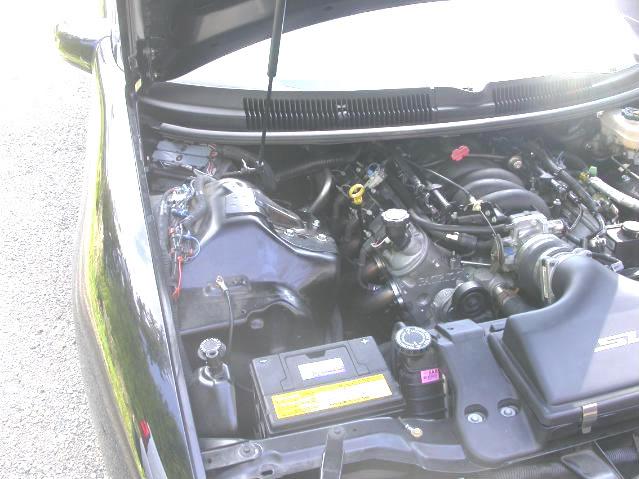
2/16/2009
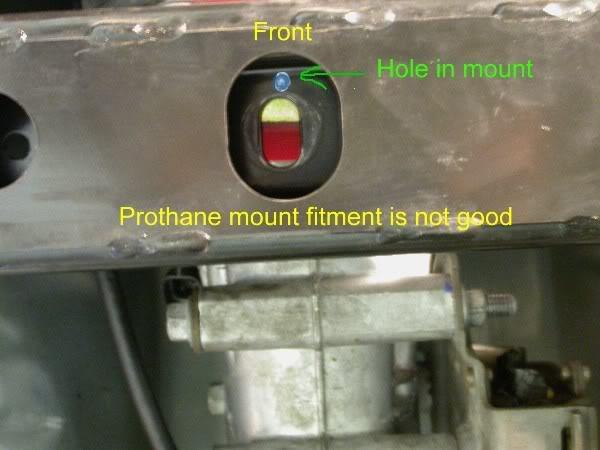
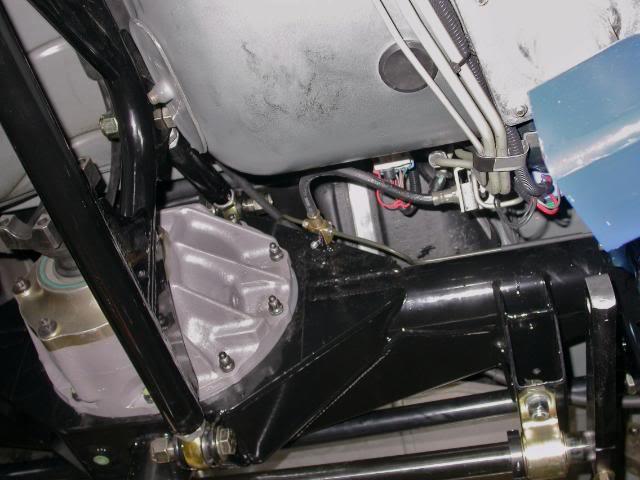
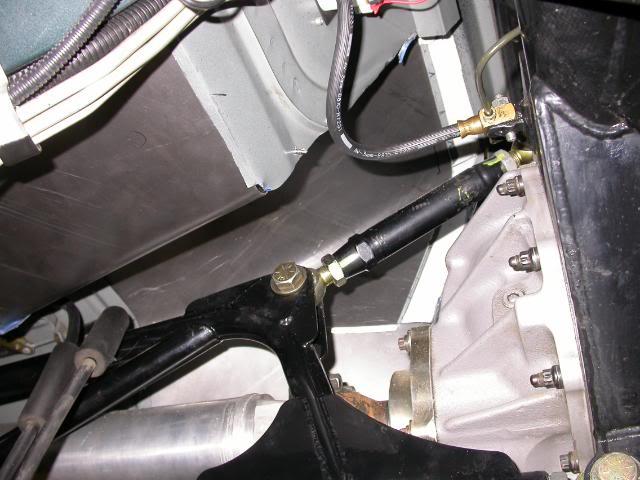
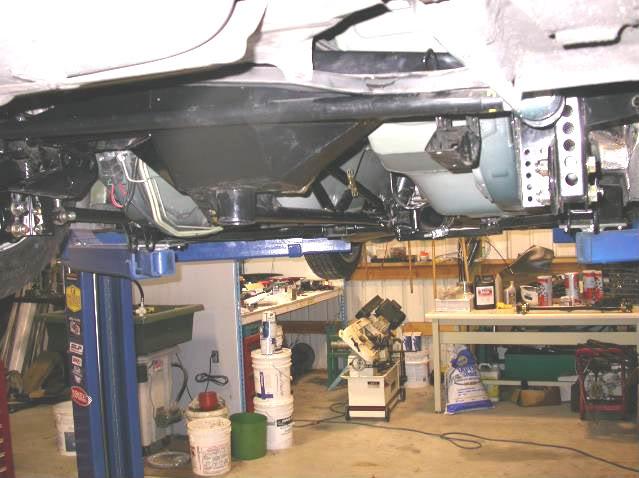
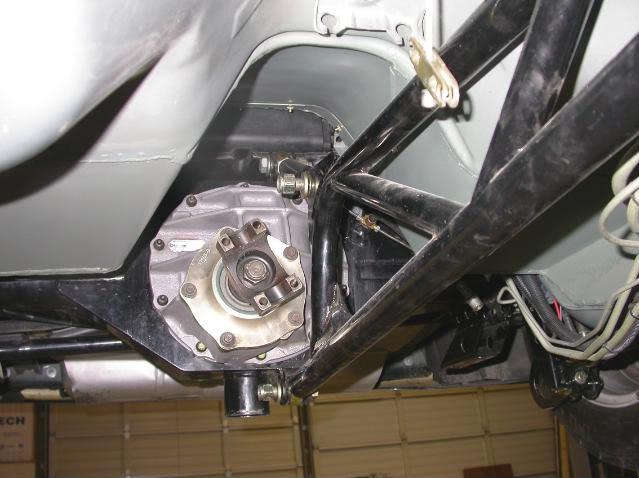
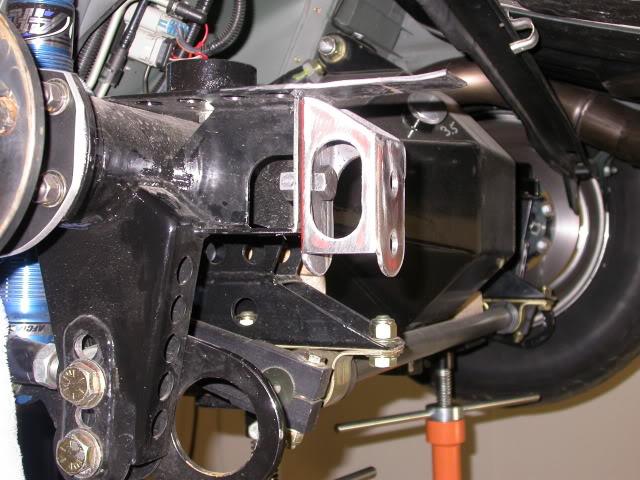
Motor is in. The only issue is the Prothane trans mount.
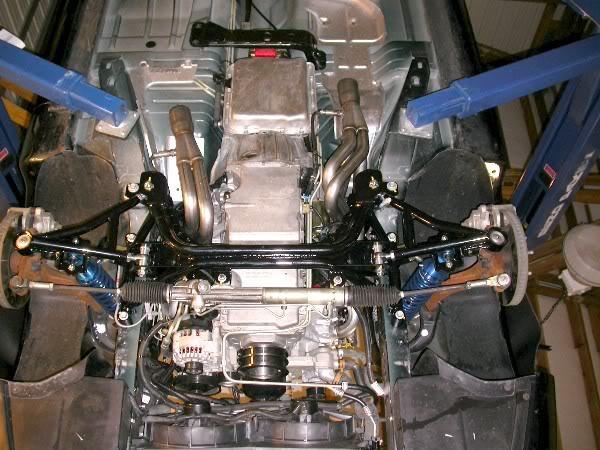
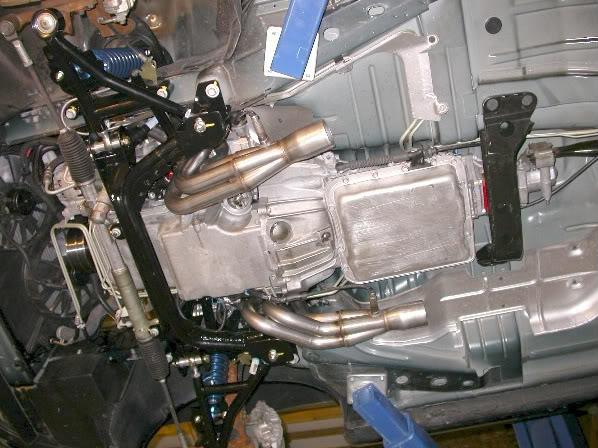
I will have to modify the stock cross member or fab up a new one.
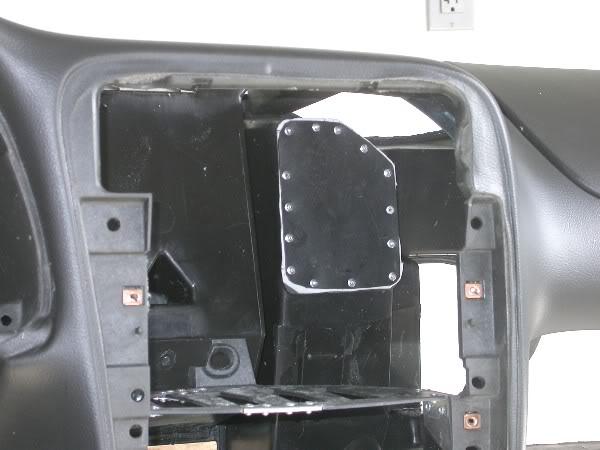
I have decided to do the ABS delete.
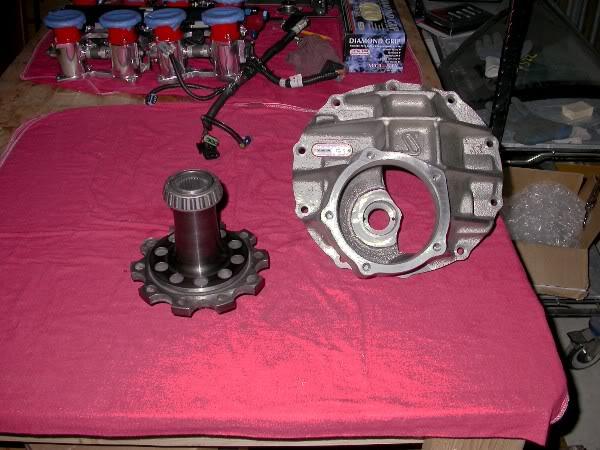
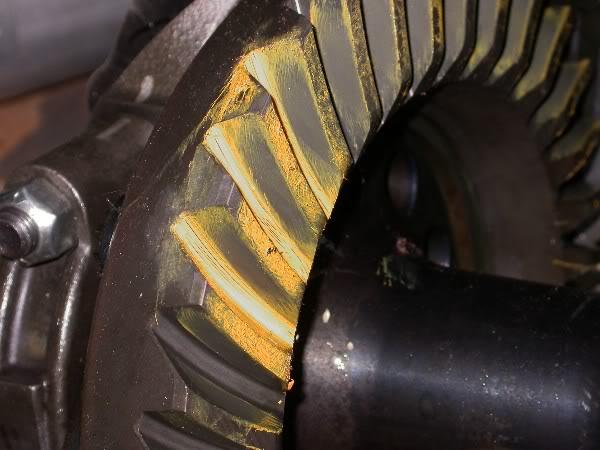
Also, this weekend, I picked up a N case 9" center section set with 4.56 gears.
2/16/2009
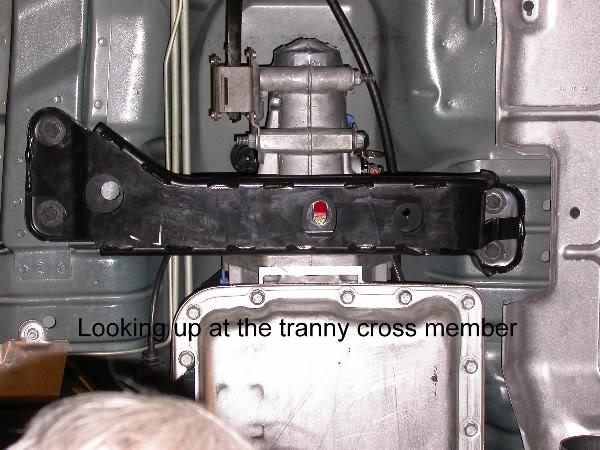
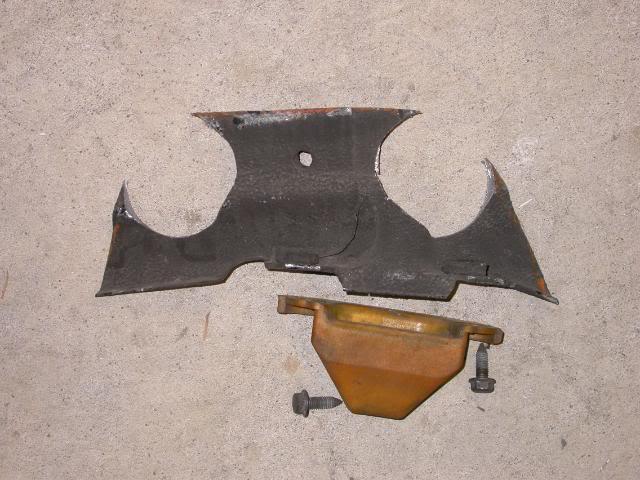
Stock tranny mount vs Prothane.
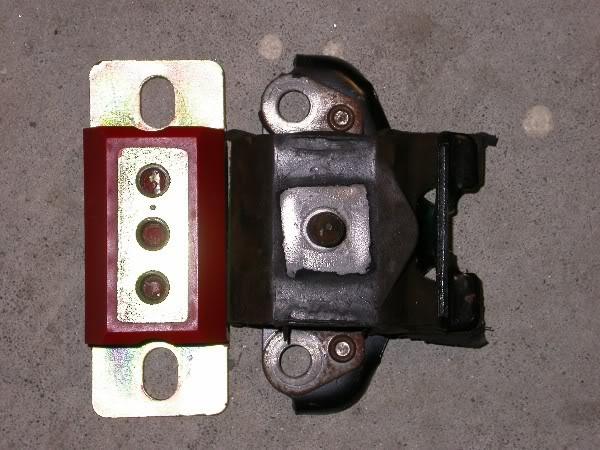
Made sure I had the correct mounts, engine, tranny and verified I put the motor mounts together correctly. Checks out.
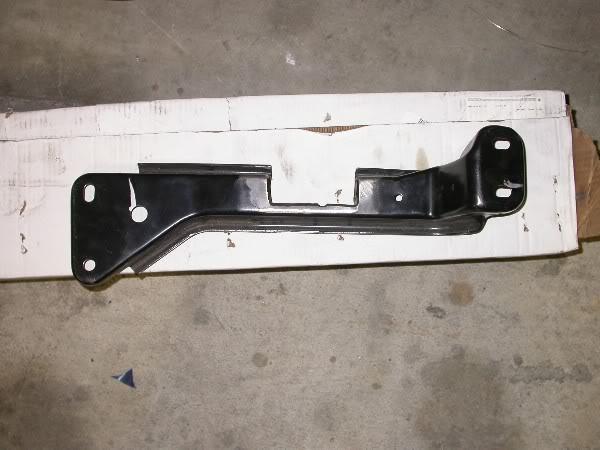
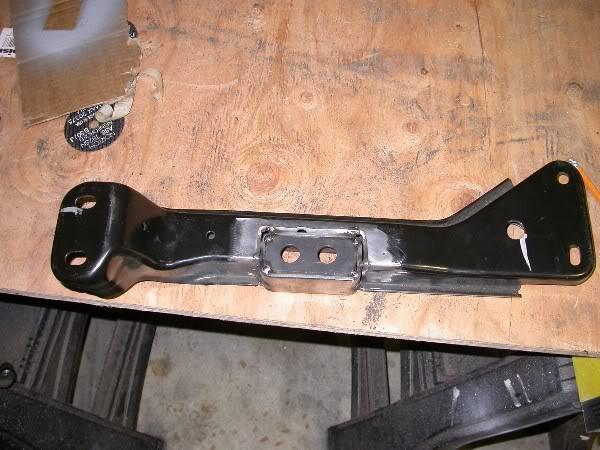
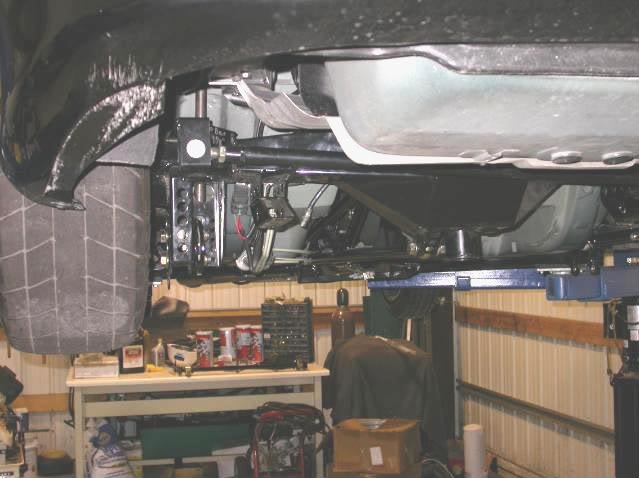
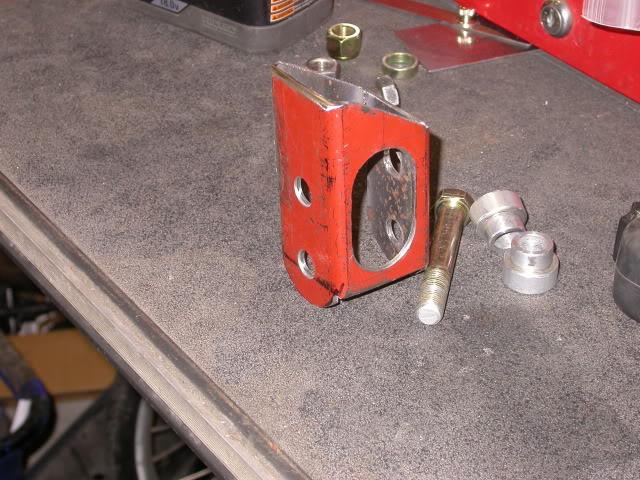
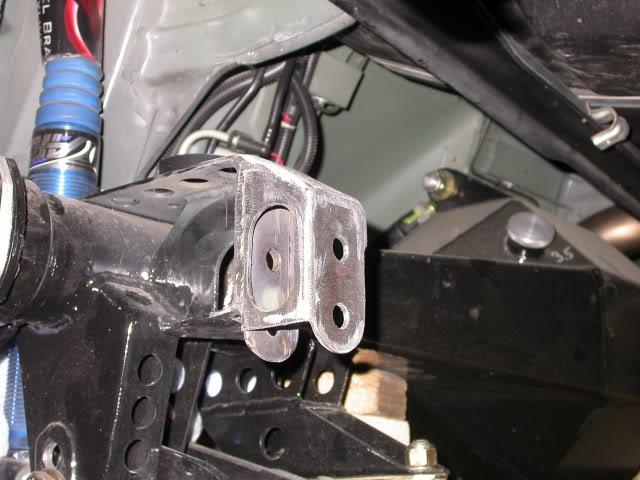
So, I decided to modify my stock tranny crossmember to accept the Prothane tranny mount which does not fit well.
Here it is tacked and test fit. Goes on and off with ease.

2/18/2009
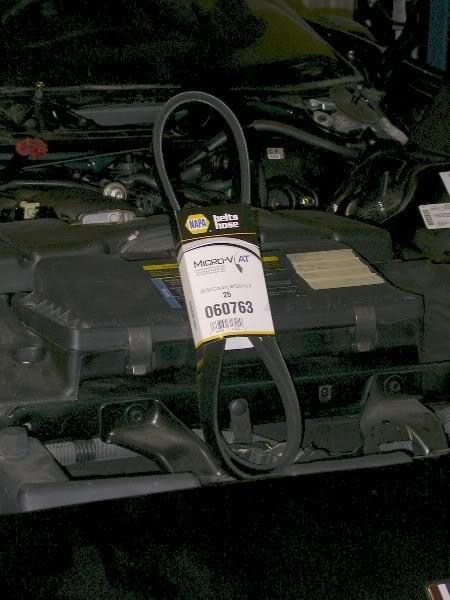
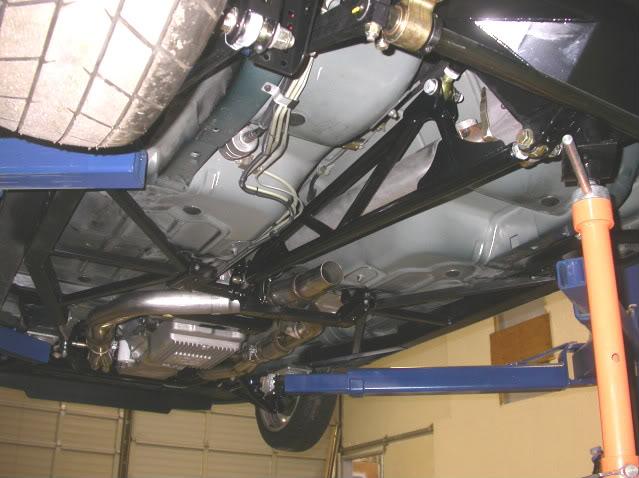
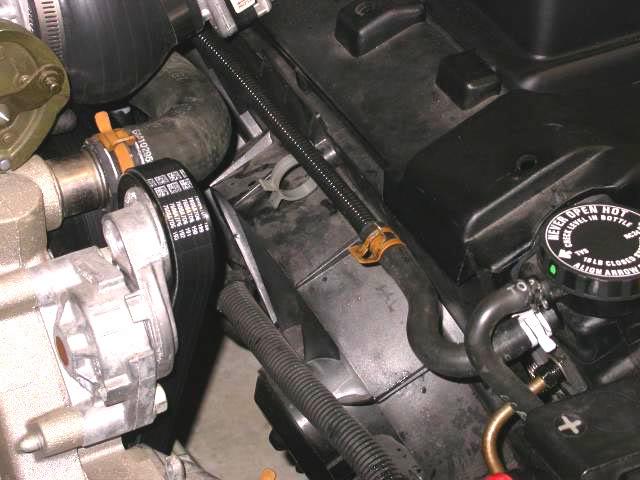
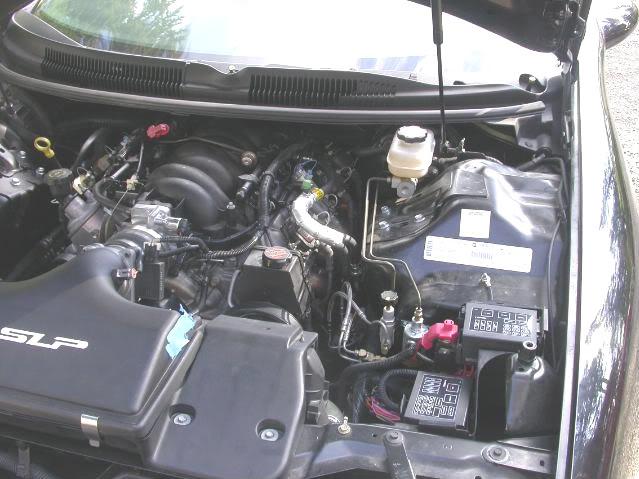
Installed a SLP balancer which required a shorter belt to be used.
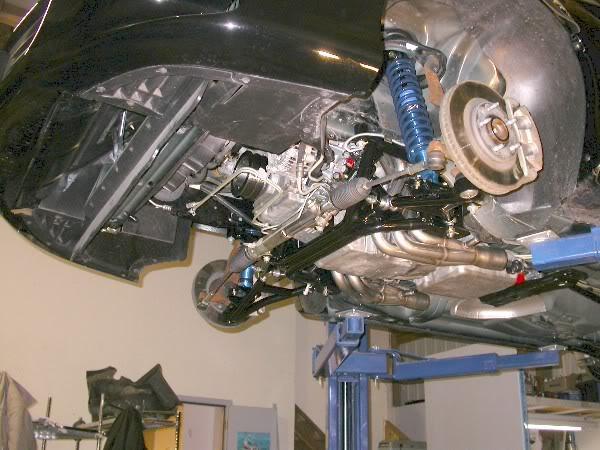
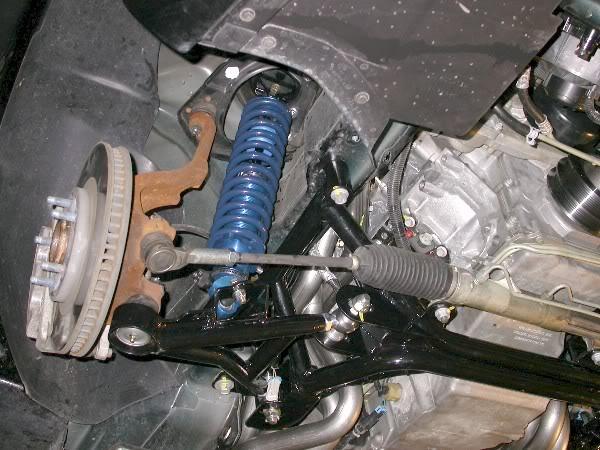
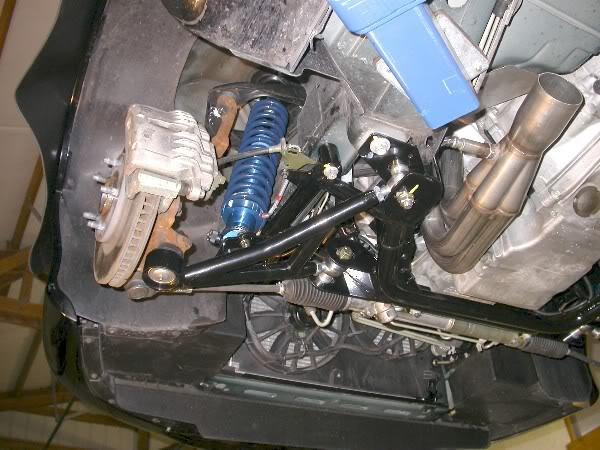
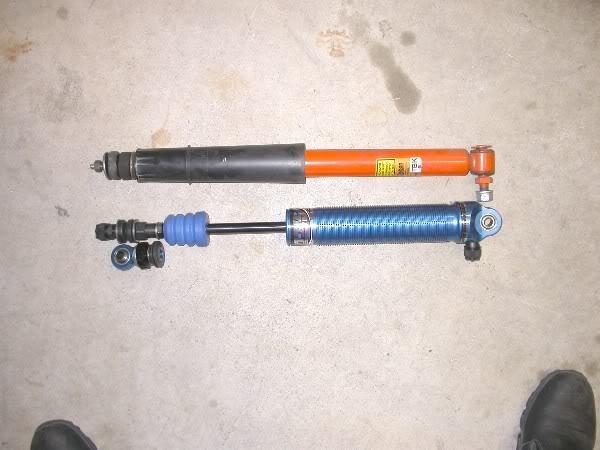
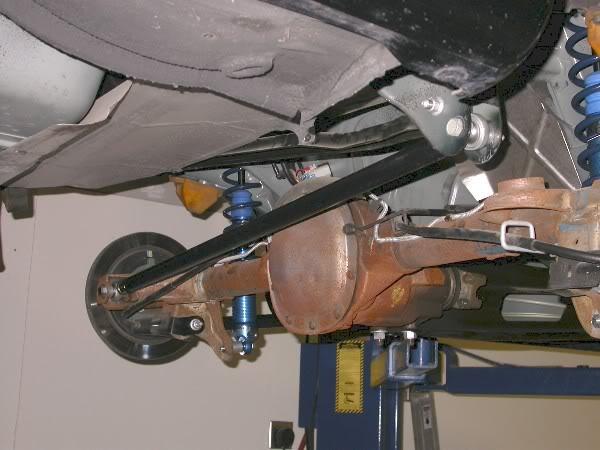
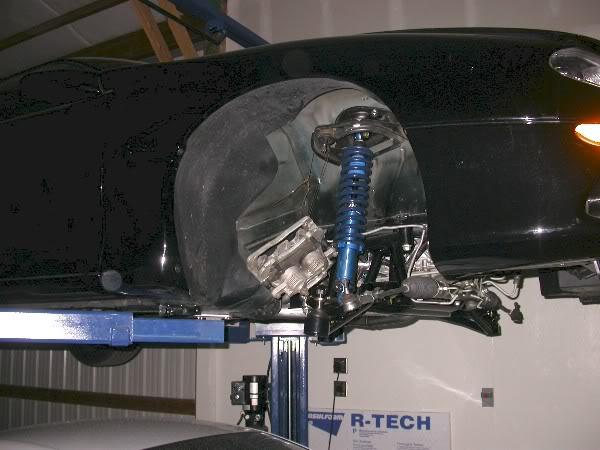
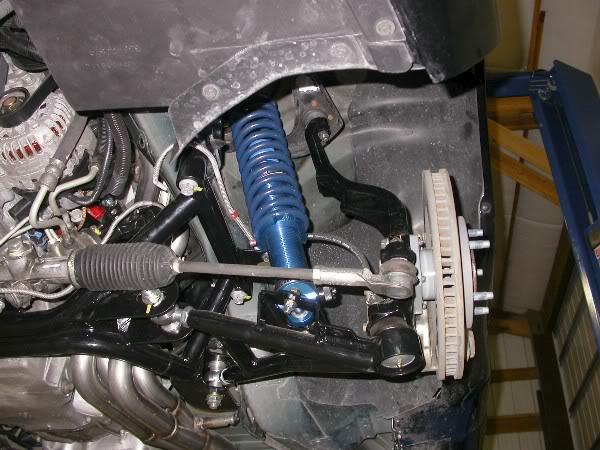
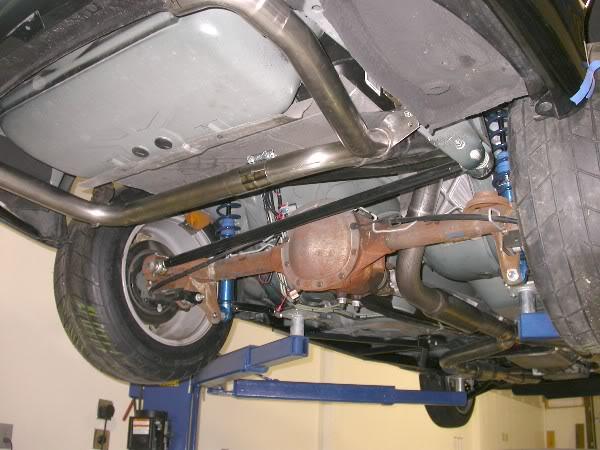
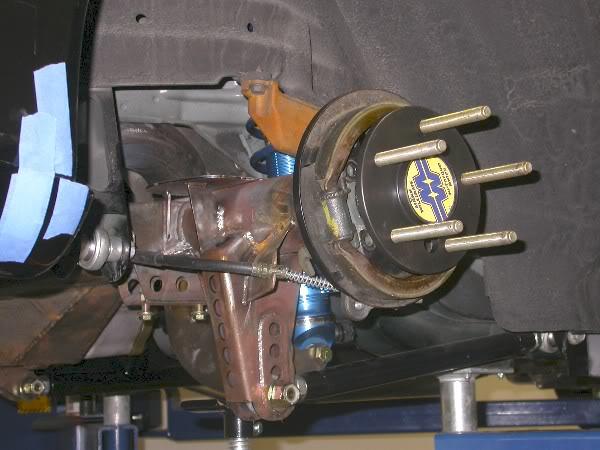
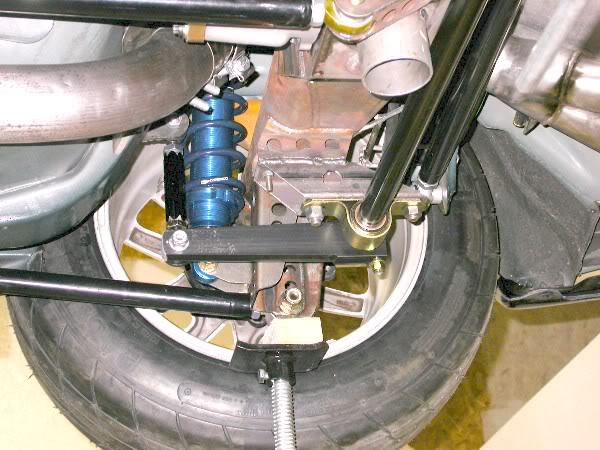
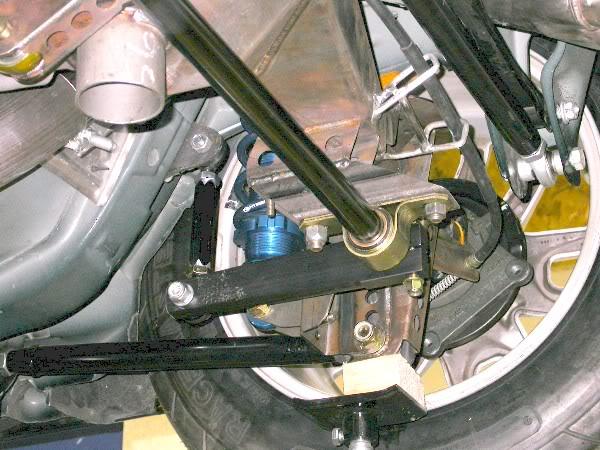
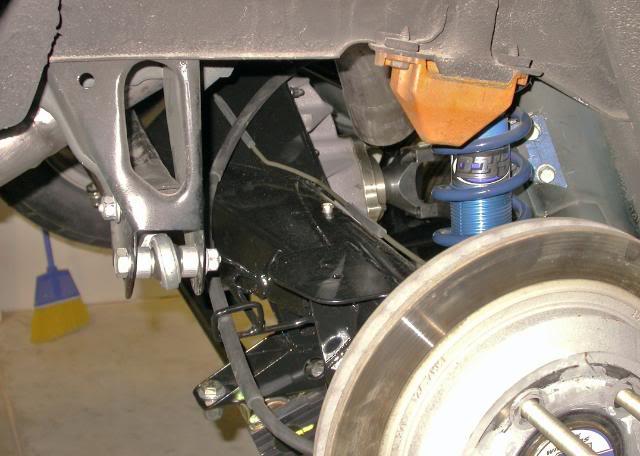
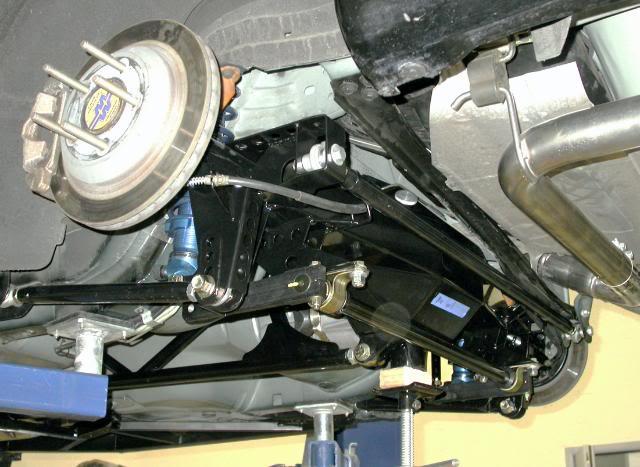
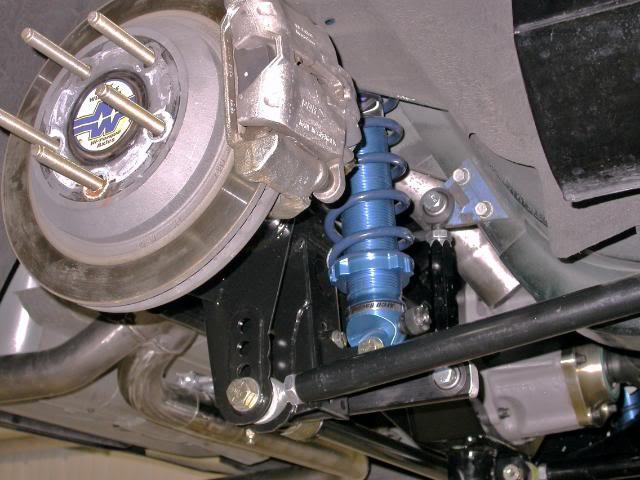
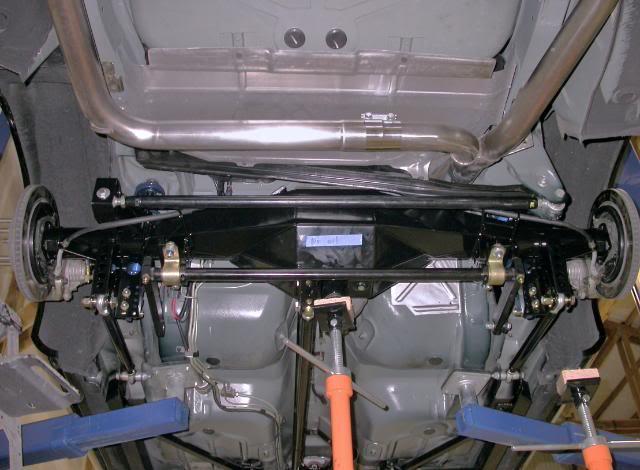
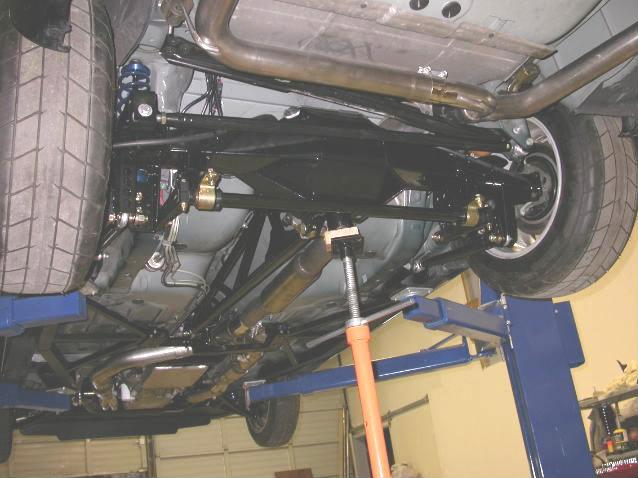
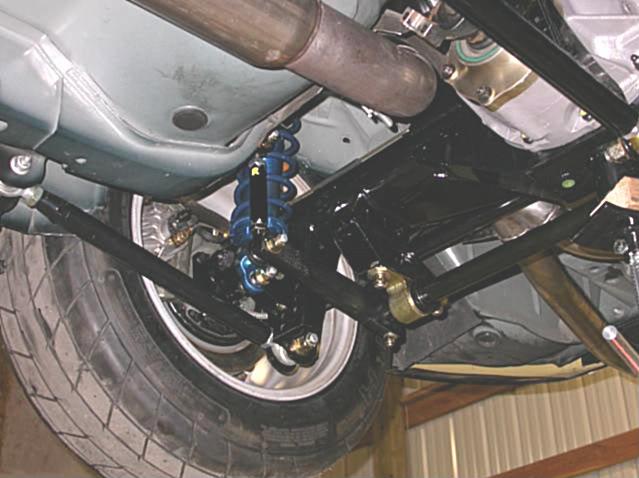
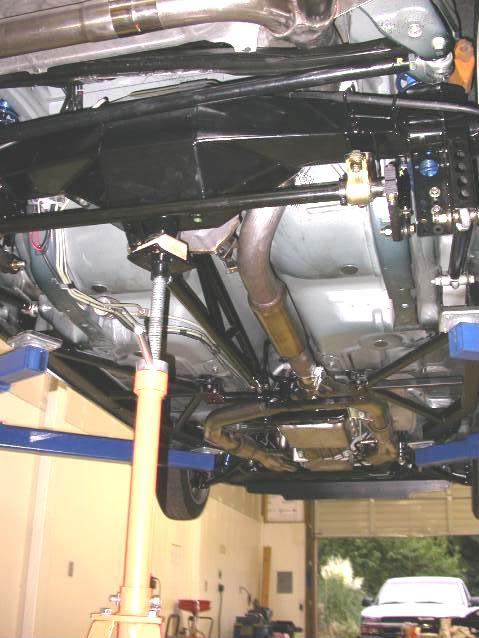
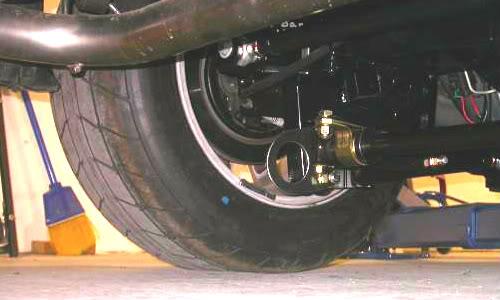
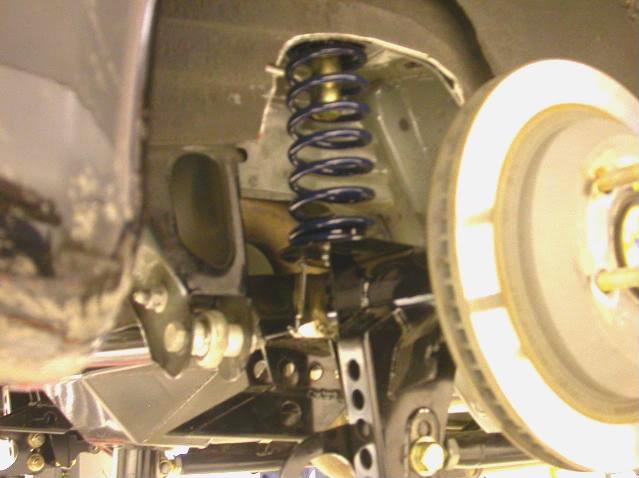
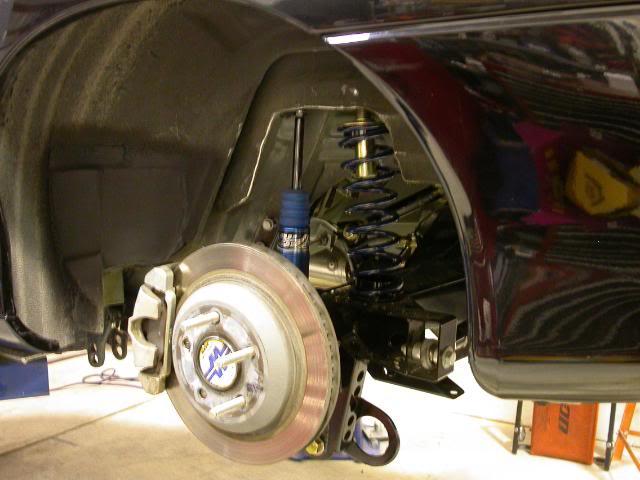
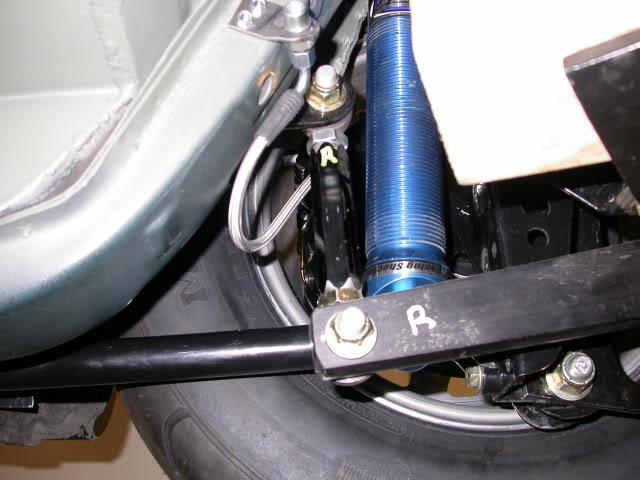
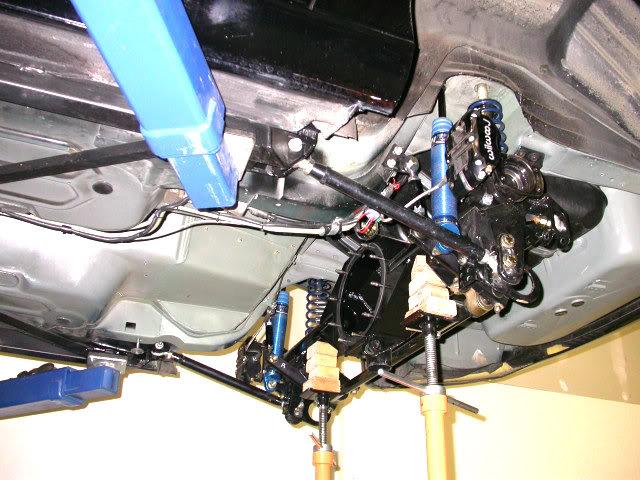
Installed the afco rear coilover shocks, Midwest LCA and panhard bar. Next, saving for 9" from Midwest.
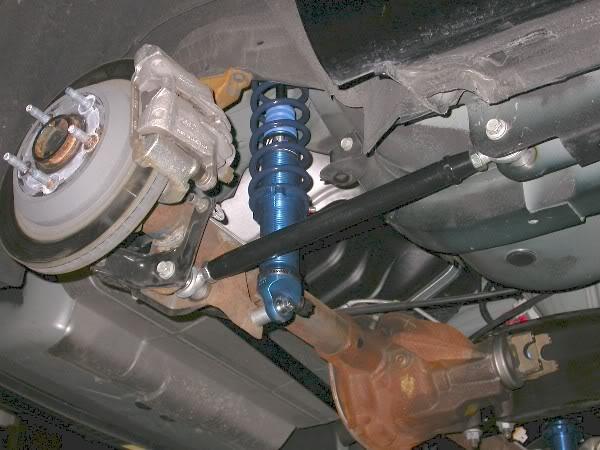
panhard bar
Preparing for ABS delete. Kit should arrive first part of next week.
Things left:
* Install KB boost-a-Pump
* Get PC680 battery
* Get 9"
* Install ABS delete
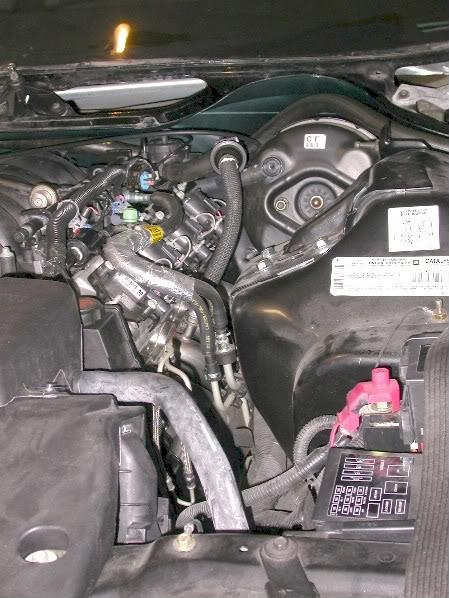
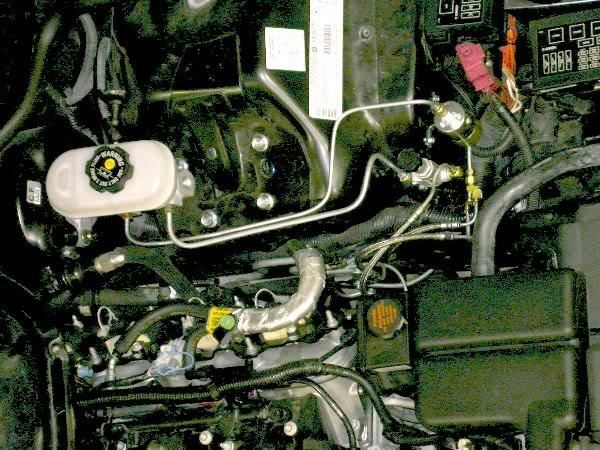
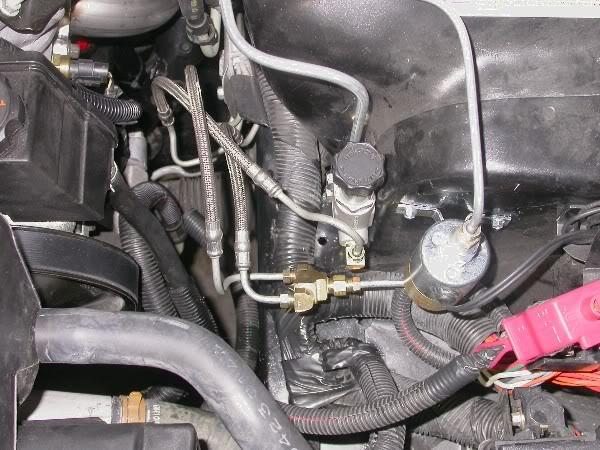
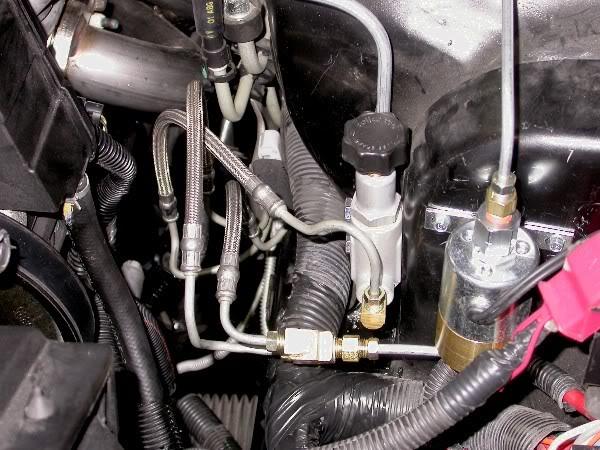
2/25/2009
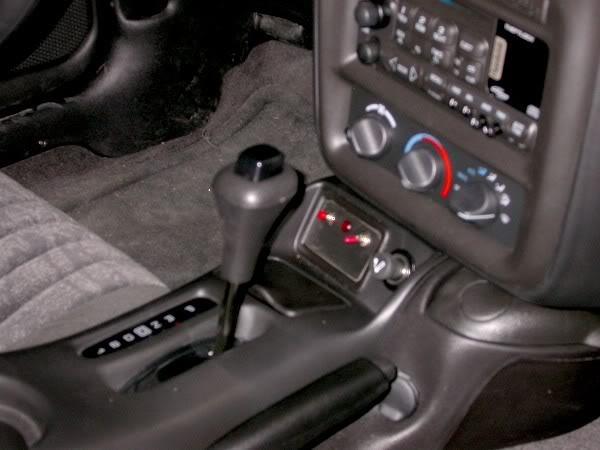
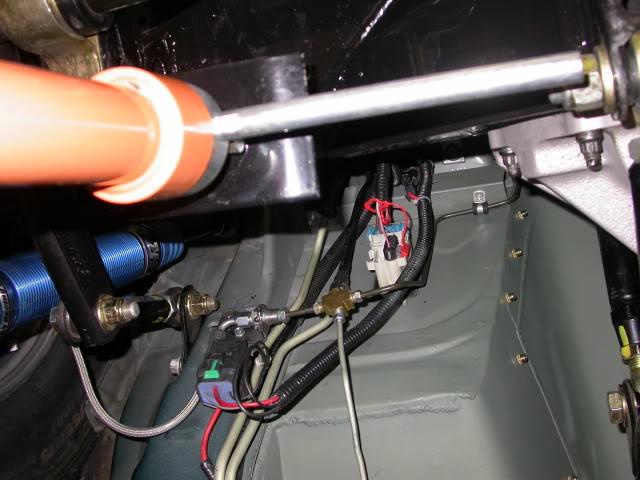
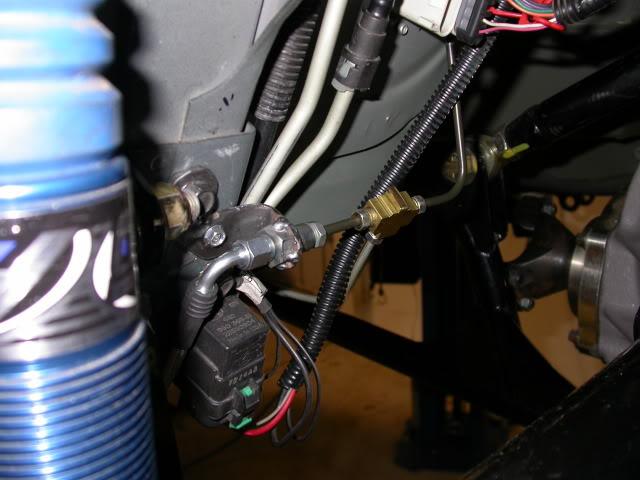
SJM ABS delete kit installed using the stock braided lines.
3/3/2009
Line lock is wired and comfortable to reach.
Used the switch and button included in the SJM ABS delete kit.
Saving for:
*Midwest 9" housing
* LNC-003
* Tune
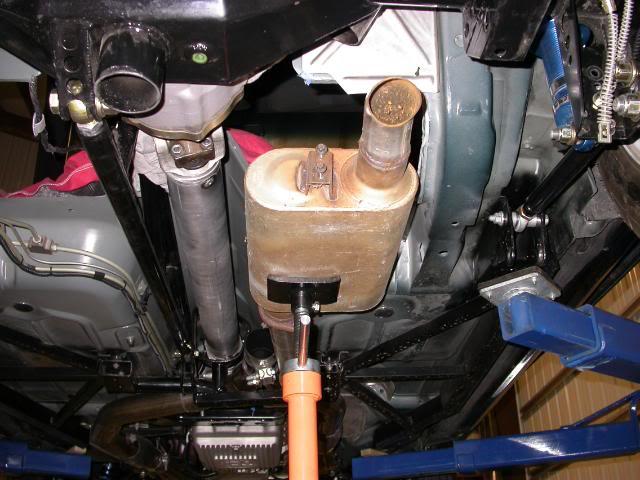
* Custom exhaust to CME
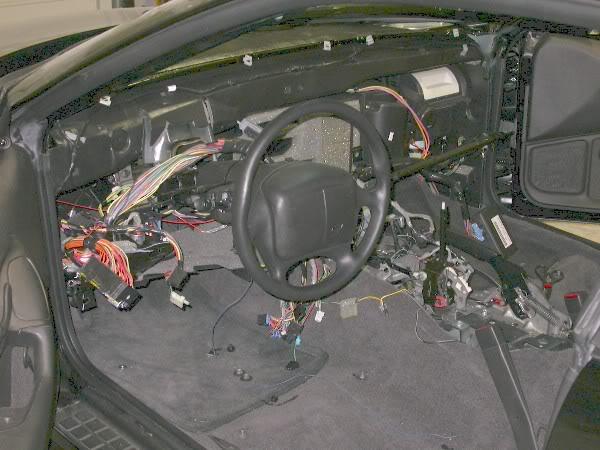
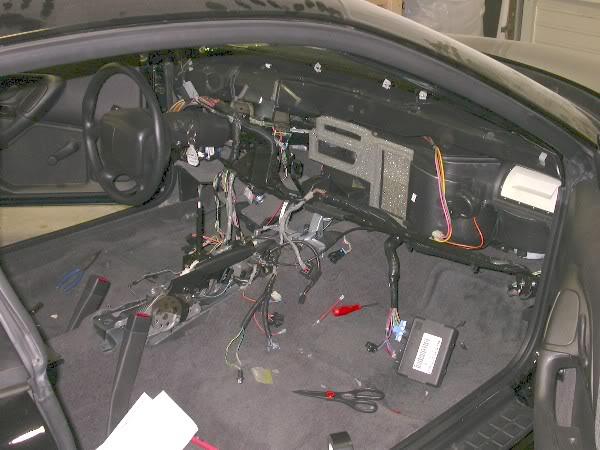
3/13/2009
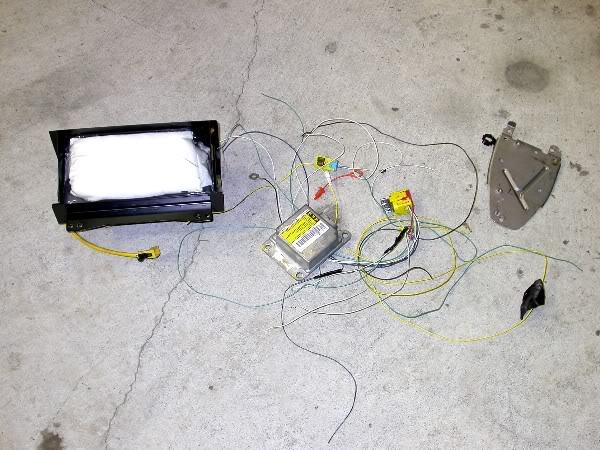
Took the dash out today, removed the passenger side air bag, modual and all associated wires.
3/20/2009
Modified the HVAC system, removered center vent.
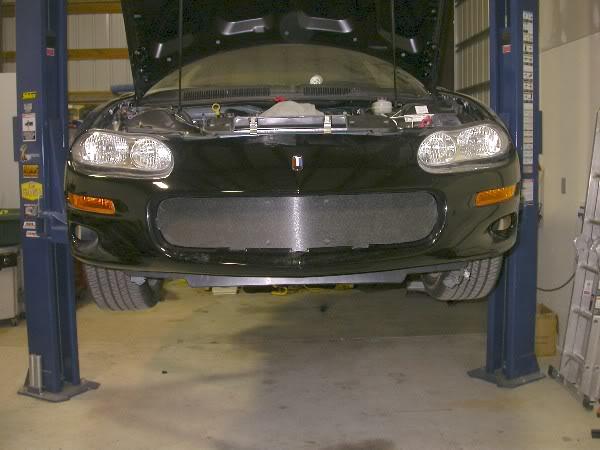
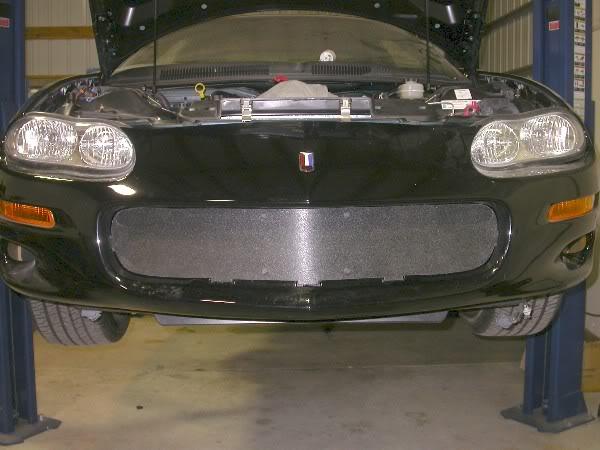
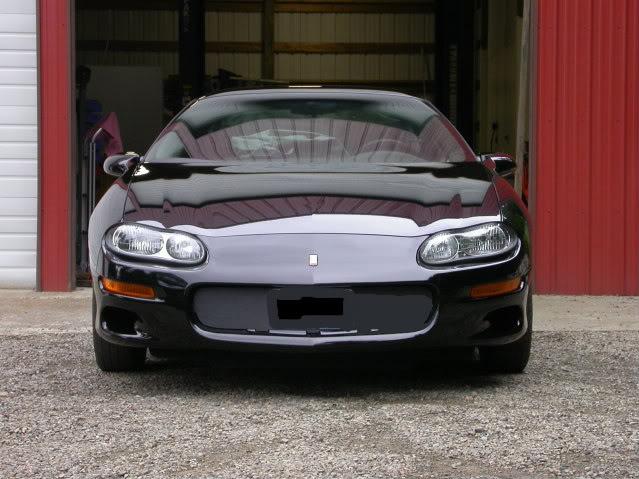
Front Bumper delete.
Fitted on car
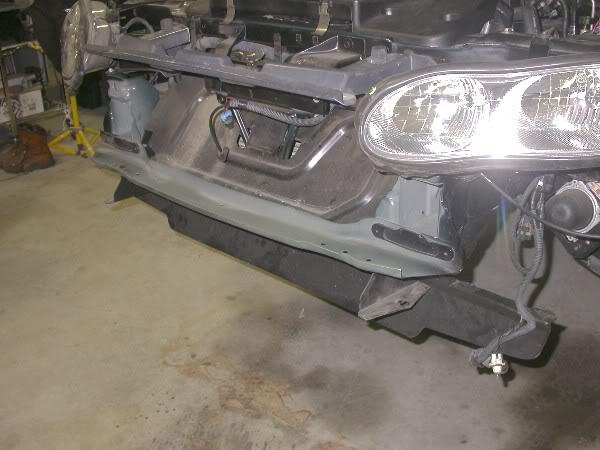
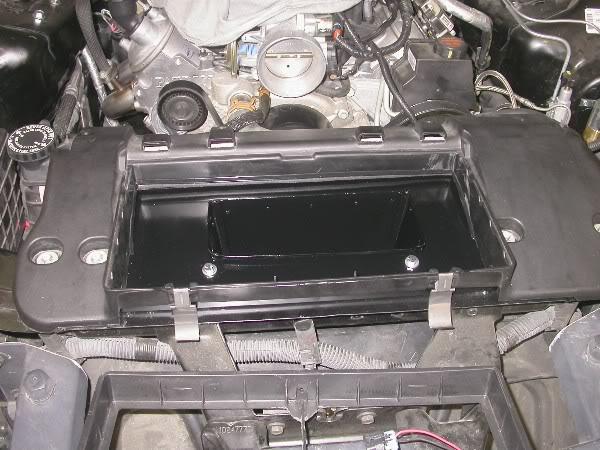
Home brew ram air system in process. Waiting for correct duct to show up.
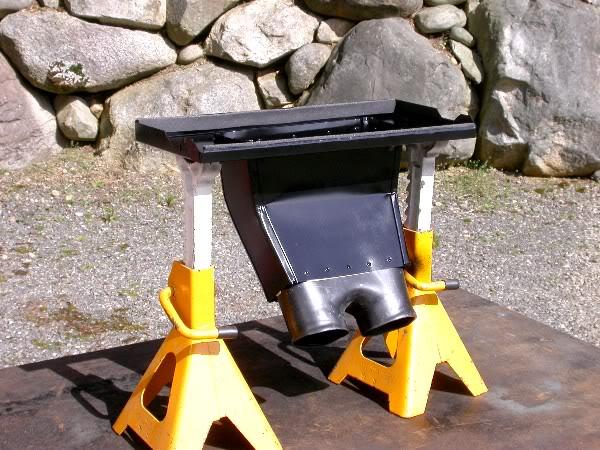
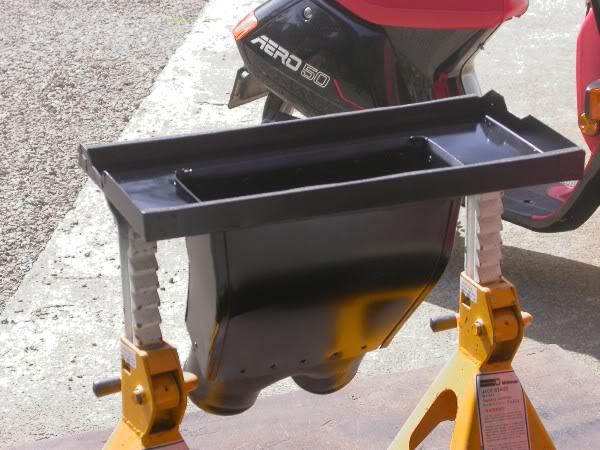
3/27/2009
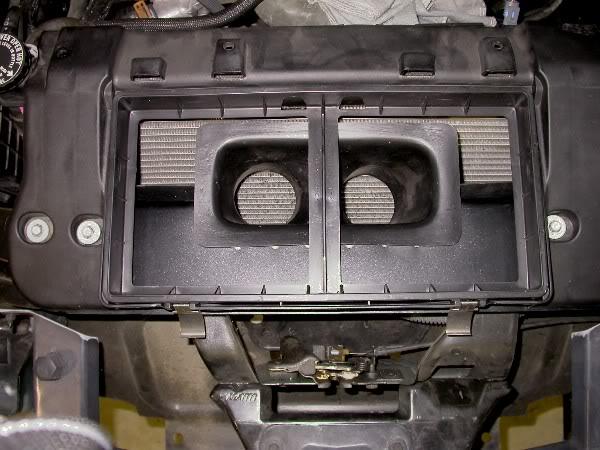
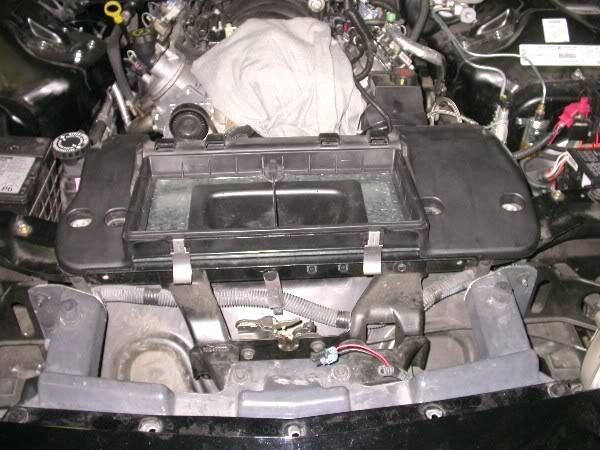
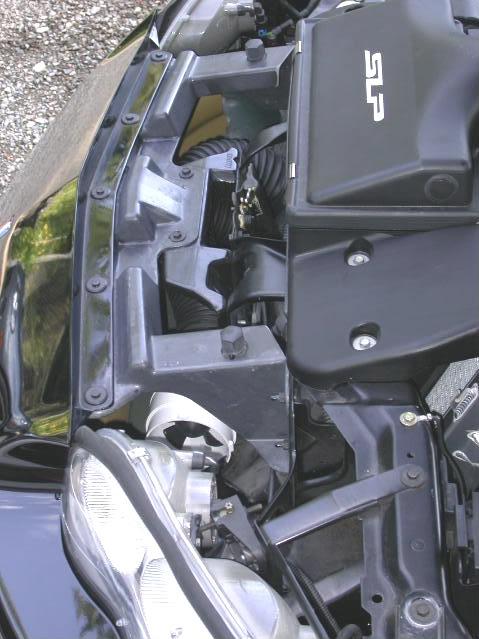
Airbox is done minus paint. It has (2) 3" tubes
Grill delete, made it so I can put the license plate on quickly if needed.
4/8/2009
Redesigned my cold air intake. This is my 4th design and worked out some building and fitment issues.
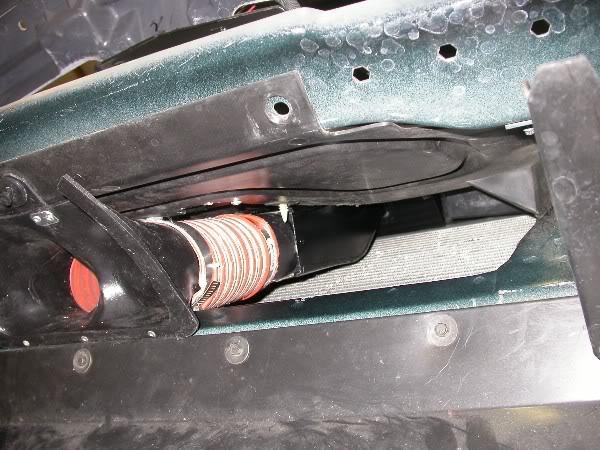
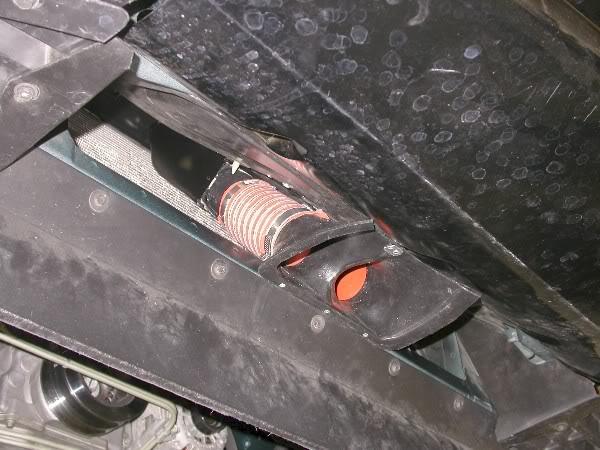
4/21/2009
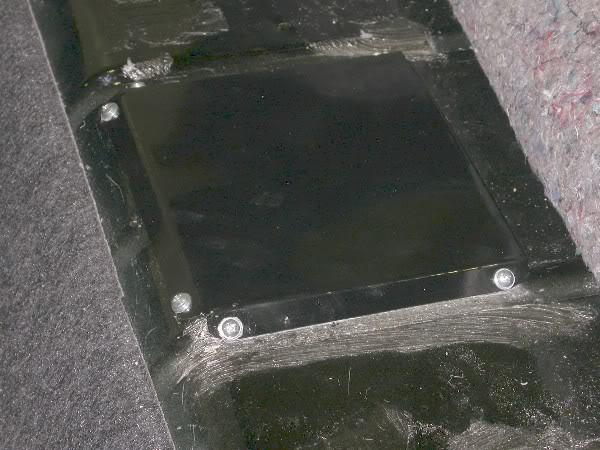
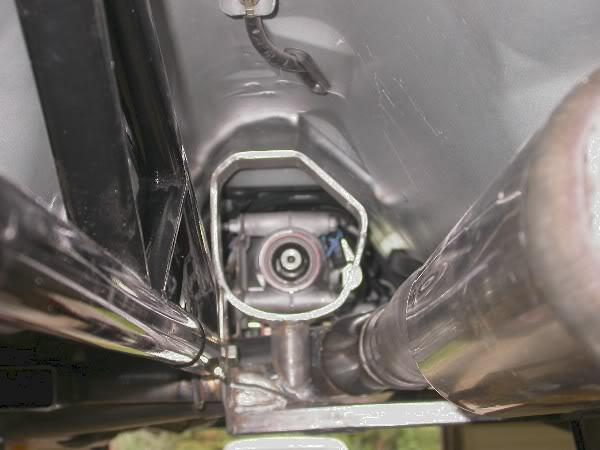
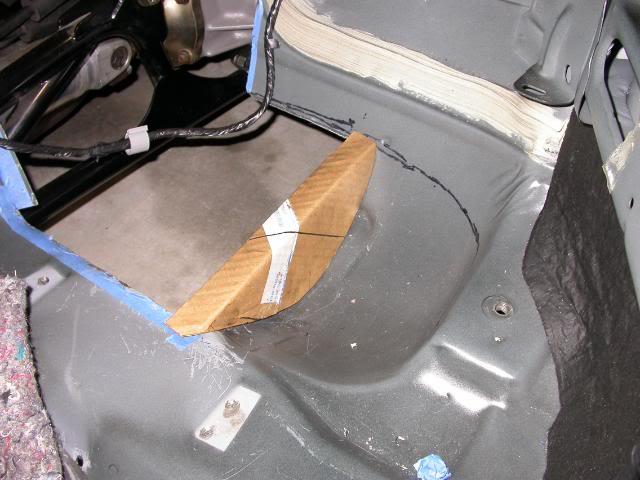
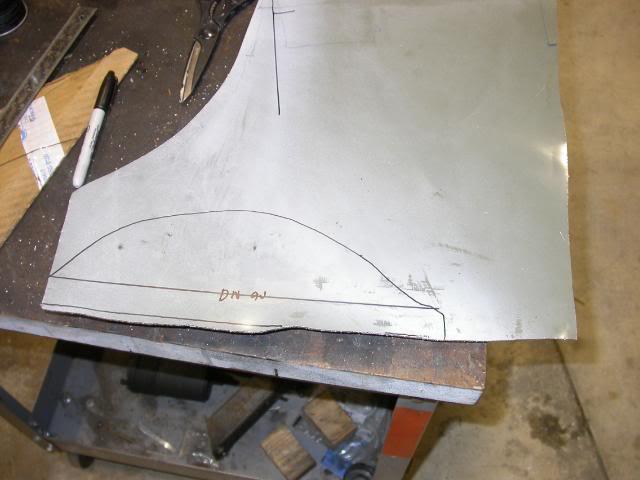
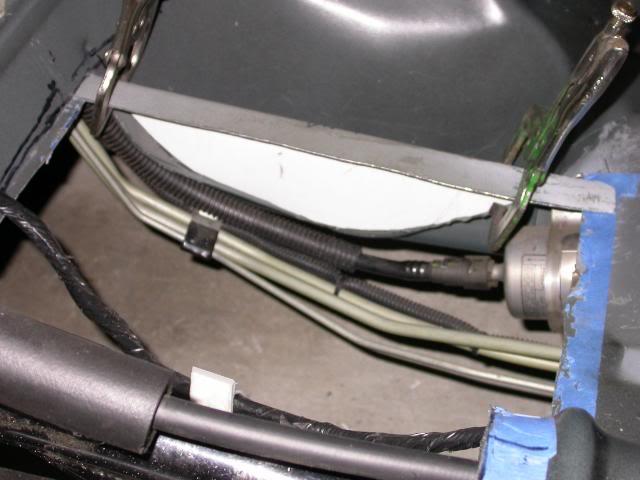
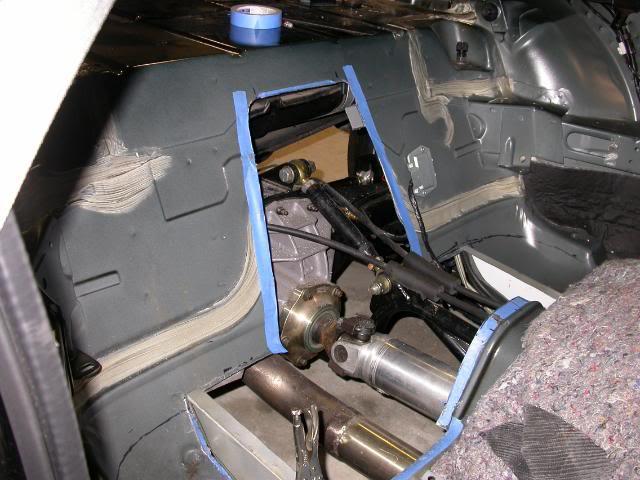
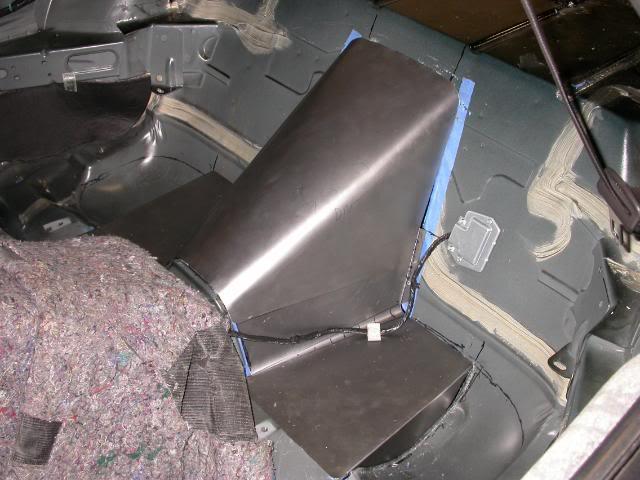
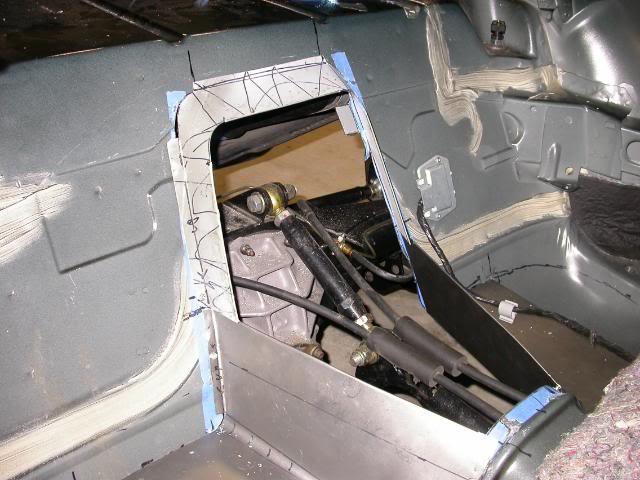
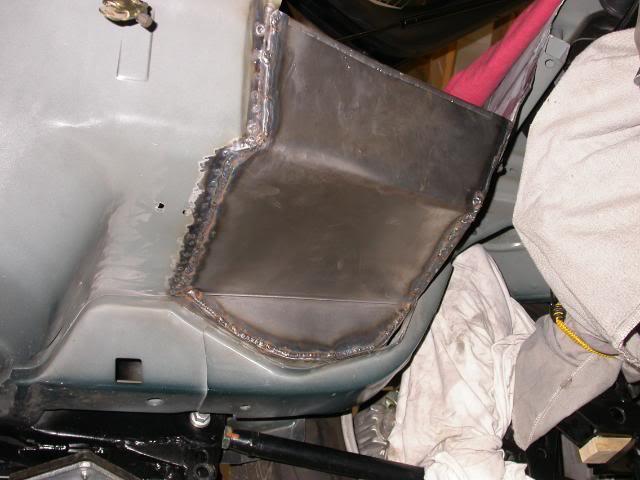
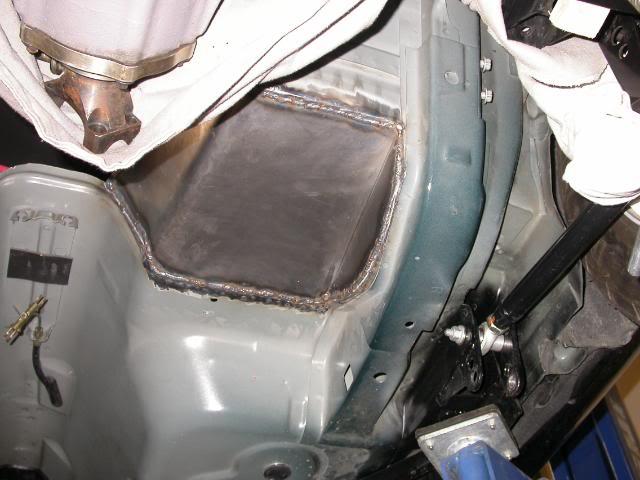
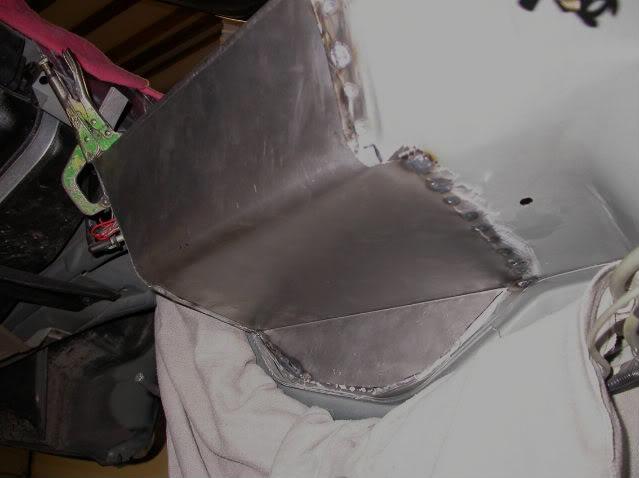
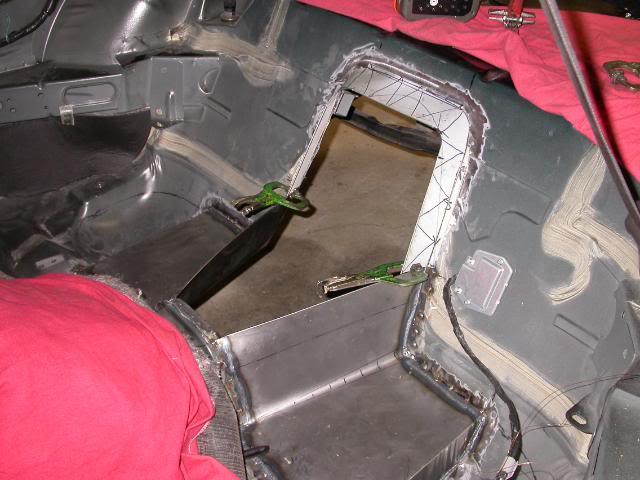
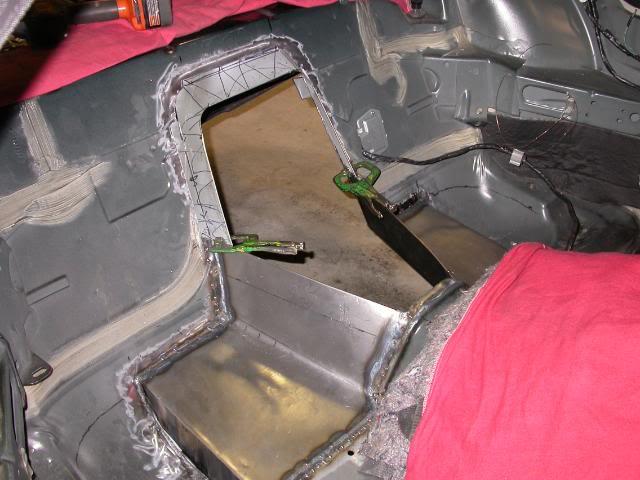
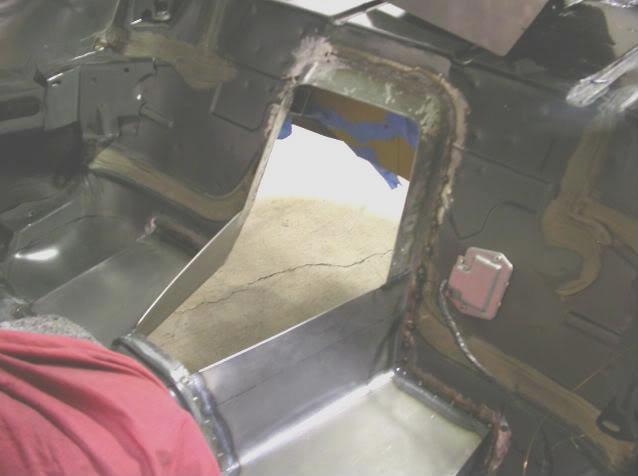
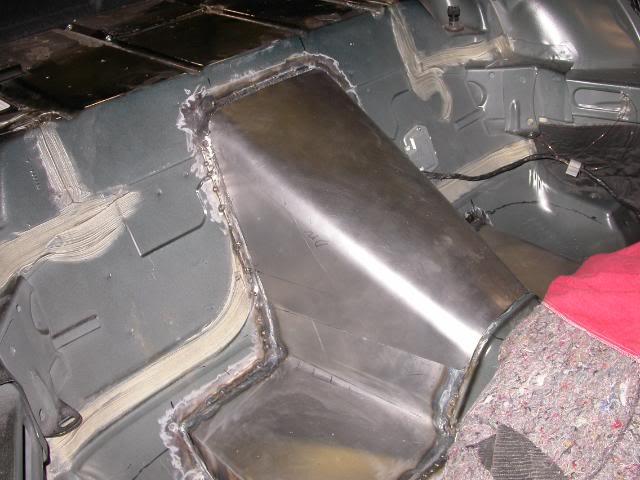
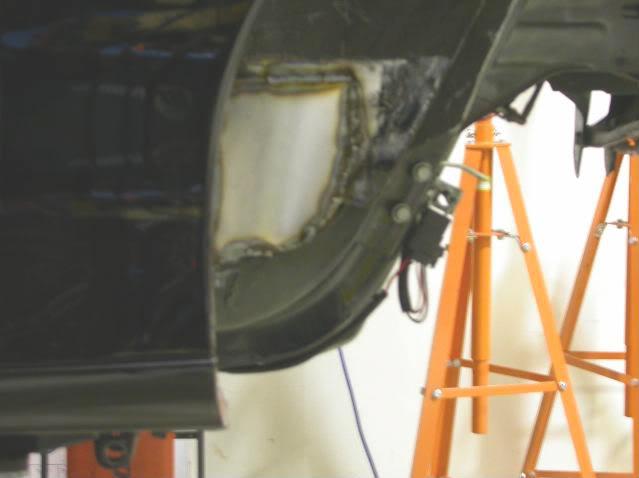
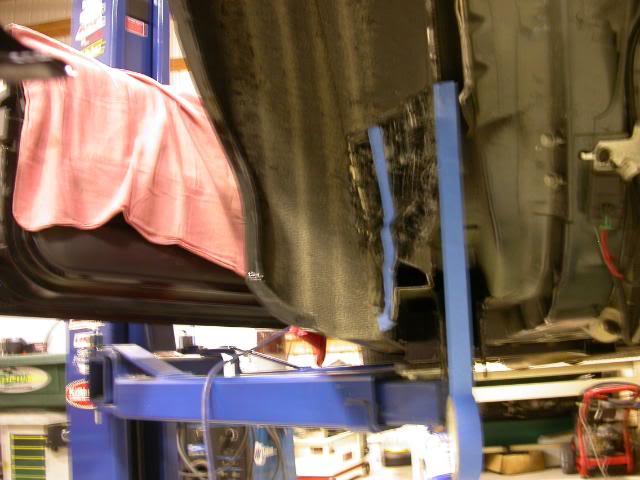
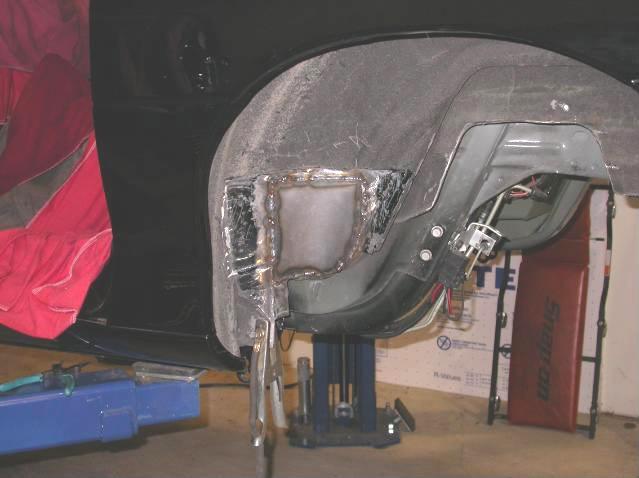
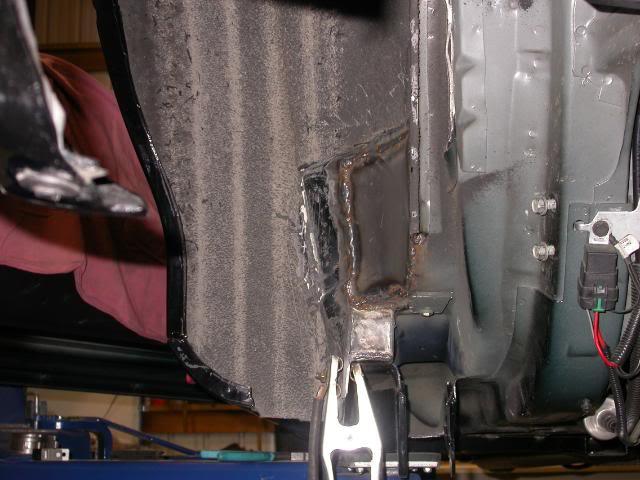
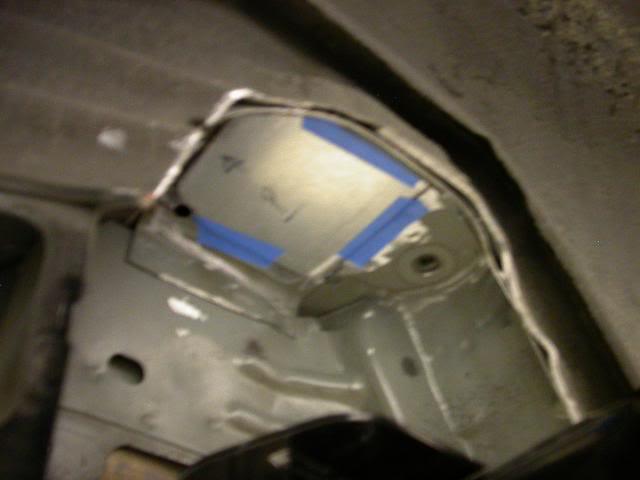
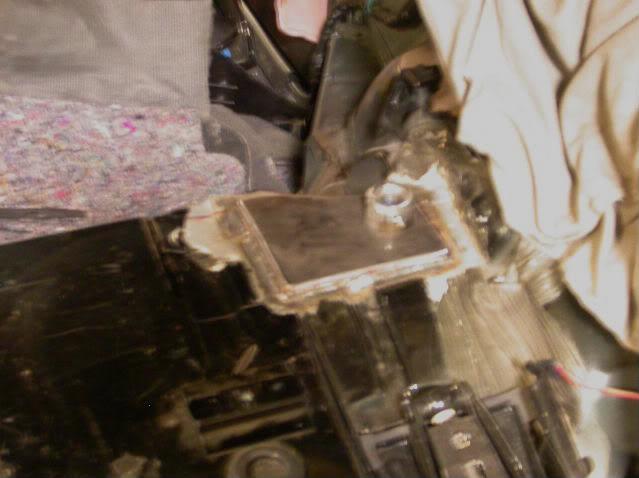
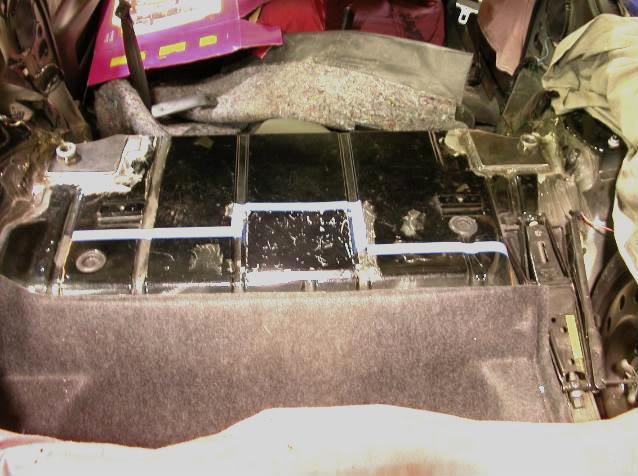
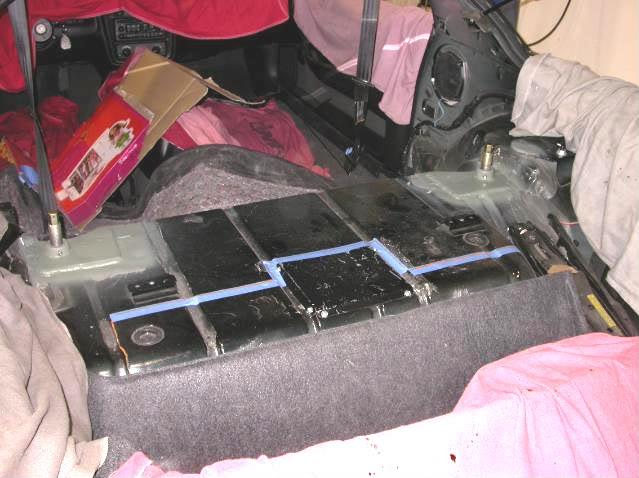
Installed the Full Throttle Speed Hotwire fuel pump kit today and cut the trap door for easier fuel pump service. The hotwire kit fit and looks as if it were factory.
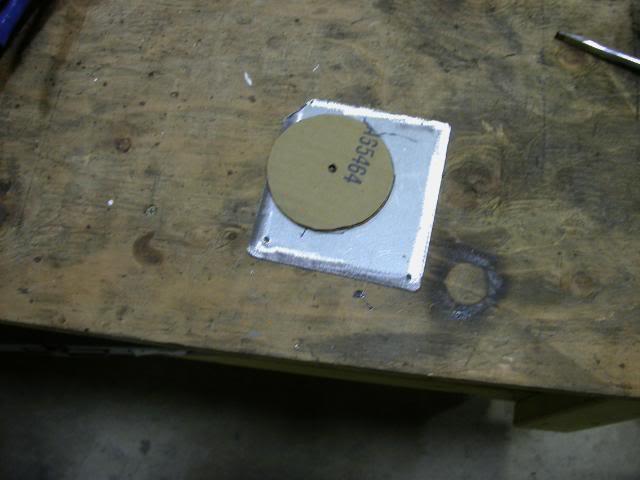
Removed the fuel tank
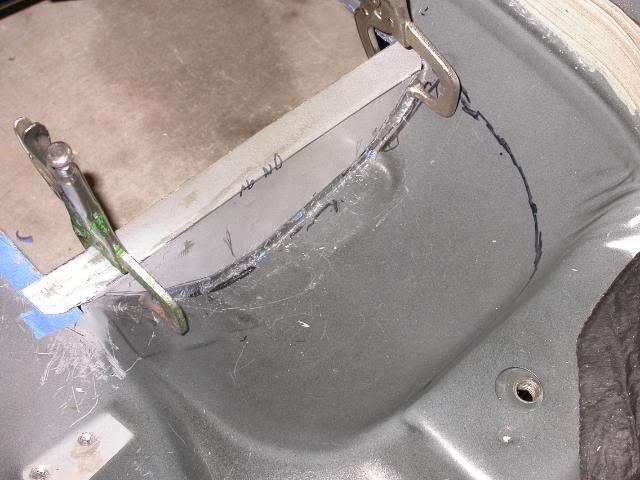
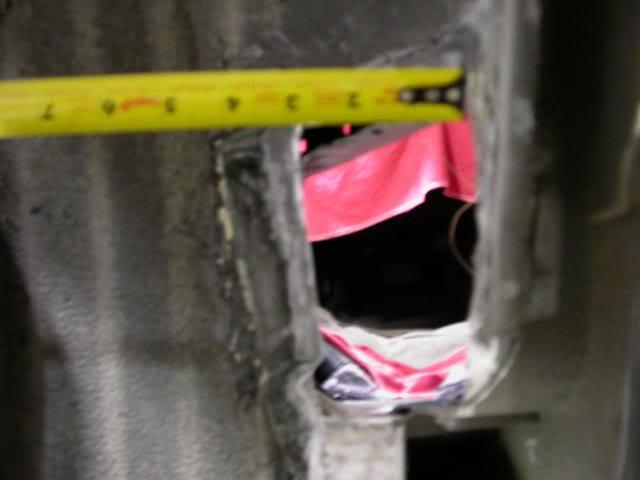
Drilled .188" holes on the inside of the 4 corners of the tape and then used a Unibit to make a hole big so I could start cutting with my tin snipes to the inside edges of the tape.

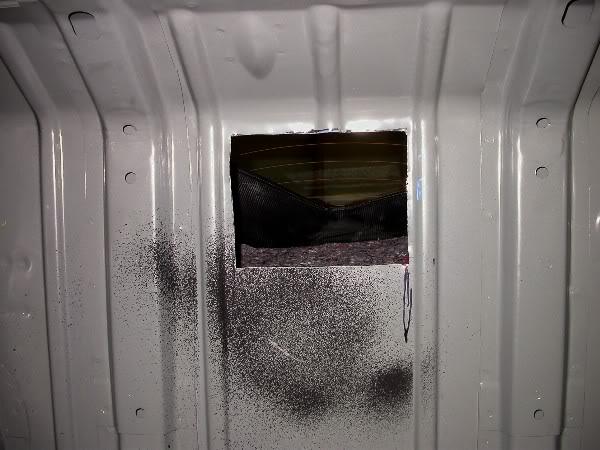
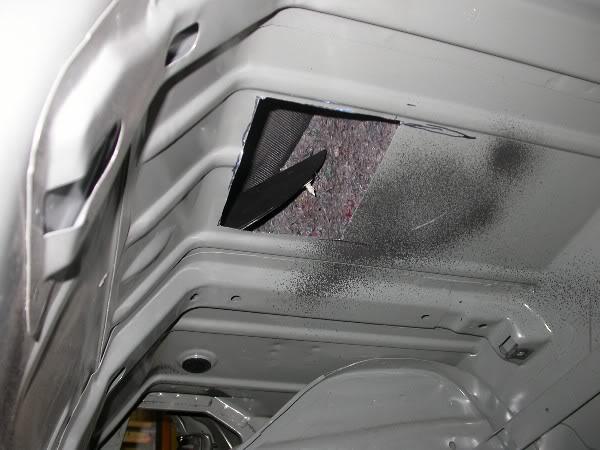
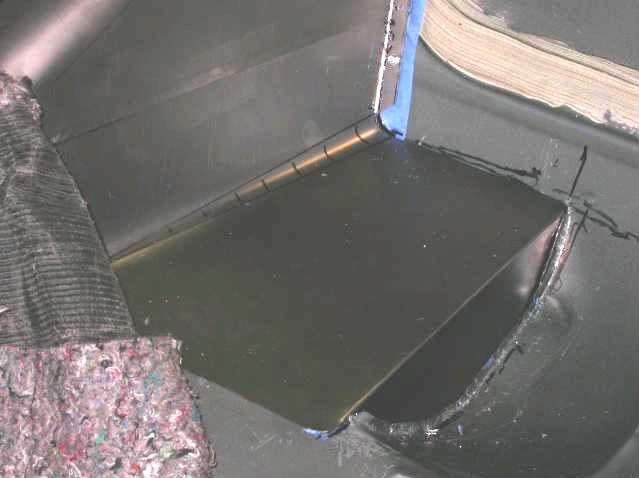
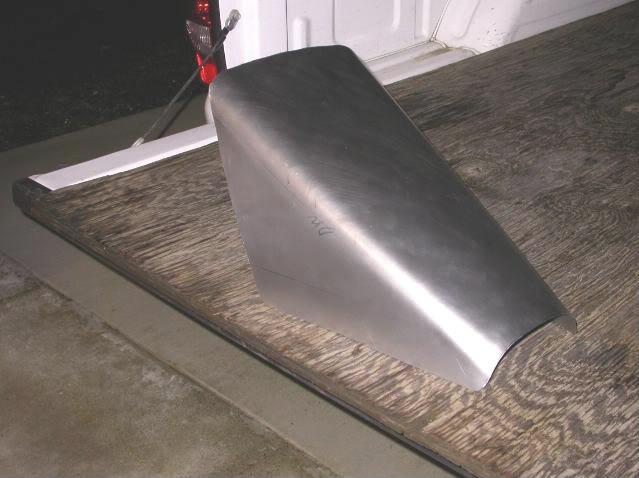
Put door edge molding on the cut edges
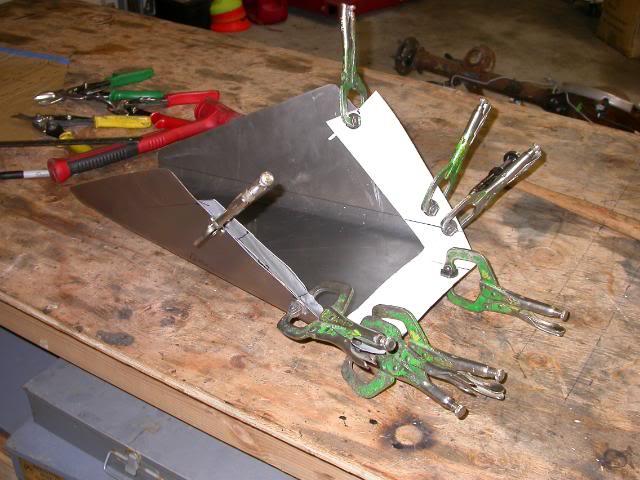
I will fabricate a lid tomorrow
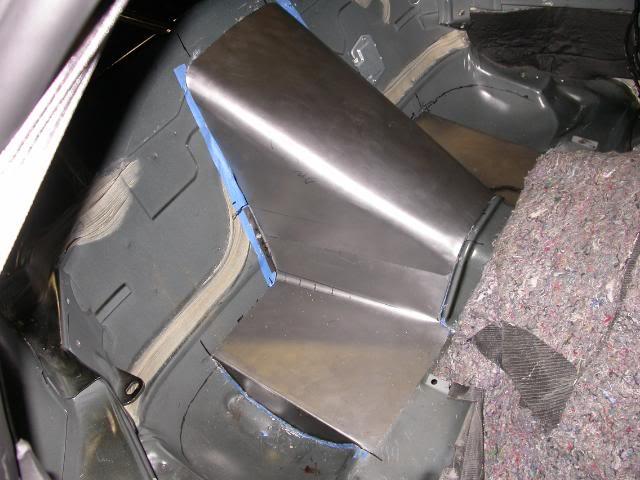
4/22/2009
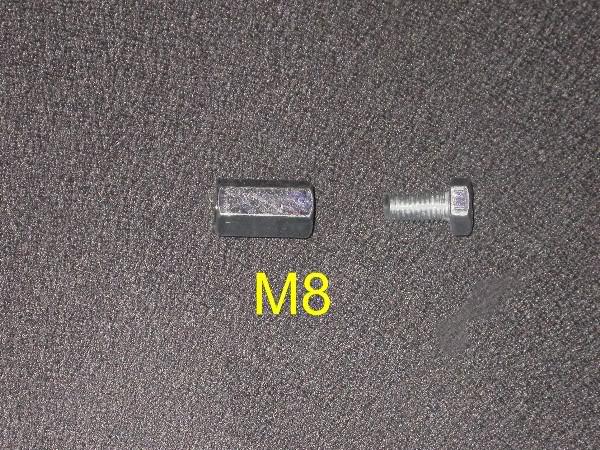
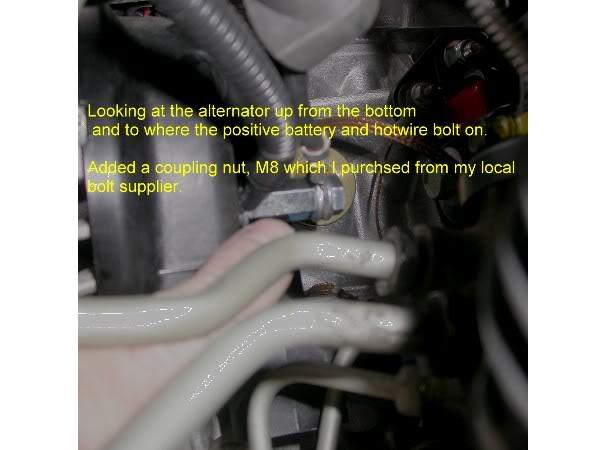
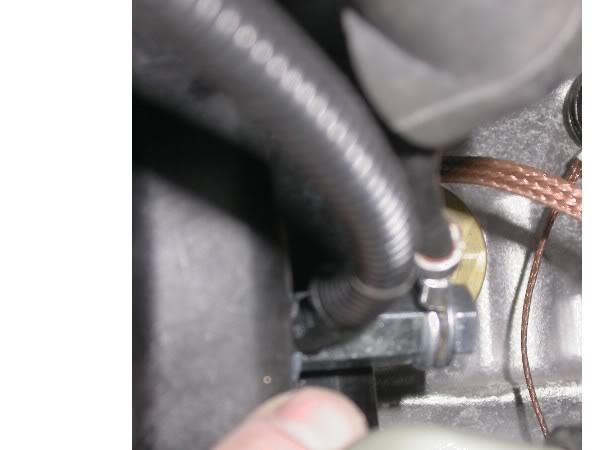
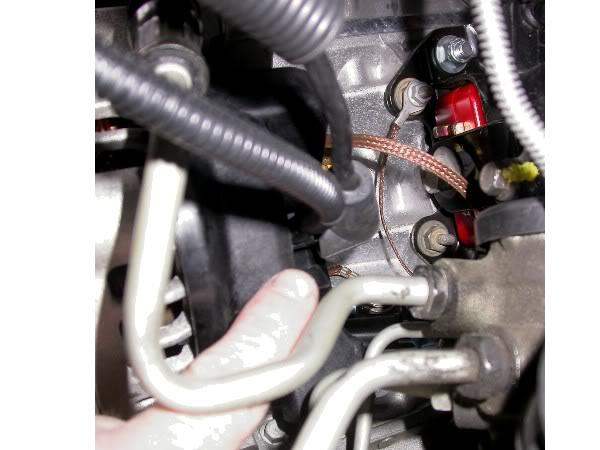
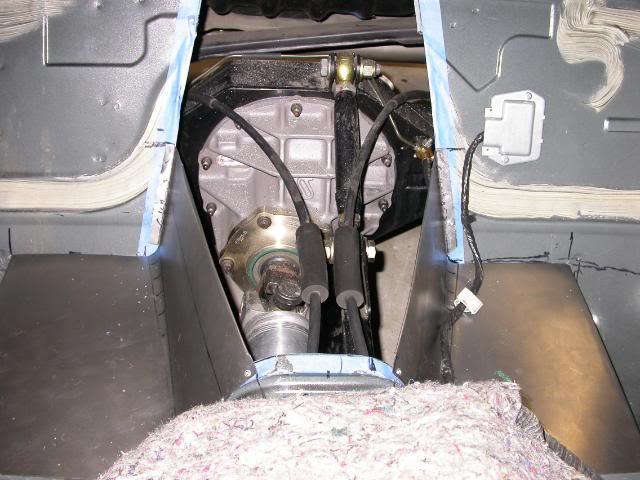
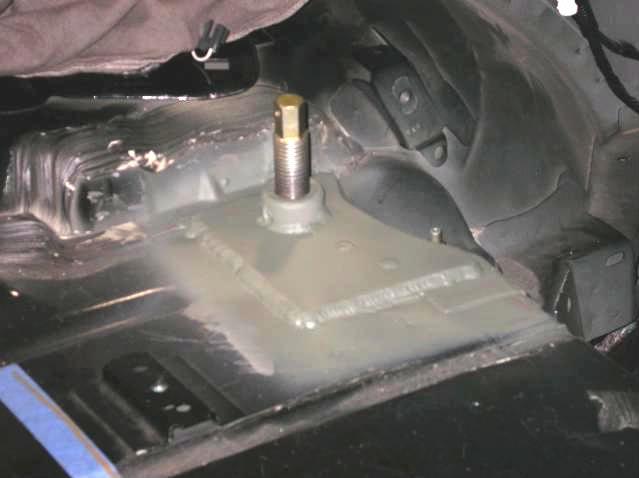
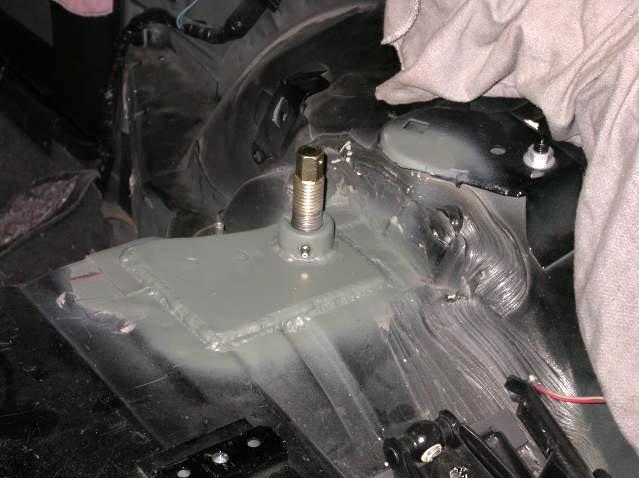
Bolted the Hotwire to the back of the alternator with the battery cable and was not satisfied with the fit. Here is what I did to make the wires fit better.
Used a M8 coupling nut.
4/24/2009
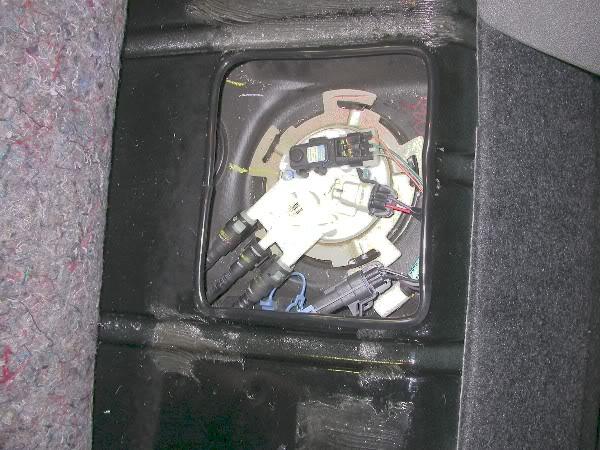
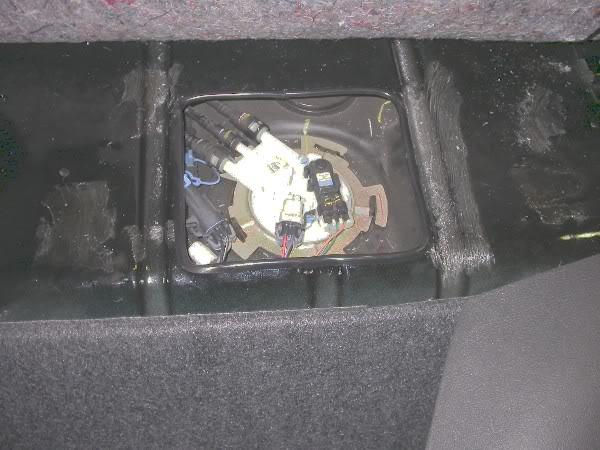
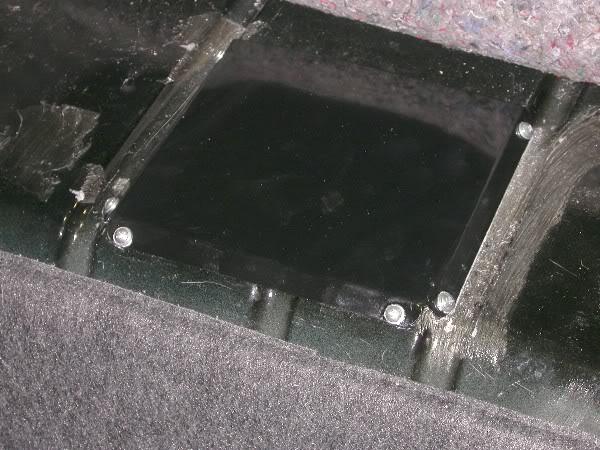
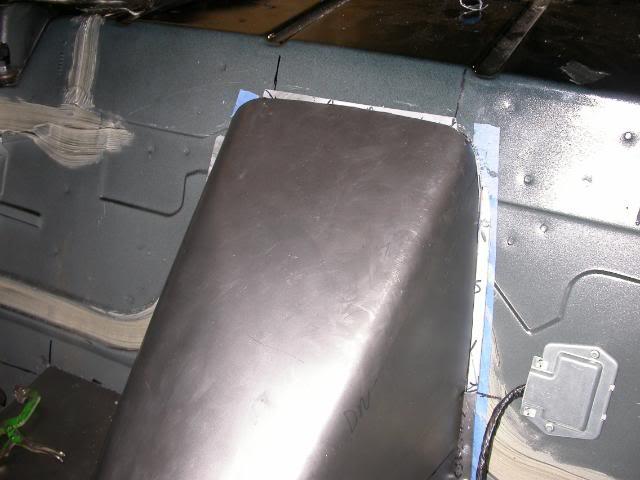
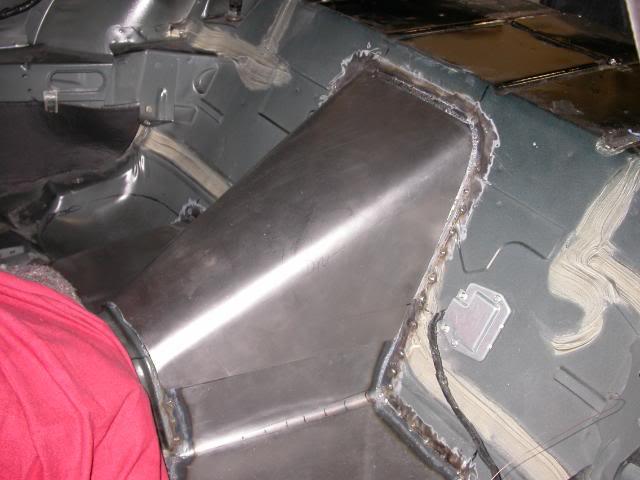
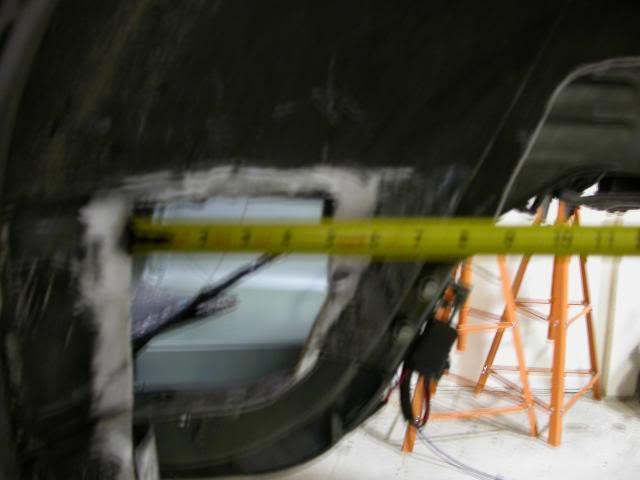
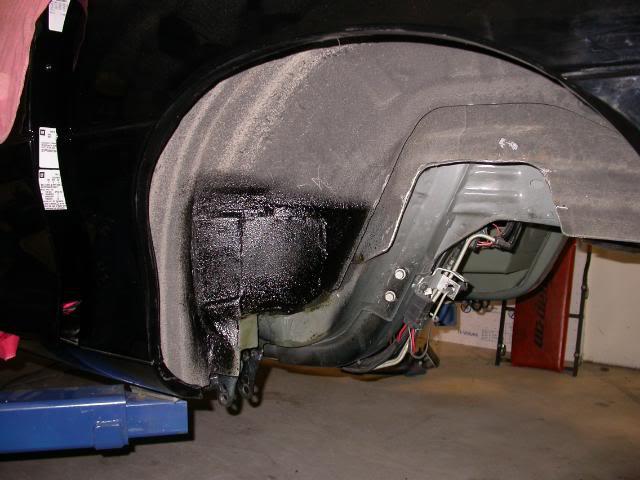
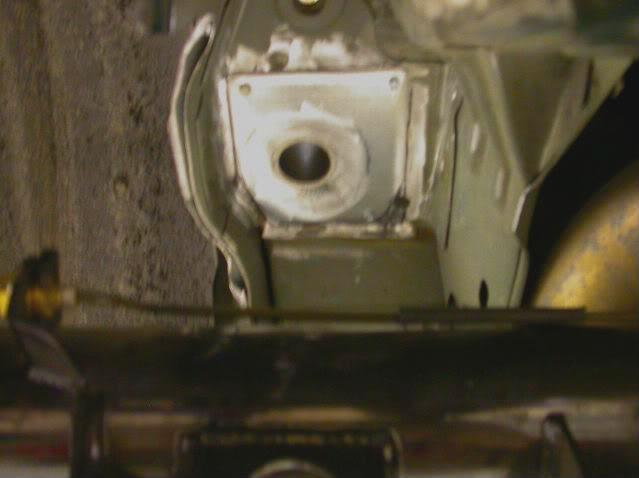
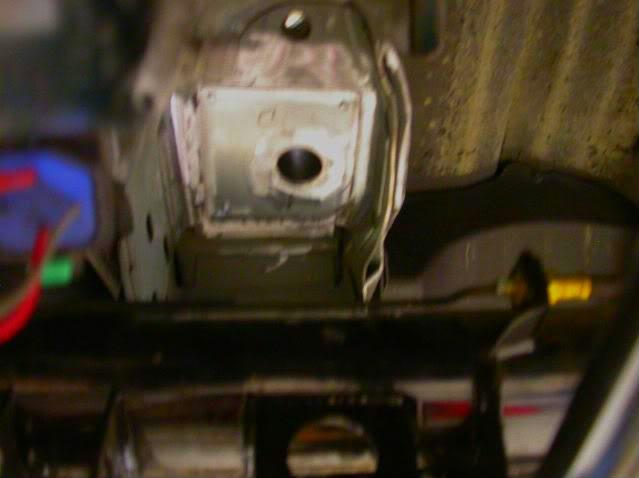
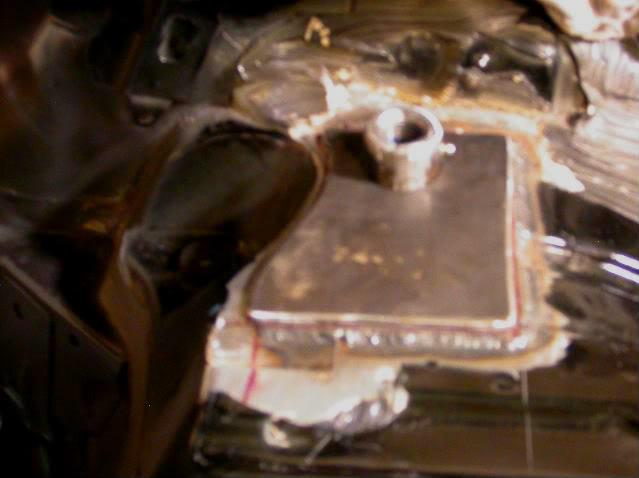
Fuel pump service cover is finished.
2/3/2010
I'm back in the game. Went back to work.
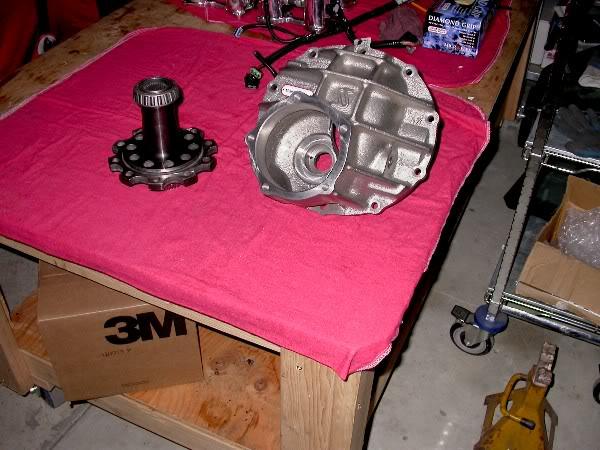
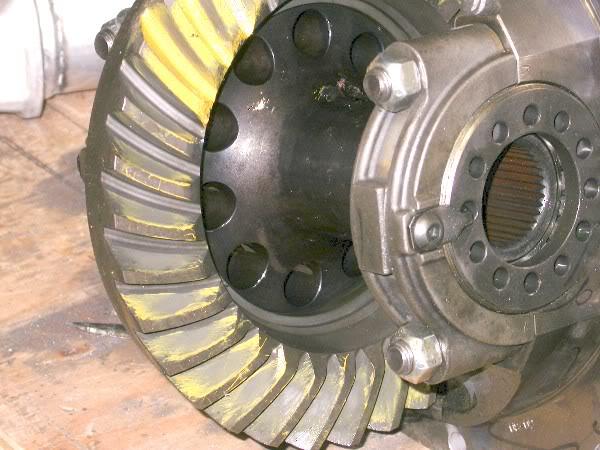
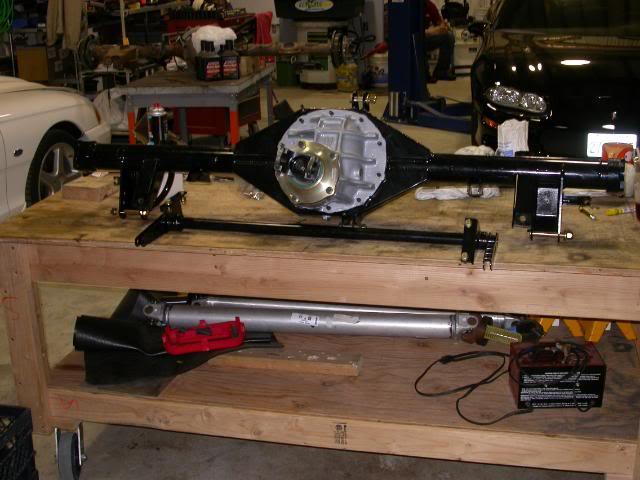
35 spline Strange spool and Strange Pro N case with 3.250" bearing.
Several weeks, I should be able to get axles and housing.
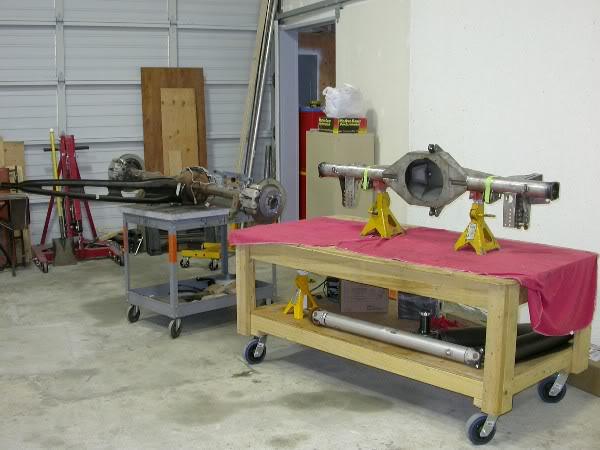
2/17/2010
Sent the center section and spindles off to be powder coated.
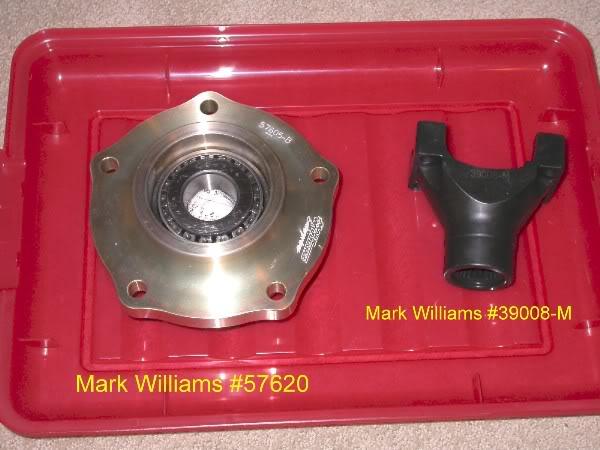
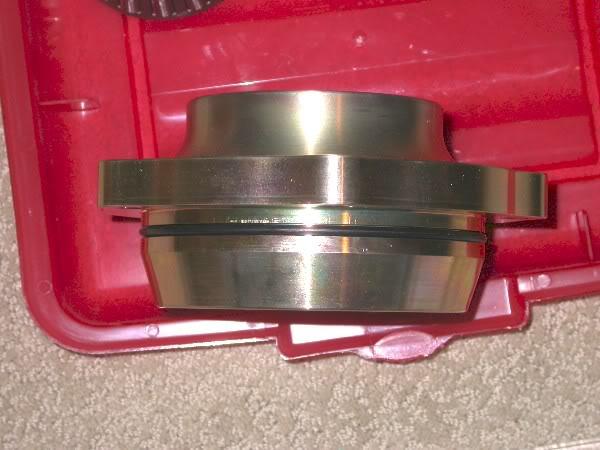
New parts came in, pinion support and yok.
2/19/2010
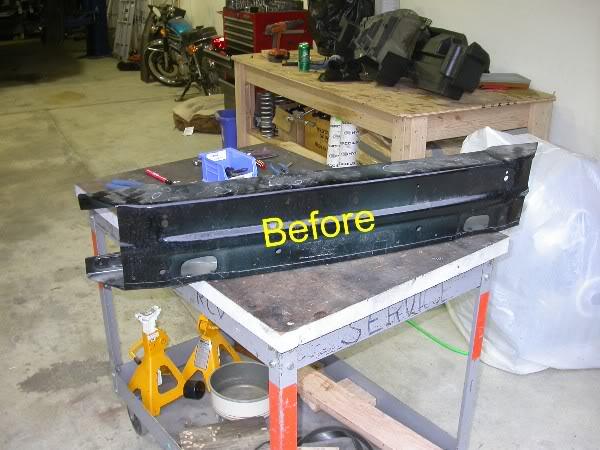
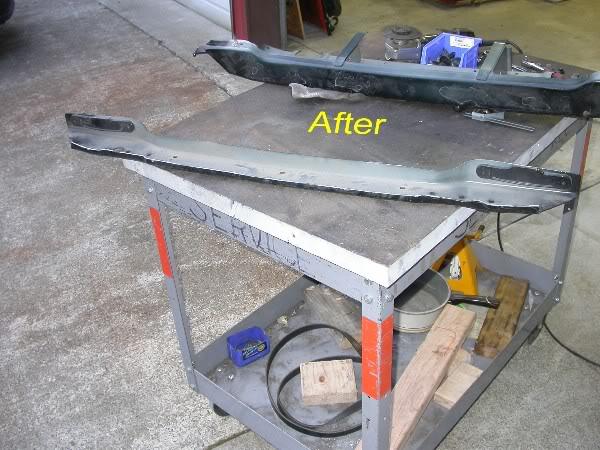
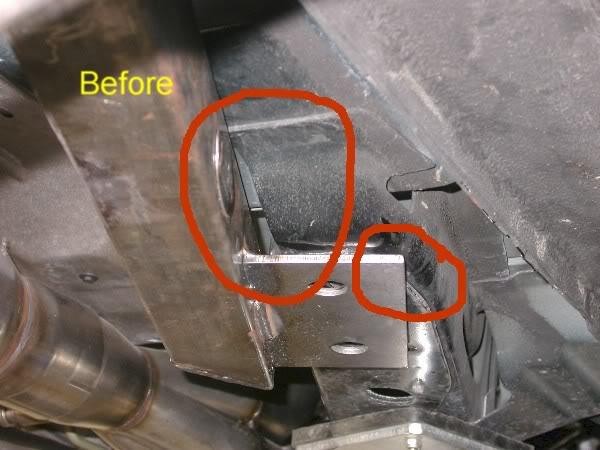
Before:
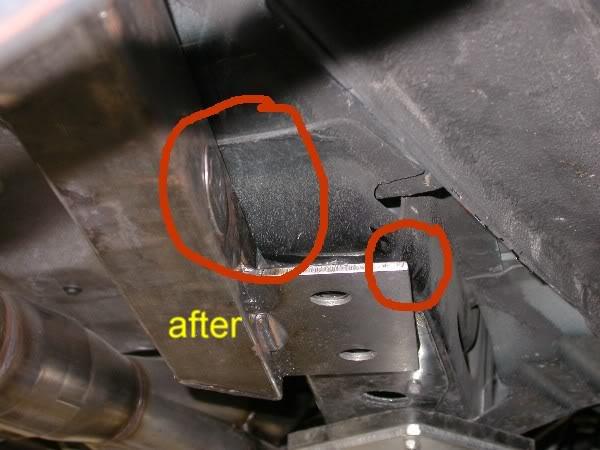
After: Powder coated
More parts to show up on Monday.
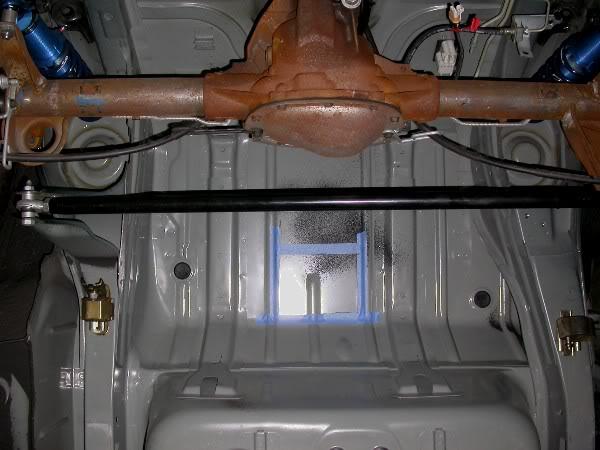
3/20/2010
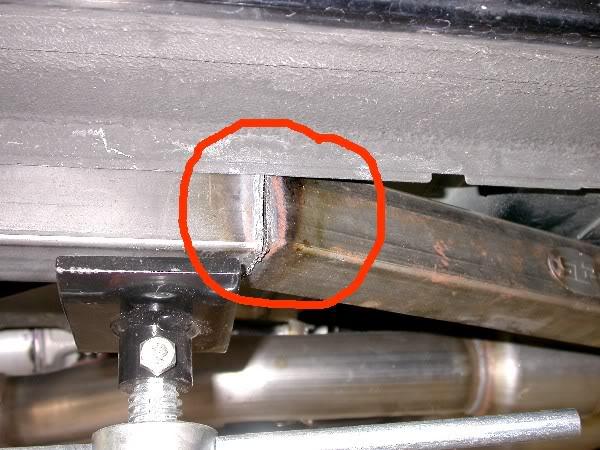
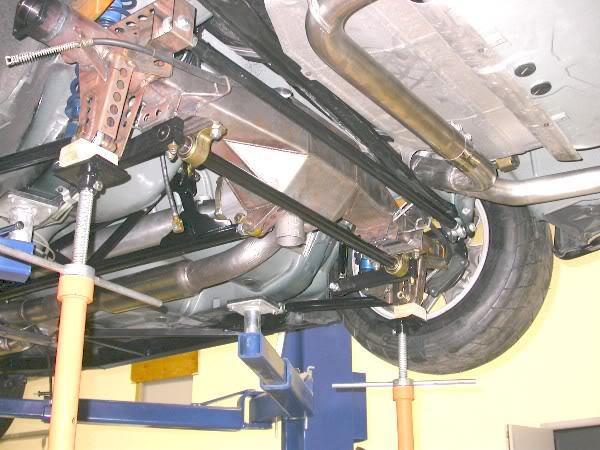
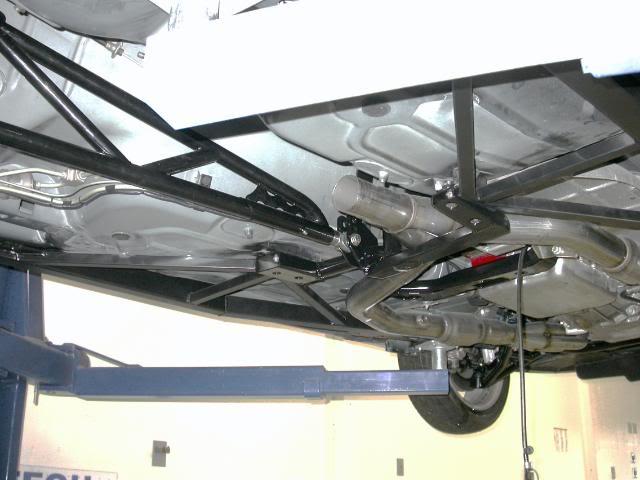
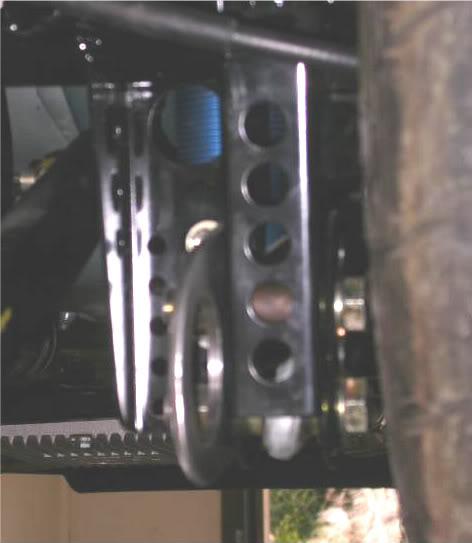
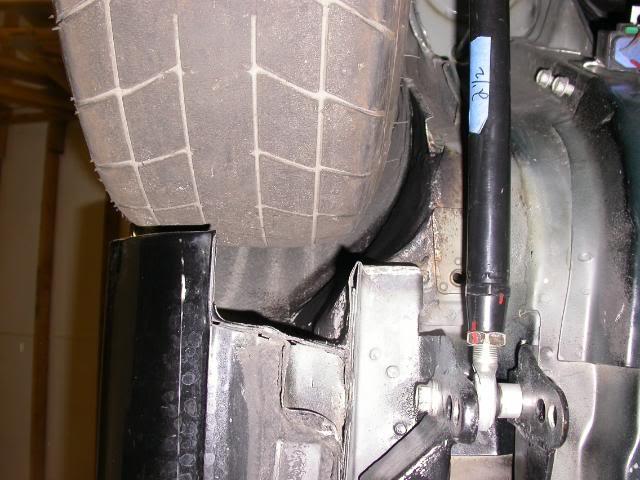
While the 9" is being built, I am fitting the subframe connectors. Having some fittment issues and had to cut them apart and making some minor changes.
Note the bent tube. I have plenty of room. Before: passenger side
After: drivers side. No issues rmoving the exhaust.

3/21/2010
Finished fitting the subframe connectors today. They are ready for paint and need to be welded on next.
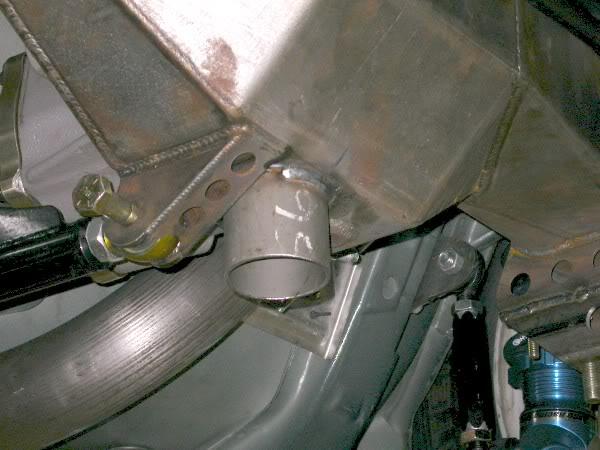
These connectors need to be modified so they would fit correctly. Here are some pictures of what was involved.
Passenger side had to be cut apart.

Finished
3/25/2010
Subframe connectors are fitted, welded in and painted.


The 9" has been ordered, may see next week.
Transmission and tune are the only things left.
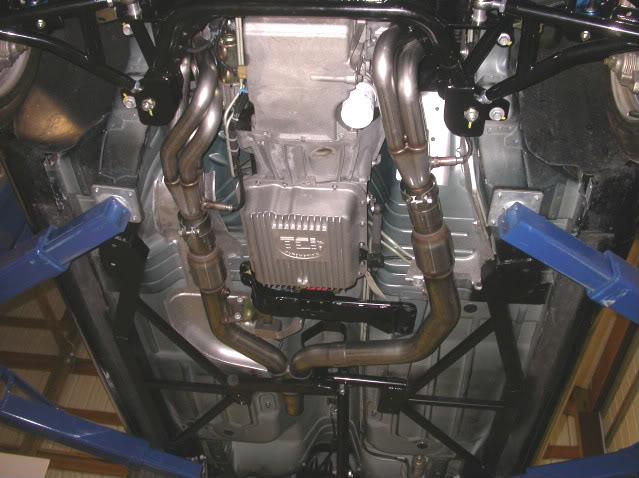
3/27/2010
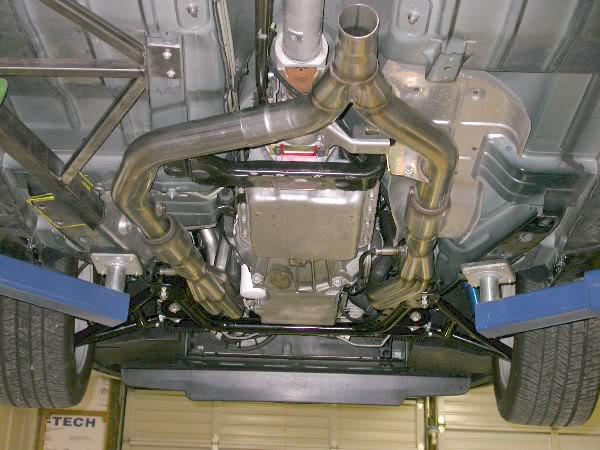
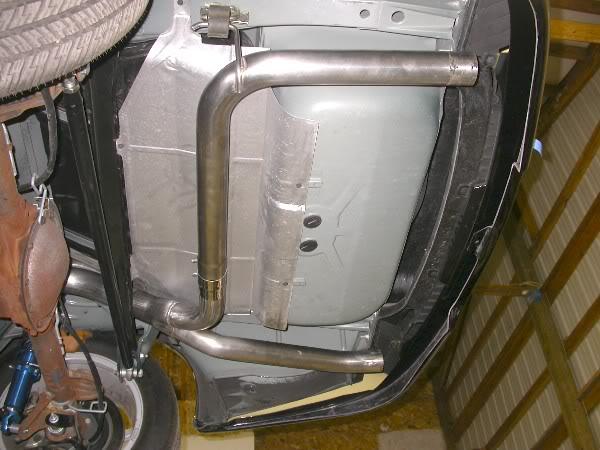
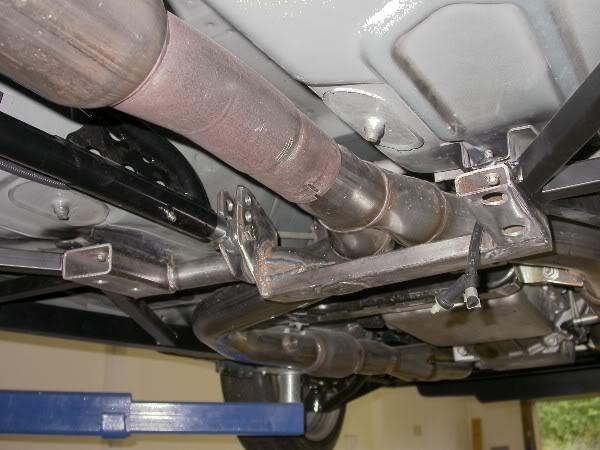
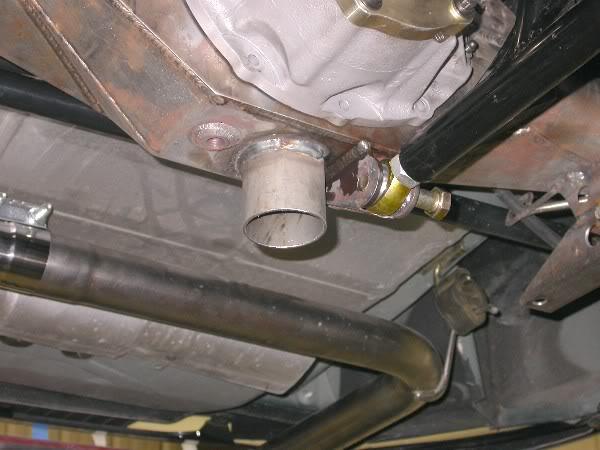
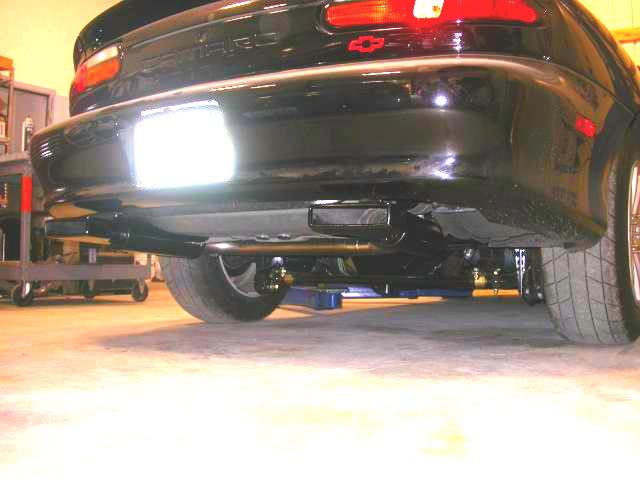
Getting the CME mounted. Going to have to go to the local muffler shop with a mandrel bender to get the center outlet to fit correctly.
4/1/2010
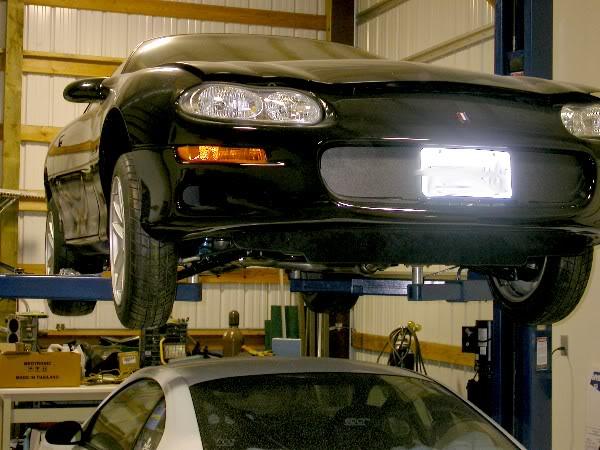
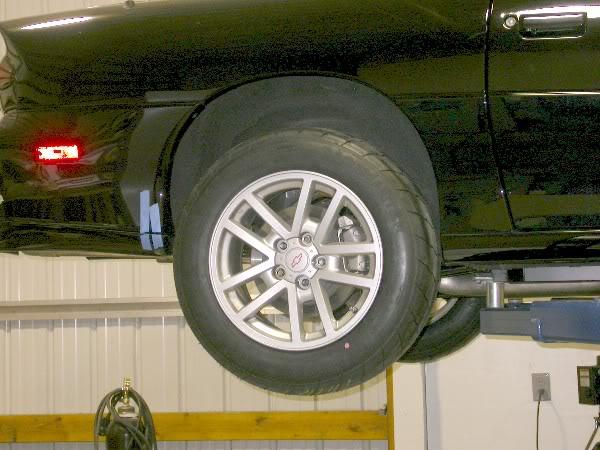
Getting closer, mounted up the tires. Waiting on the for the 9" rearend to arrive.
Front:
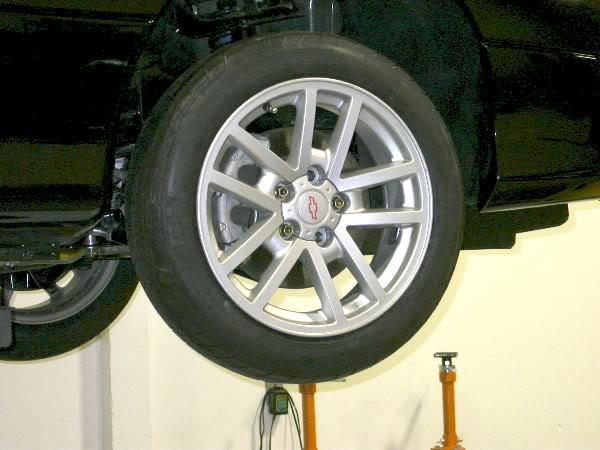
Rear:
4/18/2010
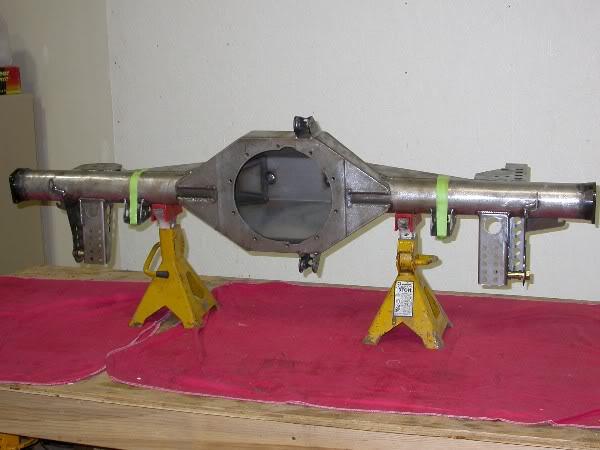
The fabricated 9" came in on friday, have been test fitting and getting things ready before powder coating.
Out with the old:
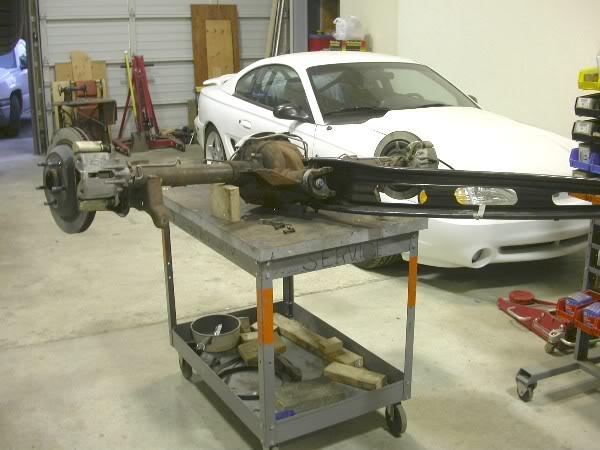
In with the new:
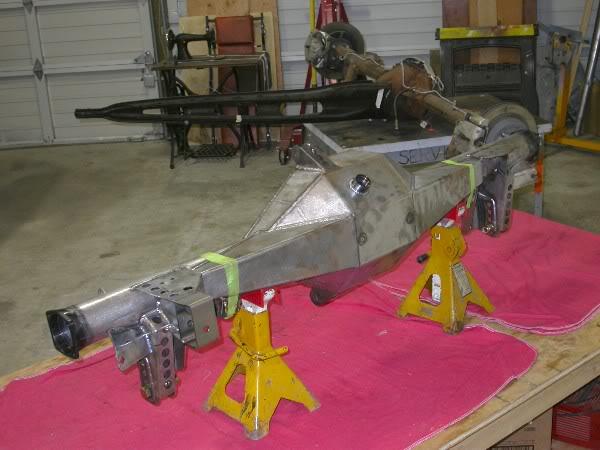

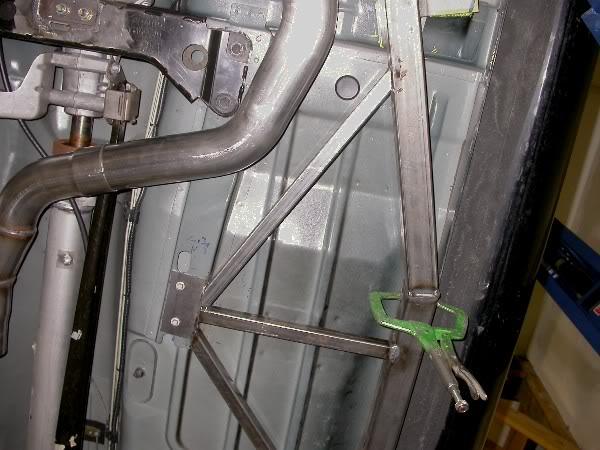
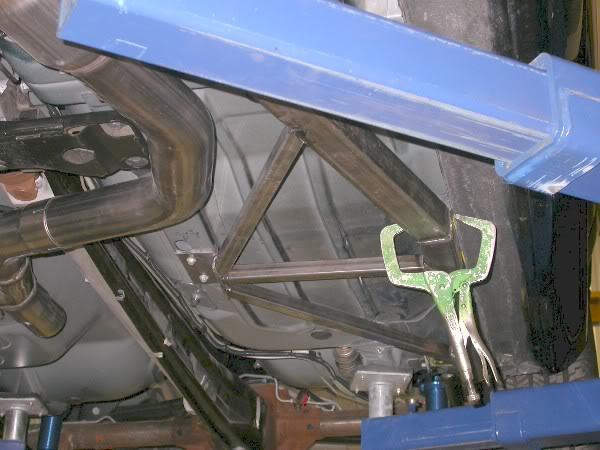
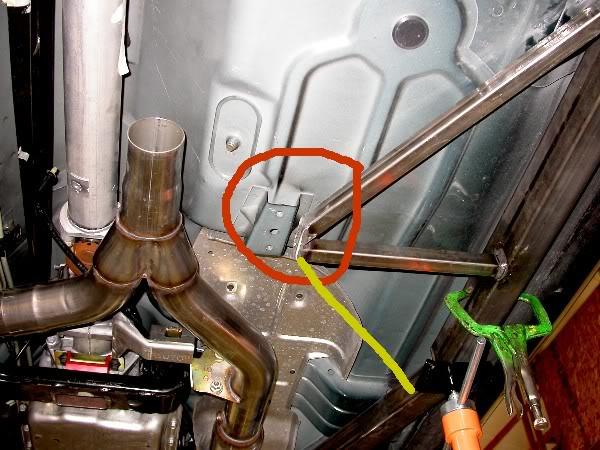
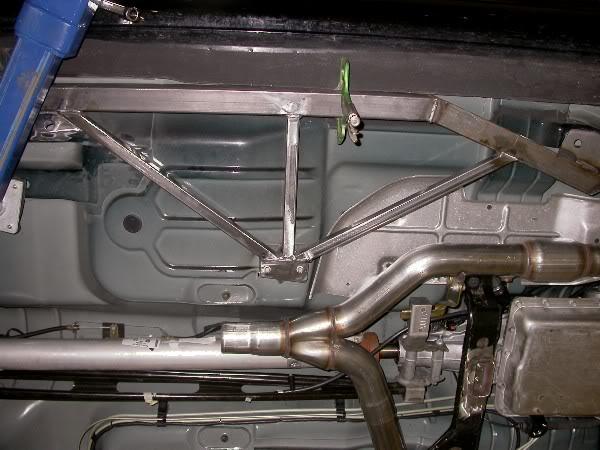
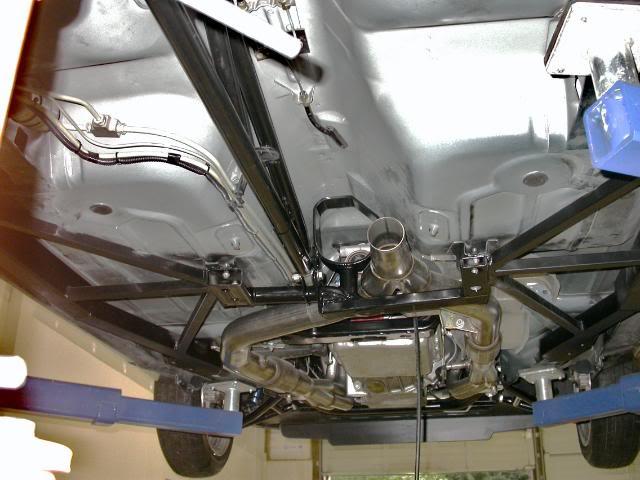
Fabbing up my own torque arm crossmember and will get the tubing bent to my specs on monday.
6/11/2010
We are almost there.
- Had some issues with the housing and had them addressed and fixed.
- Third member setup, done.
- Had to fab up a torque arm cross member, done.
- New axles arrived.
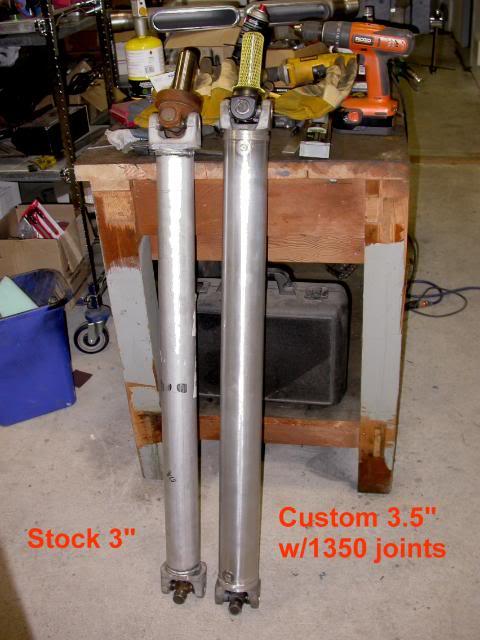
- Custom 3.5" aluminum driveline built with 1350 U joints, done.
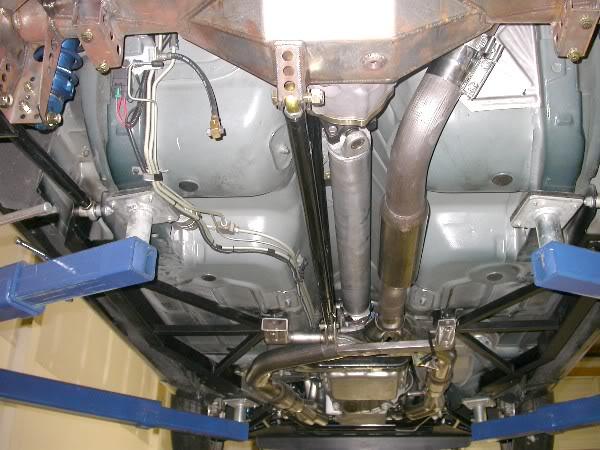
Next, build drive shaft loop, rear swaybar, pull trans out and have it built, get HP Tuners and get a tune.
I think I will be done.
6/11/2010
One more thing off the list.
Drive line loop, done.
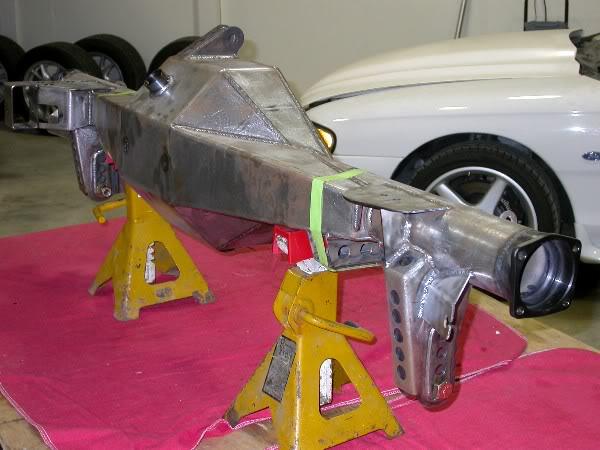
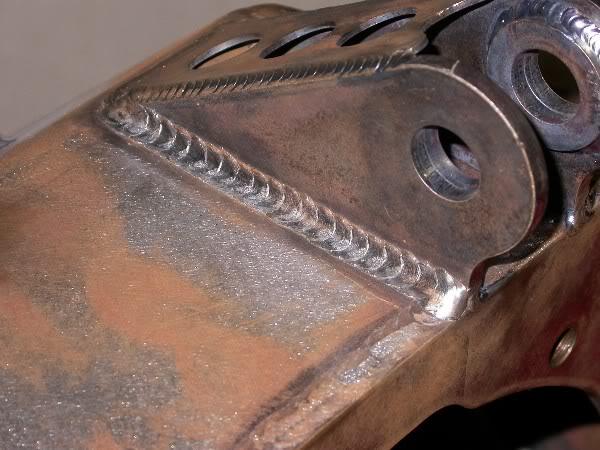
7/3/2010
Been the waiting game. Parts came in for the rear swaybar and have been busy fabbing brackets for it. This weekend, I should be able to remove the rearend, finish up some welding and send it out for powdercoat next week.

Jacking stub for floor jack.
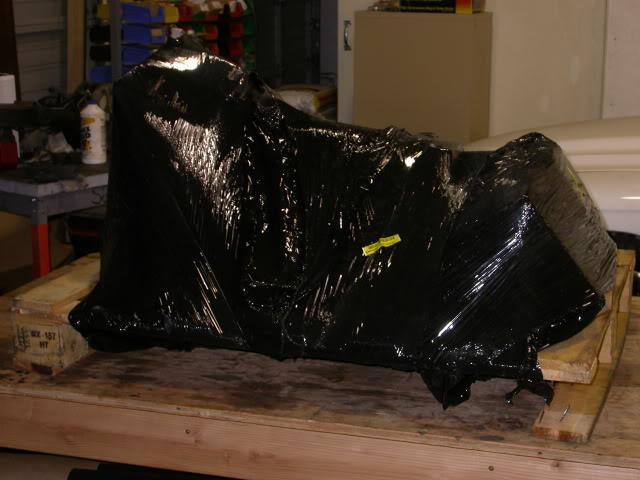
9/13/2010
Parts came back from powdercoat. I have been busy.
Coming soon, FLT level 6 trans.
The eagle has landed.
9/18/2010
I am done, the waiting game again. Saving for the FLT trans, Level 6. Will be ready to order the trans at the end of September.
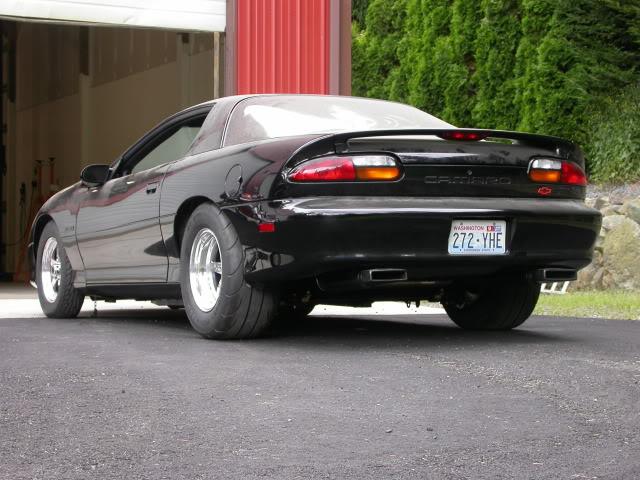
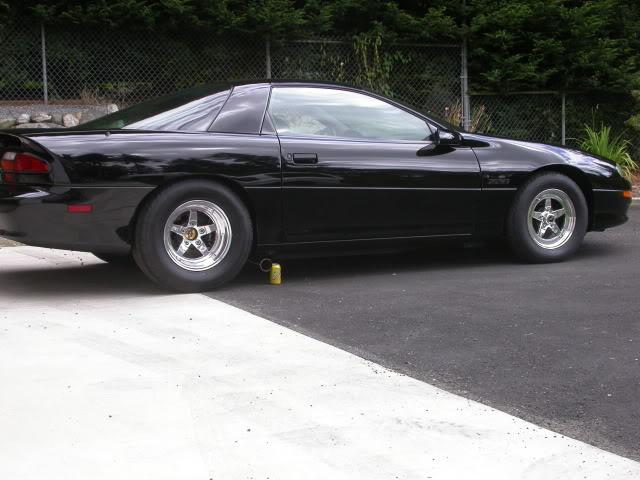
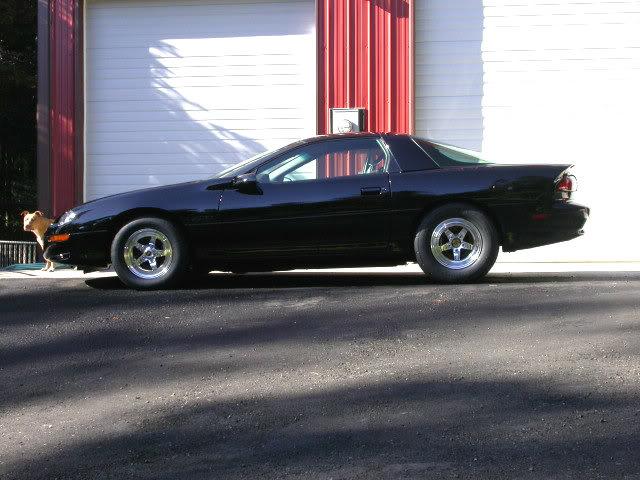
Here is the finished product so far.
My next project in the works for a fellow member.
One of Erics, MWC rearends with drag bar.
1/19/2011
I have struck black gold.
From Finishline Transmission
Level 6 trans.
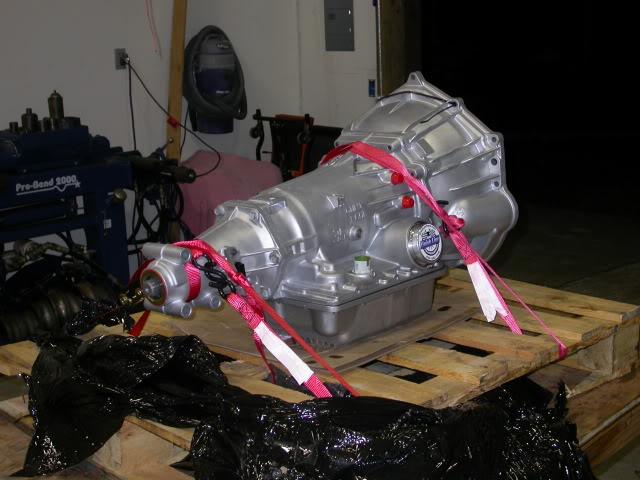
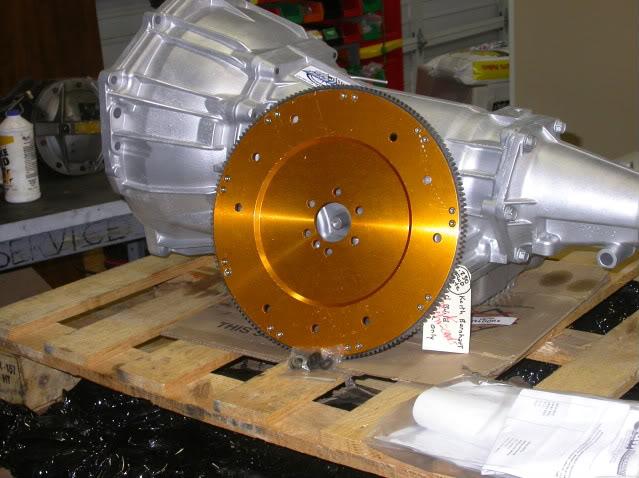
Time to get the flexplate ordered.
Once trans is installed, get tune and go have some fun.
1/28/2011
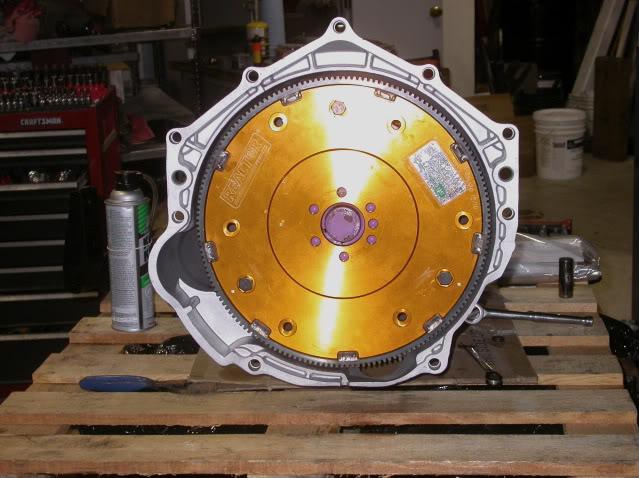
All the parts have arrived and the trans install can start.
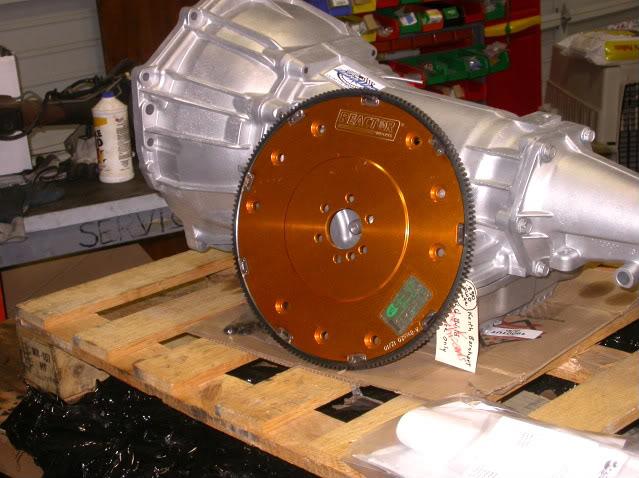
Upgraded the flexplate to billet aluminum.
Once trans install is done, get aligned front, rear and tuned.
I think this project is then completed and time to think of what to build next.
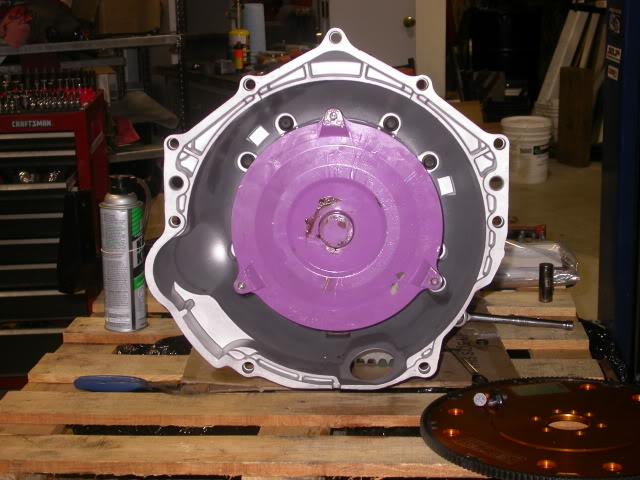
1/30/2011
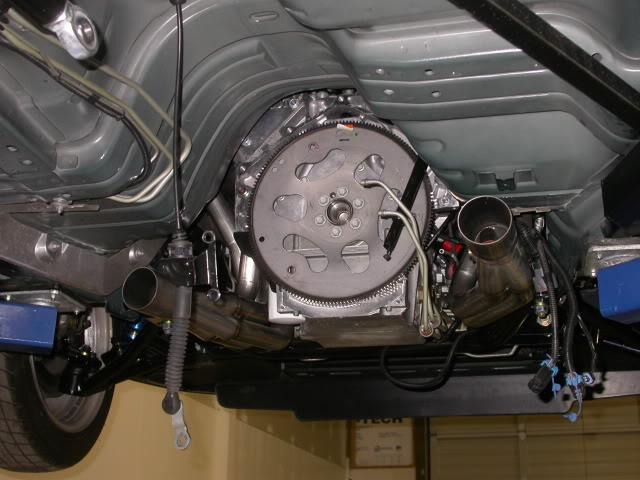
The original trans and flexplate are out.
Ready to install the new flexplate and FLT trans, ran into some bolt issues when using an aluminum flexplate. New bolts are ordered.
Convertor installed in trans, test fit flexplate to convertor.
2/7/2011
The final count down.


In the morning, fill and check all fluids, make appointment to get car sent to alignment shop and then off to the dyno for tune. 
2/9/2011
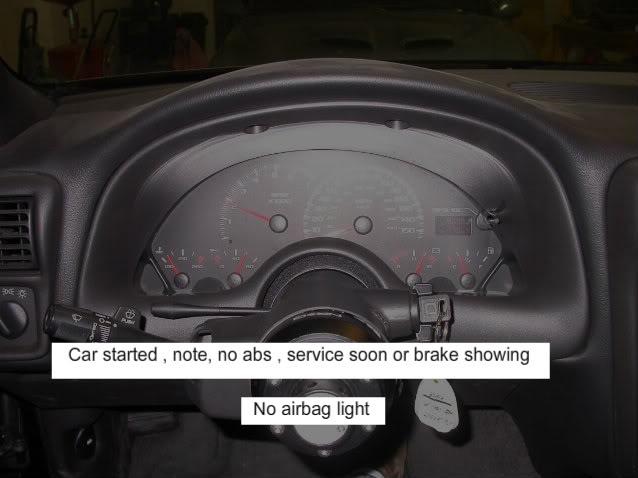
She starts,shifts, drives and no leaks.
Have an issue to figure out, tach,temp and fuel gauge sweep when the key is turned on and then do no function once car is running
Need to get to tune and alignment.

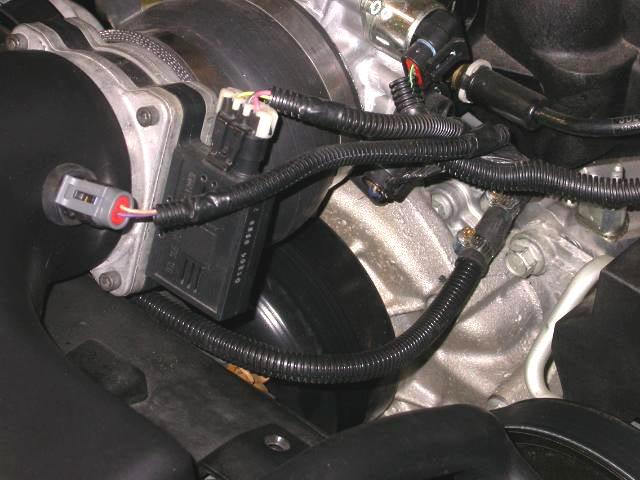
Checked the grounds, they were bolted down, so I did the wiggle test to various wires and was able to get the tach,temp and fuel gauge to work. Also, the scanner would not communicate. Here is the culprit wire.
It was plugged in, so I unplugged it and plugged it back together, pushing it firmly together. Gauges now work and the scanner communicates.
2/9/2011
Washed and ready for the alignment shop and tune. I hope I have addressed all the little issues that popped and no other ones arise.
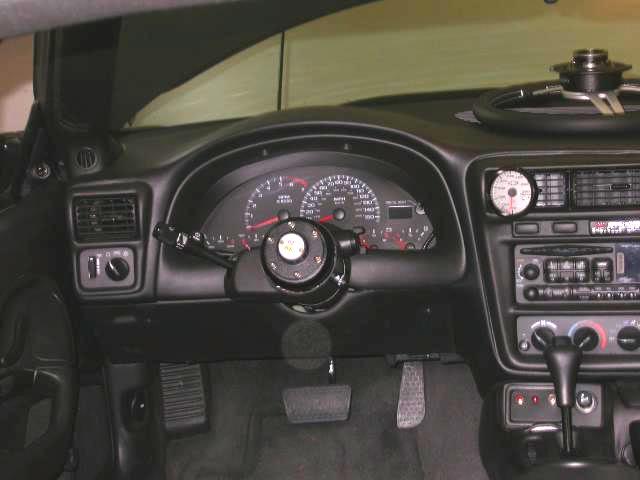
3/24/2011
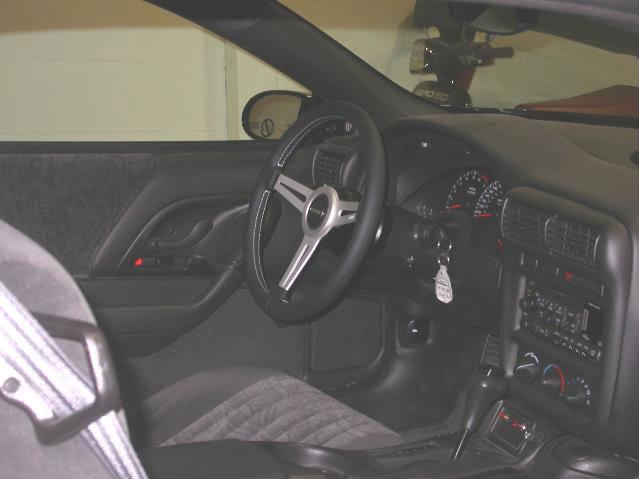
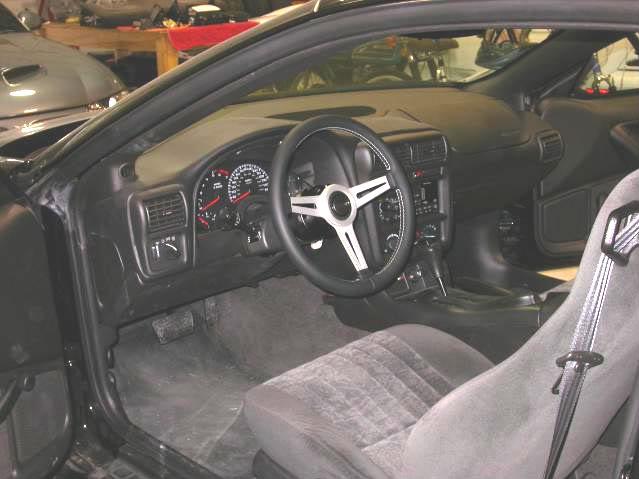
Installed new steering wheel, quick release with a working horn button.

Saving for the alignment and tune, then we are ready to rock.
4/7/2011
She is coming home.
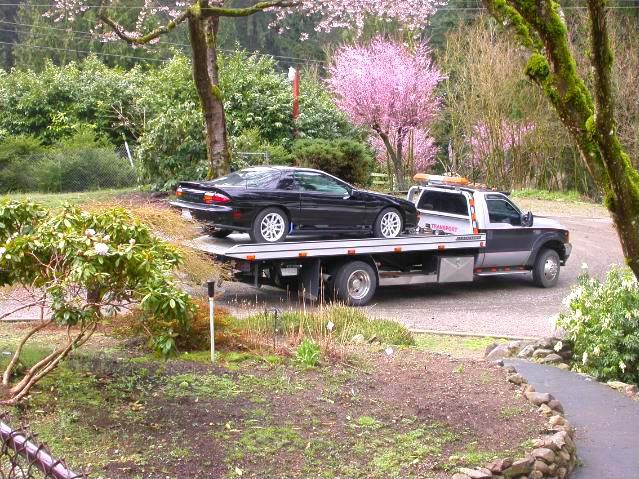
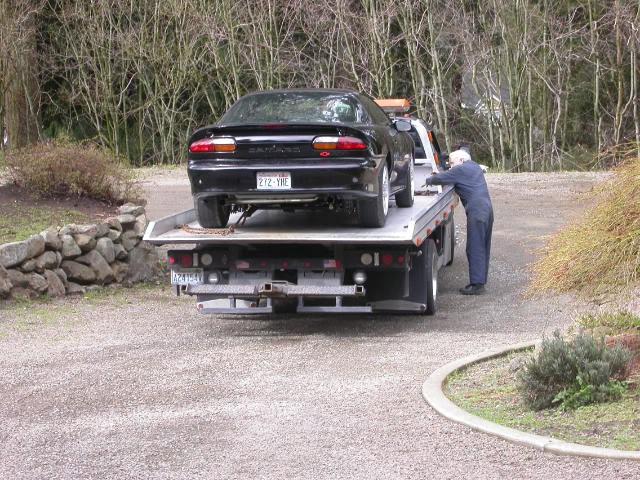
Returning from getting the alignment front and rear done.
Next will be the 2.5 hr. haul to get the tune done, then we will be ready to hit the strip.
4/9/2011
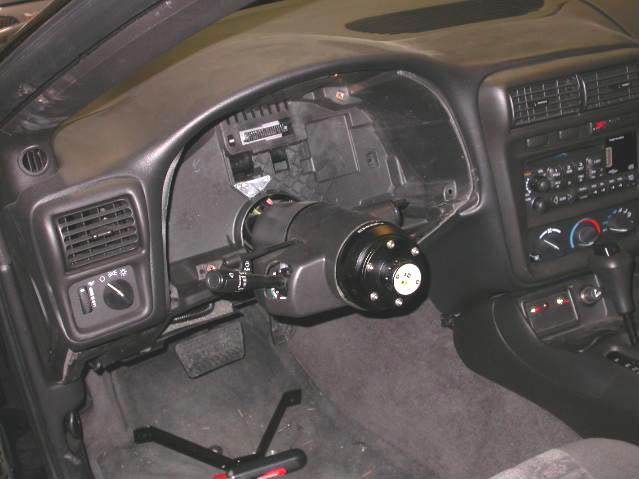
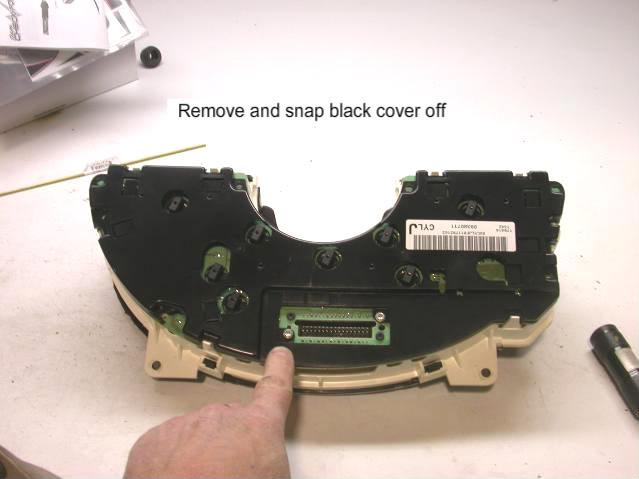
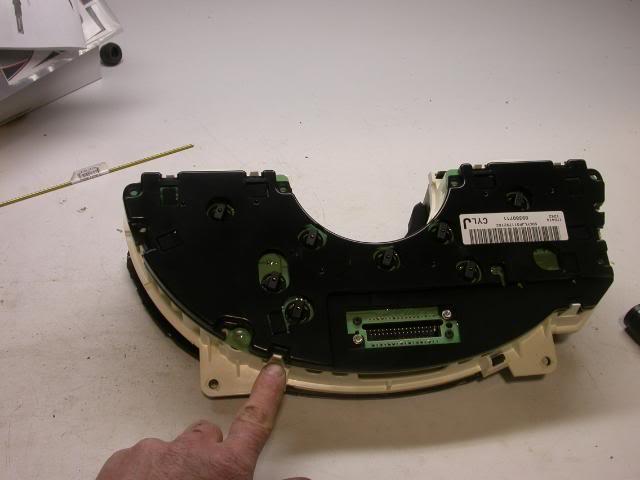
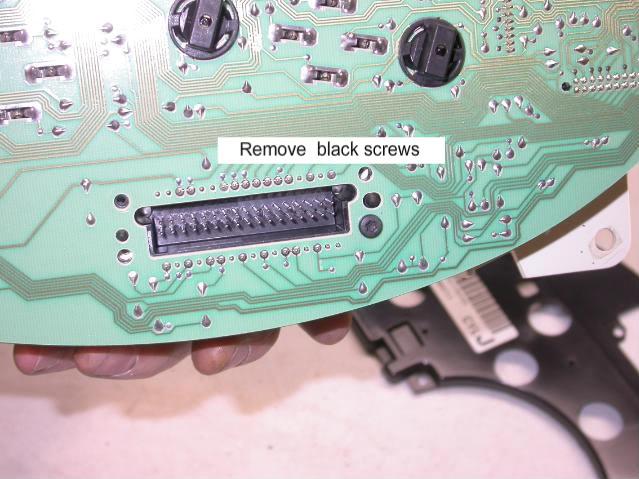
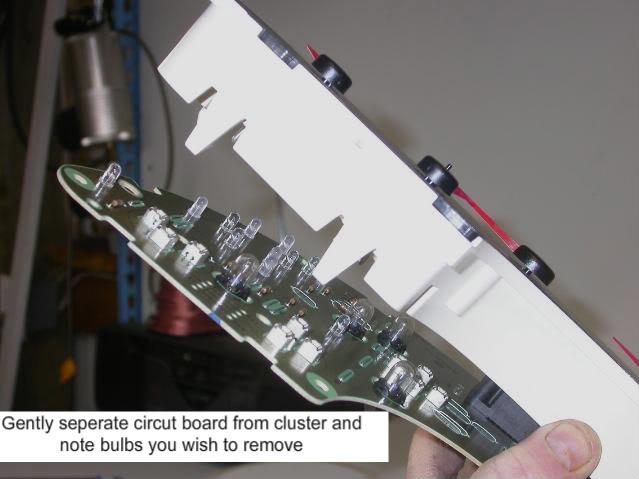
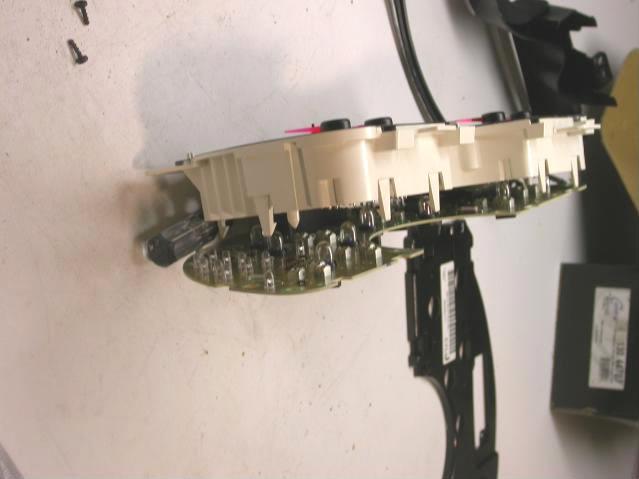
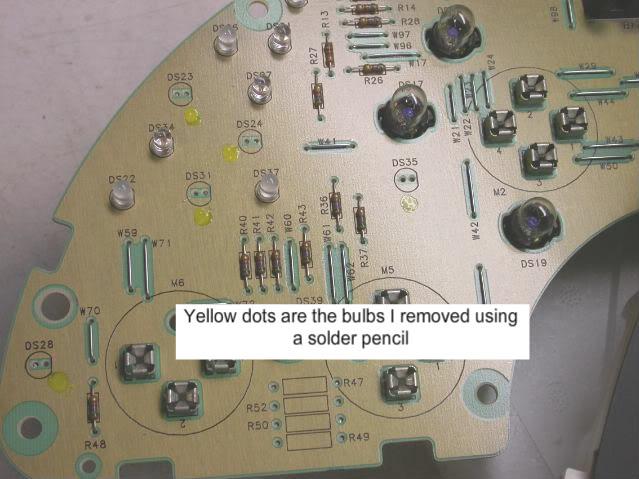
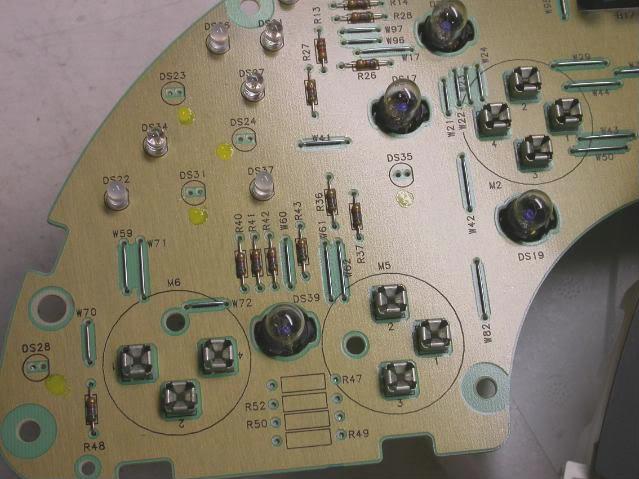
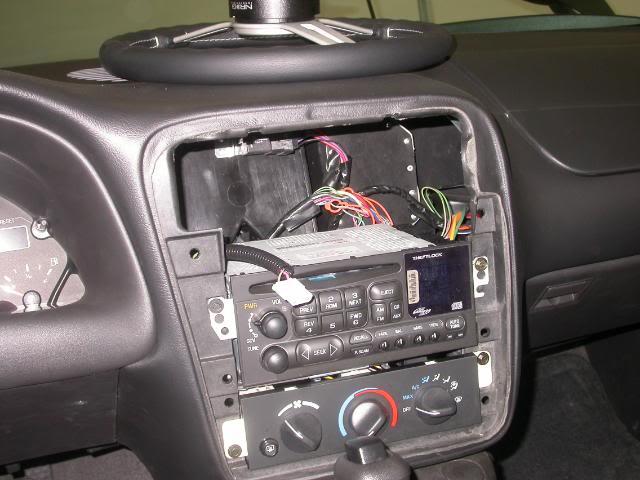
Getting the loose ends finished up. Removing lights on the dash that come on after ABS and airbag delete was completed.
I had to drop the steering colum down to get the cluster out.

4/14/2011
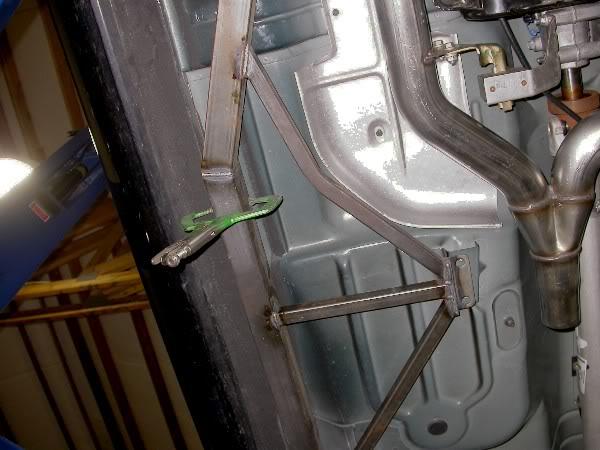
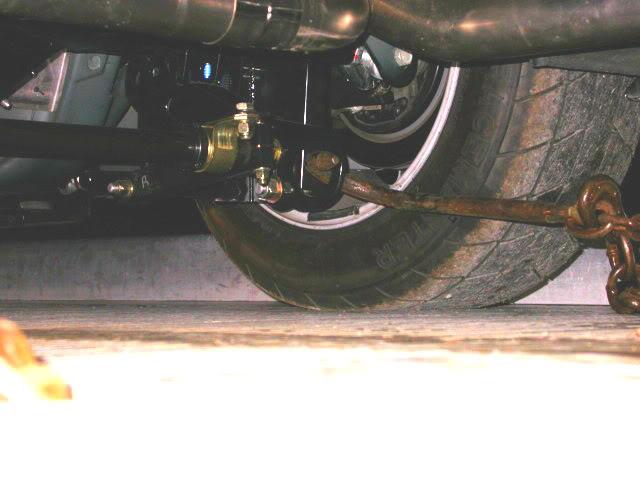
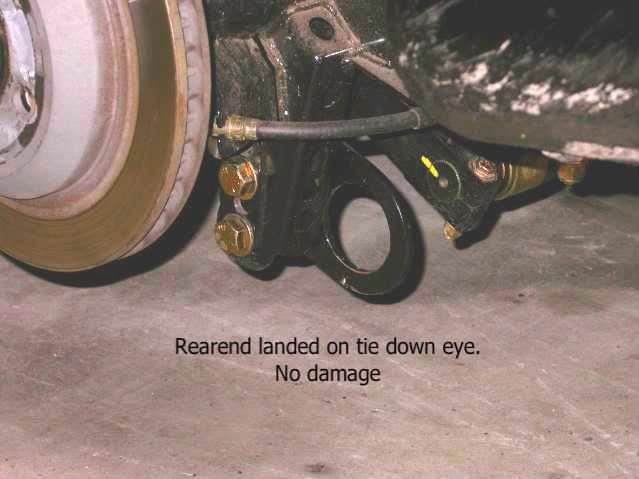
Getting ready to ship the car to the dyno. When I put the car on the roll back I didn't have any tiedown anchors on the rearend, so , I came up with this idea that bolted on to the LCAbracket. They can be left on or removed.

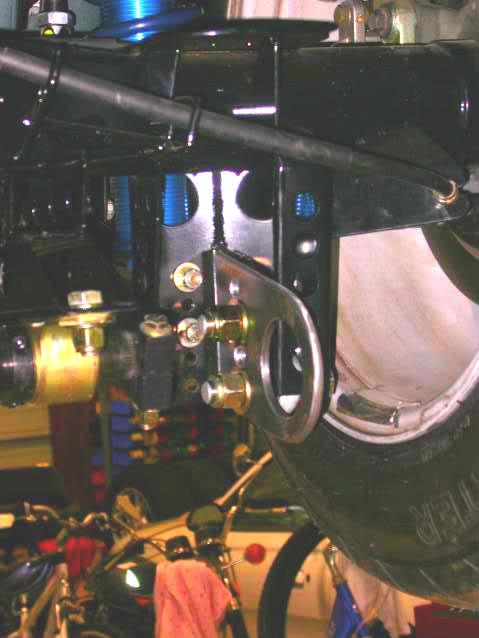
The 28th is the big day. The car will be getting tuned and ready for the long awaited fun.
4/18/2011
Did the throttle body coolant bypass.
4/19/2011
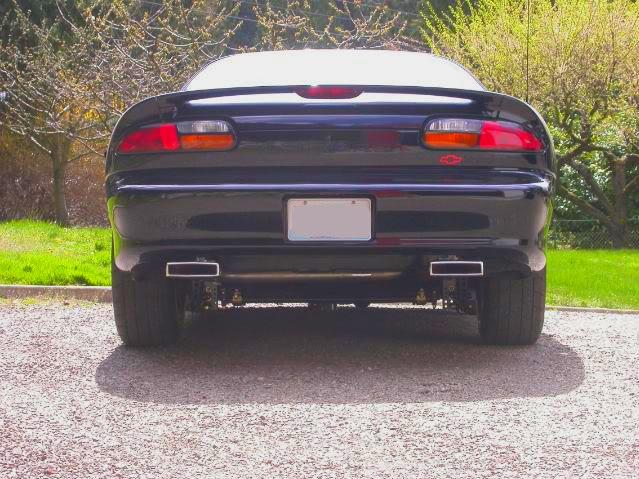
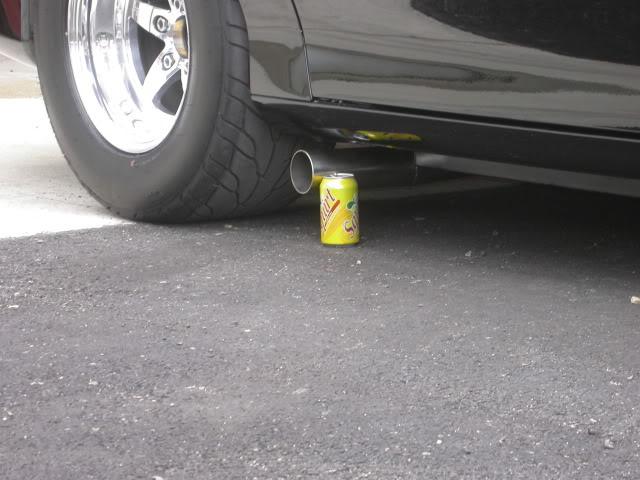
Had to decide on an exhaust tip and went with a stainless Z28 style.
4/29/2011
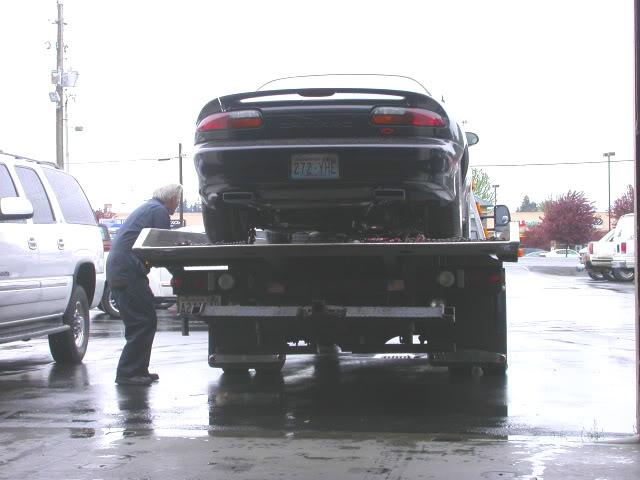
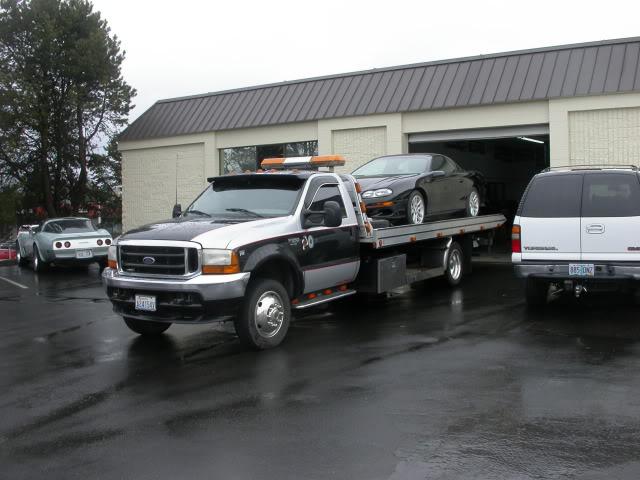
the morning starts at 3:45am to load and head to the dyno 3hrs away. Car gets loaded and Don gets to try out my new rear tiedown brackets
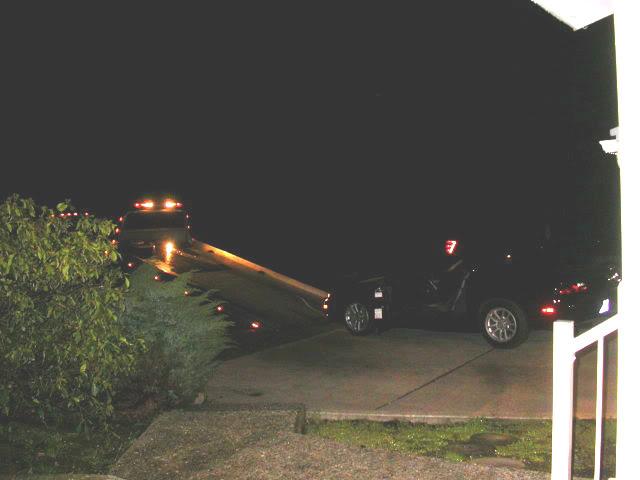
We have arrived:

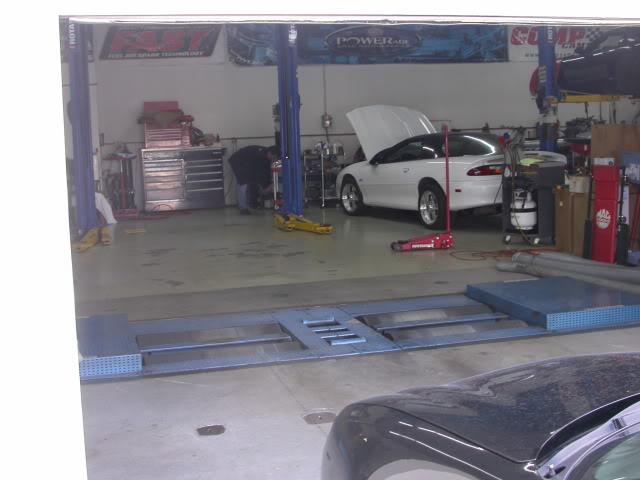
We get unloaded and leave and let Tom do his work.
Came back several hours later and get loaded for the long haul home.

Now, turn it up, the old girl has a heart beat.
5/5/2011
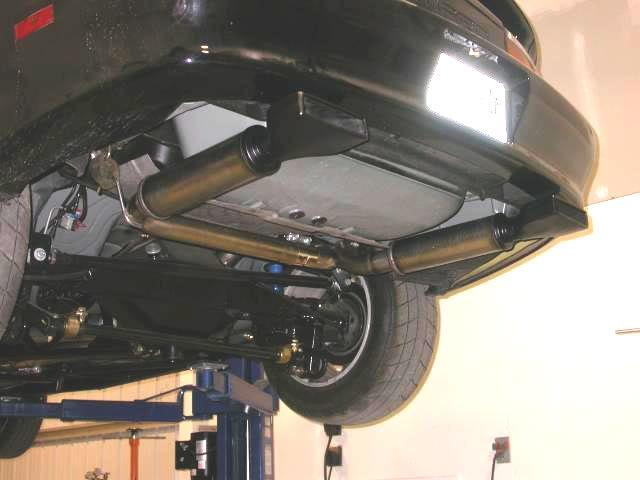
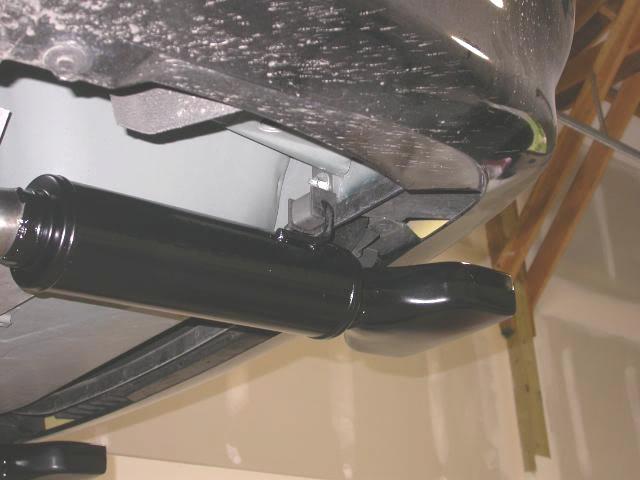
The SLP loudmouth was to loud and was going to get me in trouble. So I made myself a homebrew catback using Magnaflow mufflers.
Wanted to keep the Z28 style tips so I had to make them fit. Make them round.
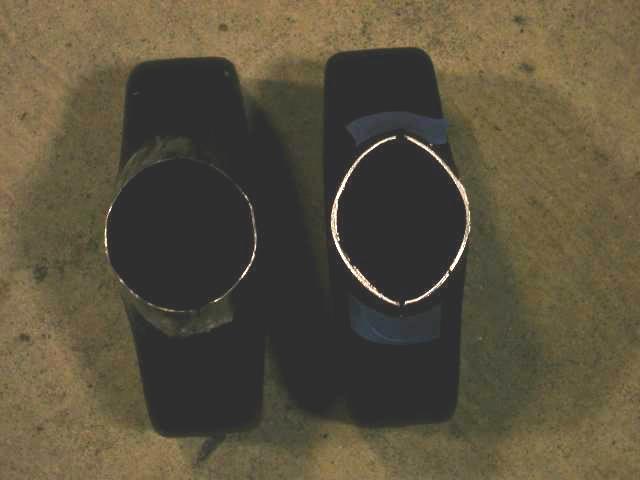
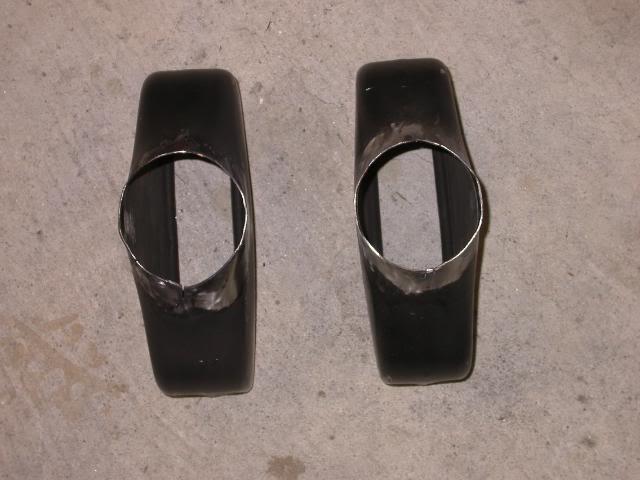
Cut the so called resinator out and installed a straight section.
Cut the necked down 3" pipe off the merge collector and added a constant 3" piece.
Fitting the mufflers with 2.5" ID.
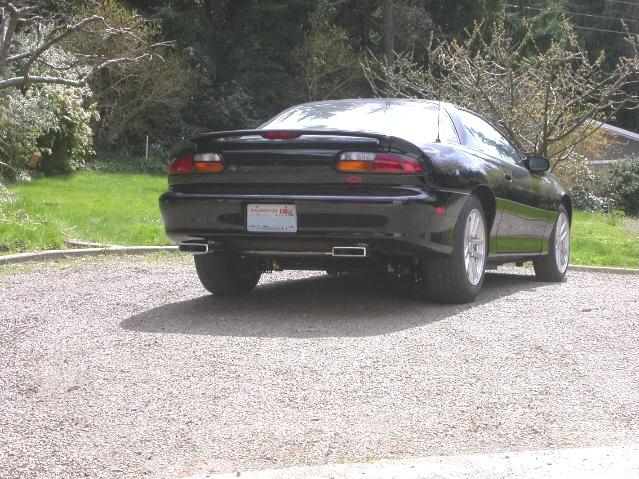
Finished product and this thing sounds good.
I need to get some 3/8" stainless rod. Weld hanger brackets on to the mufflers, then paint the mufflers black.
5/6/2011
Exhaust is finished.


Pouring down rain
no test drives today.
Now, time to save for a forged short block.
5/16/2011
Took the car out for a shake down, city and freeway driving. No overheating, oil leaks, transmission was warm after some stop and go traffic driving.
Ordered a cooler for the trans.
Overall, the car drives like a dream.
With 4.71 gears, in OD, the car spins 2800 down the freeway.
Once the cooler is installed, off to strip to what she will do.
AIR removed:
5/18/2011
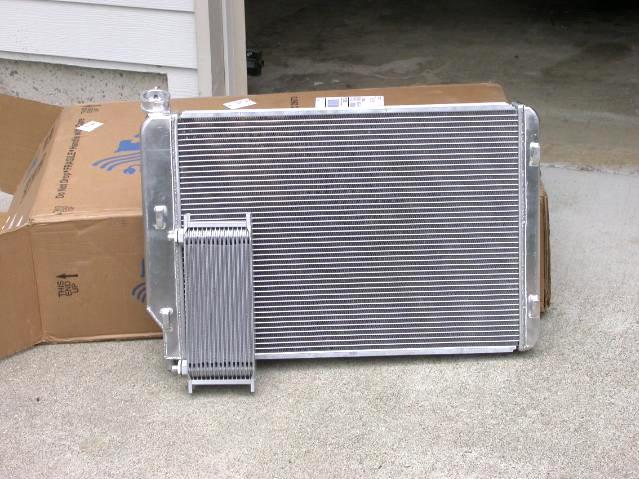
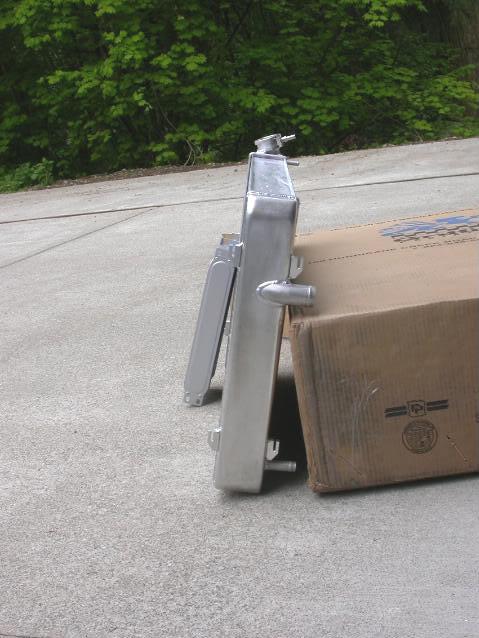
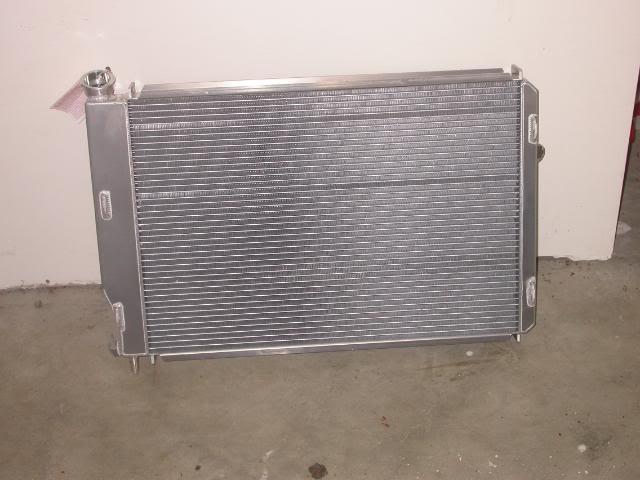
To help with cooling the trans, I upgraded the radiator to this and it should be here by the end of the week.
http://www.summitracing.com/parts/GRI-6-598AE-JAX/
Here is the trans cooler I will be using.
http://www.summitracing.com/parts/DER-51606/
5/24/2011
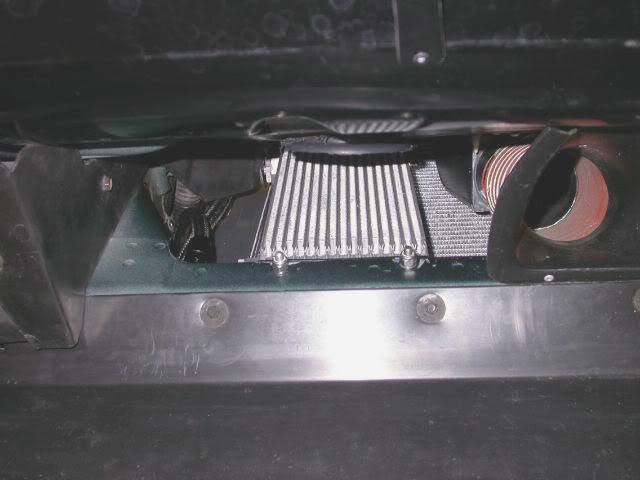
New radiator and trans cooler came in.

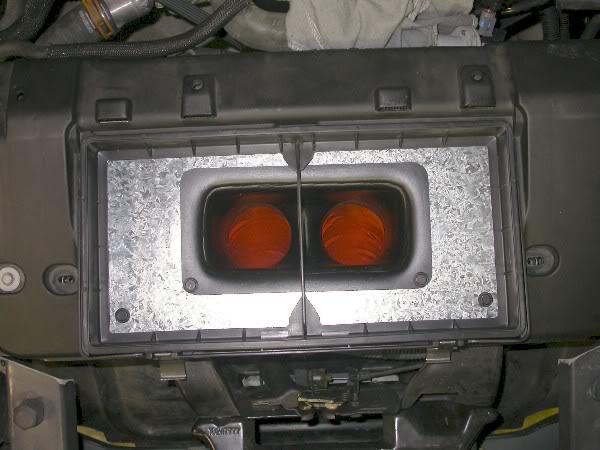
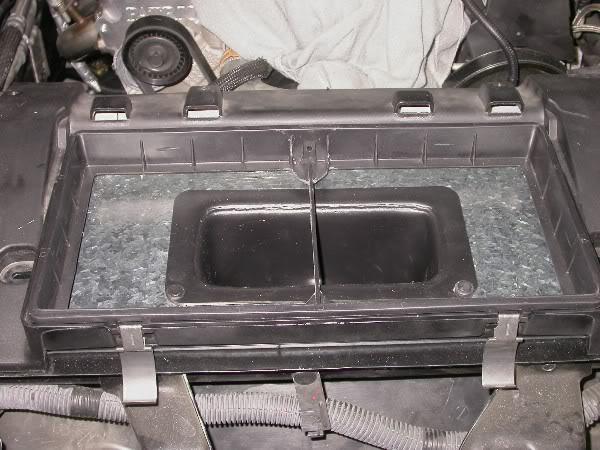
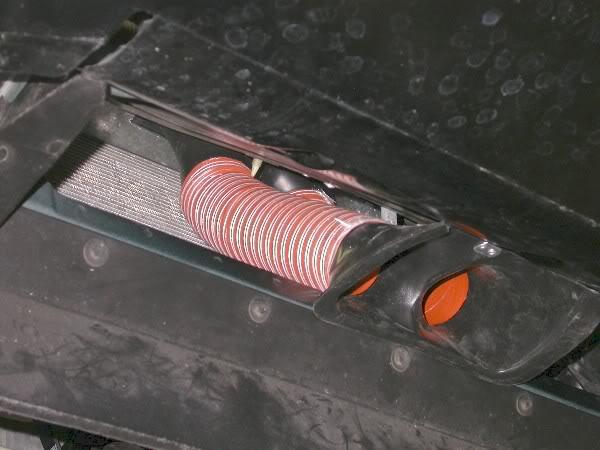
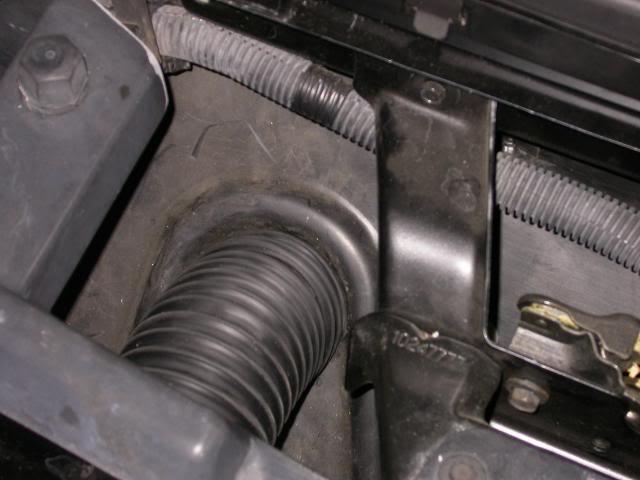
While waiting for them to arrive, I was able to build part of the trans cooler ram air system. Still waiting on parts to complete. I should be able to drive in stop and go traffic with out any worries of the tranny getting hot.
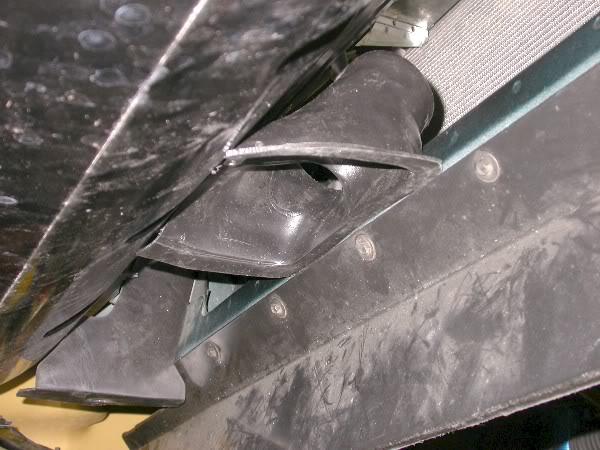
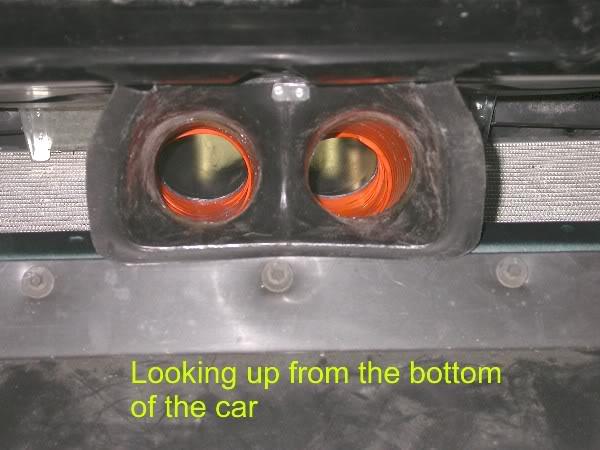
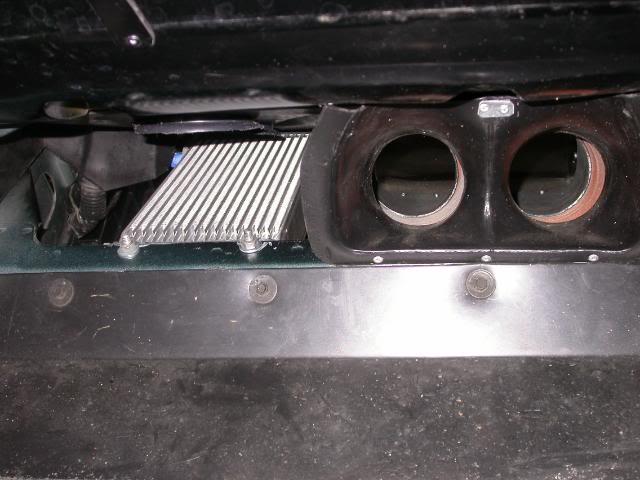
Duct under front bumper cover for tranny ram air.

Top view, looking behind front bumper cover.
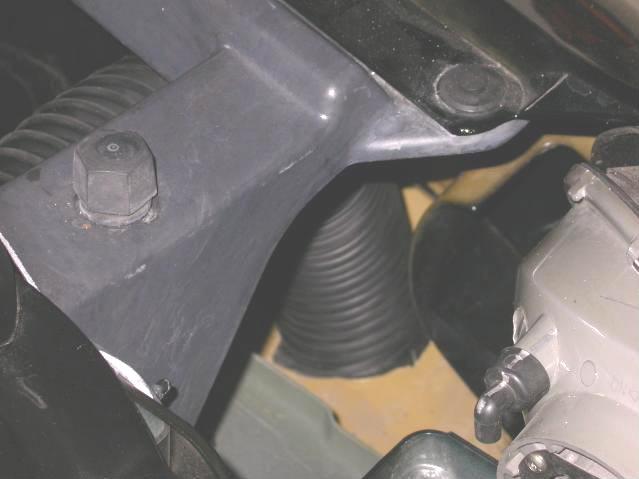
Shroud, between radiator and front bumper cover.
I will have one more cold air intake line to the trans cooler with a fan hooked to a temp sensor that will turn on when oil temps rise in the trans.
5/27/2011
Sent the radiator back. Called the vendor to verify it was the correct one. It was, but it was not direct bolt in as stated, so I sent it back. Ordered a Ron Davis and was assured it was direct fit. Will be here in approximatly 2 weeks.
So, I have been mounting the trans cooler. Everything should be done by the time the new radiator shows up.
Looking in from the drivers side.
Looking in from the passenger side.
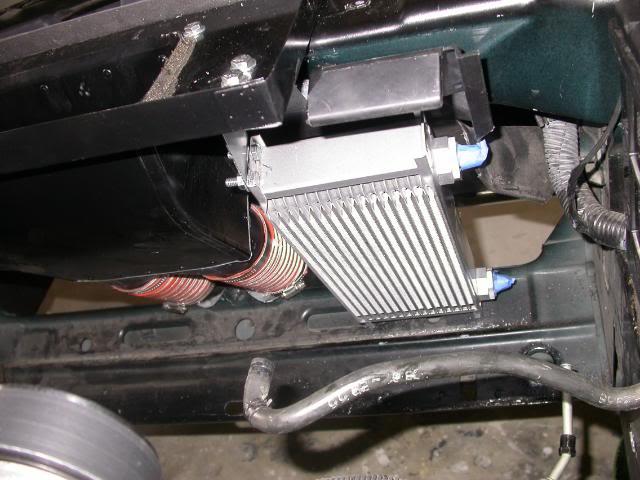
Looking up from the bottom.
6/9/2011
Still waiting on parts, radiator, Evans water pump and 160deg thermostat.
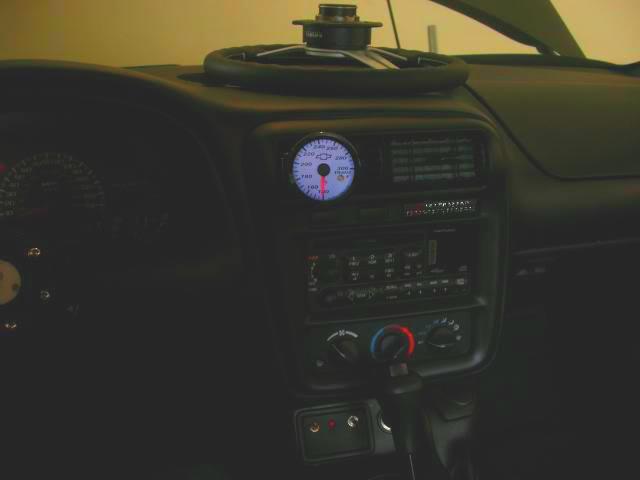
Been working on installing the trans temp gauge.
Went to the local electronics store and purchashed some 4 pin connecters
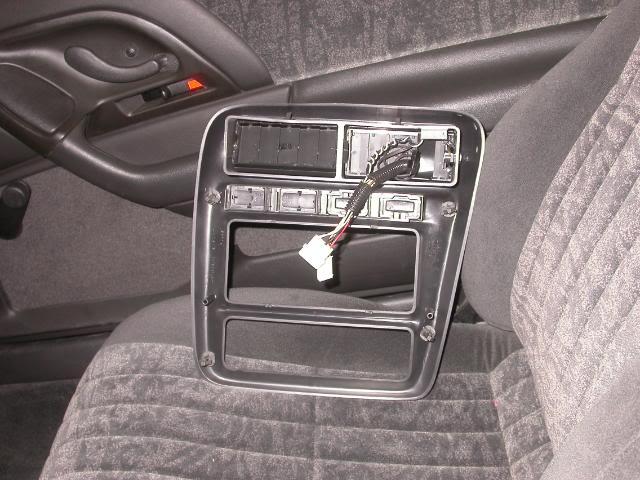
Modified the front vent to work as my block off plate with the gauge.
At night, the backgroung will be light blue, so I can find the gauge at a glance.
6/13/2011
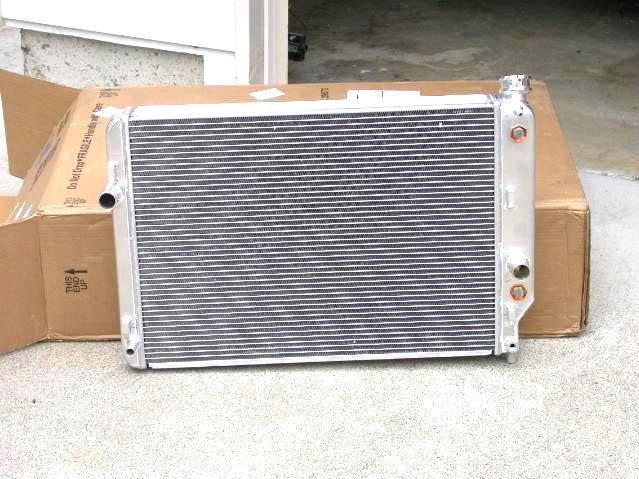
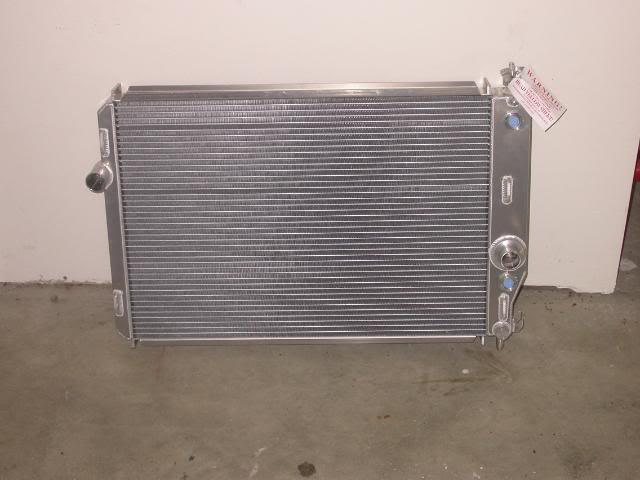
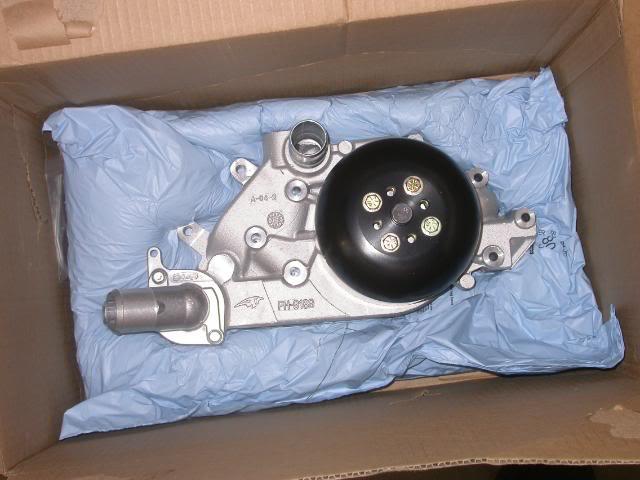
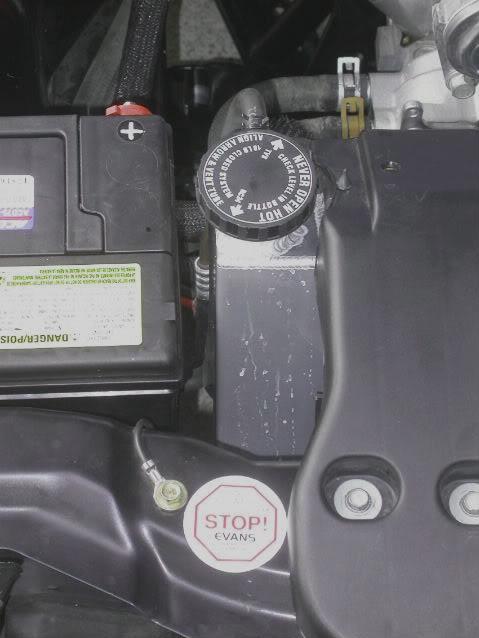
Ron Davis radiator and Evans water pump came today. http://www.nastyperformance.com/default.html
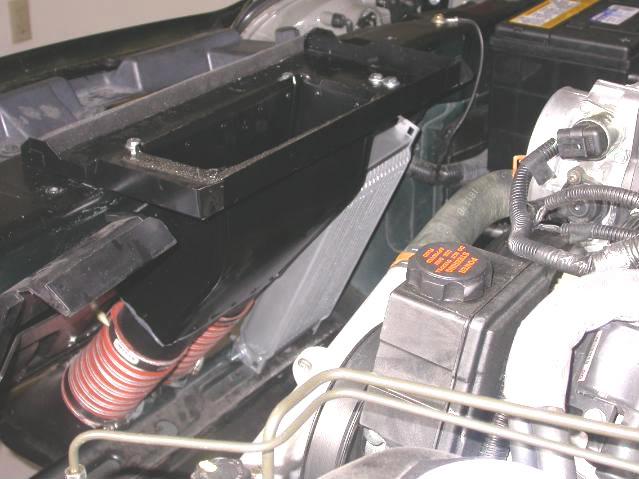
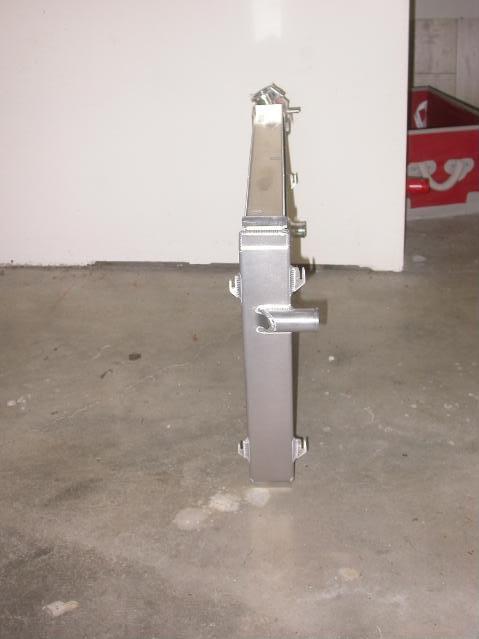
Test fit the radiator, it is direct fit.
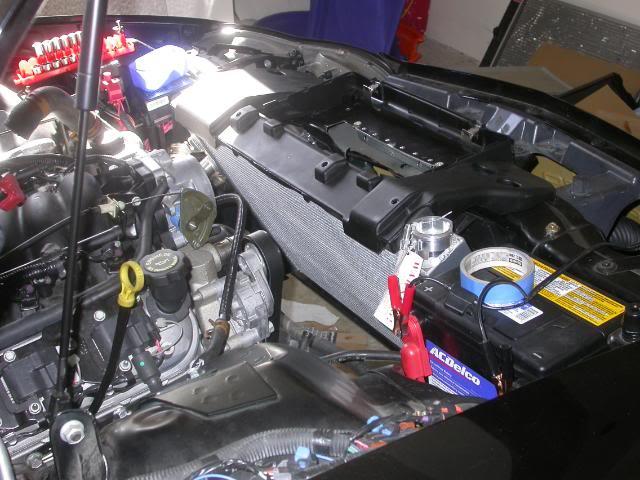
Evans pump with large pulley, to be used with 25% underdrive balancer.
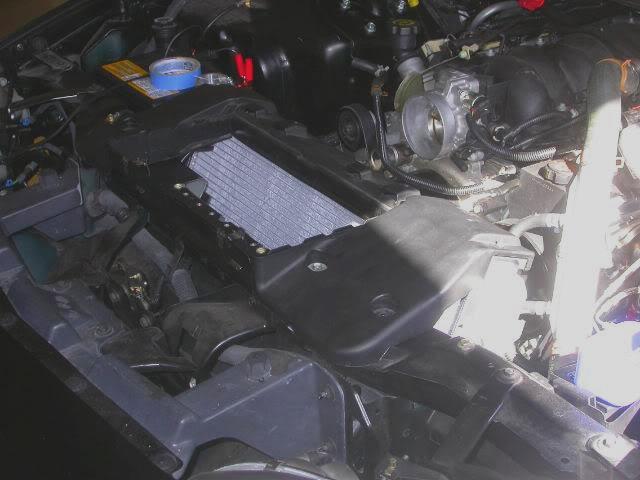
6/16/2011
Radiator,water pump install and coolant conversion completed.
Trans temp, 170 with cooler in radiator only and engine temp 188. These numbers were taken with my heat gun after taking the car for some stop and go traffic and some hard launchs.
I let the car idle for approximatly 20 minutes and the fan kicked on for less than a minute.
Fittings for the external trans cooler should be here tommorrow.
7/9/2011
Tonight, we are off to the track. Giving the car shake down runs in all types of driving, so far no issues.
- Tranny temps are peaking at 170 when driven hard and 140 or less when cruising down the freeway.
- Coolant temps, rock solid 180.
Here are some of the things that have been working on.
tranny cooler installed. Looking up from bottom of car
Bottom view tranny line (return) hookup.
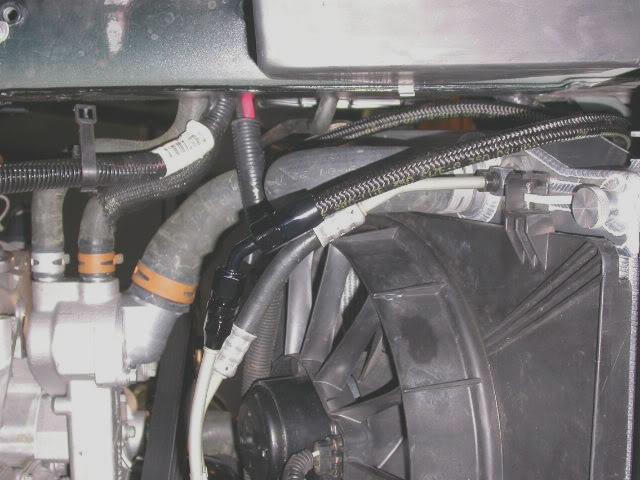
Tranny cooler fan if needed, to use on return lane at the strip or in traffic. What the Nascar boys use to help cool the brakes.
7/10/2011
A good night at the strip. Ran the Pro class, 12.00 and faster.
- First run: 12.224/103.42 mph (Backed out, not knowing what the time was going to be. Did not want to get kicked out for not having a roll bar if I went to fast. Tire pressure 20lbs. Felt like I had some wheel spin,shake
- Second run: 11.960/114.13mph (Full run) Dropped tire pressure to 18lbs. Did not fill wheel spin,shake
- Elimination run: Dial in 11.90 Ran 11.906/114.23 (I lost to a 10.12 dial in car.) Tightened up front and rear shock compression 6 clicks
Tranny temps after runs, 158.
Coolant temps, rock solid 180.
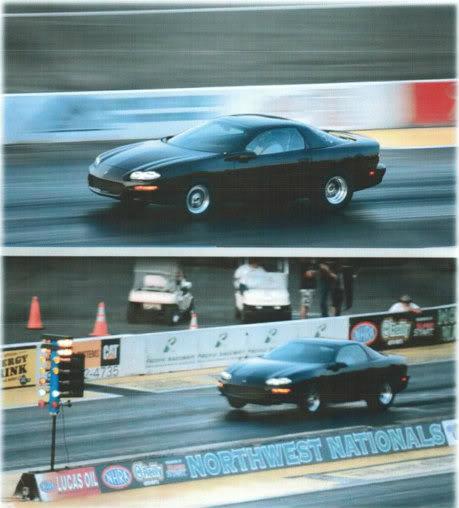
The car pulled like a bandit and left staight.
Drove the car 100 miles, to and from the strip and no issues.
Several people came up to me and commented how the car looked, thinking it would be a 13 second car.
This is at Pacific Raceways in Kent, WA.
http://www.youtube.com/watch?v=FaOk8...layer_embedded
Here is the cars first shake down pass. Not knowing how fast it would go,I backed out. Did not want get kicked out for going to fast without a rollbar.
http://www.youtube.com/watch?v=mt6wn...layer_embedded
7/31/2011
Have not ran the car since the videos. Been waiting for parts.
The seat felt as if the back was flexing on the hard lauches, so I upgrade the seat. Just finished the install.
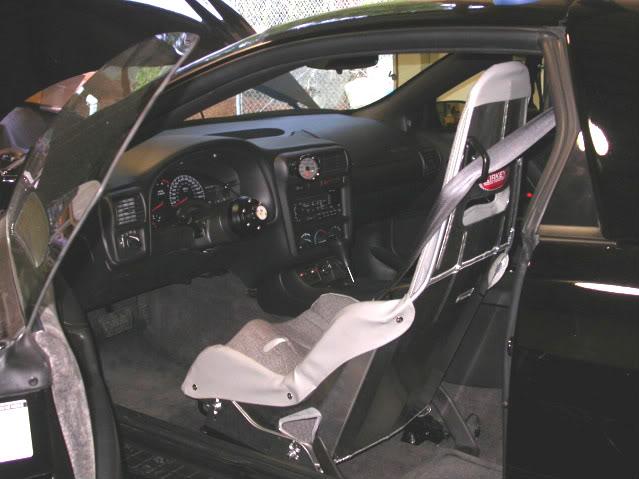
Was going to upgrade to a vaccum pump system. After talking to the manufacturer rep, it would not benifit me at this time with engine I am currently running . So, I did what I think is best for my current set-up.
Fittings should be here this week to finish the install.
9/13/2011
Have been working away getting the little things done.
Switched the passenger LS1 valve cover to LY6 valve cover, which only has 1breather tube. LS1 has 2 breather tubes.
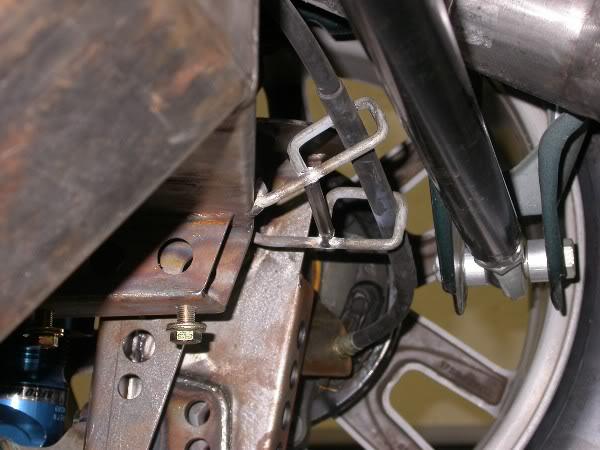
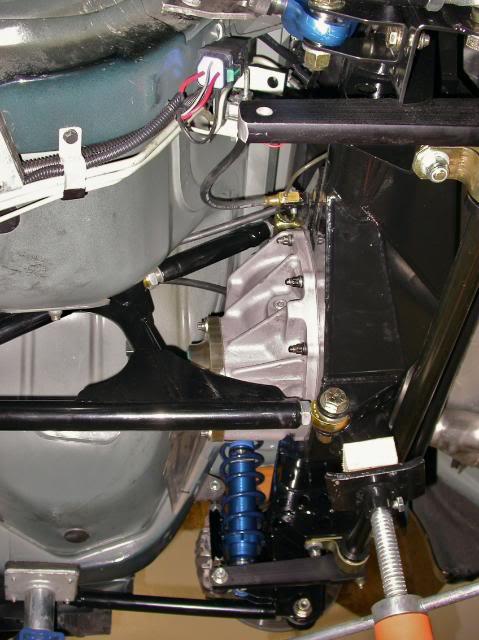
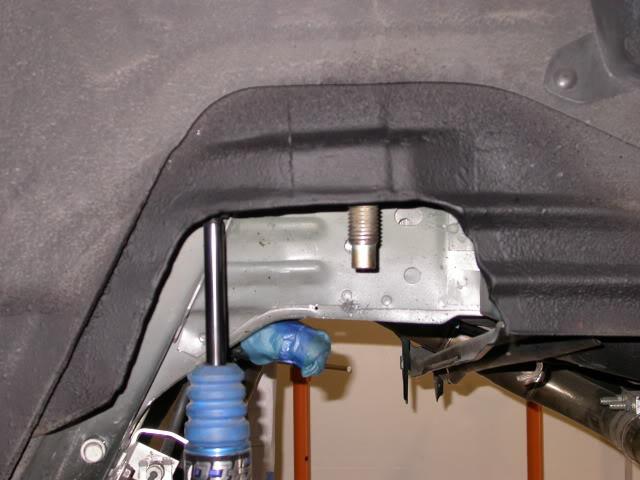
Front control arm shock mount. Prep for limiters.

Front limiters.
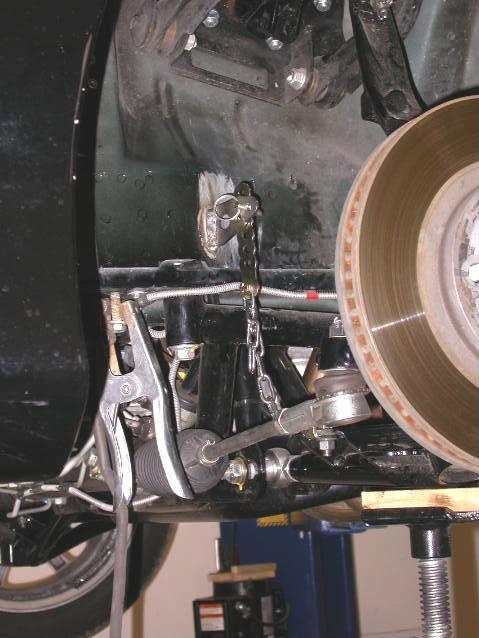
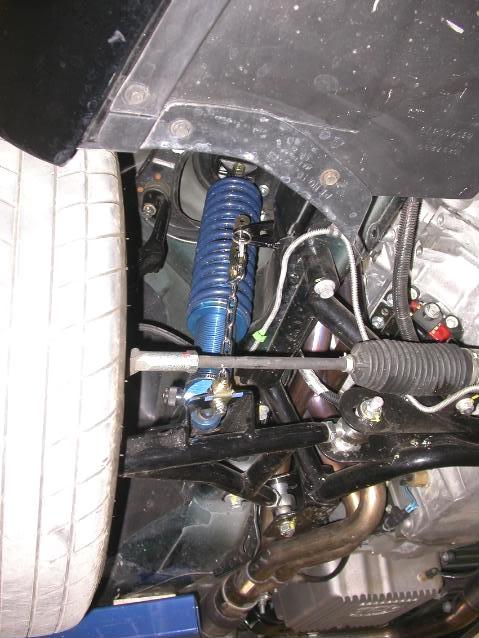
Moved instant center.
Car now wants to lift and go forward like a frog. I need to get to the track where I can get some real traction.
9/25/2011
Ran the car at Bremerton, was a test and tune night. Made adjustments on the car and was able to see how it reacted. Last pass was my best the car has done. 11.905.
Think I am going to have to go to a 15x28 tire. Need more side wall so I can soften the hit on the tires.
I have put 1500 miles on the car. You could drive this thing cross country comfortably, freeway gas mileage, 24mpg!
9/30/2011
Heading to the track tonight.
Checked to see if my oil was low. Before the PCV upgrade, I was approximatly 1/2 qt low after a night at the strip. After up grade, oil still on the full mark and no oil drained out of thecatch cans.
Made some chassis adjustments, hoping to get my 60' down.
10/11/2011
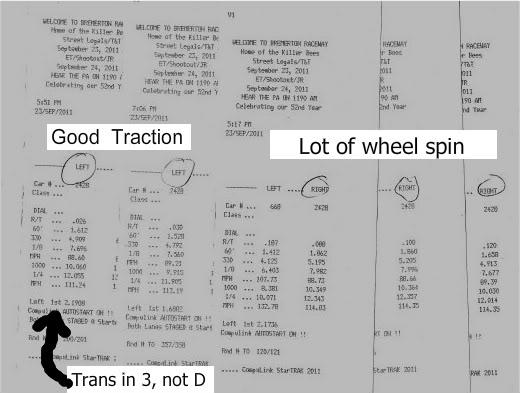
Spent the night at the track tuning for low traction conditions. Every pass, a change was made to see how the car reacted.
60' were all over.
Here are the R/T using the left lane the entire night, in order.
.305
.077
-.015
-.069
.280
.064
.064
.091
.140
-.072
.037
The next pass.
It happened.
Tuning with short side wall tires is a real eye opener.
Looking forward to 275/60/15 tires. Time to start saving.
10/1/2011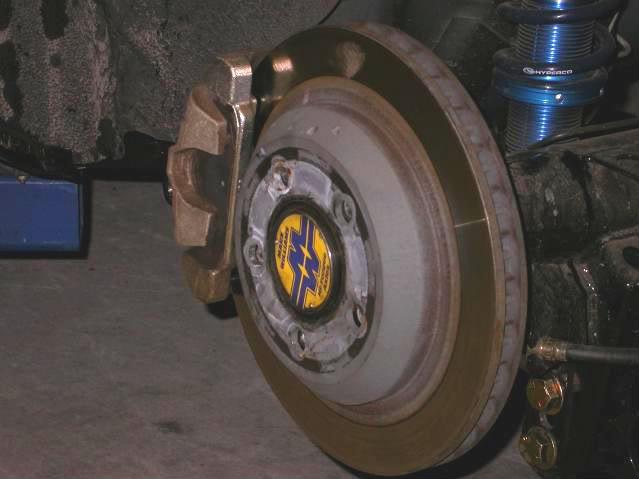

Thank you Heidi and Shawn (wws699) for the Breakin It vidieo. Heidi was in the stands filming.
In the video, the starter helped me stage. I was searching all night for traction.
http://www.youtube.com/watch?v=rkz1Q...layer_embedded
The one thing I noticed in the video, was how level the car left. The front limiters set with 3" of travel and the rear with 75% anti-squat. From my calculations, from a drawing I created in Solidworks (3d modeling program), I needed 2" of rise in the front. I didn't hit the limiters.
Afterwards, the starter came up to me and said, the previous weekend the same thing happen to one other car.
Heidi and Shawn, thank you again for the video.
12/18/2011
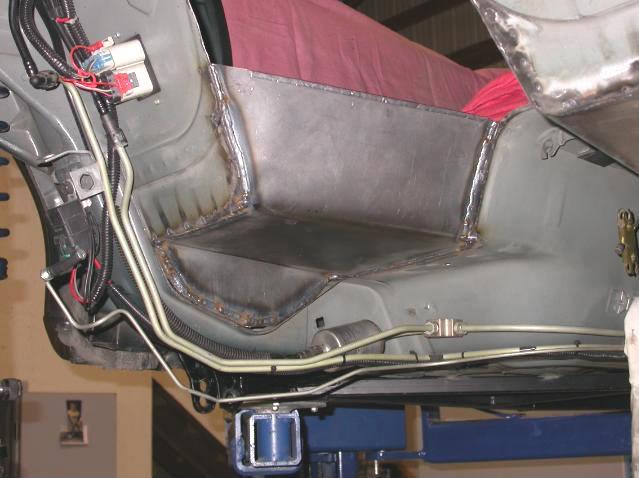
The car is getting some changes, tires, wheels, brakes, rearend and some sheetmetal work.
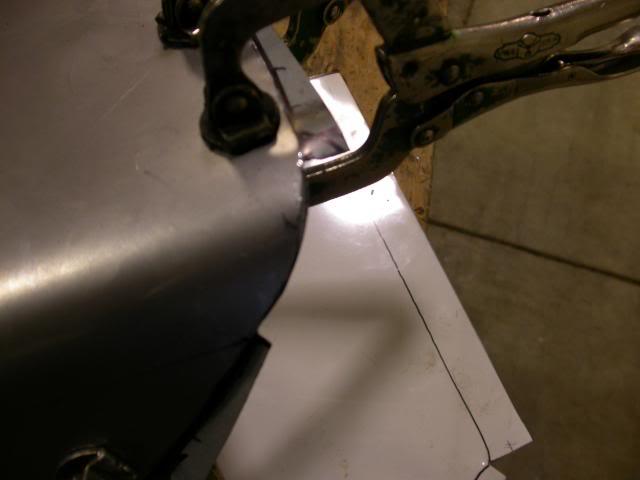
Here is some of the sheetmetal work getting done. The torque is difficult to adjust for pinion angle.

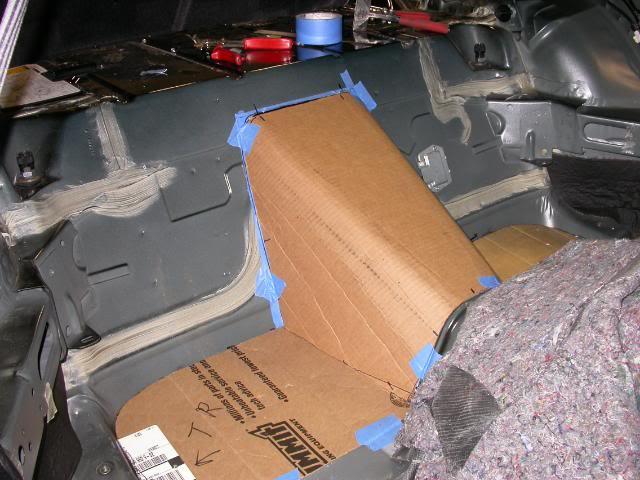
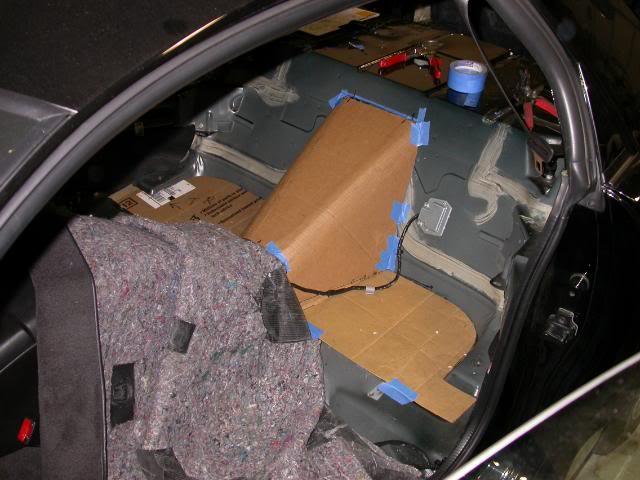
Thought I had some 20ga sheetmetal and it turned out being a sheet of aluminum. So, I did the next best thing.
12/19/2011
Made some headway today. First thing, went and bought a sheet of 20ga. sheetmetal.
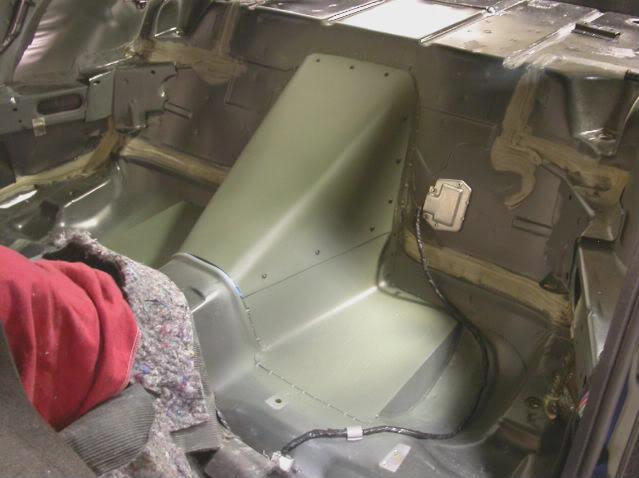
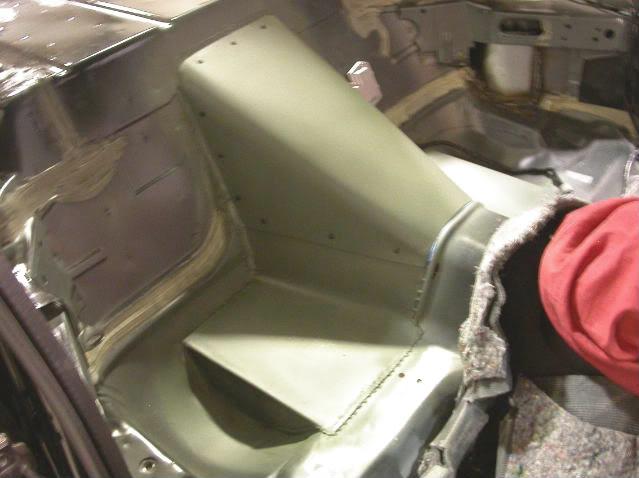
Came up with some ways to eliminate some welding. Formed the floor pieces up as one.
Before:
After:
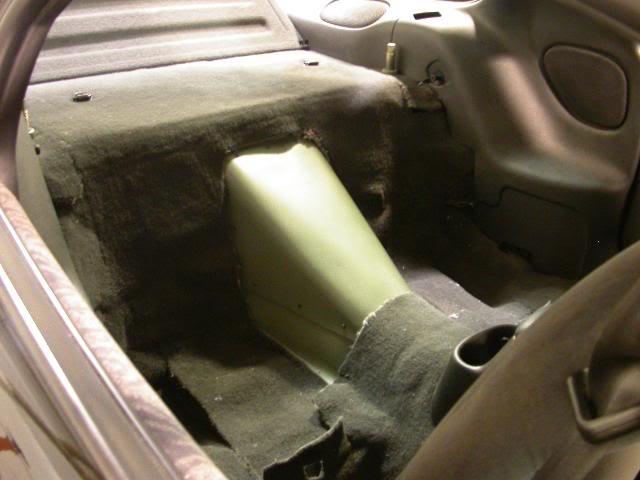
Removable tunnel:

Next will be tacking the floor panels into place,getting some duz fasterners and mounting the removable tunnel.
Then, remove the rearend and fabricate a 1" flange around the cutout above the rearend so the tunnel has something to seal against.
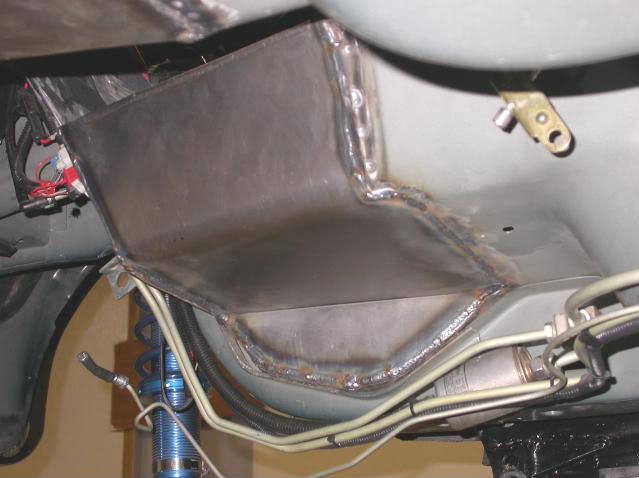
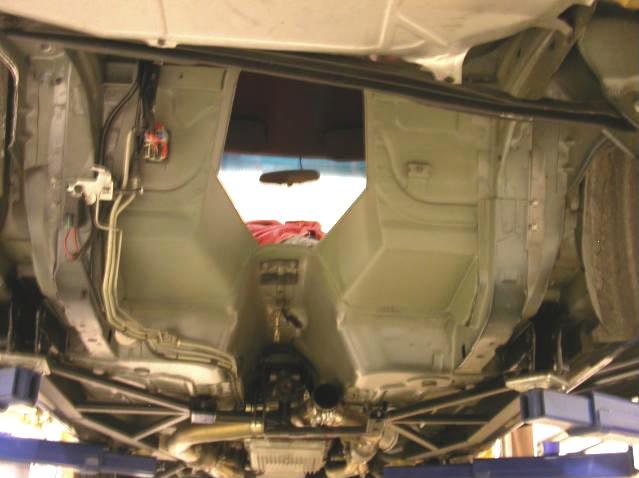
12/20/2011
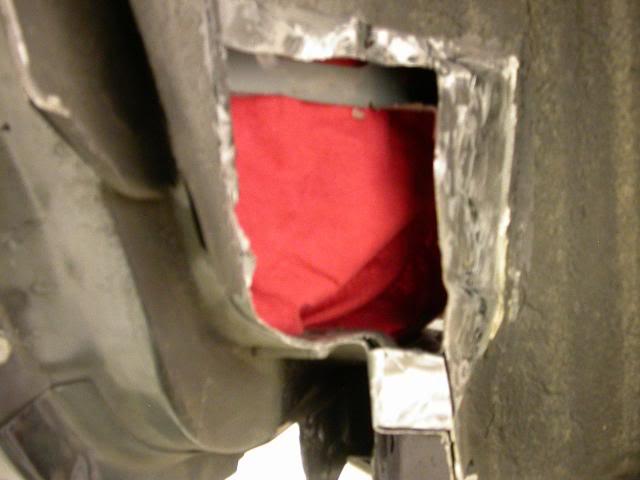
Decided to try and make a flange that goes around the cut out above the rearend, without removing the rearend.
I made a pattern to fit the removable driveline tunnel.
Calculated my flanges and and notched the radius because I can't bend a flange on it.
Flanges turned up.
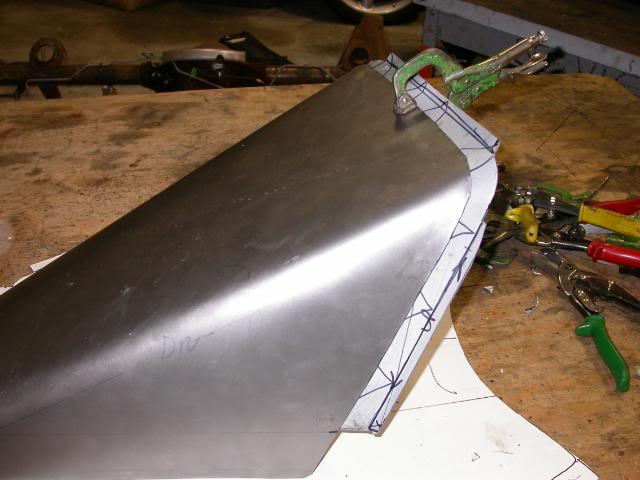
Here is the formed part.
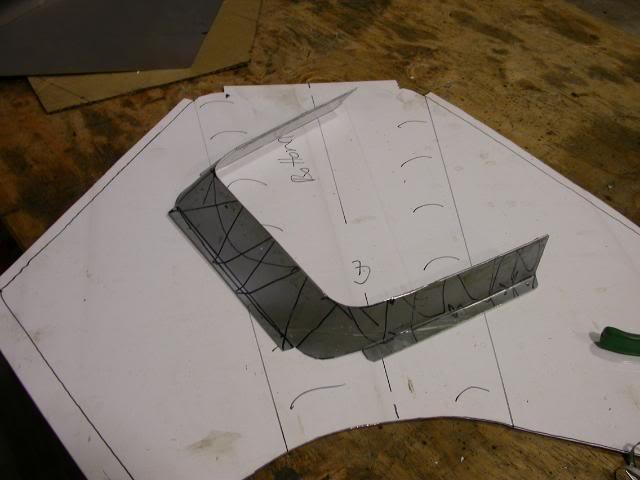
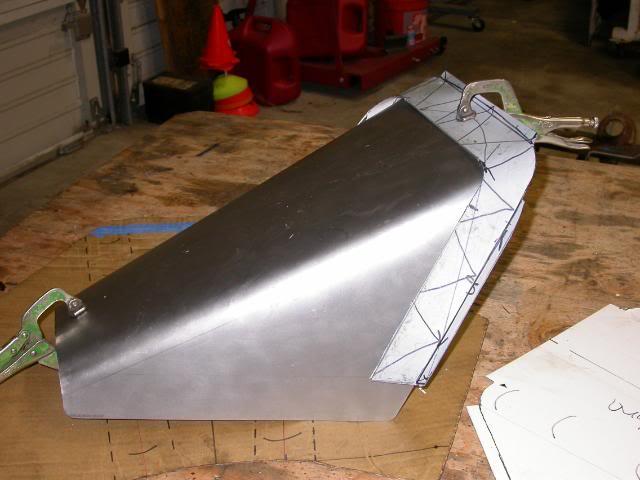
From the bottom of the car.

Need to decide on what fasteners to to use to hold the cover on, Duz or quickcert.
12/20/2011
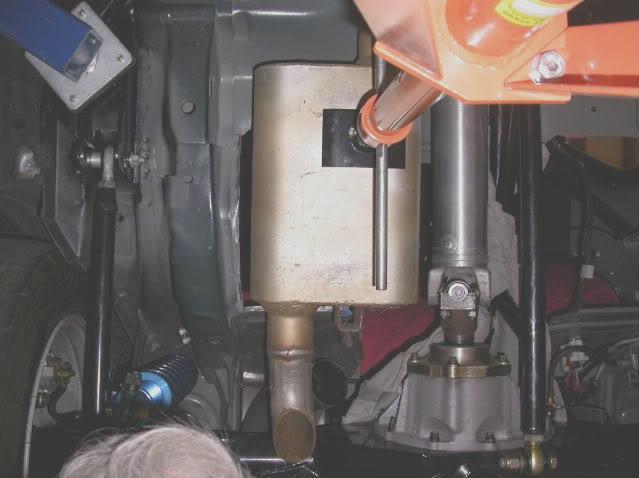
Here is a 40 series Flowmaster. Not tucked up into place, but you get an idea what it would look like.

12/21/2011
On the down hill side of the tunnel modification.
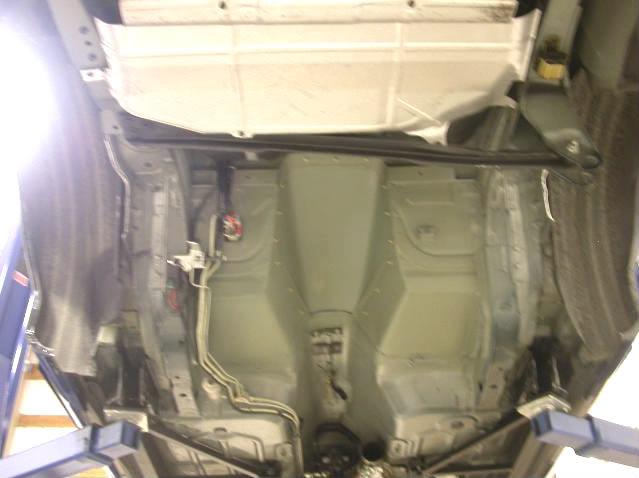
Floor panels are welded in. Pictures from the bottom of the car.
Right side:
Decided to remove the rearend to make things easier.
Left side:
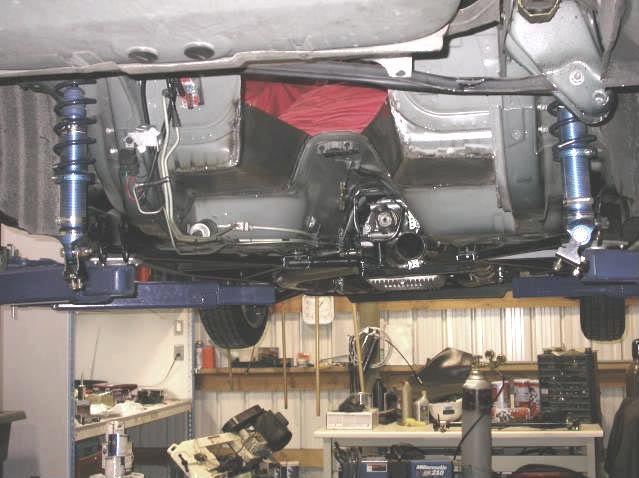
One more piece to go. Going to try and get finished up tonight.
12/22/2011
A candy bar and cup of coffee later, I am fired up. All parts are welded in. On my last weld pass doing the passenger side radius I blew a 3/8" hole  and had to fix.
Next , clean up, decide on fastener to hold cover on, paint and seam seal.

The primer sealer has been put on. Going to have to wait till spring to apply the paint, warmer weather. Ordered white seam sealer to match what is inside the car.
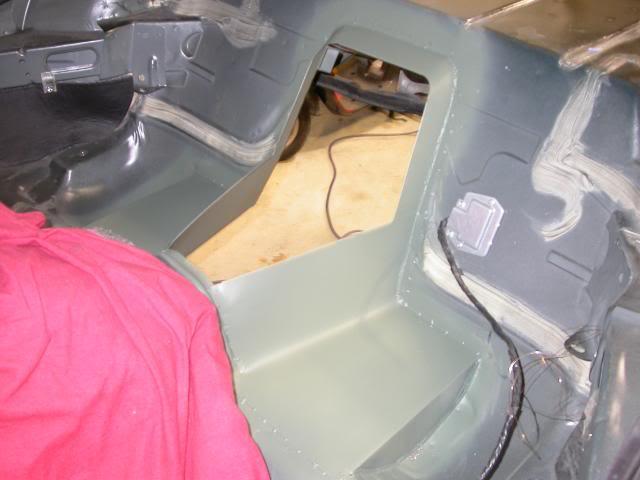
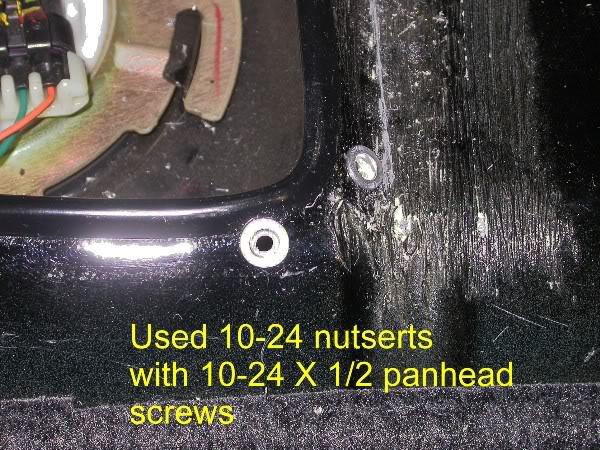
Decided to use Nutcerts to hold the cover on.
12/23/2011
Picked up a nutcert gun this afternoon, so tomorrow I should have the cover mounted.
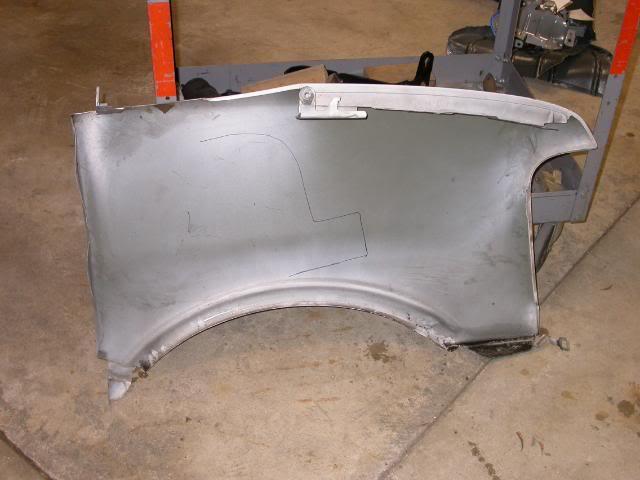
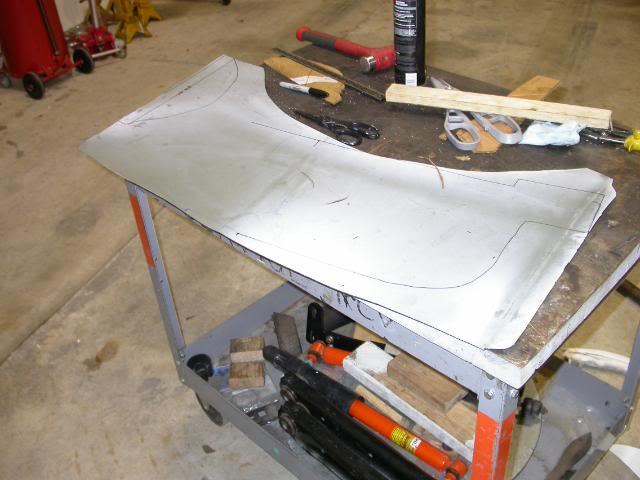
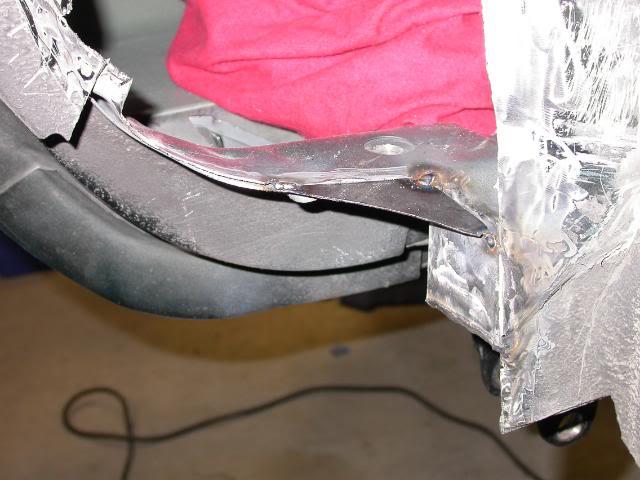
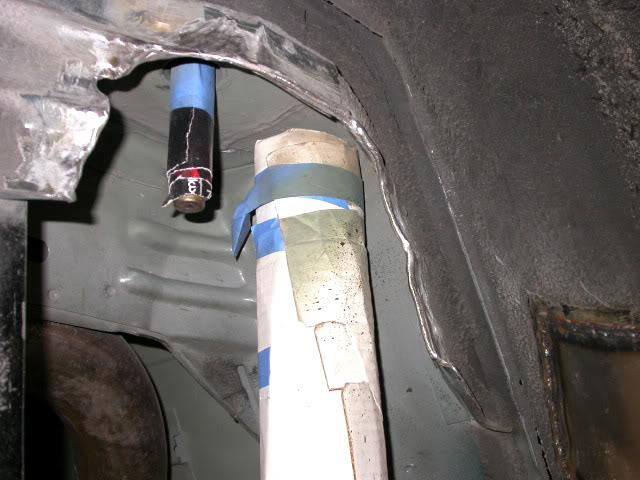
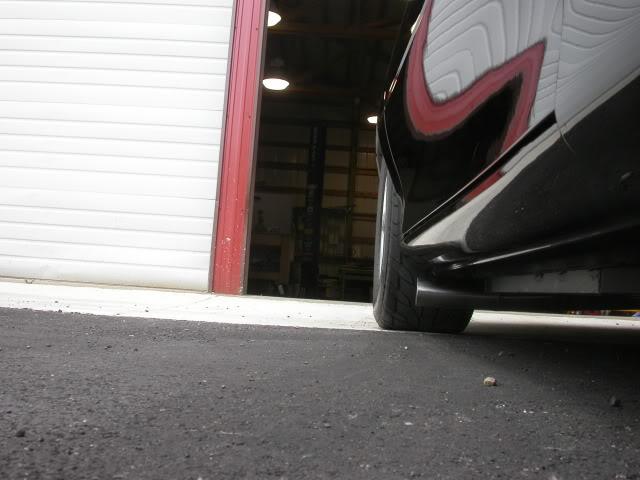
I cut out the bump stop mounts and while I was in there, I was looking at the fenderwells where alot of people have to clearance front inside of the fenderwell for tire clearance. Being in the cut and weld mode, I pulled out the sawzall and went to town.
First I decided how far forward to go. Looking into the fenderwell from the side, I sighted staight back to the inner fenderwell and determaned the starting point. Tire is not going to be any farther forward than that point.
I wanted to try and follow the contour of the inner fenderwell. Decided to start cutting and made a pattern that follwed a the contour I was looking for.
Looking from the back of the car:
Side
Cleaned the seam sealer from behind the areas to be welded. The brace on the inside of car is still in place. Just cut away the bottom flange in the area of the brace where the new piece of sheetmetal was going to be added.
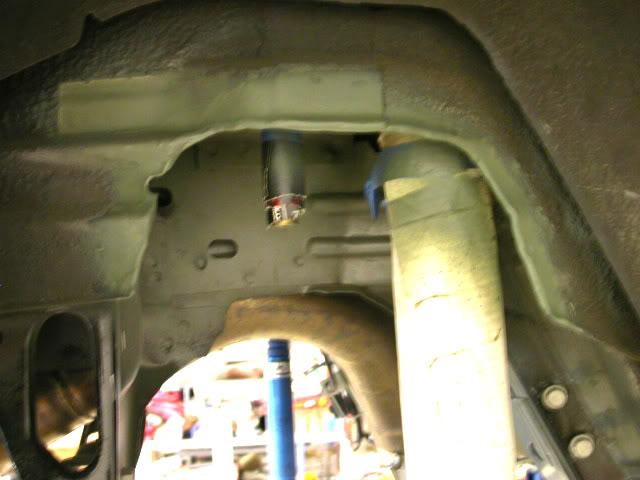
Cleaned up the welded area and sprayed with some self etching primer. once the primer dried, applied a light coat of undercoat.
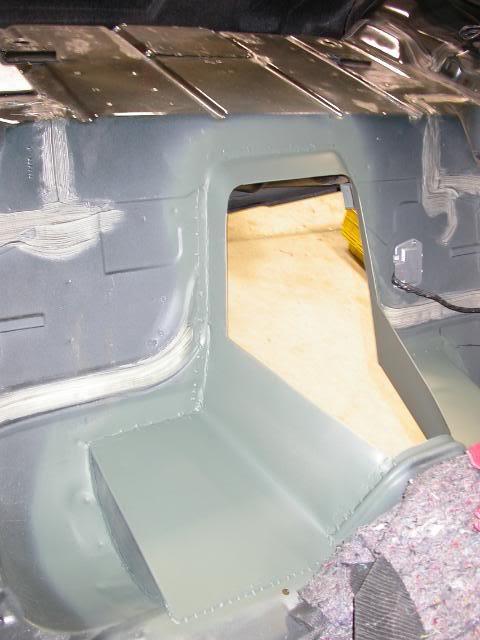
Tunnel is done. White seam sealer came today.
Just need to paint and seam seal to be complete.
Next, will be finishing the fenderwell modification to the right side.
12/24/2011
Been working on the right fenderwell modification. Tacked in and will finish in the morning.
Looking from the back of the car:

12/26/2011
Put the rearend back in the car today to see how much more clearance I have. The car is set at an approximate ride height for the rear and the LCAs set at 19.50".
I was not able to get the torque arm level with the bottom of the the car before the modification.
The front inner fenderwell modification for tire clearance.
12/29/2011
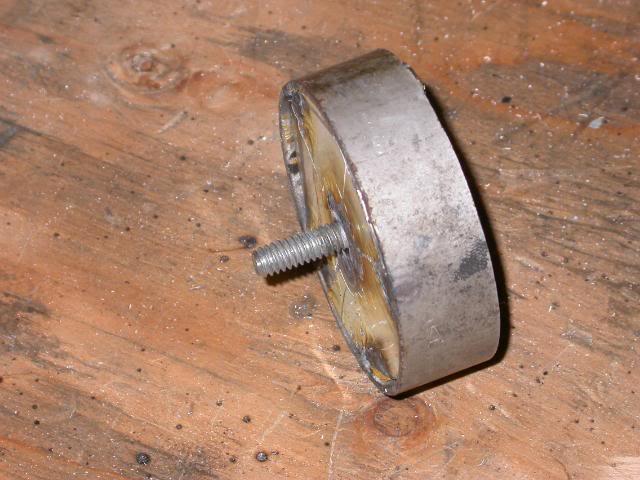
Quote:
How much do thouse bump stopes weight?
2lbs each, including 2 bolts and rubber stop. Also rounded to make up for lost material from hole saw.
Quote:
Are you glad you cut them out, still think its strong
There is a 90 degree flange down, on the inside of the stock spring bucket, I cut right up to it. In my thinking, this will help keep the structural integerity of the sheetmetal supporting the rear frame rail.
Drivers side
Passenger
1/3/2012
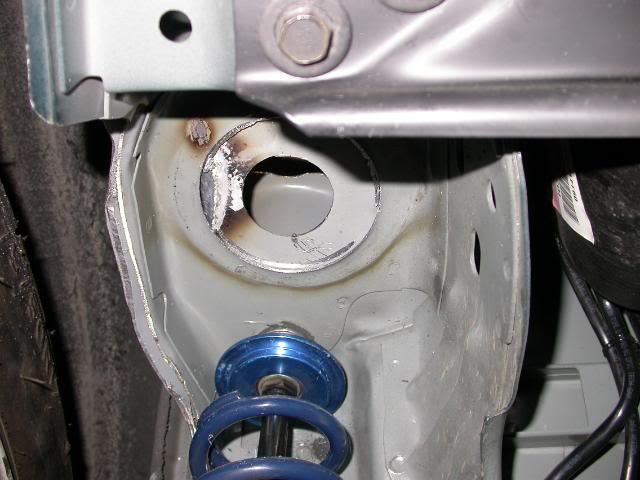
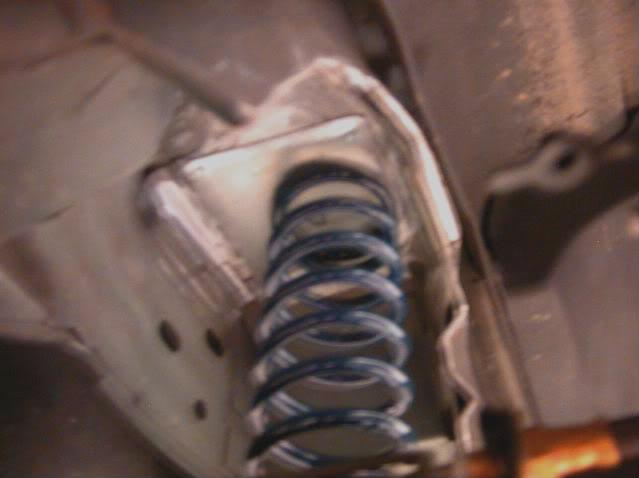
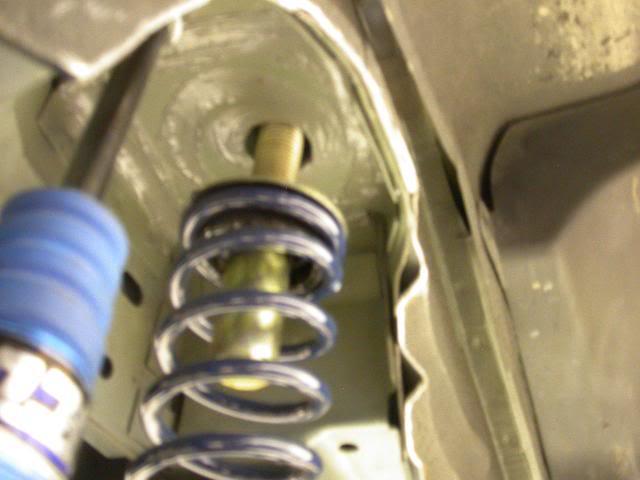
Decided to remove the rear coilover and put the spring in the stock location. Spent some time over the holiday designing an in car ride height adjuster set-up and incorperated the roll bar pad area.
Time to cut and see what I find.
Right rear, inside car, over stock spring bucket area.
This area needed some structural help if I was going to incorperate it into the rollcage. I plated 3 sides. The area to the front of the car (shock area)appears to be 16 or 18 guage, should be strong enough.
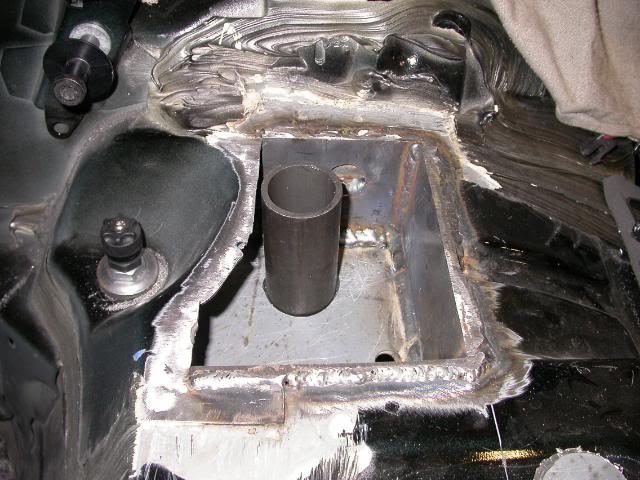
Waiting for the jack bolts to get here so I can keep going.
1/6/2012
Last night, I needed to get something done, so I removed the ebrake handle and cable.
Purchased a 4" holesaw this morning and removed the stock upper spring locators.
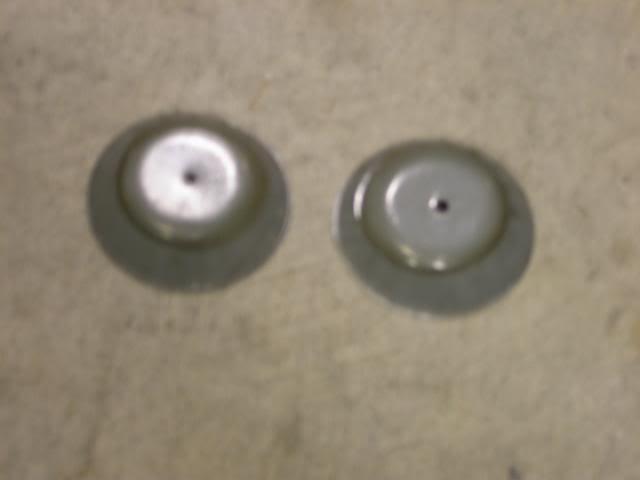
Located a 10" spring for testing and built a temporary spring locator that bolts to the housing.
Installed the spring, raised the rearend till tension is on the spring and 90 degrees to the spring pad.
Looking up into the stock upper spring bucket, the coil spring is going to be positioned back from the stock location.
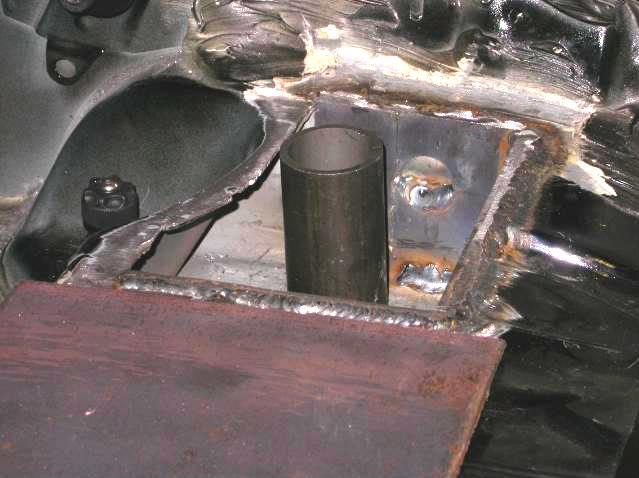
1/7/2012
The new 10" springs came in. Waiting for several parts to arrive to complete the project. The prep work is done and ready for welding once the rest of the parts arrive.
Made plates to be welded in on the bottom side of the spring bucket. Held them on with tech screws until welded. By doing this they will locate the same every time.
Installed my temporary spring locators on the rearend, both springs and raised the rearend to ride height while springs were pressing against the plates. Took a torpedo level, squared the springs front to back and side to side. With a Sharpie, traced around the outside of the spring where it contacts the plate.
Removed the spring and plate. To make it simple to locate center, I made a template. Center punched center and used a hole saw to cut the hole for the tubing.
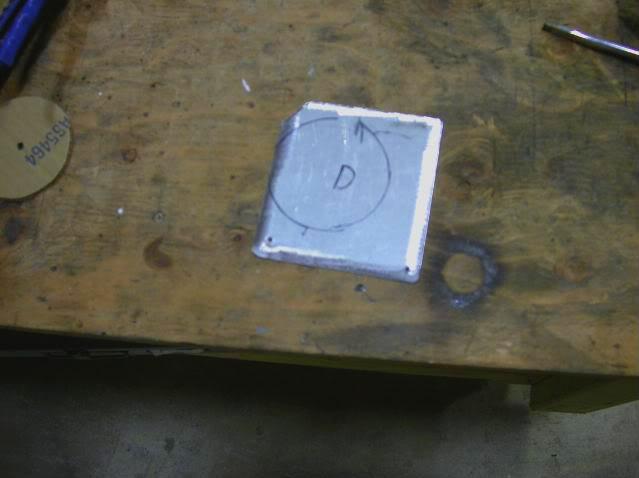
Inserted the tubing and installed the plates back in the car. The tubing is pressed in, don't want to weld in until the rest of the parts arrive.
Passenger
Driver
1/8/2012
Fabbed up some spring perches for the rearend. Made bolt on style because holes were aleady in place on the housing. Painted them with POR15.
1/11/2012
Still waiting on jack screws, should be here friday. Getting the top plates fitted and ready for welding once the jack screws arrive.
Finished cutting and fitting the roll bar mounting pads for welding. Once the rest of the parts arrive, it will take no time to finish this project.
1/16/2012
Jack bolts arrived and done except for paint.
Welded a piece of angle, .125"x1.5"x1.5" from frame rail to jack bolt housing to give added support. I think my battery is going bad in the camera, not staying focused.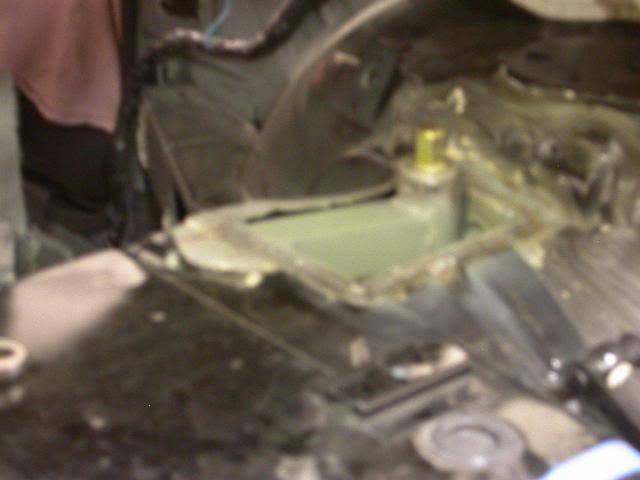
Welded the top plate on and plug welded to the the angle.
Drivers side
Passenger side
2/6/2012
I put the car back together for now.
Have to save for: New axles, rear brakes, rear tires, narrowing the rearend housing and new carpet for the back half of the car.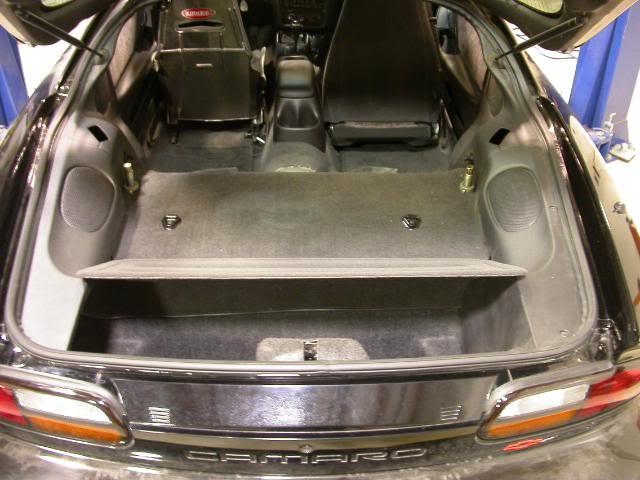
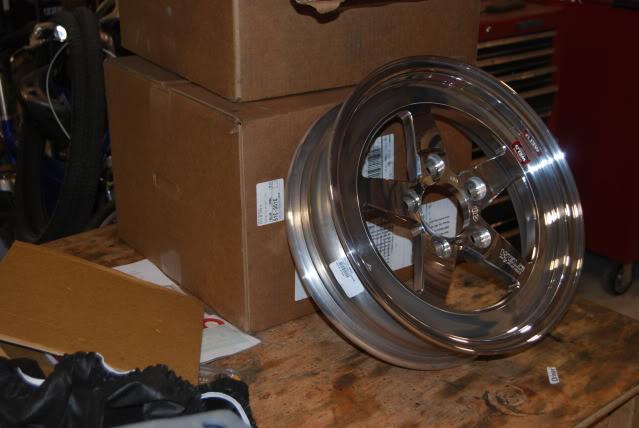
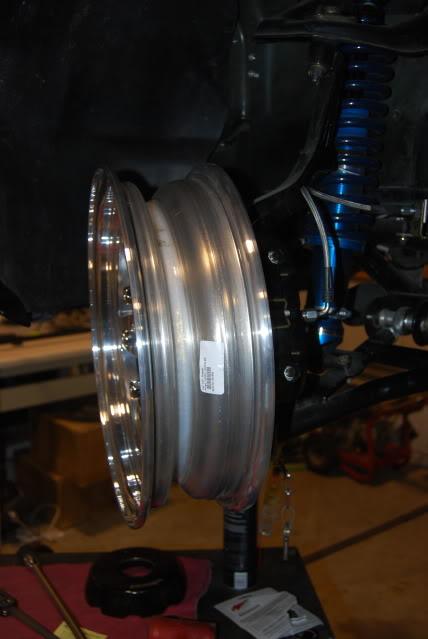
New back rims came in, Weld RTS, 15x9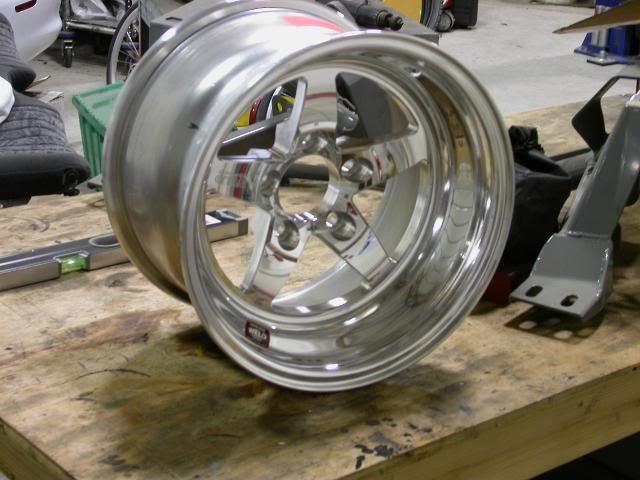
2/23/2012
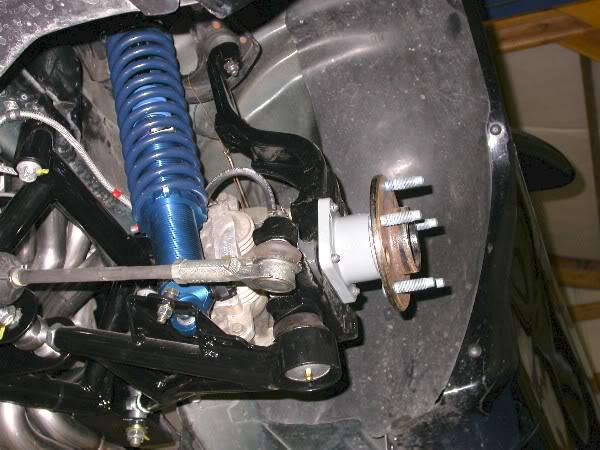
The RTS low pad 15x4" with 2.5" bs came today. I test fit, using the stock LS1 front brake caliper and rotor. RTS low pad will not work because the caliper extends past the rotor hat face.
I am confident the low pad 2.5" bs RTS rim will fit with the Wilwood brake kit I ordered. Calculated, using the numbers from Wilwood, the caliper will be .180" behind the rotor hat face, thus not causing any fitment issues.
The brake kit I ordered should be shipped on 2/28/2012.
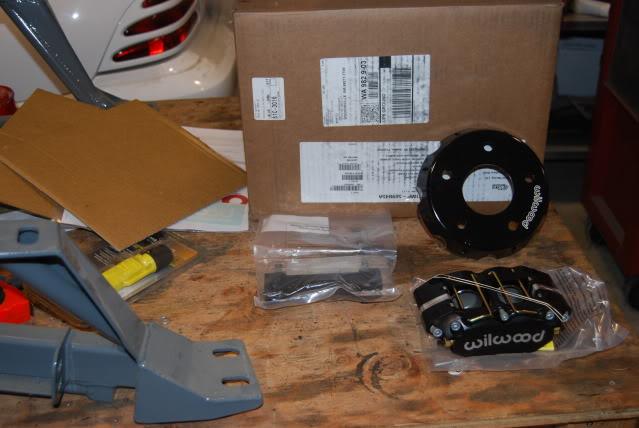
3/23/2012
Parts have arrived, 2 months waiting on the front brake kit to be built.
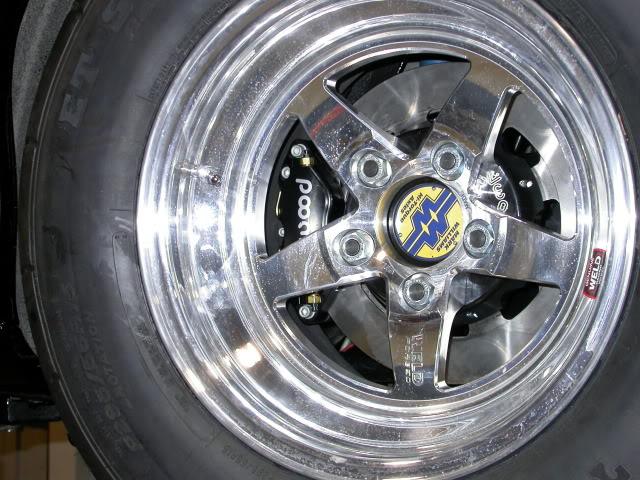
With this brake kit, you should be able to use a 15" wheel with 2.5" bs with no issues. 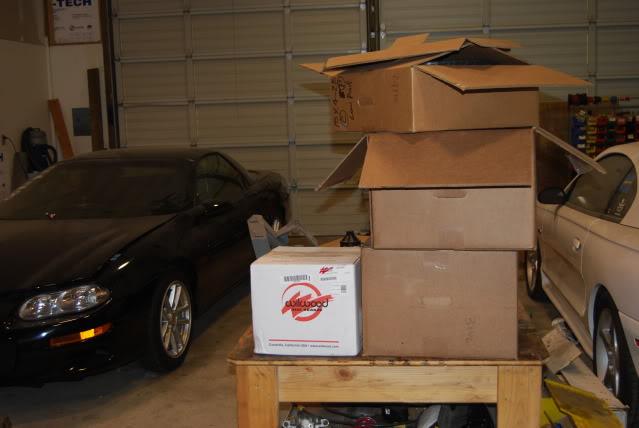
Next week the rearend will be coming out to get norrowed 3" per side.
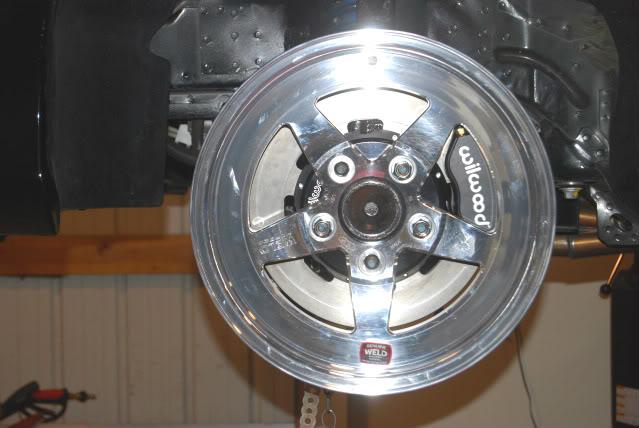
3/25/2012
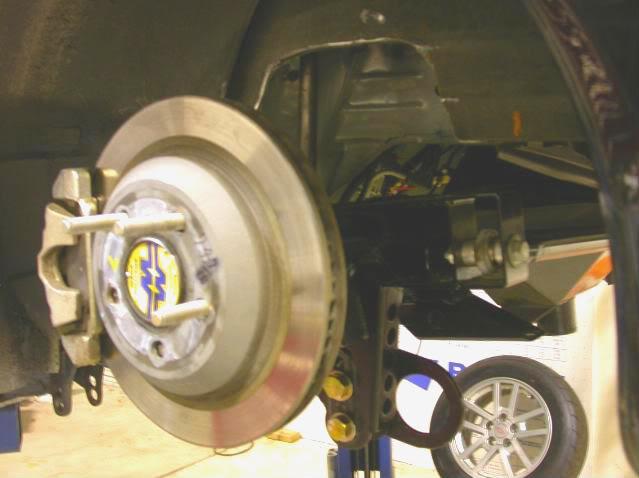
Front brakes are on. This is with a low pad 15"x4" 2.5" bs. No issues.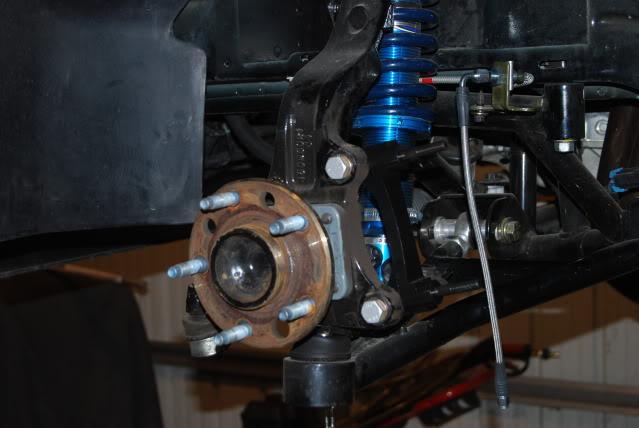
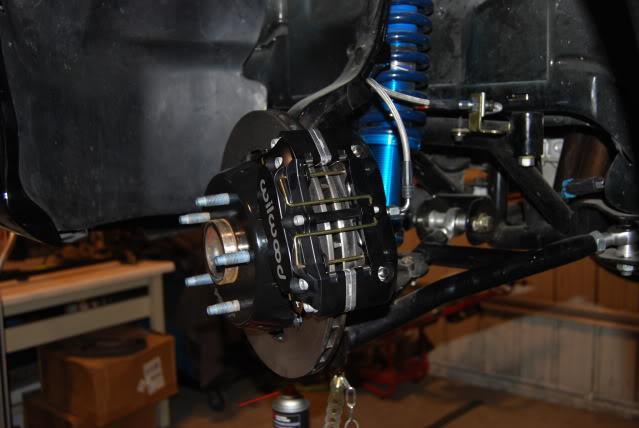
Next, will be to send the rearend out to get narrowed 3" per side.
3/27/2012
The rearend is out and will be sent off later this week to be narrowed 3" per side. 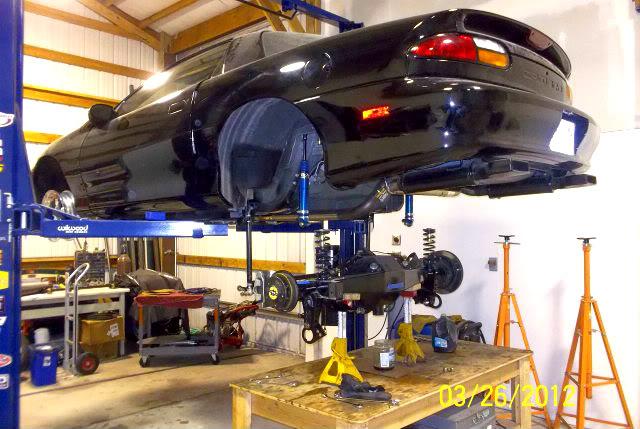
In the near future I will be posting in the for sale section.
*(2) Mark Williams 35 spline Prostreet axles for stock width 9" with LS1 backing plates, calipers and rotors.
*(4) 17x9 2002 SS rims with center caps.
*(2) 17x5.5 narrowed 2002 SS rims with center caps.
*(2) M/H 275/50/17 rear drag radials.
*(2) M/H 185/55/17 fronts.
3/28/2012
Removed the ebrake and brake line brackets before taking to the fabricator for narrowing. Will be be dropping the rearend off in the morning.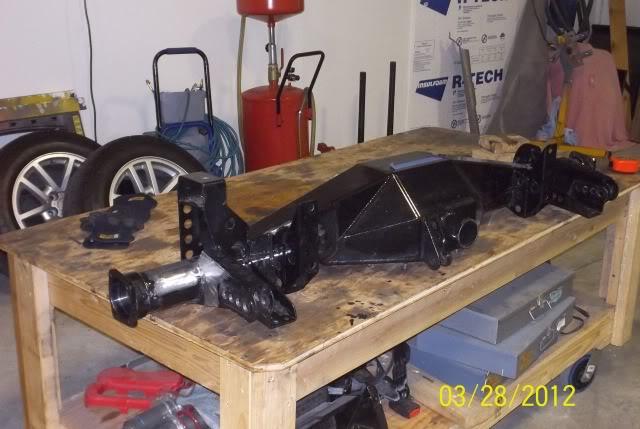
Front tires arrived today. Still waiting on one more front rim to arrive. May be here friday.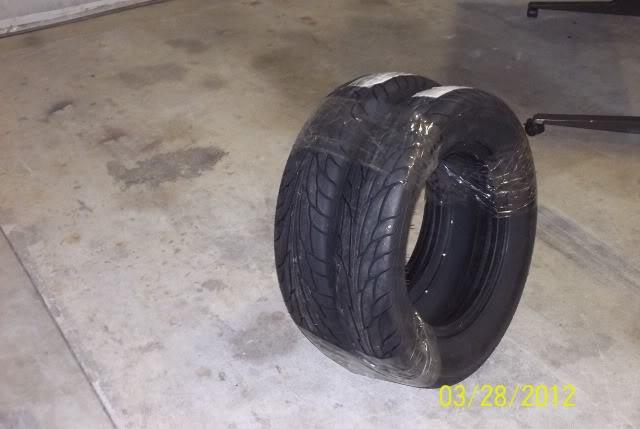
Ordered another Wilwood front brake system, same as the one I just installed in the above post. Will be using it for my rear brakes.
4/8/2012
Rearend is done, narrowed 3" per side and will pickup tomorow.
Parts that have been ordered, the waiting game.
*Mark Williams axles.
*Wilwood radial mount rear brakes .
*295/55/15 Mickey Thompson DR .
Front tires mounted: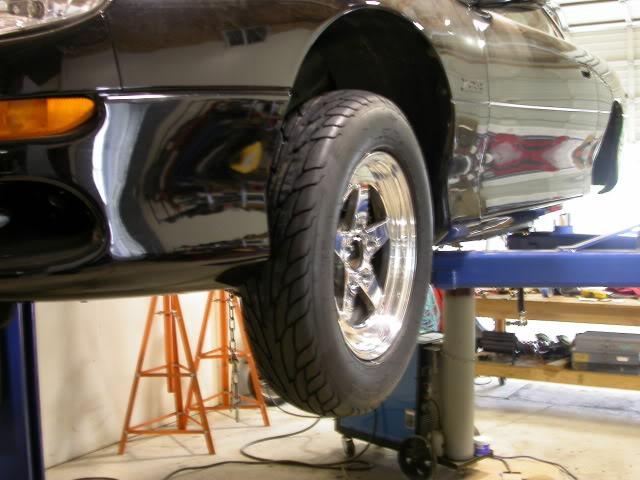
Finishing touches on the bump stop removal:
Before
After
4/9/2012
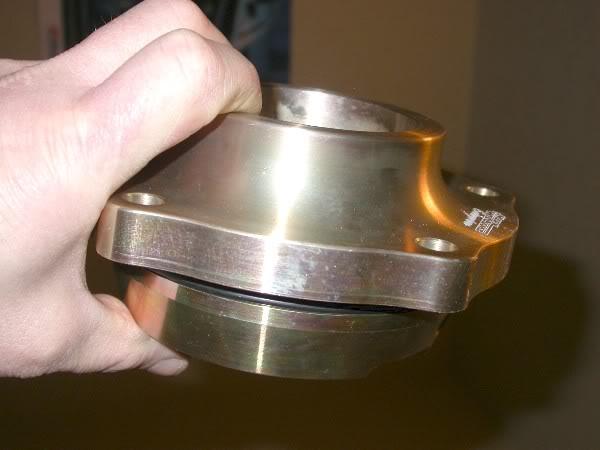
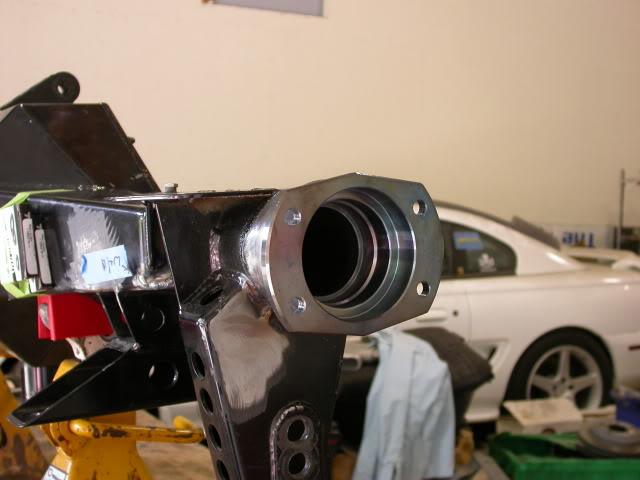
Picked up the rearend today. Had the new style, large Ford ends installed and narrowed 3" per side.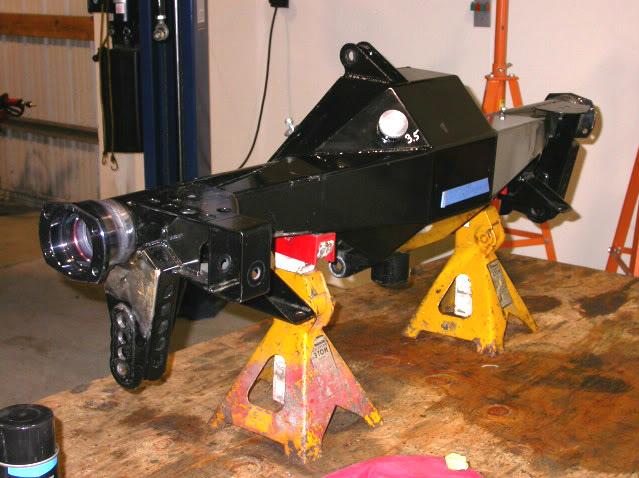
4/12/2012
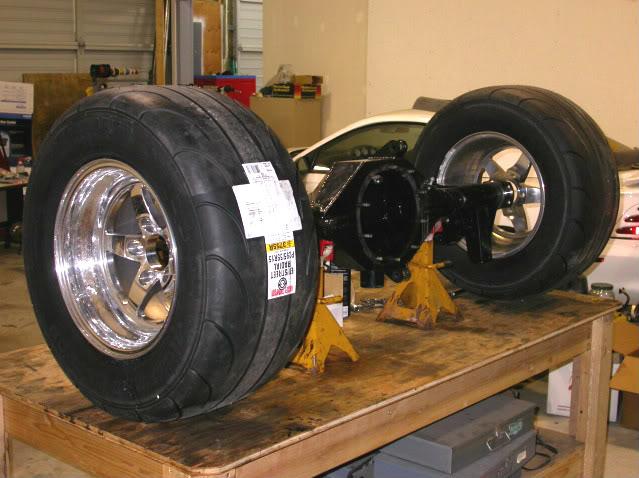
Rear tires tires came today. I should hook up now, they are huge, 295/55/15.
Brakes should be here tomorrow. Waiting on axles.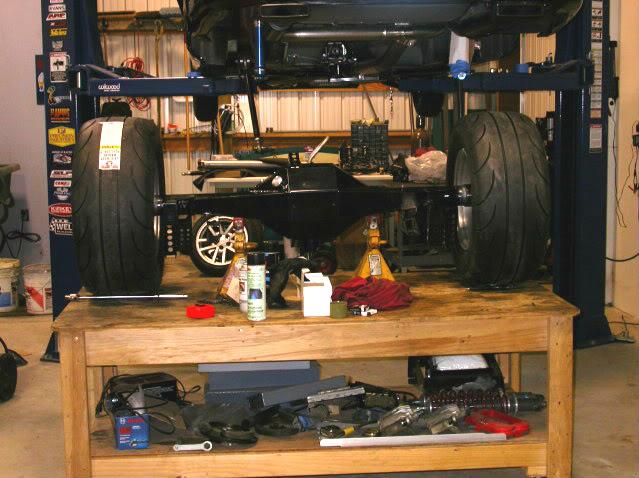
4/16/2012
Rear brakes came today. 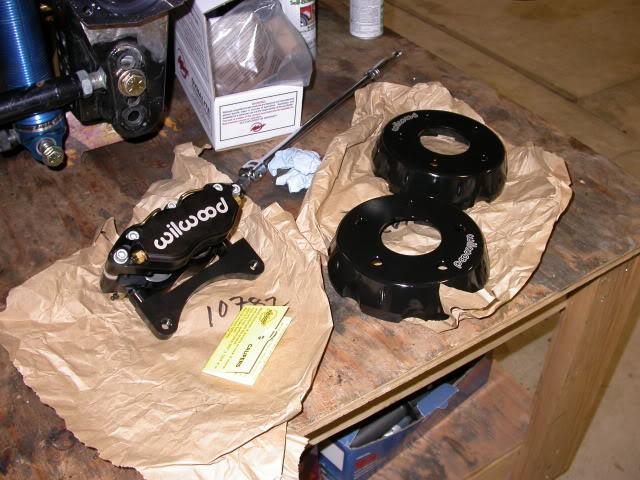
Need axles to fabricate the caliper radial mount tabs on the housing.
Here is an idea what the ole girl will look like.
4/27/2012
Axles and axle bearing retainers have arrived. Had .625" studs installed. Getting brake brackets lazer cut to be welded on the housing for the radial brake mount.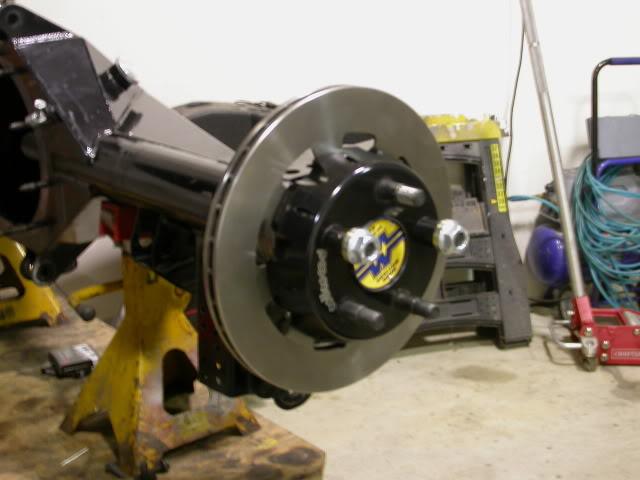
Working on a 10 gallon fuel cell that stock Evap can be used on. It will be a direct bolt in tank and you use your existing Evap components.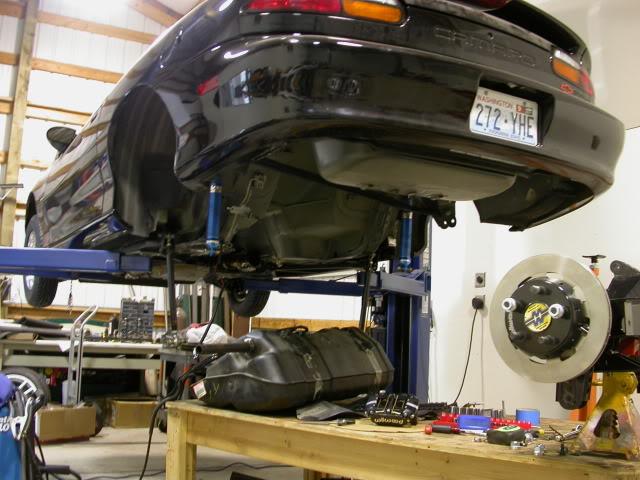
5/7/2012
Picked up lazer cut rear brake caliper brackets today. By the end of the week I should have rearend back in the car.
Working on the 10 gallon fuel tank also. Finalizing the drawings for fabrication.
6/30/2012
I can not believe the car has been down for 9 months.
Rear brake install is done. Any 15" wheel should fit with no issues.
Brake line routing: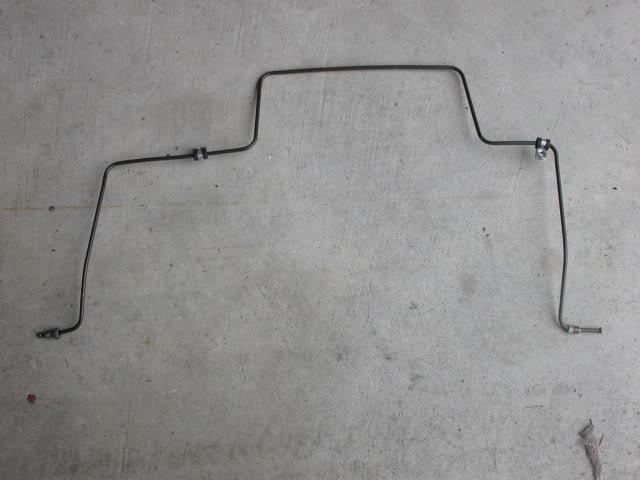
Above rearend.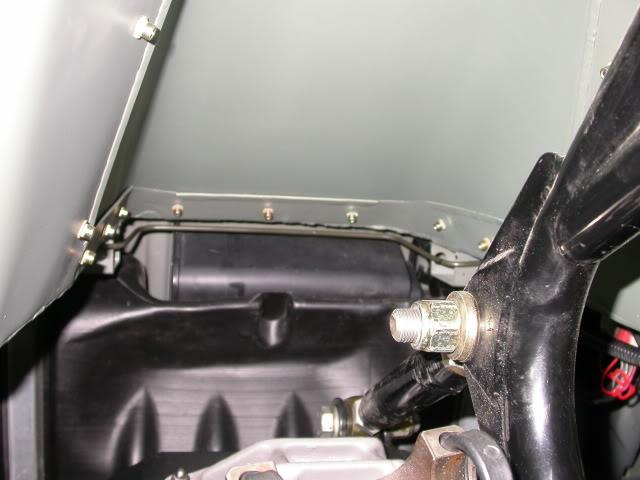
Took the car out for a shake down, new brakes and supension changes. Wow, what a difference.
Drawings are done for my new fuel tank, which works with evap, goes in the stock location, holds 10 gallons of fuel instead of 16 gallons, uses stock fuel pump bucket and fills with stock filler neck.
7/5/2012
Almost out of things to do.
Right rear sat 1" low, so I made 1' spacer to go under the spring perch on the rearend. Suspension ajust evenly now.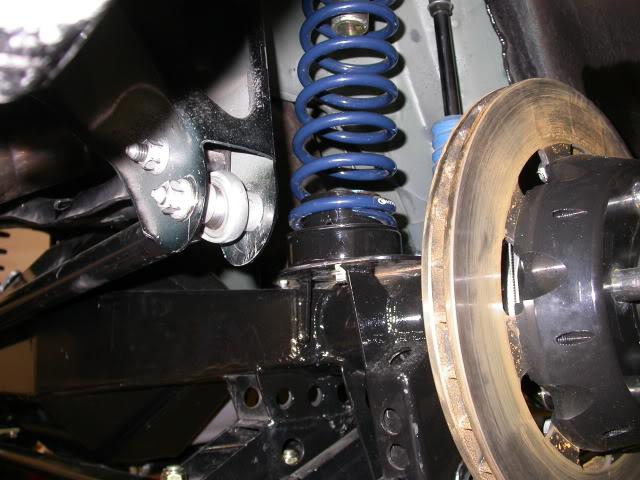
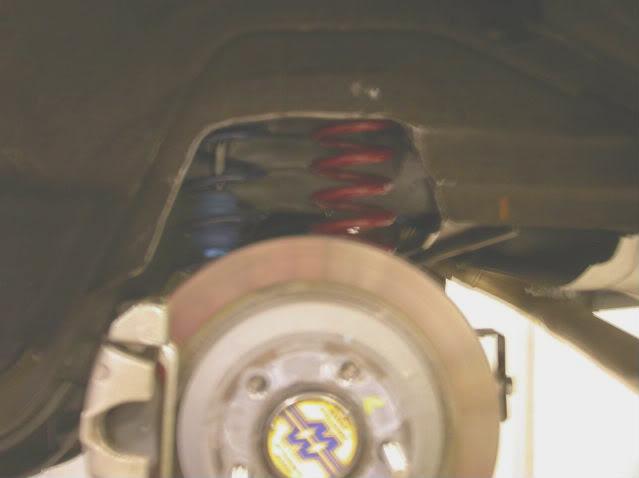
Finested the front of the rear inner fender wells for more clearance with the bigger tire. Had 275 on and went to 295. 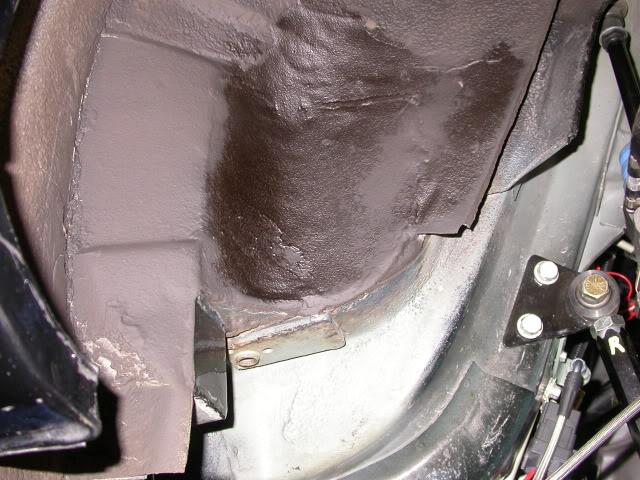
Next thing to do, modify the panhard bar mount on the rearend so the panhard bar is level at ride height.
Took the car out for a 50 mile shake down drive, no issues.
Ordered some M/T S/R 28X12.00R15LT tires for driving around town or long trips. Will order the same rear rims to mount them on.
7/6/2012
Had the drag radials dismounted and mounted the M/T S/R 28x12x15 tires that came today. 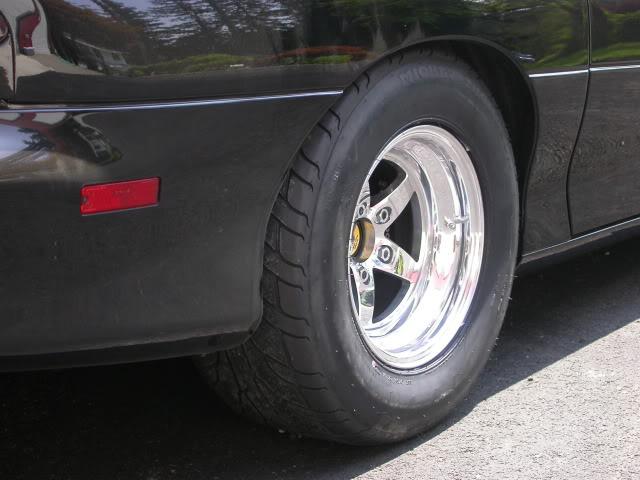
Ordered another set of rims and they are 3 weeks out.
7/10/2012
Panhard bar mount has been modified so it sets level at ride height. Used a piece of .125"x2"x2" tubing to make the new bracket out of.
Here it what the stock bracket looked like.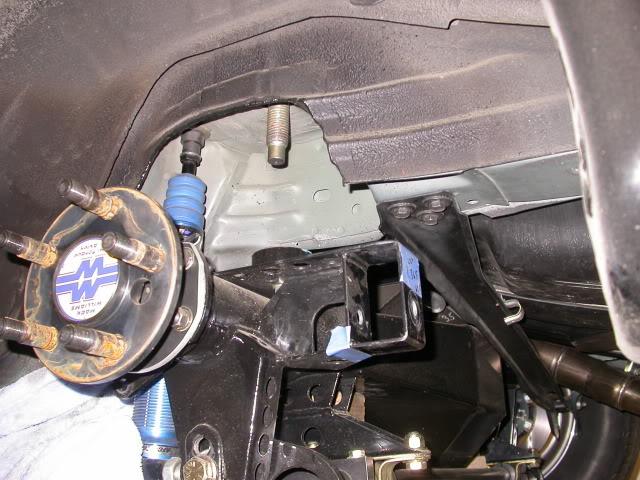
Cut part of the bracket away, took a torch, heated and dollied flat so I could use the material as an end cap.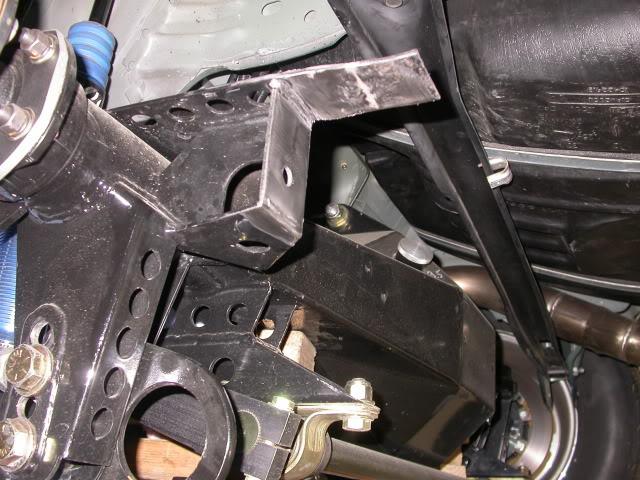
Layed out the needed diamensions, used a hole saw to cut the large radiuses and a 4" cut off wheel to remove metal as needed.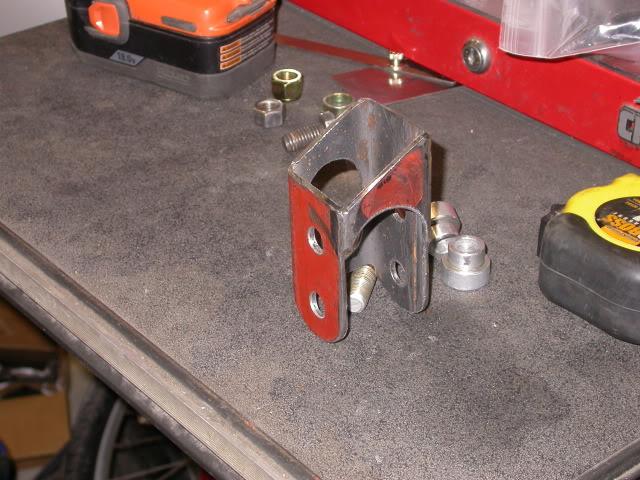
Used the original bolt hole to hold the new bracket in place until tacked.
All welded up and ready for paint.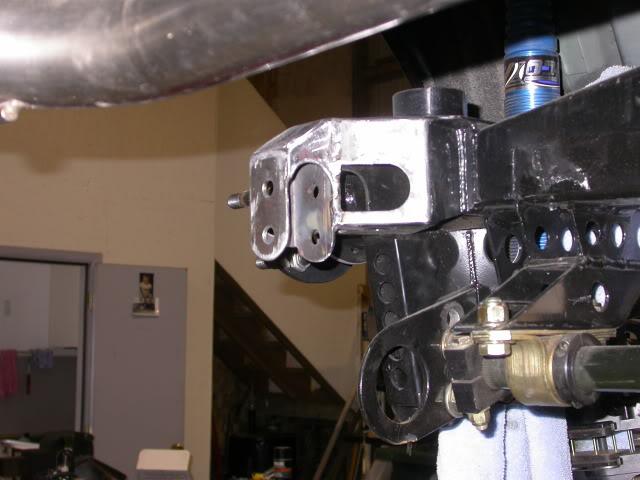
Shorted both bushings .0625" to fit in the ID of the tubing.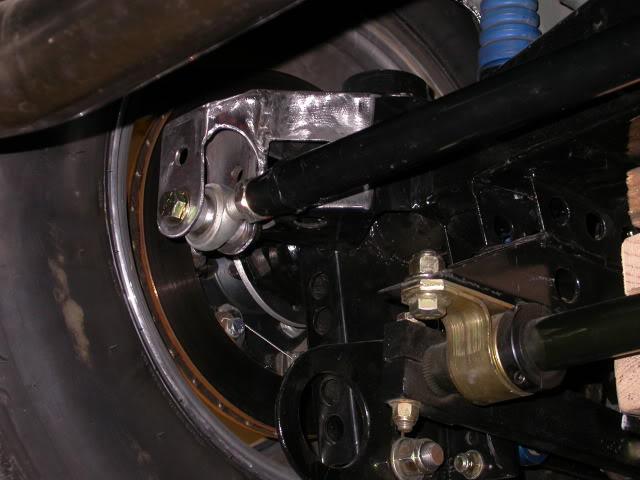

Next thing, shorten the swaybar end links so I have more adjustment to get the arms level
7/11/2012
I am out of things to do. In 2 weeks (waiting on new rims to show up for drag radials), will be at the track fine tuning the suspension to see what the ole girl will do.
Today, machined up a spacer for the panhard mount and shortened up the swaybar end links, so it can be adjusted level at ride height.
The spacer may be overkill, but it is cheap insurance to help prevent flexing.
7/20/2012
While out of town, had Tim at Muffler King in Kirkland, build my new catback. One for the track and the other for general use.
Aug 4th the car goes to Tommy Wong to have it dynoed.
Magnaflow muffler setup: 8.5 lbs.
Resonator setup: 6.0 lbs.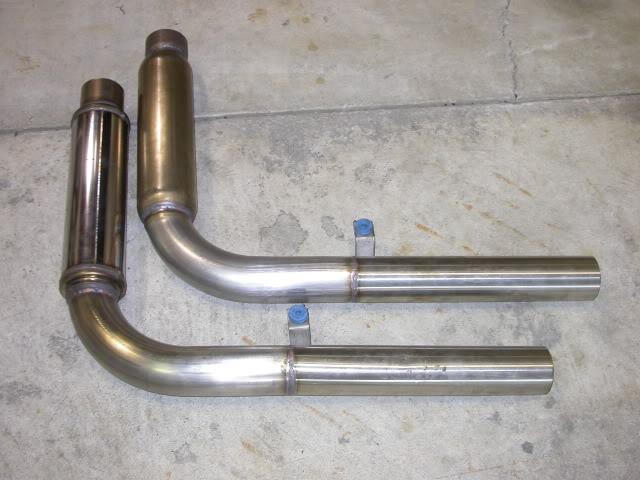
The catback that was on the car: 18lbs.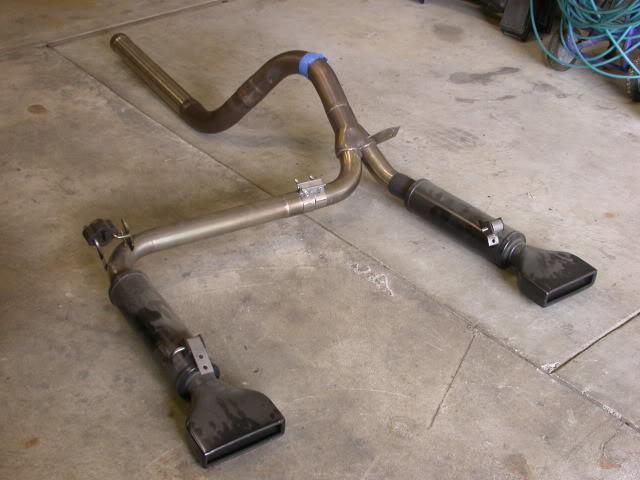

8/5/2012
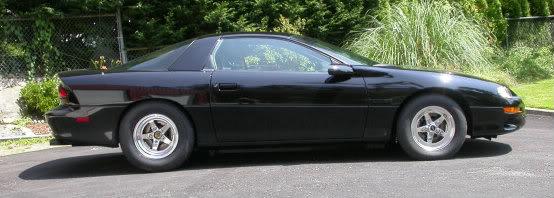
Car is ready for the strip.
New wheels came in to mount the drag radials on.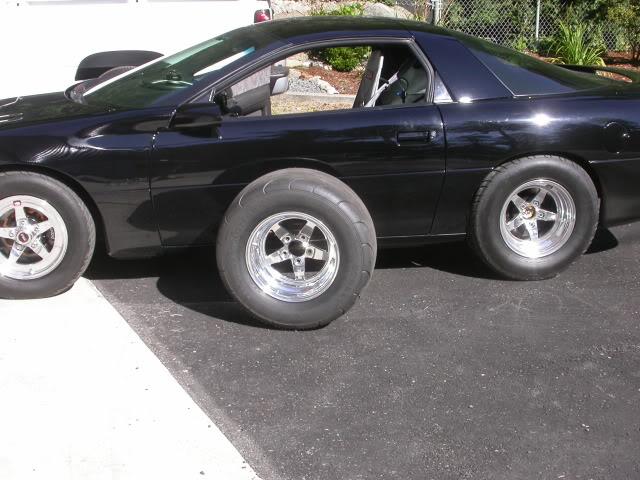
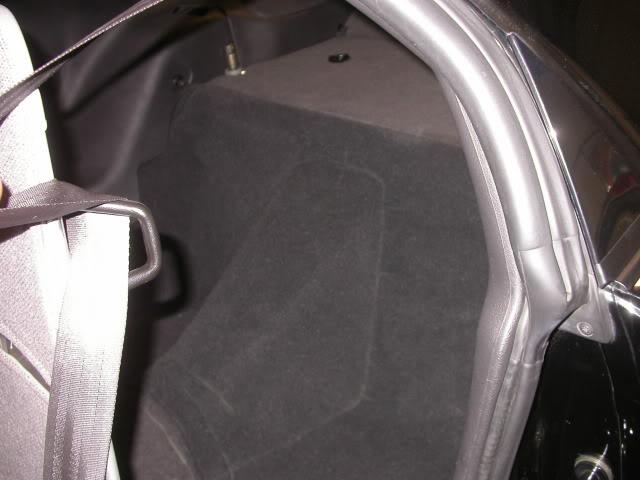
Back seat area carpeting is done.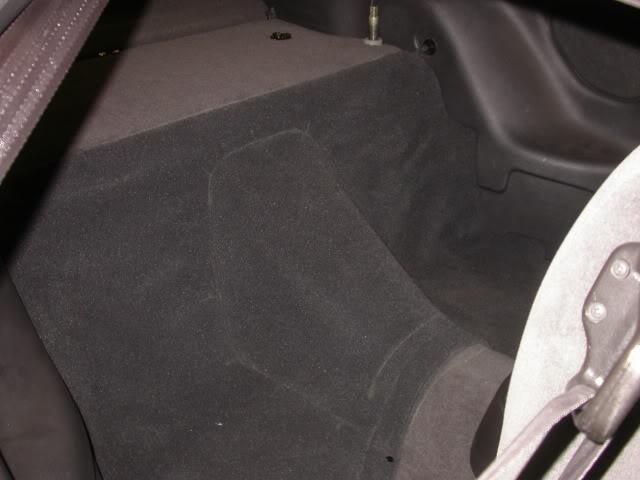
Suspension and shocks set at baseline. 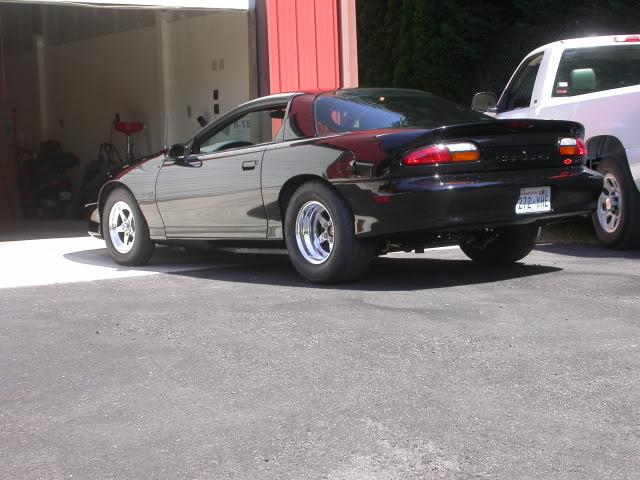
Car was driven round trip, 450 miles from Seattle down to Vancouver, WA. to Tommy Wongs shop. He tweaked the tune, car runs great. Going down, bumper to bumper traffic, 19mpg, coming back with no traffic, 24mpg. Temp stayed rock solid 180deg in stop and go traffic.
8/11/2012
Good night at the strip, car went faster and left well. Had top local driver run the car down the strip, Randy Johnson. http://www.championraceway.com/2011/...%20johnson.jpgRandy gave me great feed back and found out the car needs more rear gear. Only was able to get 2 runs in tonight. Will be going back tomorrow night to race with Randy at the wheel.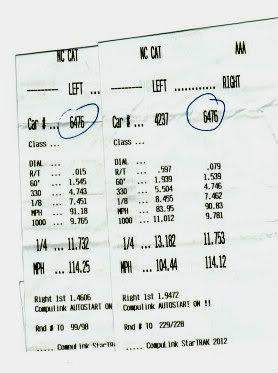
Thanks to Shawn (WS699) we have a video of our saturday night.
Went 3 rounds with Randy Johnson behind the wheel before getting eliminated in a double breakout. Car was consistant cutting 1.53X 60ft and 11.8X ET
We now have a good baseline, so next time out, I need to make a small change and see if it helps
8/19/2012
Making several changes so we can run the car again next weekend.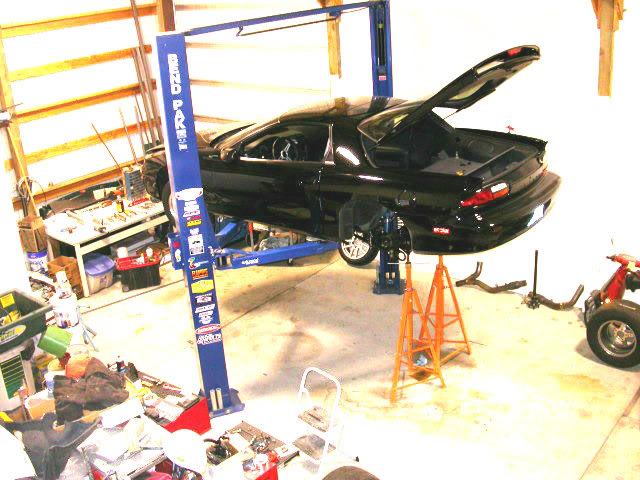
8/24/2012
Car is back together and ready to go racing tomorrow night. Should pick up ET, 60ft and mph with the spring and rear gear changes. Randy will be at wheel.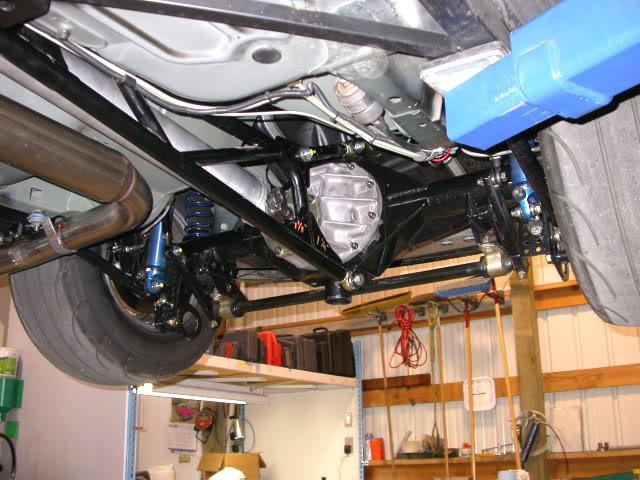
8/26/2012
Randy cut an .000 light first pass with the suspension changes and was given a momento for doing so.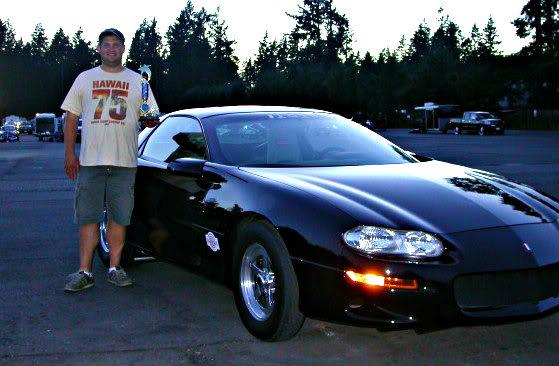
The car slowed down the with the gear change. Going to have to make some decisions over the winter on which direction to go with.
*Keep current 243 heads, LS6 intake manifold, change rear gear to what works well and be a consistant 11.7 car.
Or
*Replace intake and heads to pick up some hp/tq.
Or
*Replace entire engine with LS3 based 416.
The car is put away, till I make a decision on which direction to go.
Quote:
Why not drive your own car?
I need to see what the car is doing to learn setup and my plans (dream)for the future are bigger than what you see. It will be a team effort.
9/30/2012
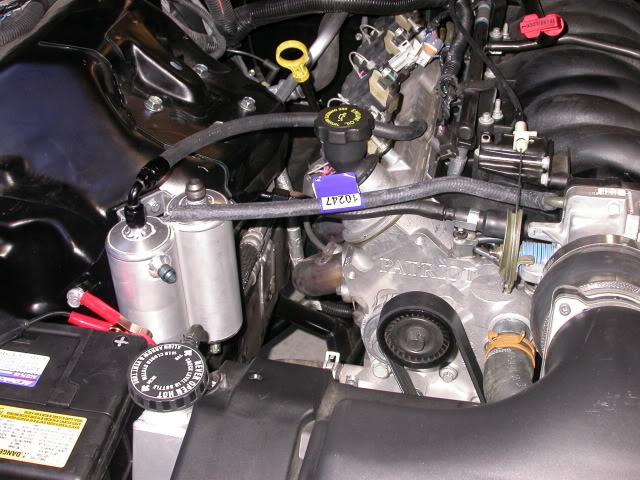
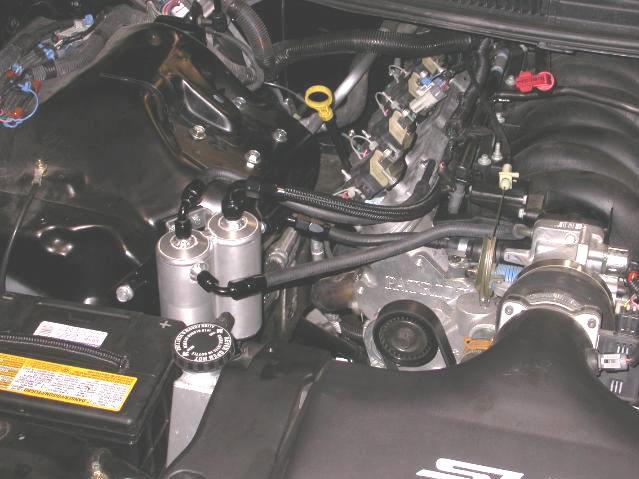
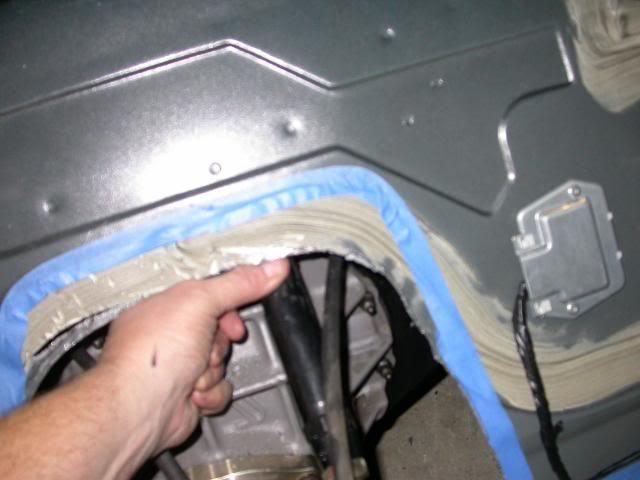
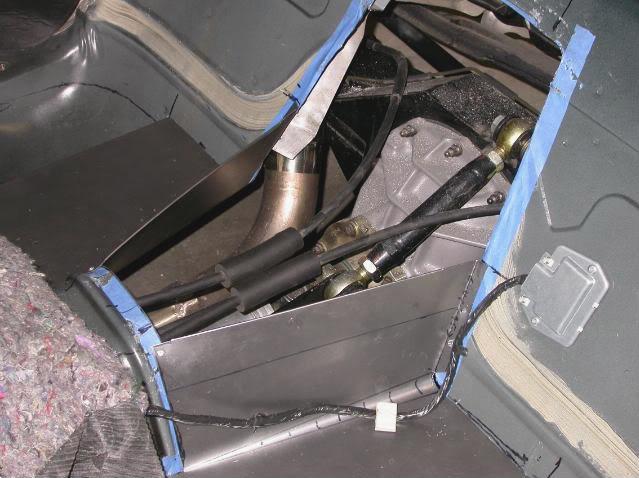
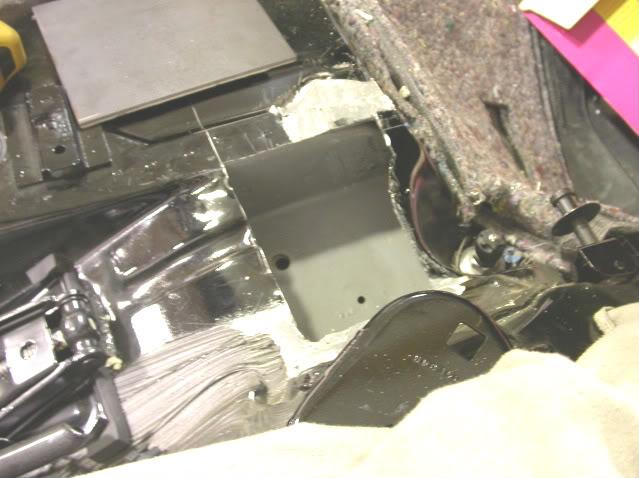
After seeing Johns video of oil pressure drop on launch, I decided to install the baffles.
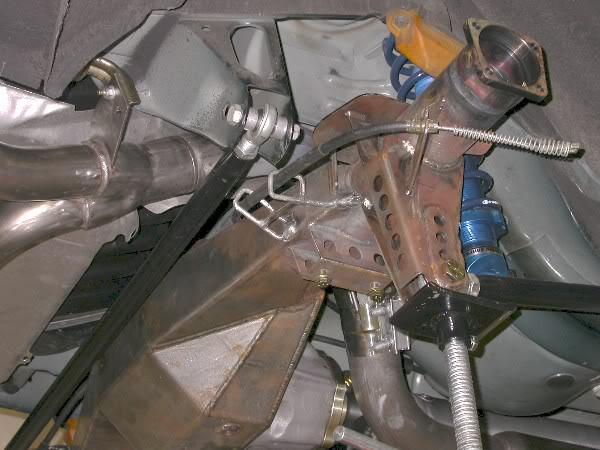
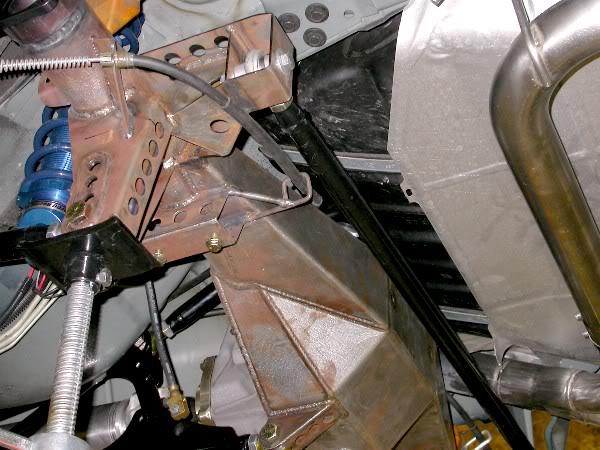
Spent the day fabbing brackets for a motor support, so I can lower the K member, drop the pan and install the Improved Racing Trap door baffles.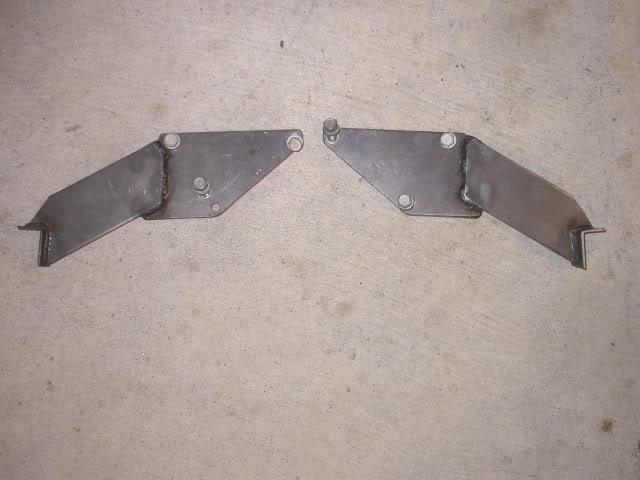
Bolted to the heads and have pads welded on them so they can set on the frame rails.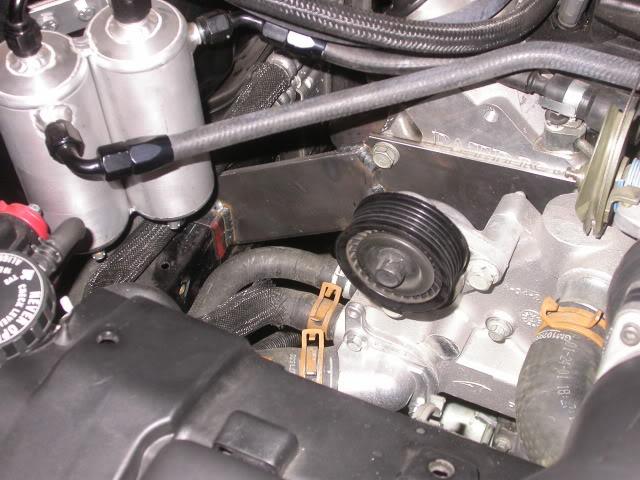
k member dropped and pan slipped out.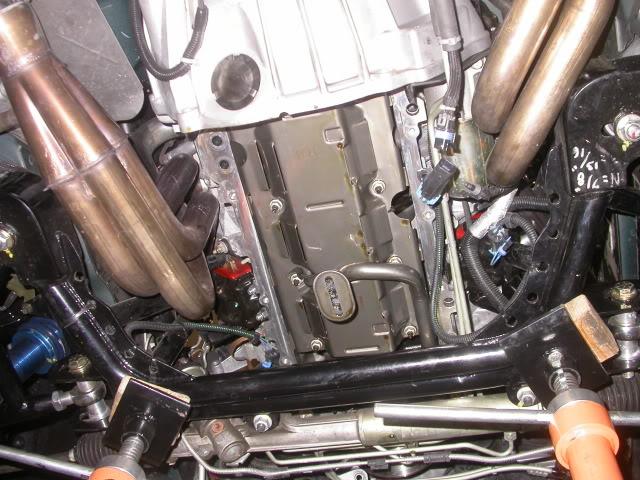

comparison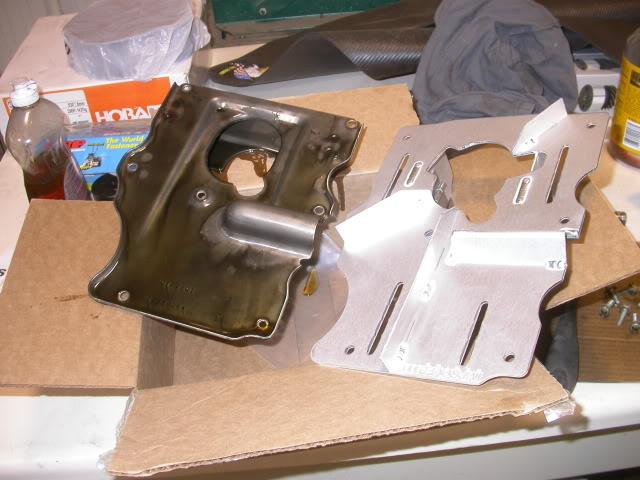
Installed in to pan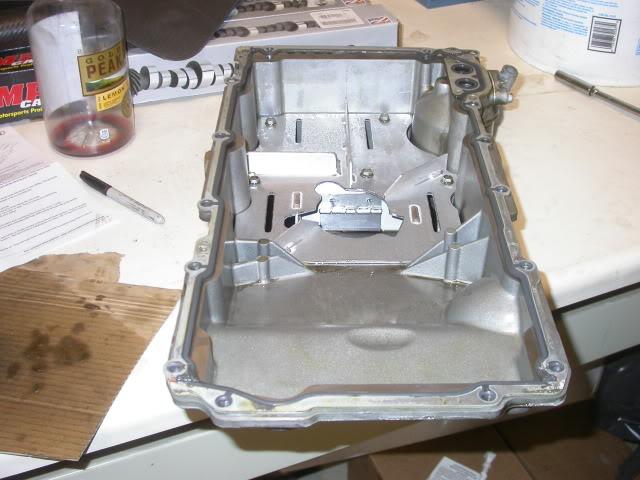
All buttoned up.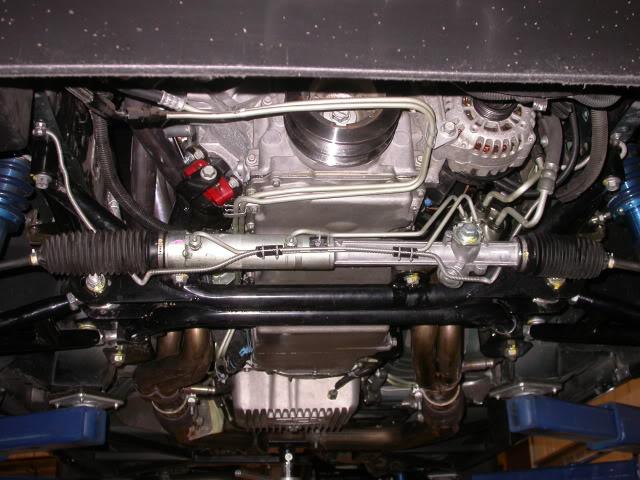
11/4/2012
More parts came in.
Wideband:
3rd member case. Saving for pinion support, spool and yoke. Having a second third member will be nice. If I have to do a gear change, in and out quickly. 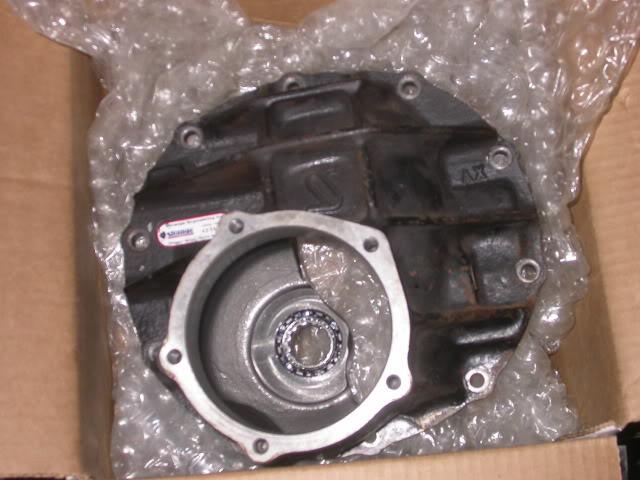
Gear set: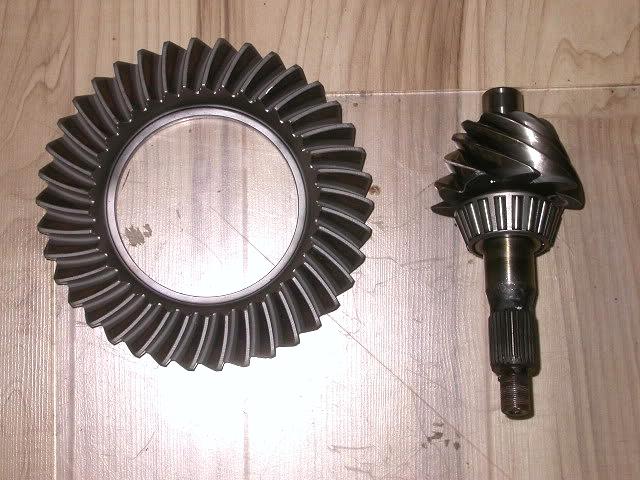
Wired in second OB2 port: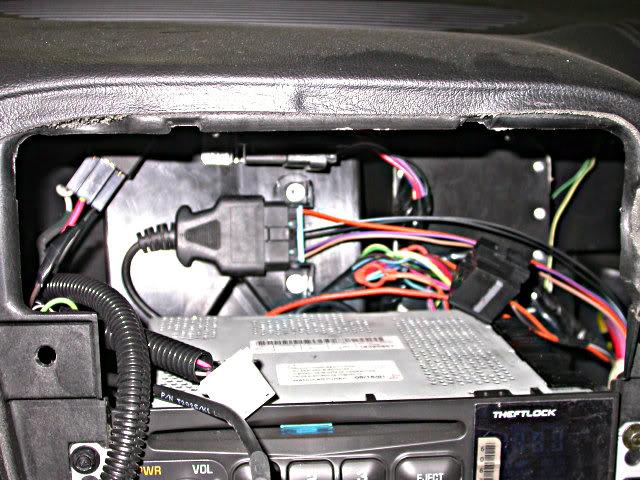
EFI Live: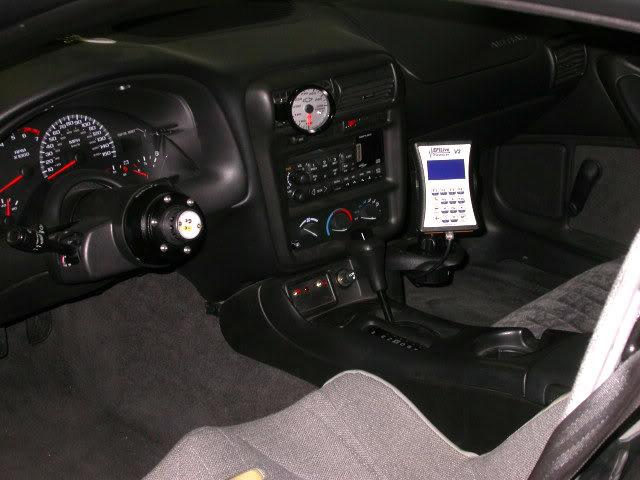
11/9/2012
Second OBD2 port is wired in. Bought a fog light switch, wired it in so I can turn EFI Live on and off for data logging with the fog light switch.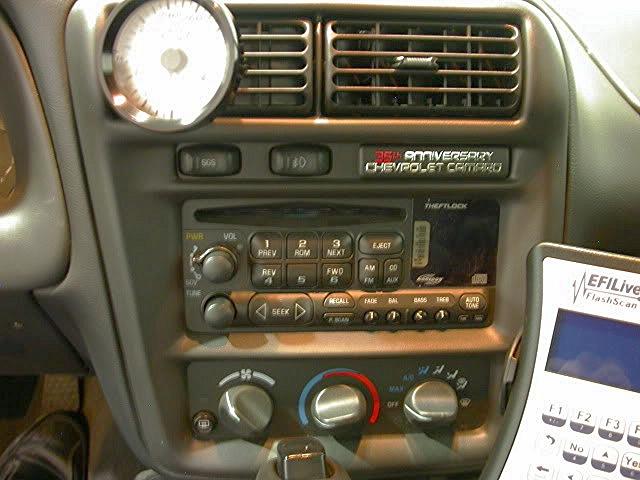
Second OBD2 port is wired in. Bought a fog light switch, wired it in so I can turn EFI Live on and off for data logging with the fog light switch.
7/9/2013
Just finished up a rear gear change. Went from 4.71 to 3.89, now to 4.30.
Also have the car set up to tune with EFI live
Made some tooling to hold the case and a spanner wrench.

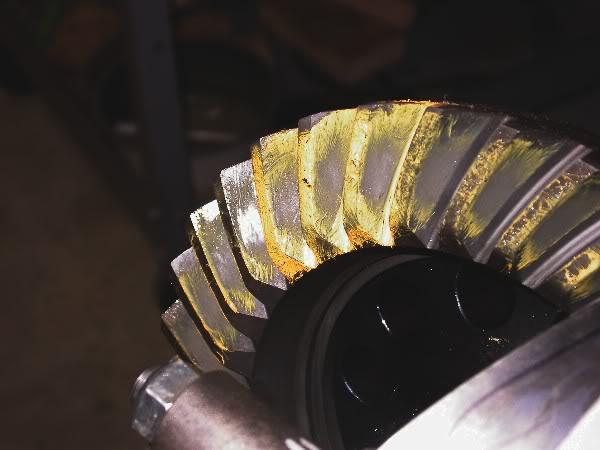
This is my first time setting up a 9" and it is quiet as church mouse. 

With this gear set, I am shooting for 11.50 because I don't have the roll bar installed.
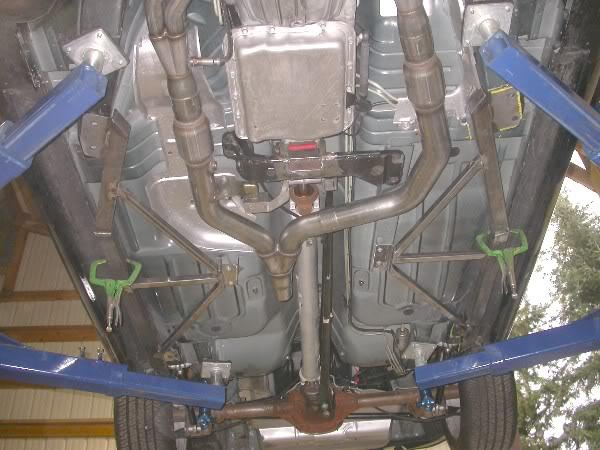
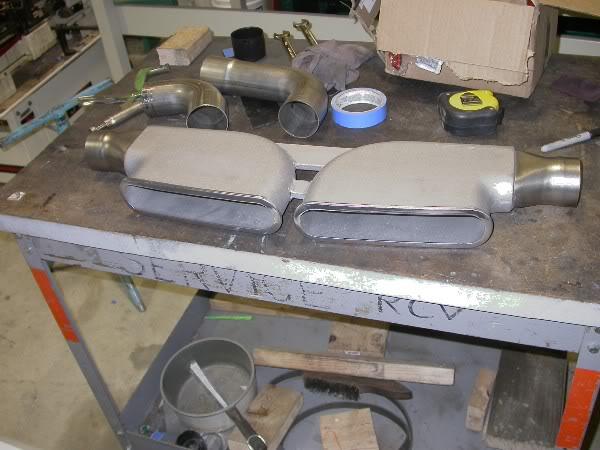
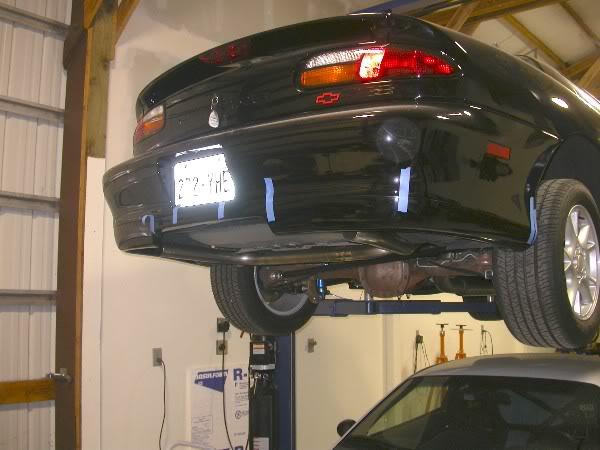
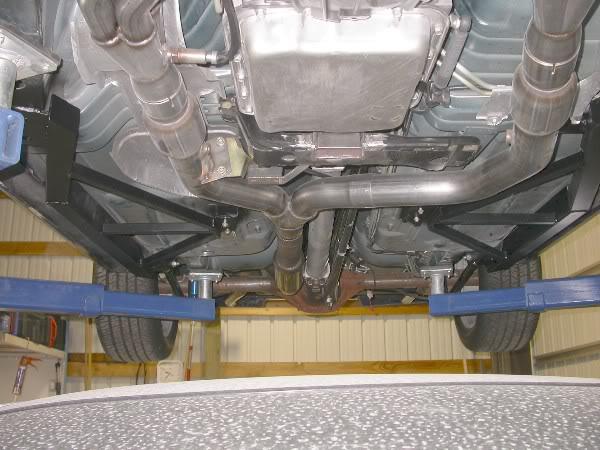
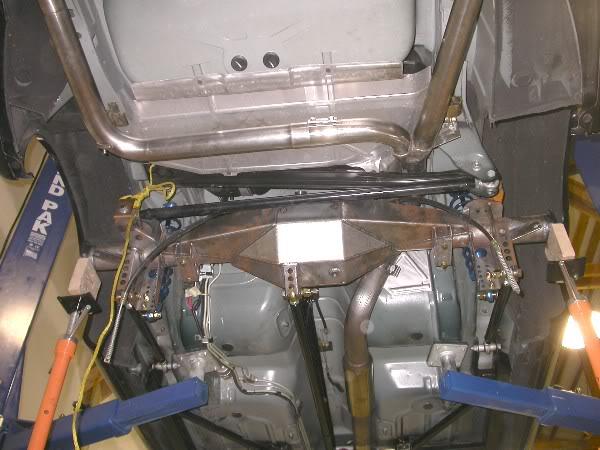
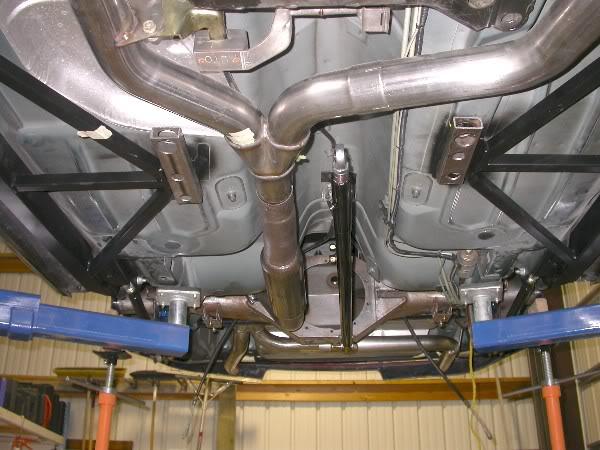
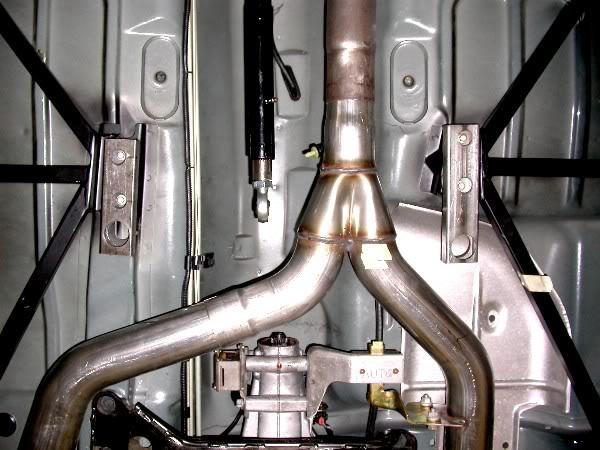
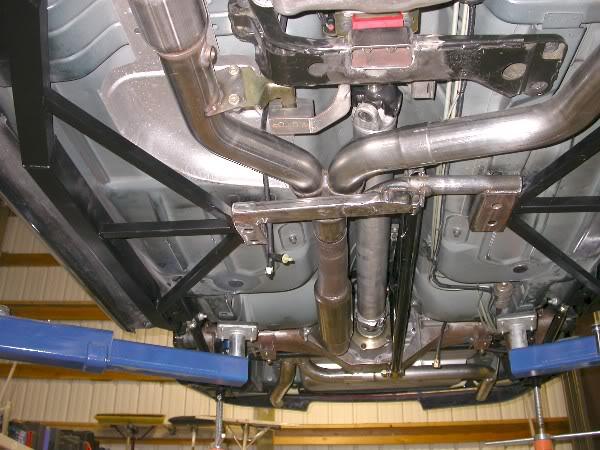
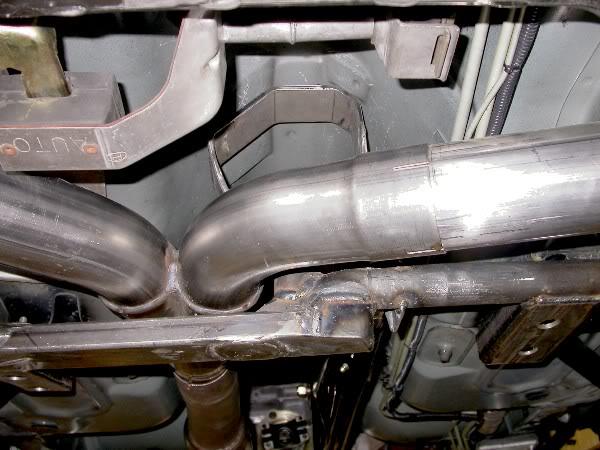
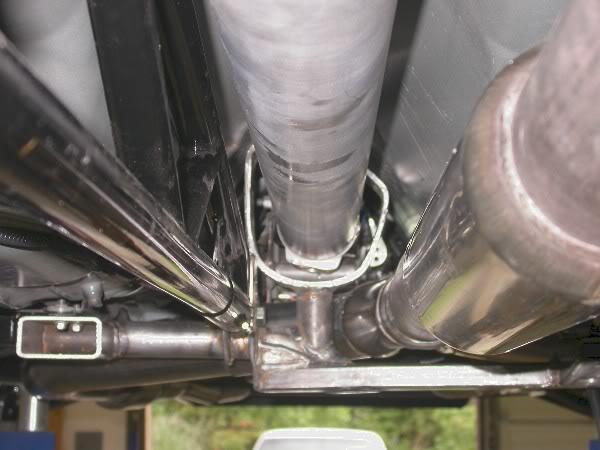
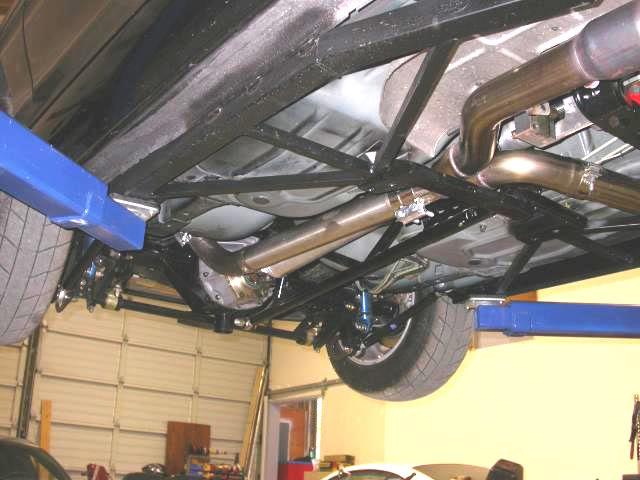
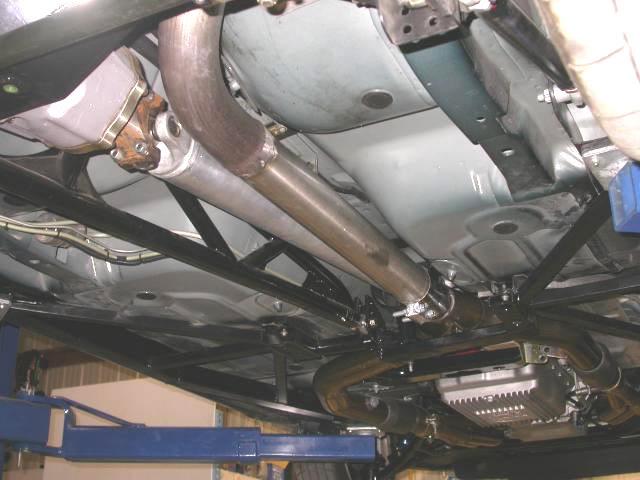
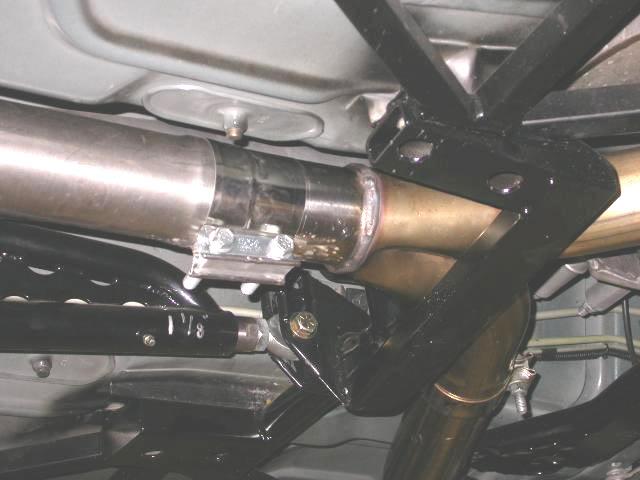
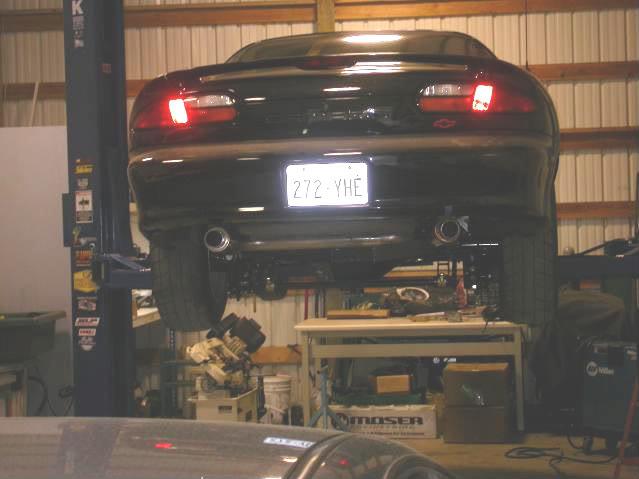
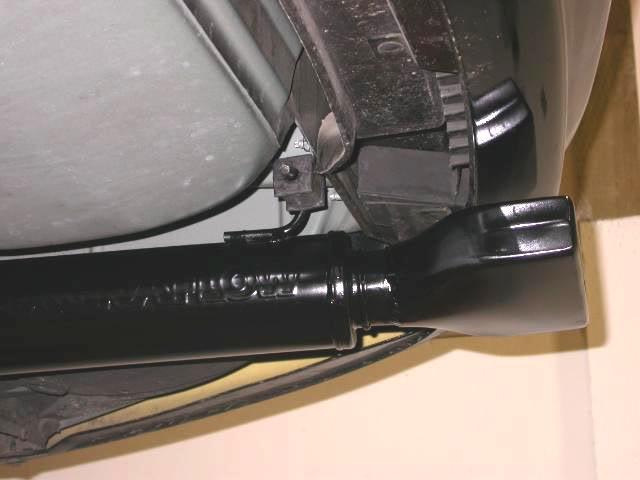
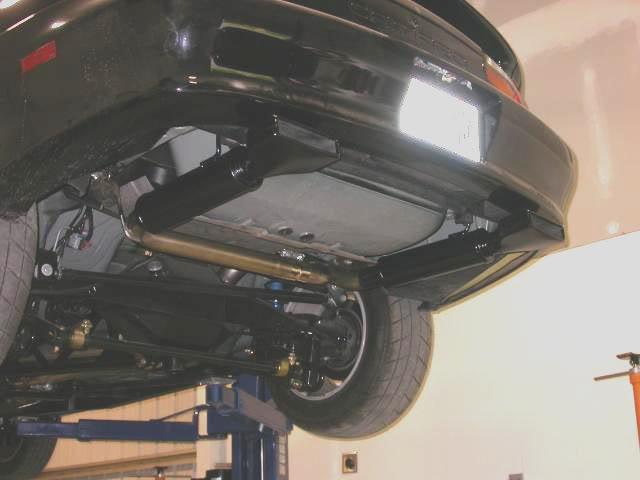
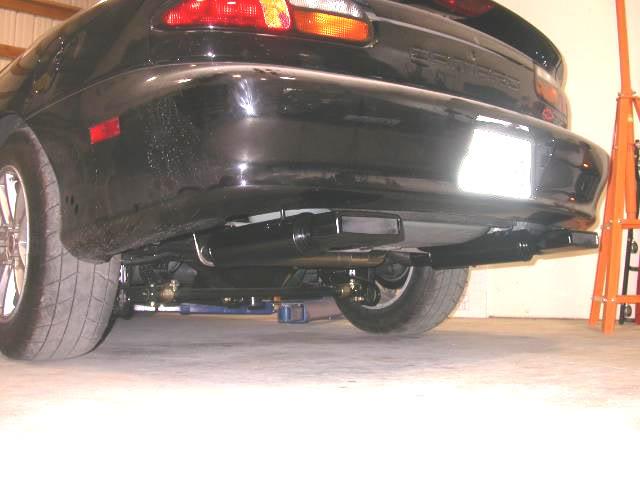
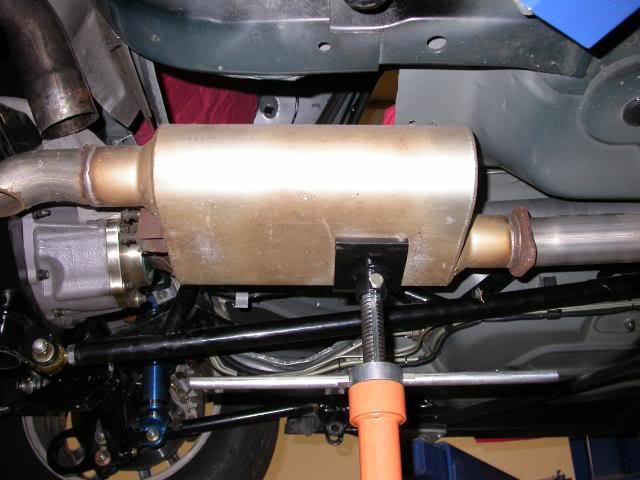
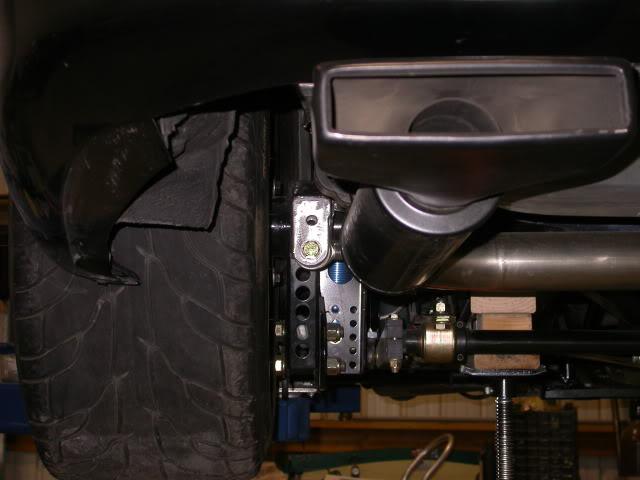
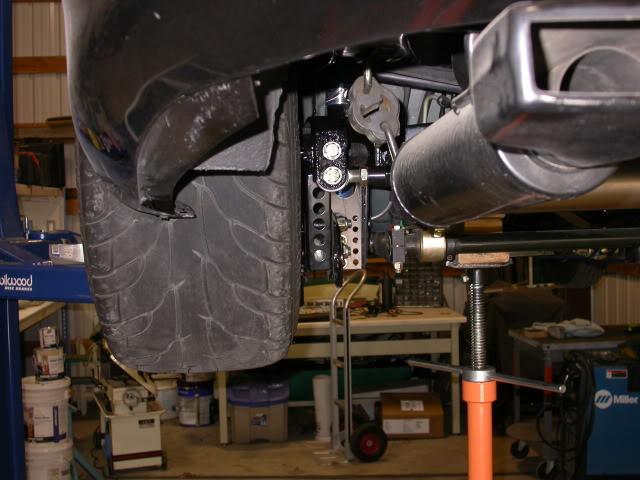
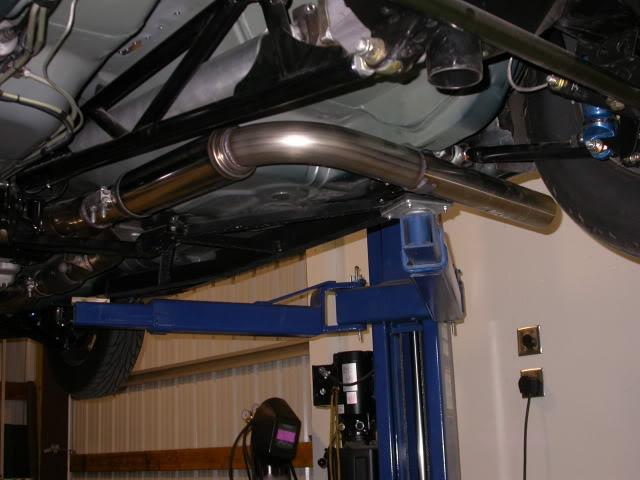
4-7-2015
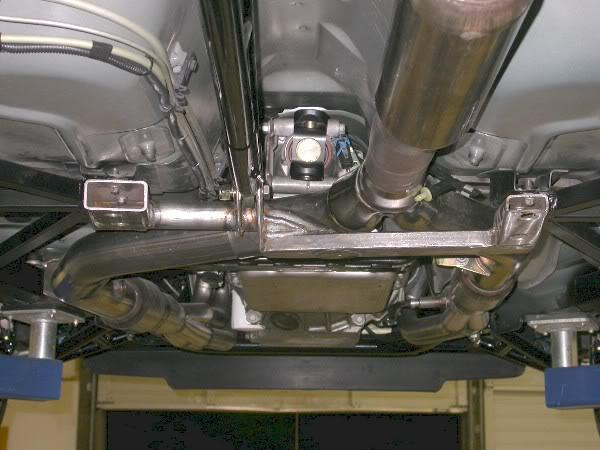
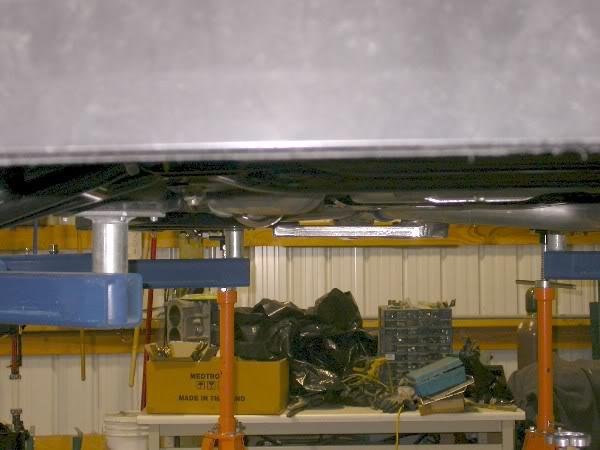
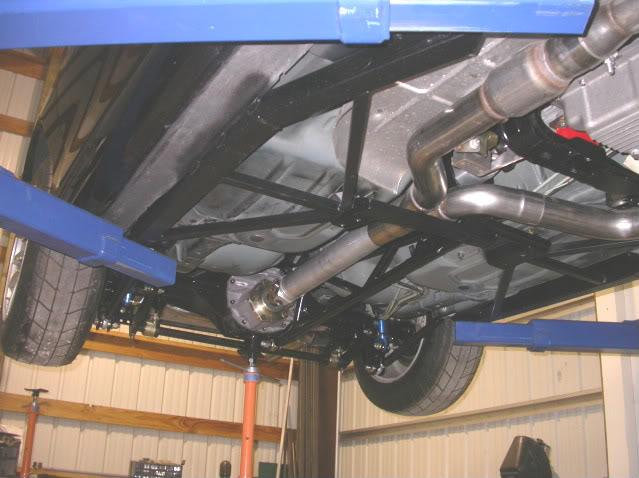
Been working on over the winter. just finished new exhaust.


7-29-2015
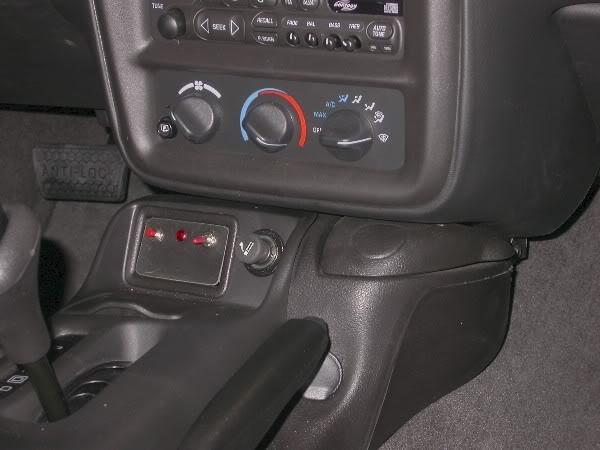
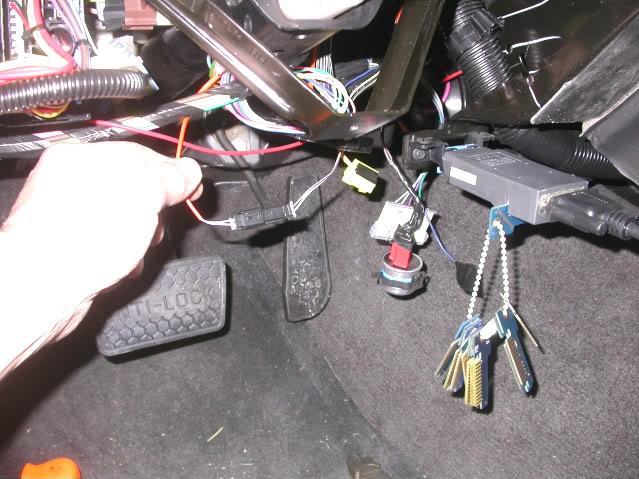
Redid the line lock button.
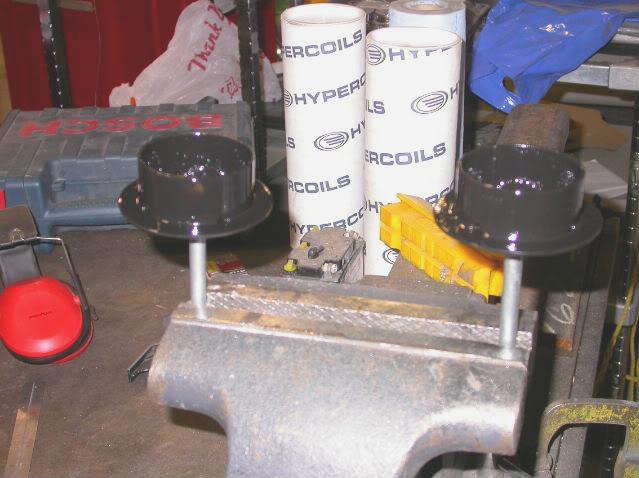
1-17-2016
Scaled the car .
200lbs setting in the drivers seat to represent the driver. Going to have to get some more lead if I want get the balance closer.
Note: The right front is light with the battery in the stock location.
3-22-2017
Some time since I have been able to stay focused on the car. Being with and taking care of family. As of last two years, we now have two proud Marines, my grandsons.

My main focus was chassis tuning. A friend loaned me his scales and I spent many hours with the car on them. Getting to understand weight distribution.
Shooting for 53/47 front to rear weight bias. Note: All adjustments were done with 200lbs sitting in the drivers seat to simulate drivers weight
Right front is light and moving the battery to the rear would have made it worse. Note: I did not take pictures of the corner weights prior to balancing and I wish I would have. Also, prior to balancing, spring length was different when adjusted to get set for ride height. Front springs, 3/8" difference, rear, 7/8" difference in length.
Once the car was balanced, I was able to change the front and rear spring rates. I did the spring rates for sprung weight. What I did, was remove the front coilover shock from the car, put the wheel back on and measured the free weight by lowering front suspension on the scales. (80lbs). For the rearend, I disconnected the rear swaybar and shocks and lowered the assembly onto the scales. (290lbs, divided by 2. 145lbs per side.) To get the numbers to come in, I ended up having to have a full tank of fuel and add 90lbs of lead to the right rear.
Now, the front springs are within an 1/8" of overall length and the rear are .040" of each other of overall length. I did not measure till the car was balanced. I let the scales tell me where to adjust.
Have not been to the track, but on the street the frontend rise is not as violet and the car has more of a forward motion. Have the shocks set at 50/50 so I could see what affect scaling has. Big difference. will tighten the car for the track.


3-23-2017
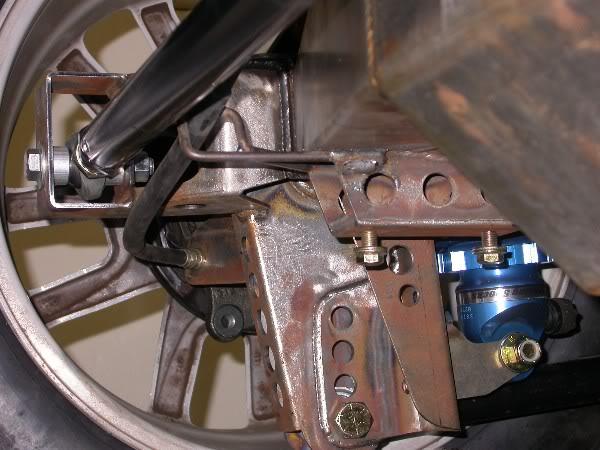
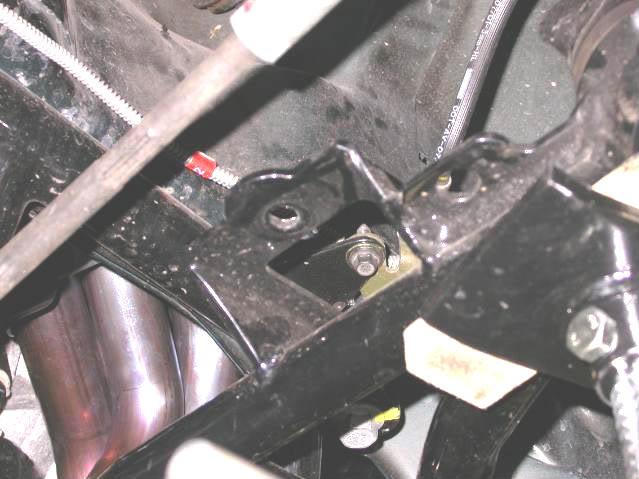
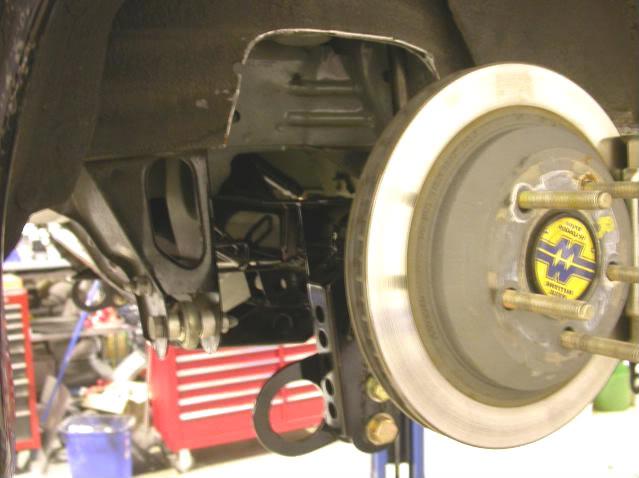
The next upgrade, was making the sure the front end alignment would stay. All the adjustments are done with the lower control. Being I do my own alignments, I wanted make sure the alignment would not moved over a period of time.
When building the car, I welded washers to make sure the alignment stayed in place.
Having some down time, I modified the K member in a way that the adjustment can be altered easily, removable inserts.
Upgraded the front wheel studs to longer ARP ones and Champion aluminum lugnuts.
Champion lugnuts with stock studs.
ARP studs.
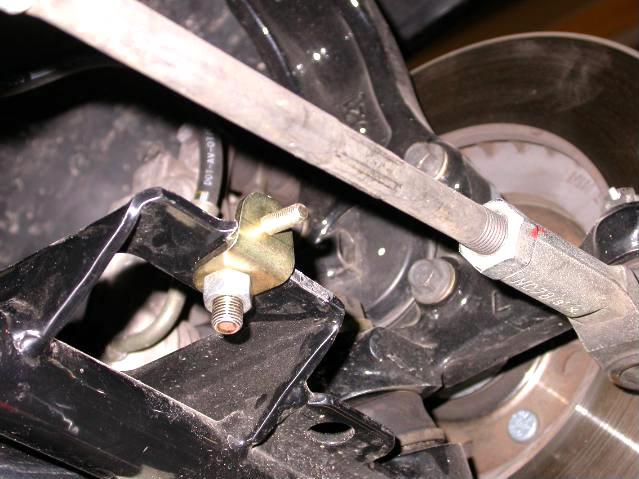
Made a Bumpsteer kit after getting the car suspension set at ride height. The bumpsteer is terrible with 3" of travel, over .125". After correction, less than .020". All the upgrades paid off, car drives and rides much better.
3-28-2017
Rain just won't stop, just keep getting things done and off the list. Changed trans fluid to HY-Guard, drilled,safety wired drain plug and made some straps to support the rearend as I raise the car on the lift. Only thing left, is a some paint work on the suspension work I did. Need warmer weather. Buy smaller 275/60/15 MT drag radials. Currently using 295/55/15 which is over killer at my HP level.


