You must be logged in to rate content!
13 minute(s) of a 891 minute read
8-10-2022
Alrighty, time for a MEGA UPDATE / 56K BEWARE!! (do kids these days even get that reference?)...
I went to drive it for the first time this season around mid-May, and had one successful drive in low boost, but it had a random cut-out of power that I assumed was just low fuel. I then filled it up and drove it the next day, and it started cutting out all over the place, boost or not, and it wasn't necessarily during cornering G's or any particular movement.. the only consistency it was that it happened during any throttle position other than just barely feathering above idle.
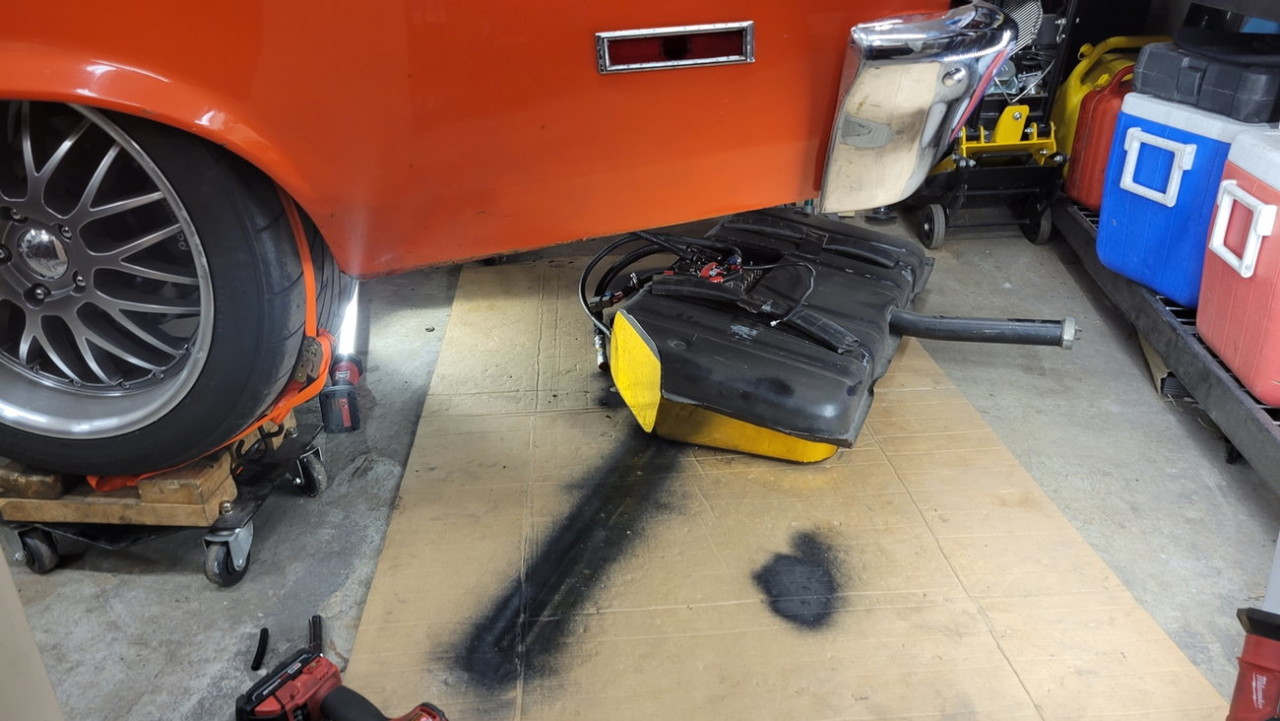
I figured I either had a pressure line that had come loose, or somehow had one or both internal fuel pumps dying that couldn't keep up the pressure once there was any real fuel demand. I looked under the car with the pumps running... no external leaks. I checked the fuel filter, and although it was a bit dirty, it seemed to flow air through it without issue. I also tried ramping up the fuel pressure on my Edelbrock adjustable FPR to what should have been 60-70psi.. but the static pressure at idle wouldn't increase above maybe 15-20psi (it should have been ~45psi at idle)... this is what told me that I had a fuel pressure supply issue inside the gas tank. Well.. time to drop the tank... I think for the 4th time now?

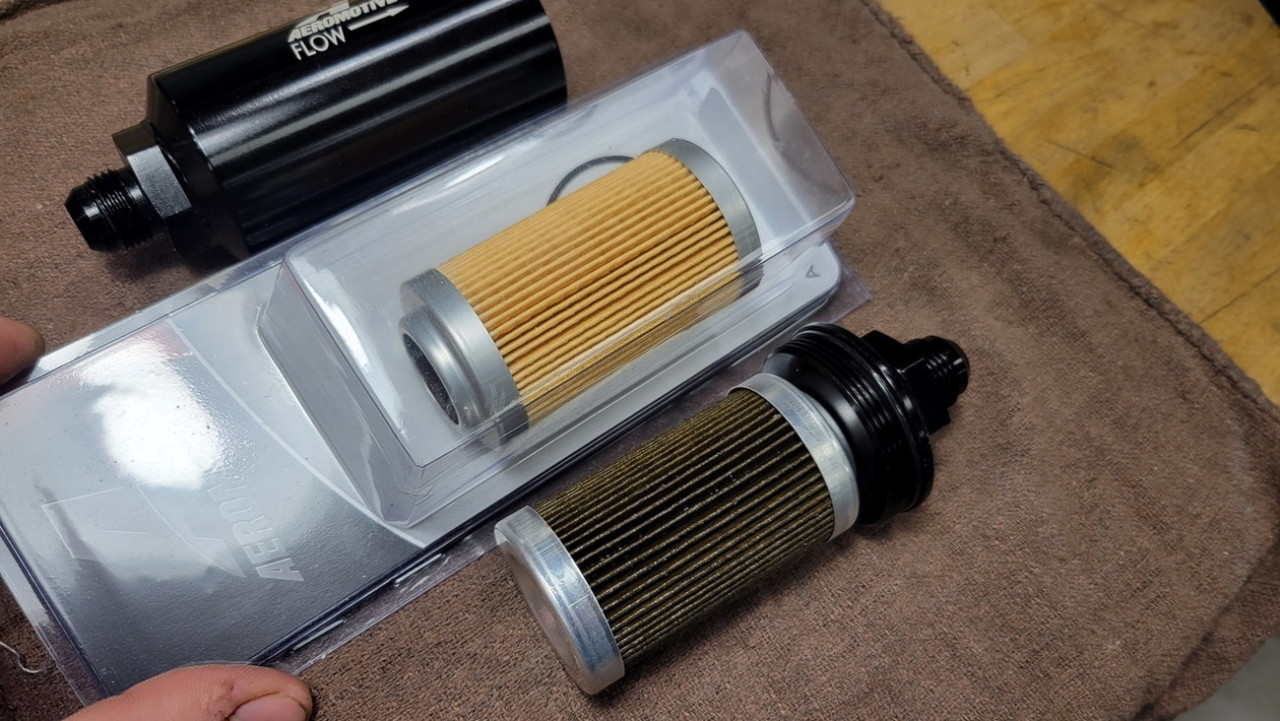
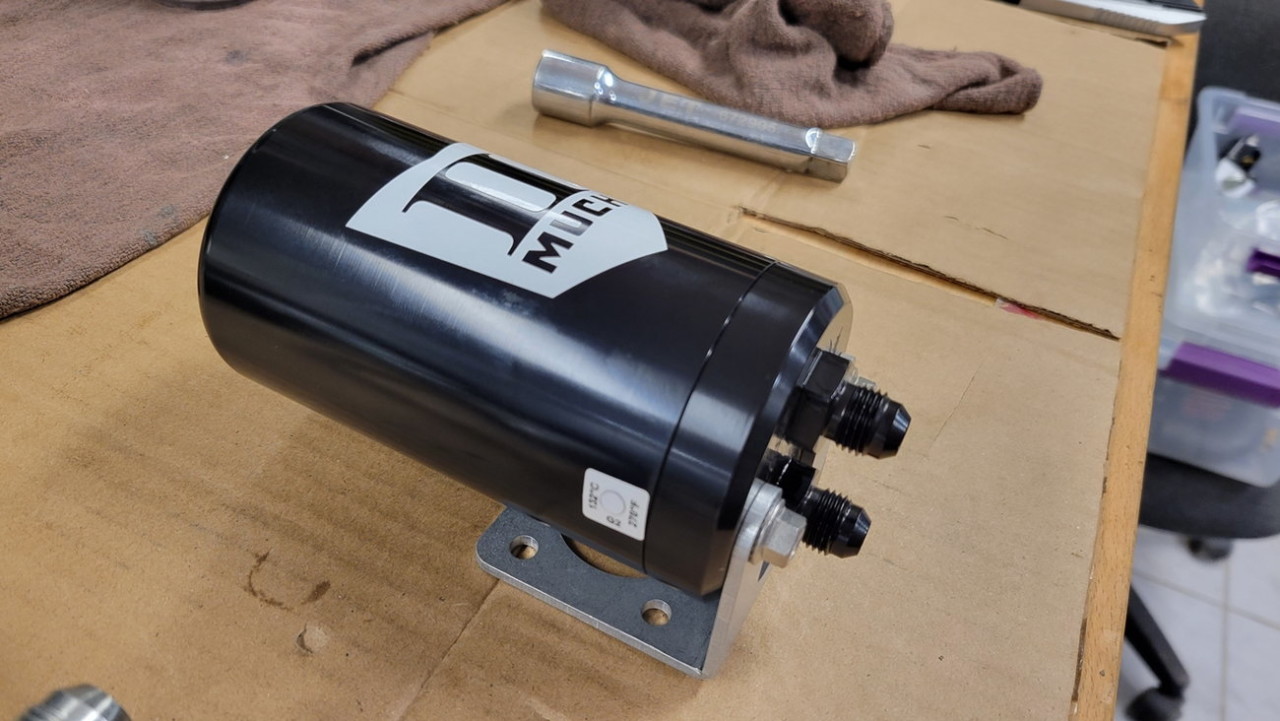
Here's the 10 micron post-fuel-tank filter I had under the car, with a spare filter for reference and to swap in during this "fuel system redo"....
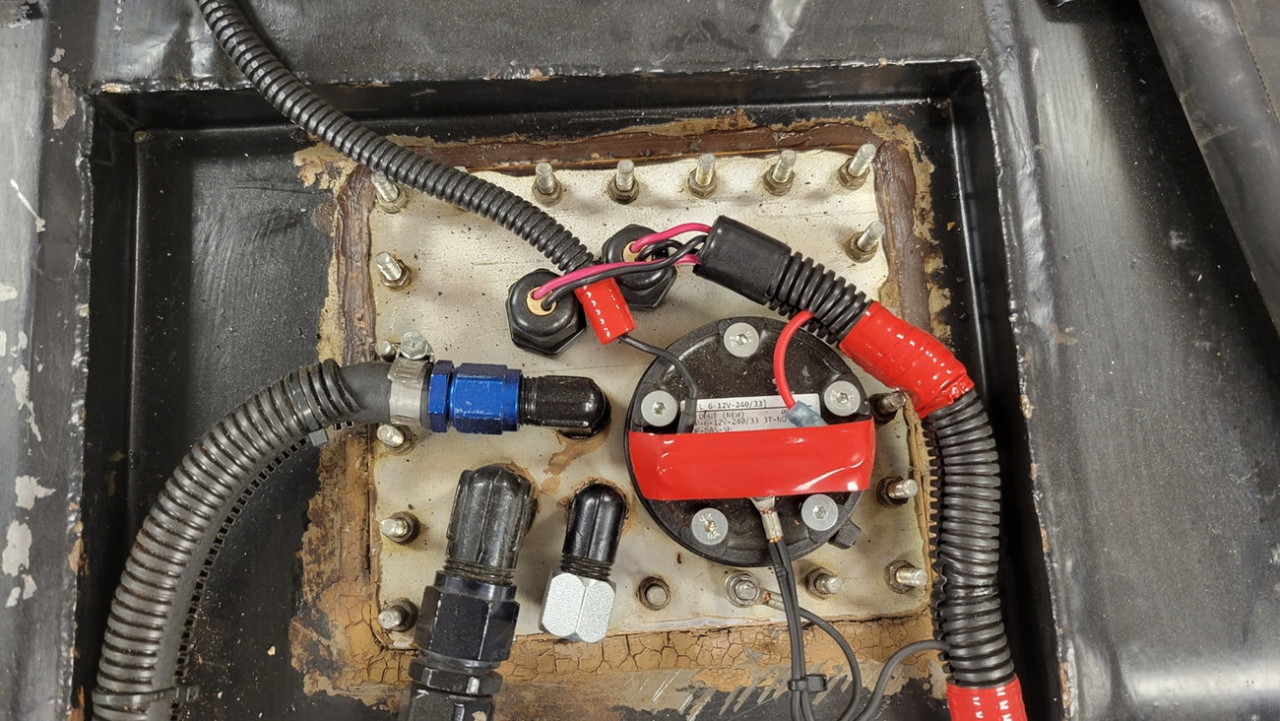
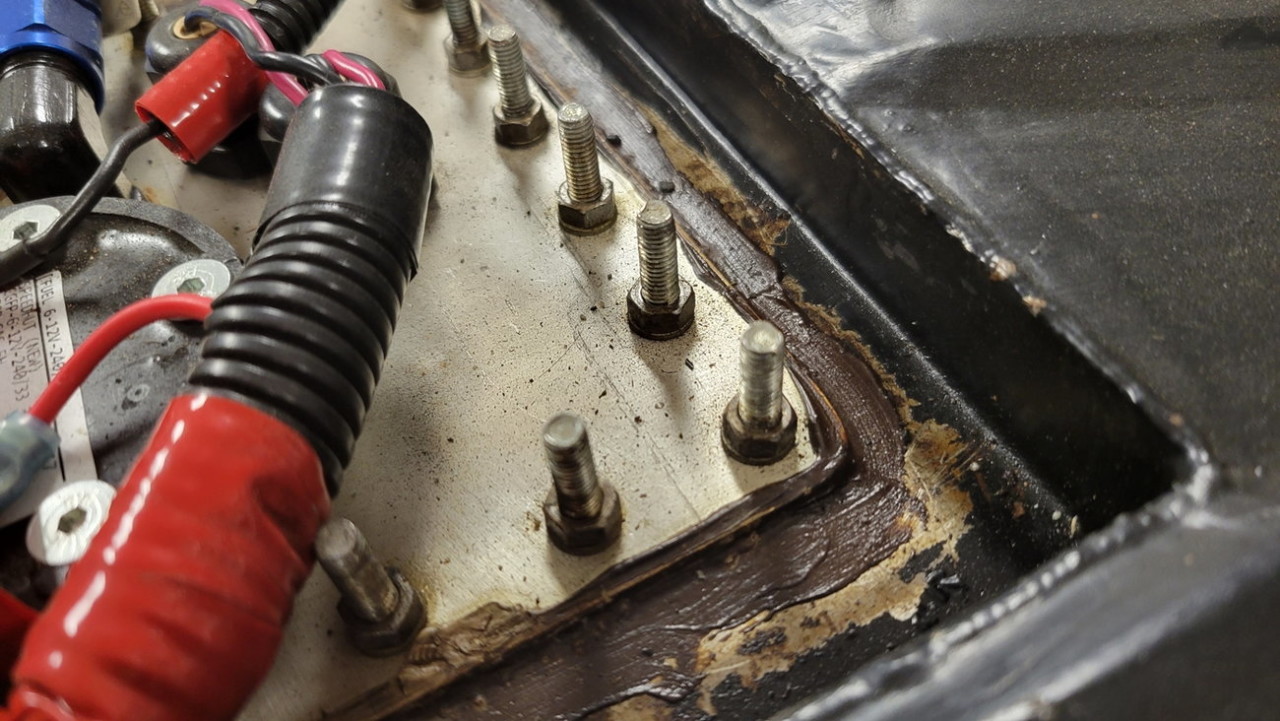
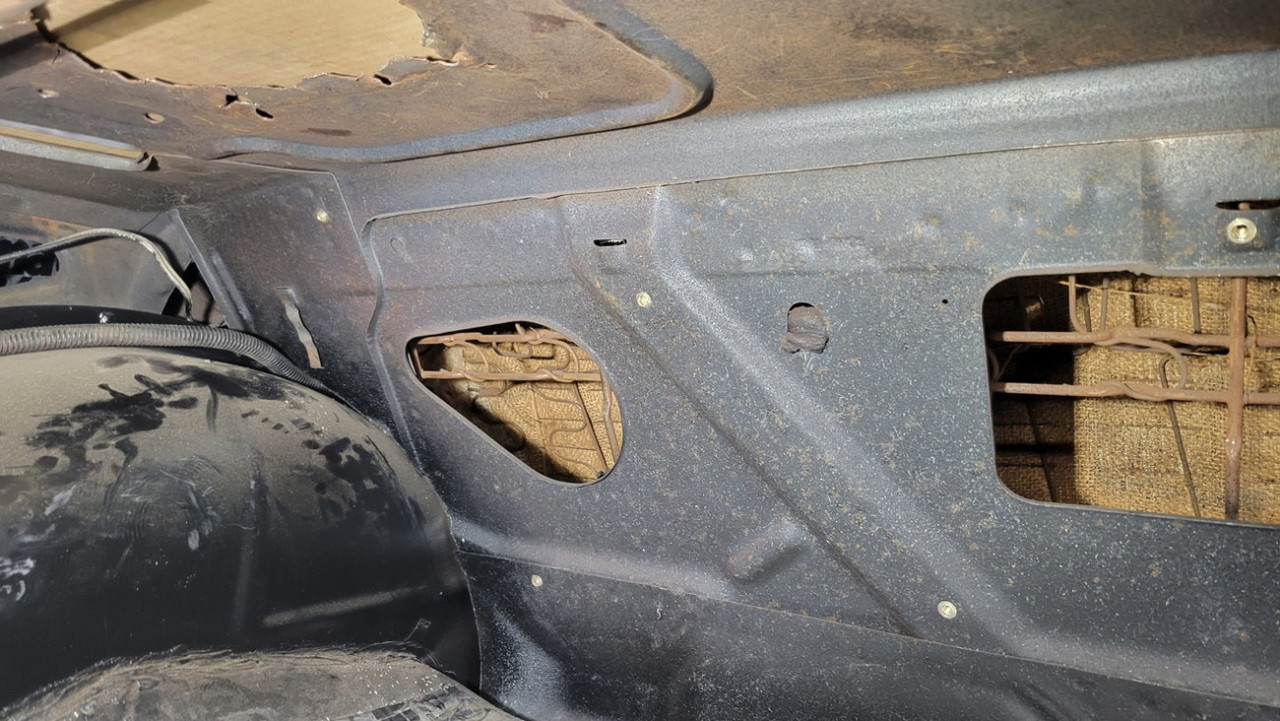
When looking at the tank, I noticed the previous fuel-safe sealant was hard and cracking in some areas, and had some misting. Strange that there was wetness, considering the gas should have evaporated.. but oil could not have come from anywhere on the back of the car....
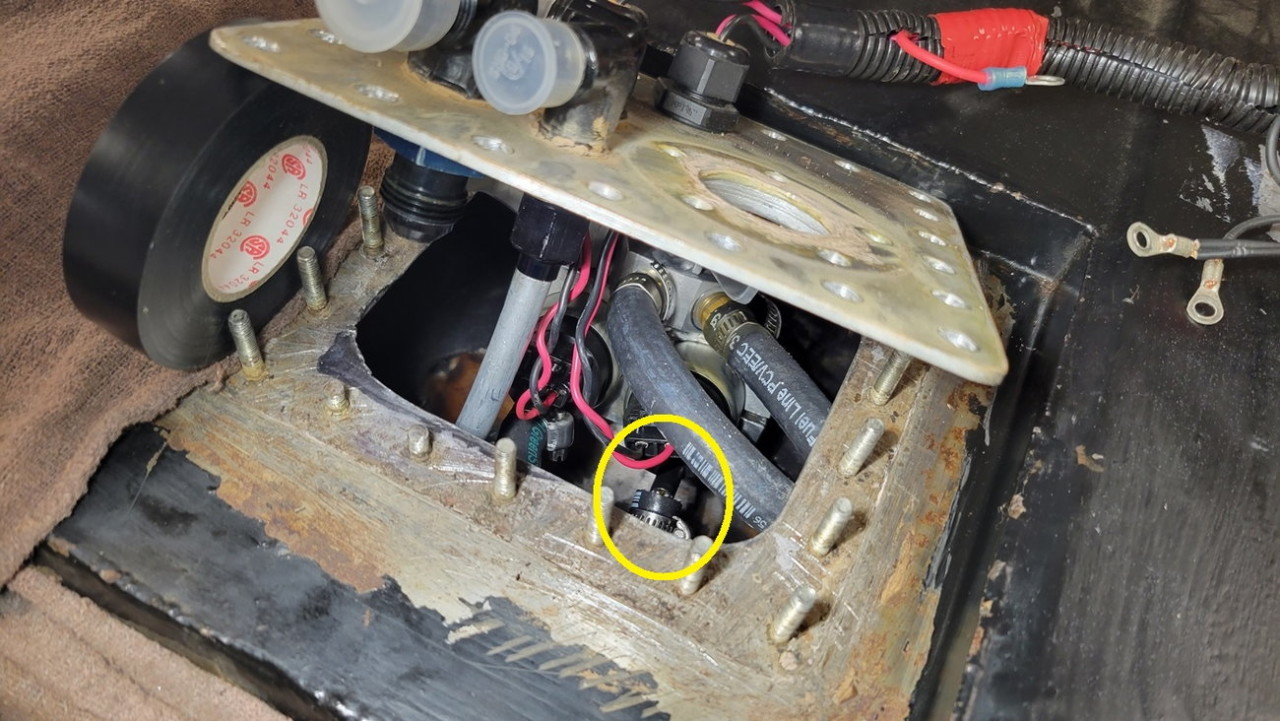
Well this would probably cause a lack in fuel supply pressure (pump #2 pressure/outlet is highlighted)....
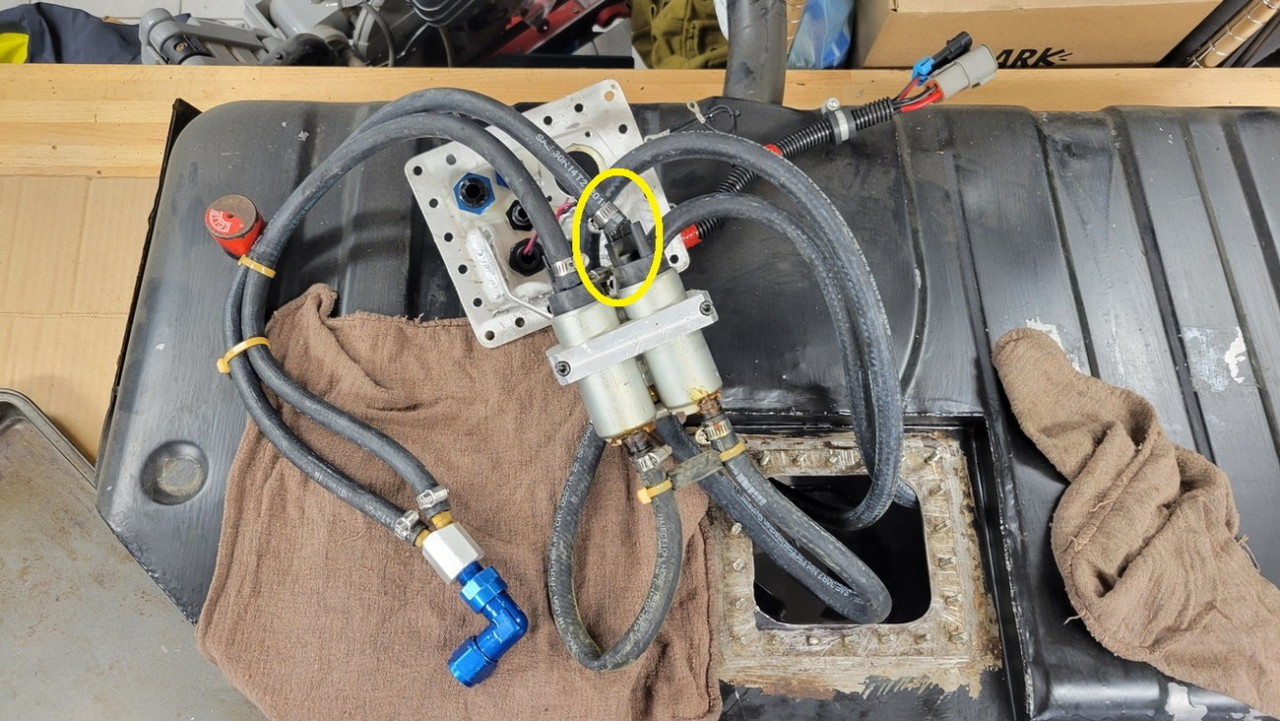
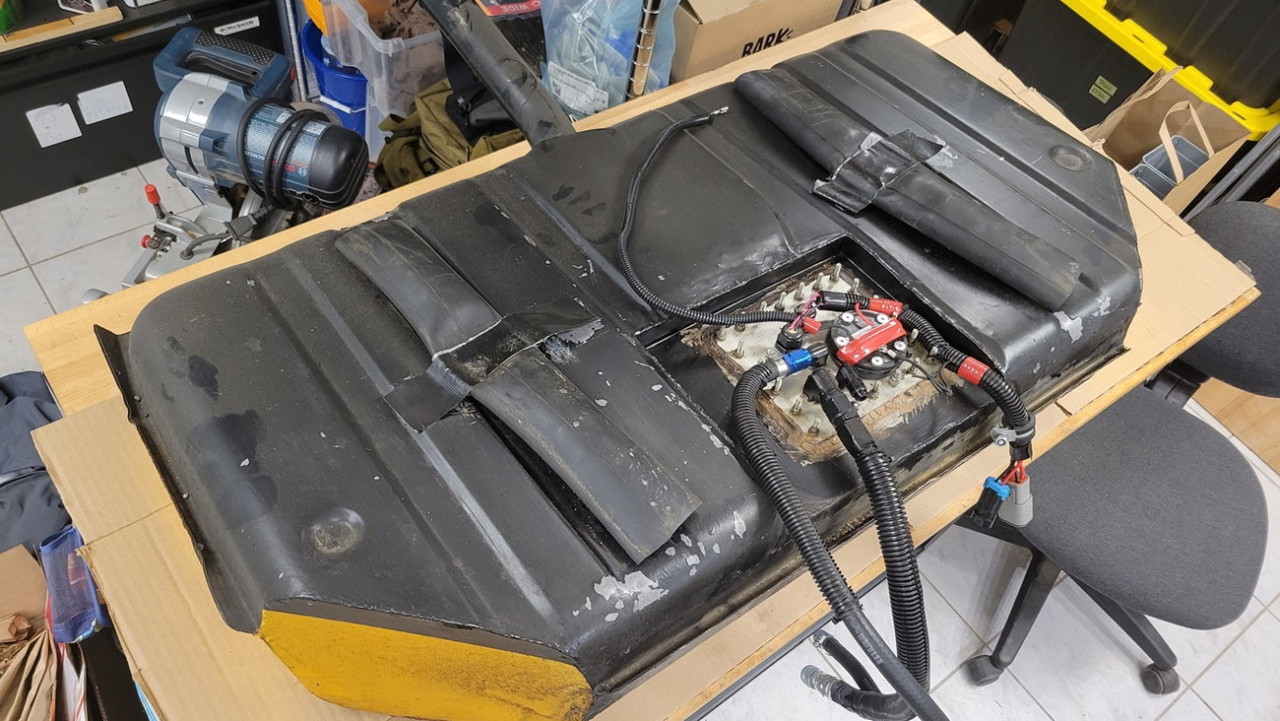
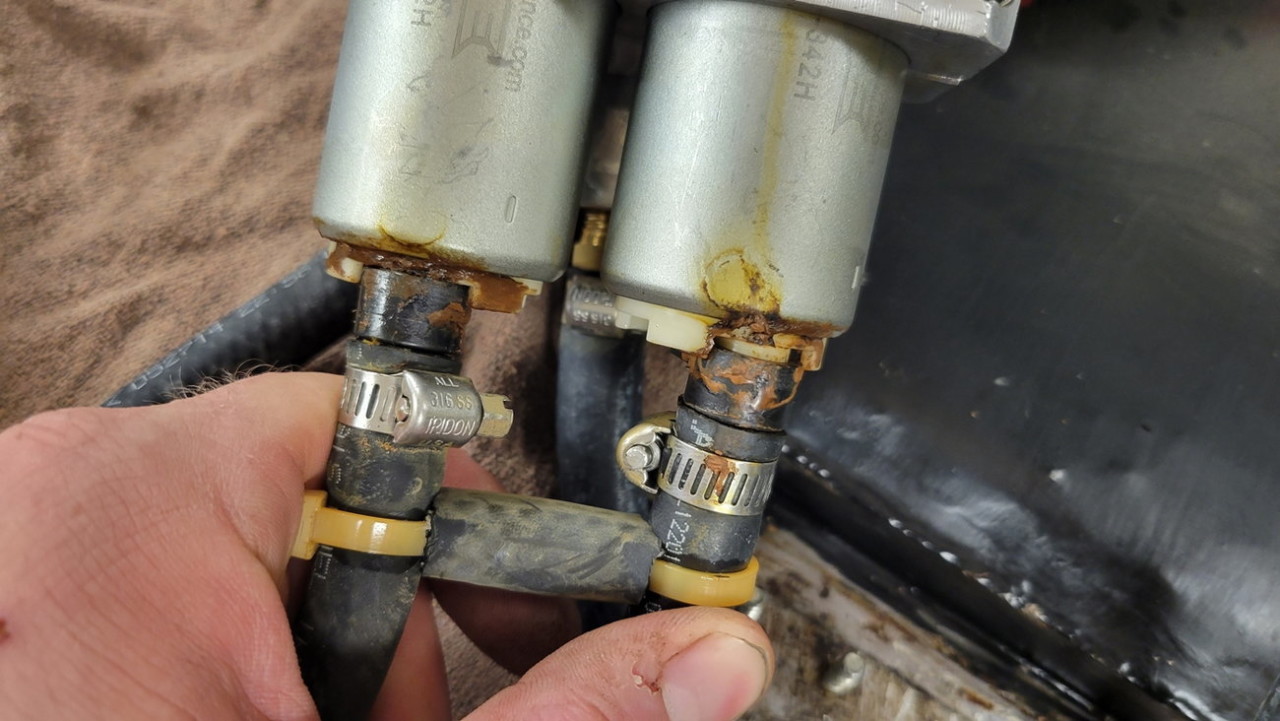
I also didn't like how these held up.. they're plastic "adapter barbs" to make a hose fit on the standard socket inlet of an internal fuel pump. At the time, years ago.. I must have added some fuel-safe sealant as extra sealing protection, but that sure didn't hold up well....
After I had the realization that there was an issue inside the tank, and I was going to have to drop it to inspect, I told myself "this is the last time I'm dropping this damn tank to service a fuel pump".. and I started ordering parts.
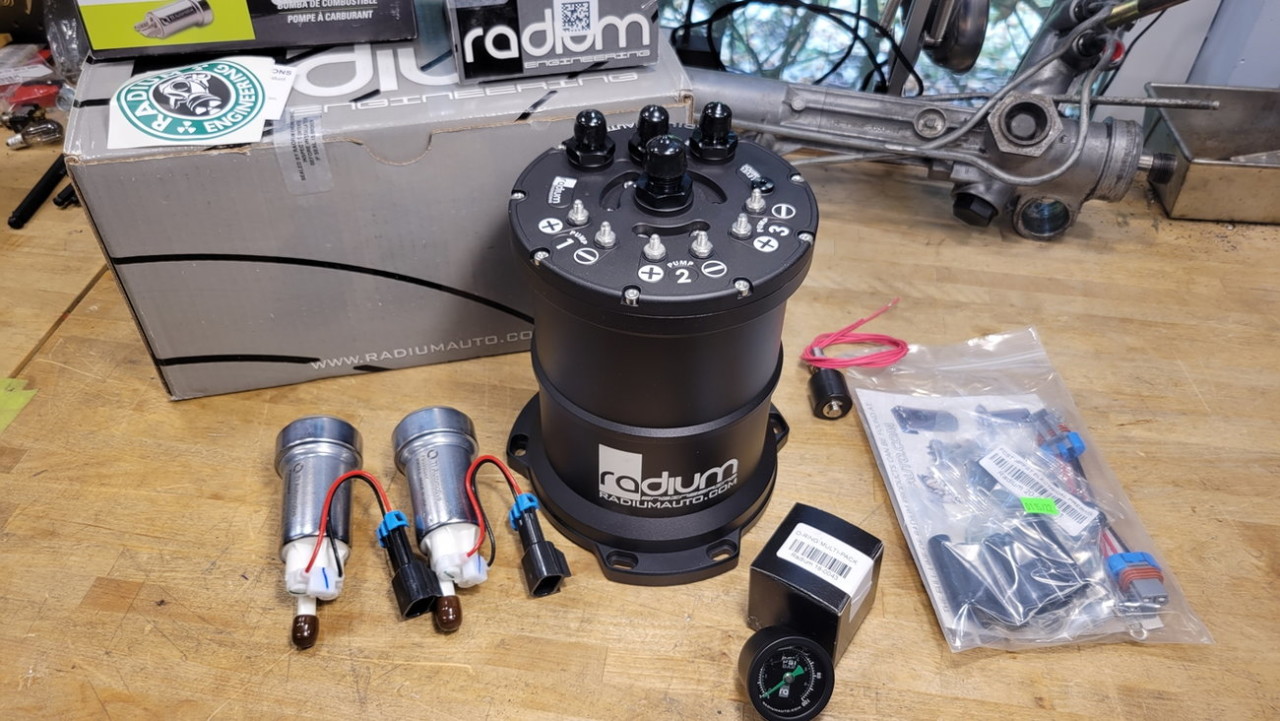
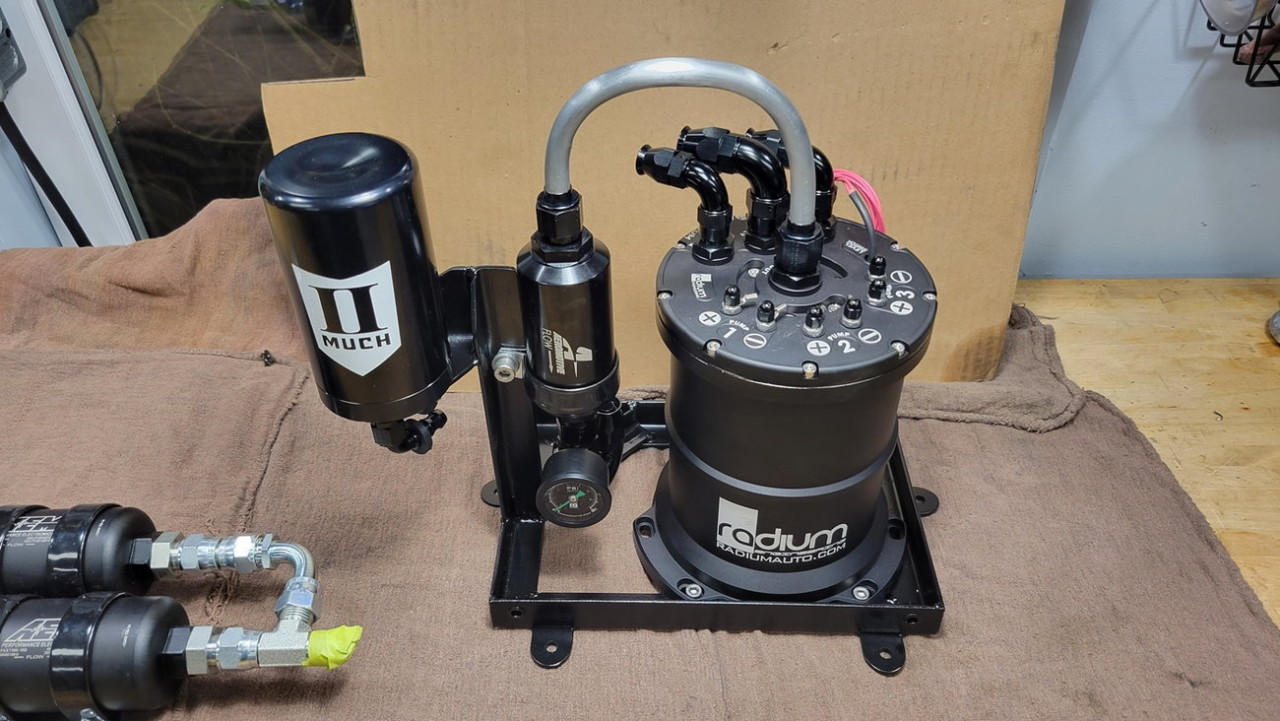
Years ago I started thinking up wanting to do a fuel surge tank in the trunk, with a lift pump in the gas tank.. to ABSOLUTELY ENSURE proper fuel pressure and zero chance of starvation. Well a number of years had passed since then, and this company called Radium has come on strong and heavy, and actually has a shocking amount of universal and application-specific fuel products.
As far back as maybe 2015-2016 I had bought some large 7" aluminum tube and fully had plans to one day fabricate my own surge tank, but looking at the fit and finish of this Radium stuff versus my [non-existent] free time.. and well, it just made sense to buy.. the engineering work and troubleshooting had already been done, and it would look way better than any raw aluminum stuff I would have fabricated.
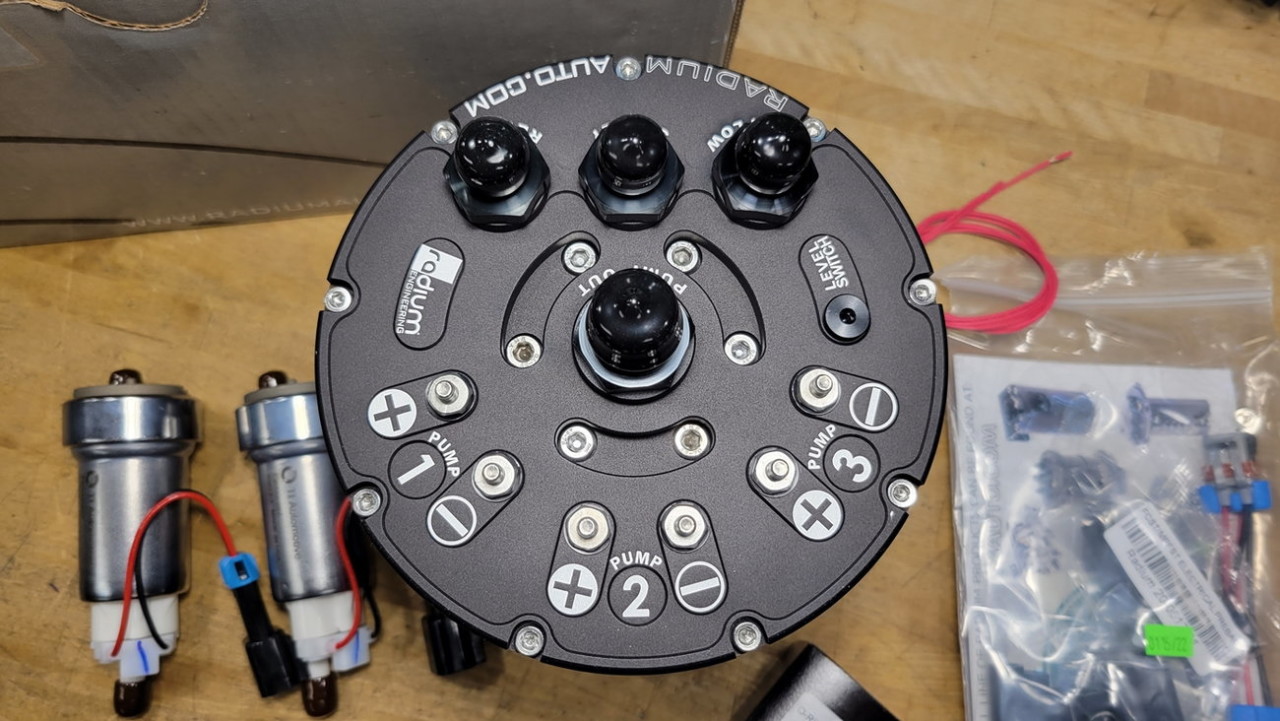
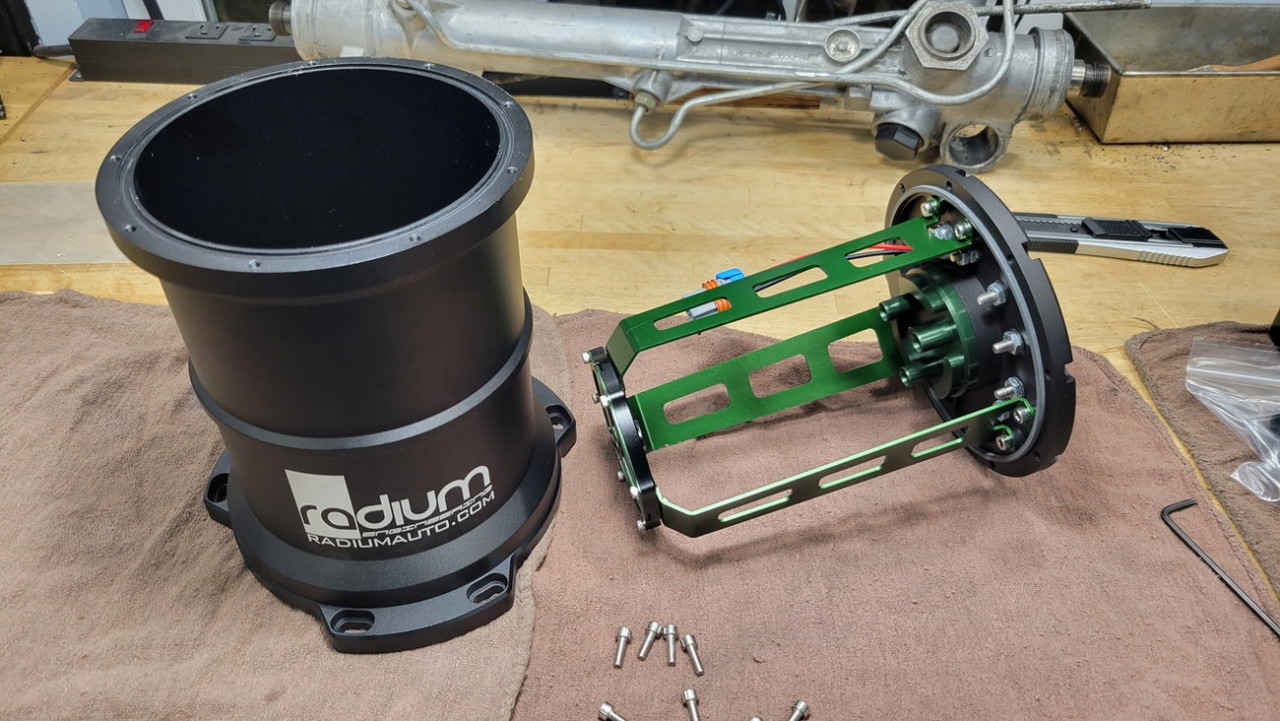
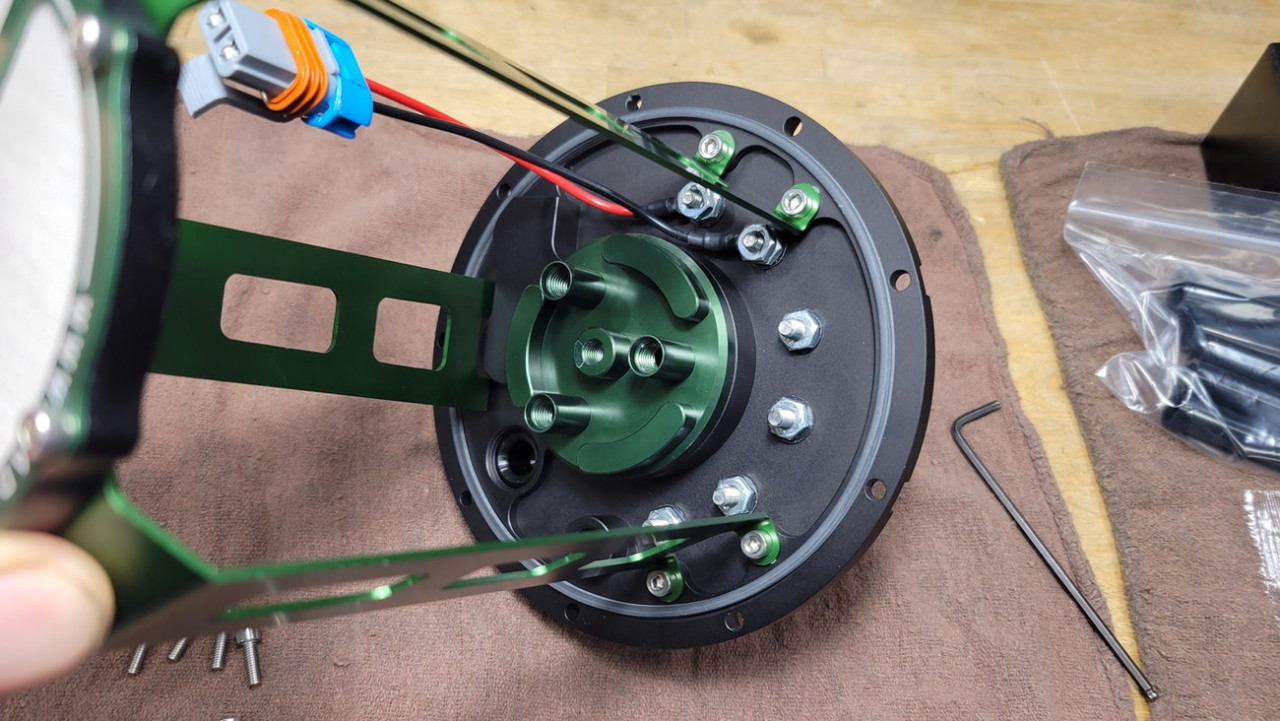
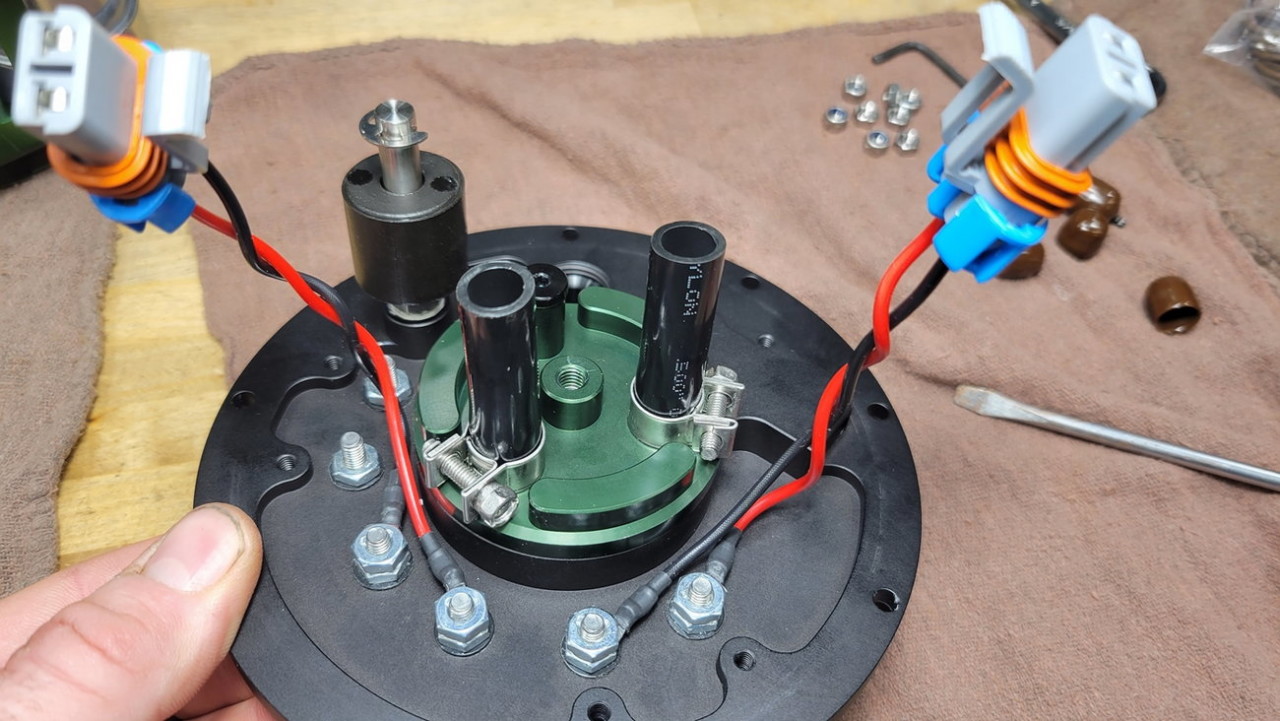
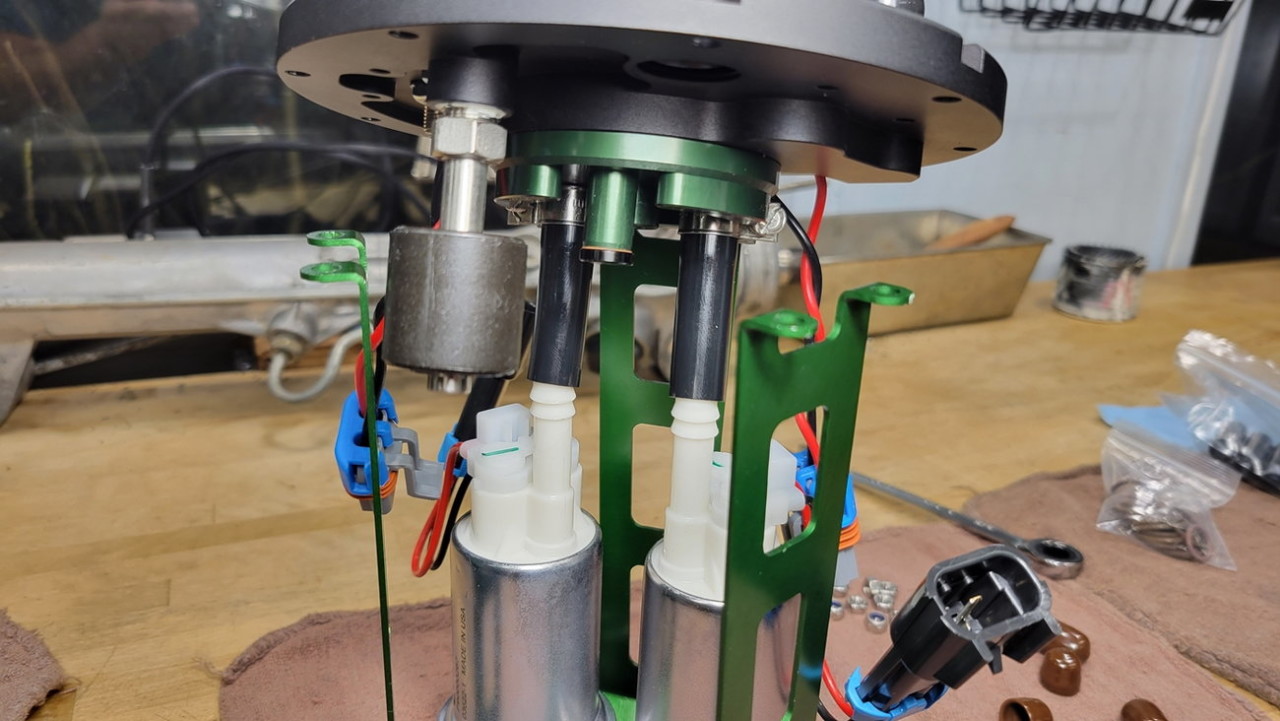
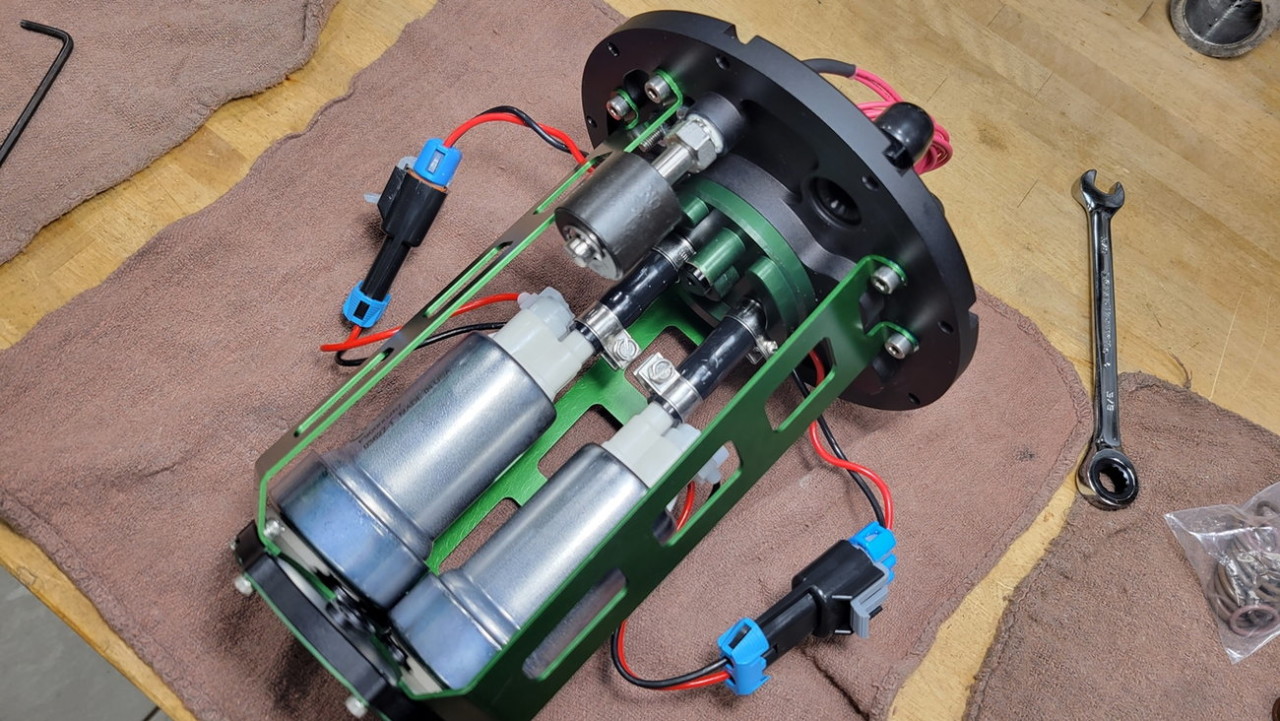
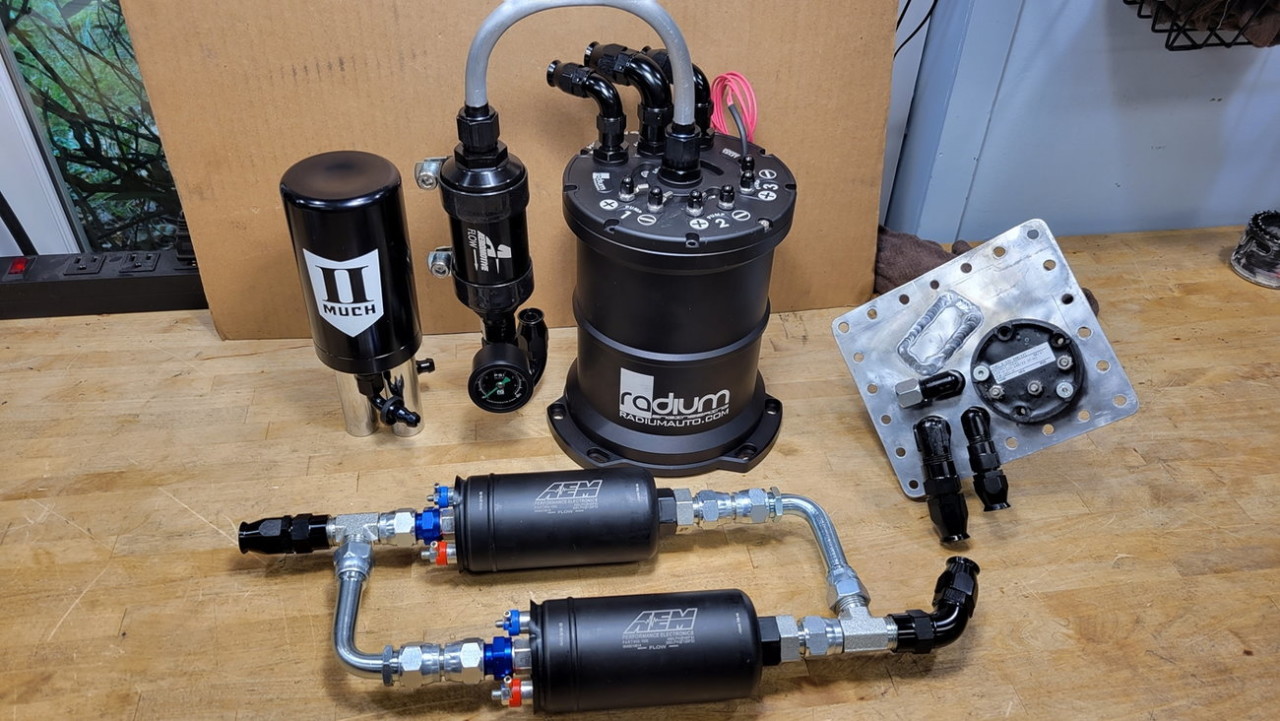
I chose the Radium MPFST (stands for "multi-pump fuel surge tank") since it has the ability to comfortably fit 2 pumps (3 possible in total), all pumps are individually wired, but they share a common single output port, and the total volume with 2 pumps inside is ~1.75qt.
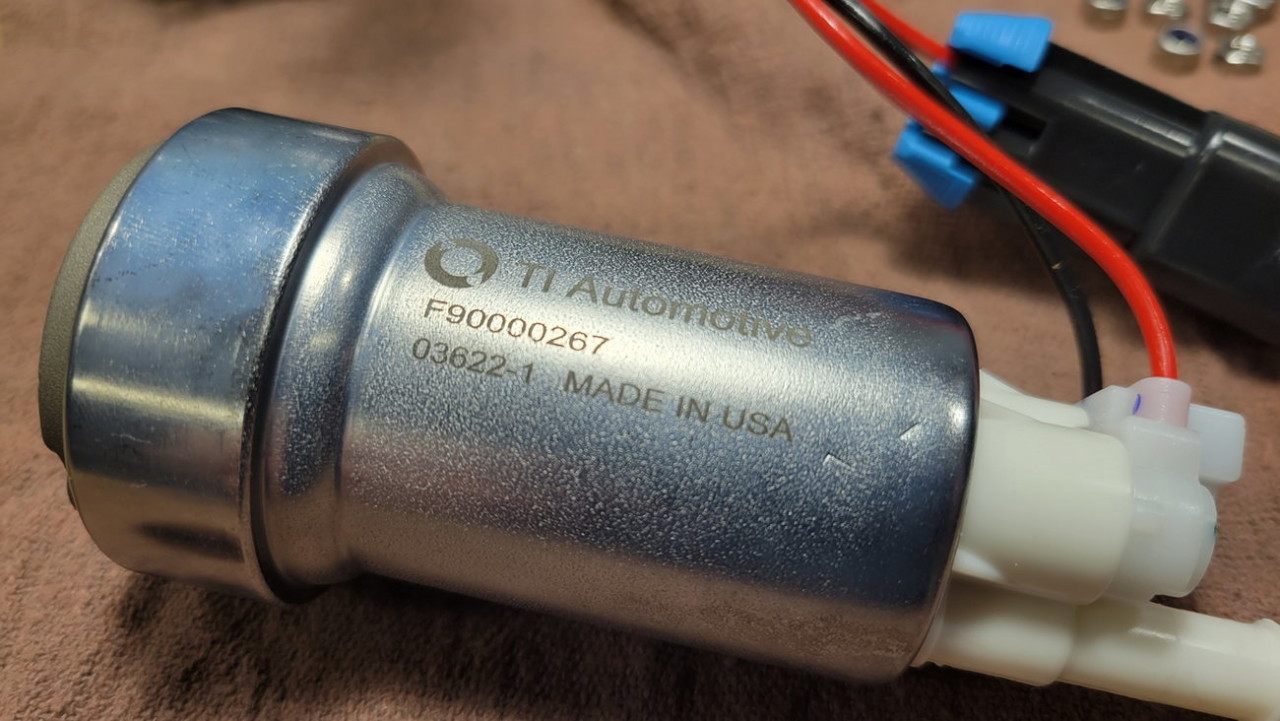
For pressure pumps, I chose two TI Automotive (new owner of the old "Walbro" brand) F90000274 pumps, which are the "low pressure" 87psi capable pumps, max flow of 450lph at 0psi, but also contain a check valve for use individually in a tee'd setup, for if I want to do sequential boost-referenced pump wiring in the future. I gotta say these pumps look like badass quality... metal everywhere you look, barbs on the output fittings, and even say Made In USA..!.......
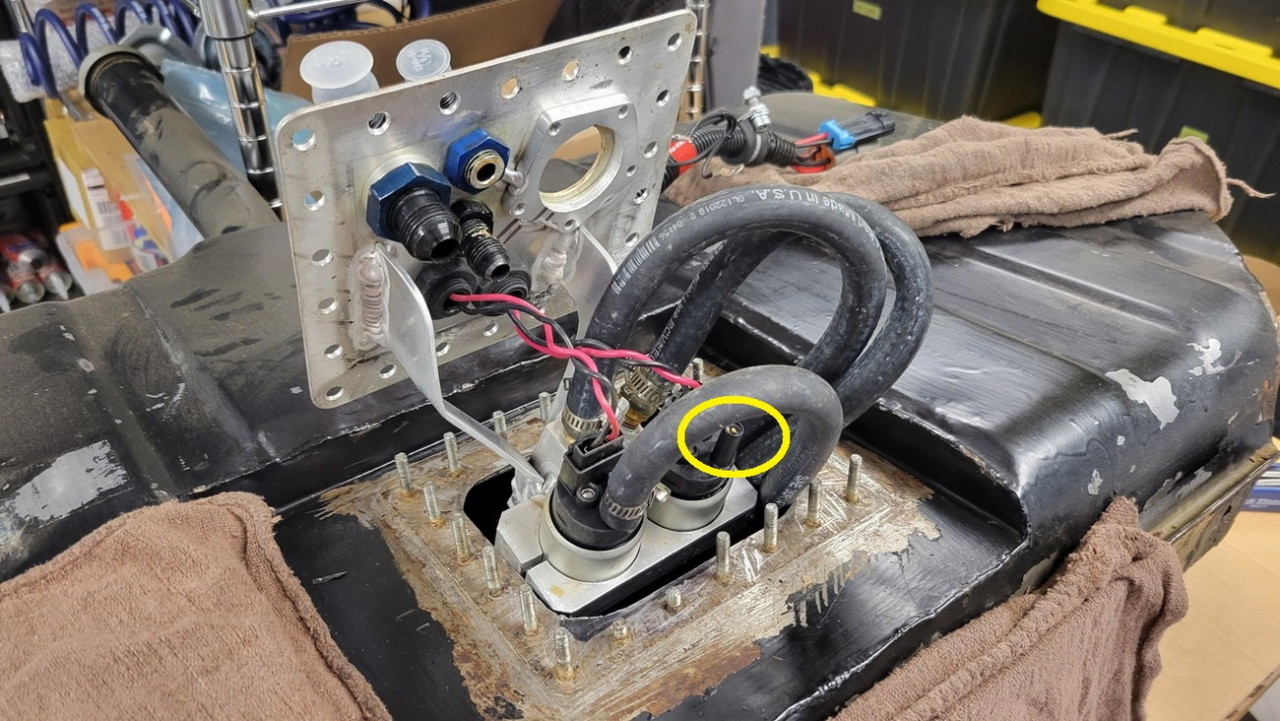
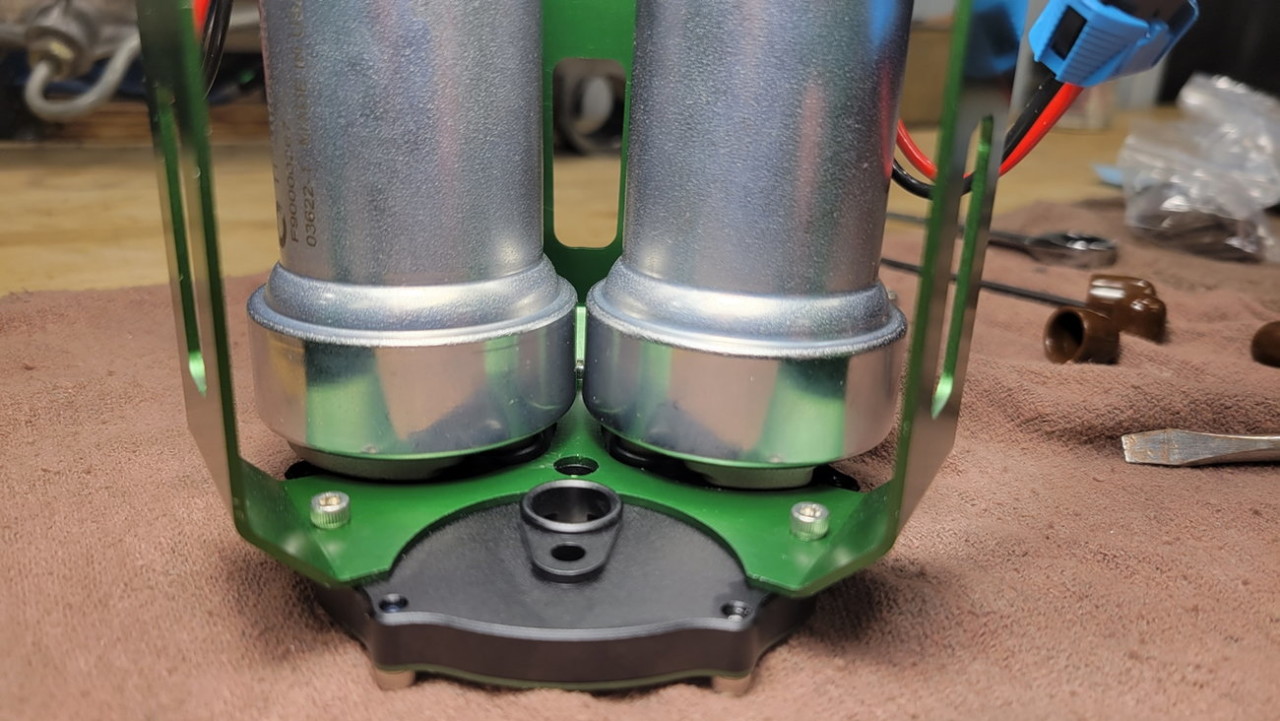
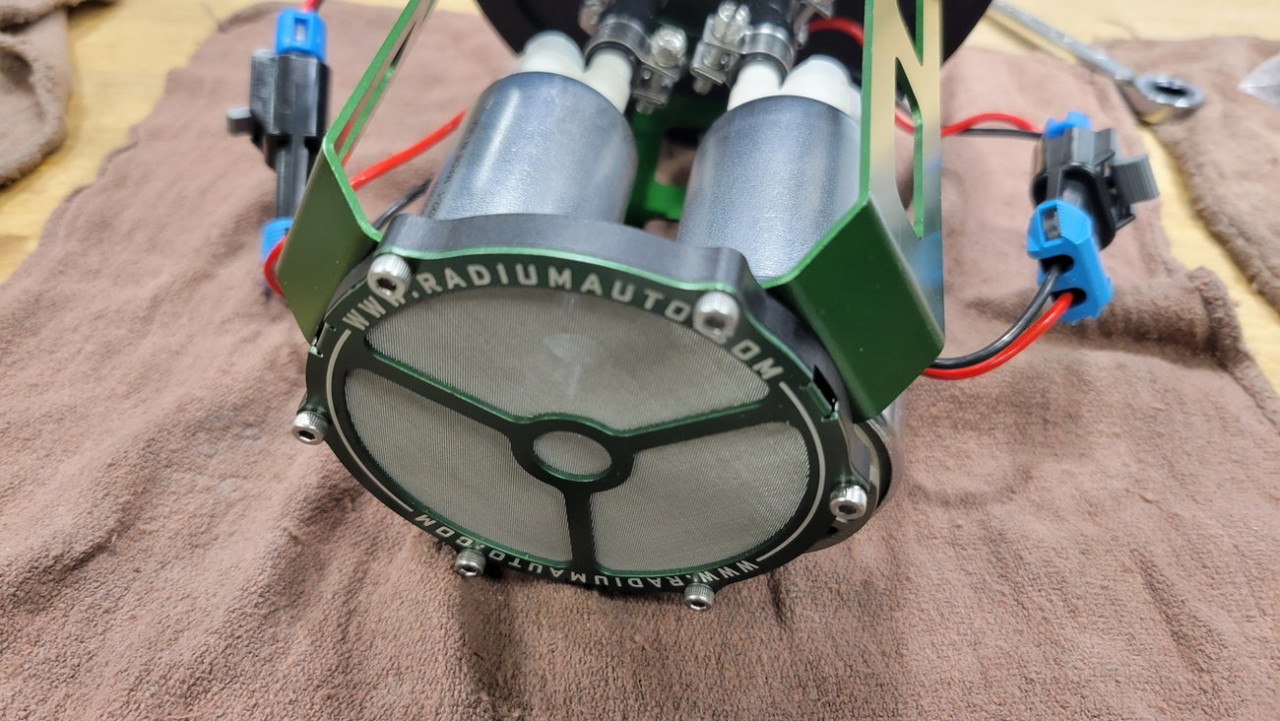
These ports on this bottom inlet screen press against the suction inlets of the pumps, so no shitty plastic socks are needed, they all share this stainless mesh inlet screen...
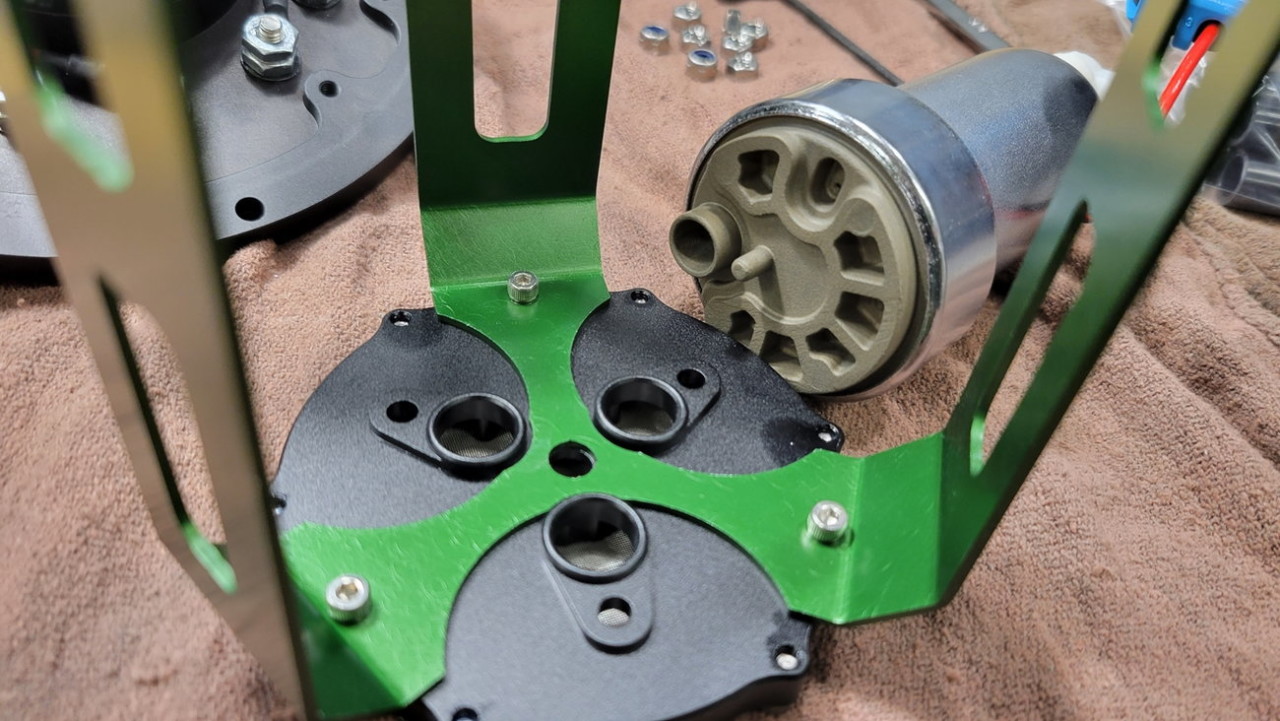

Nice substantial barbs on the pumps' outlet fittings....
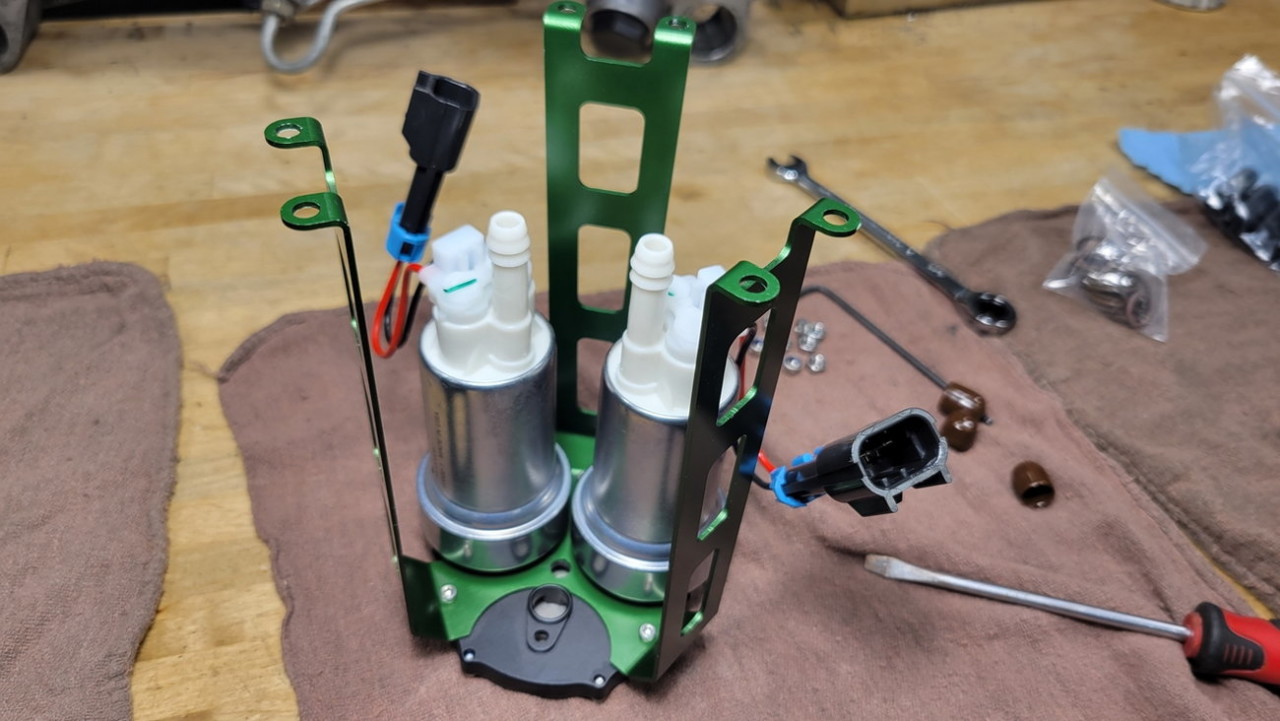
Nice, high-quality rigid PVC hoses were a tight fit to the barbs on both the top tank side and the pump side....
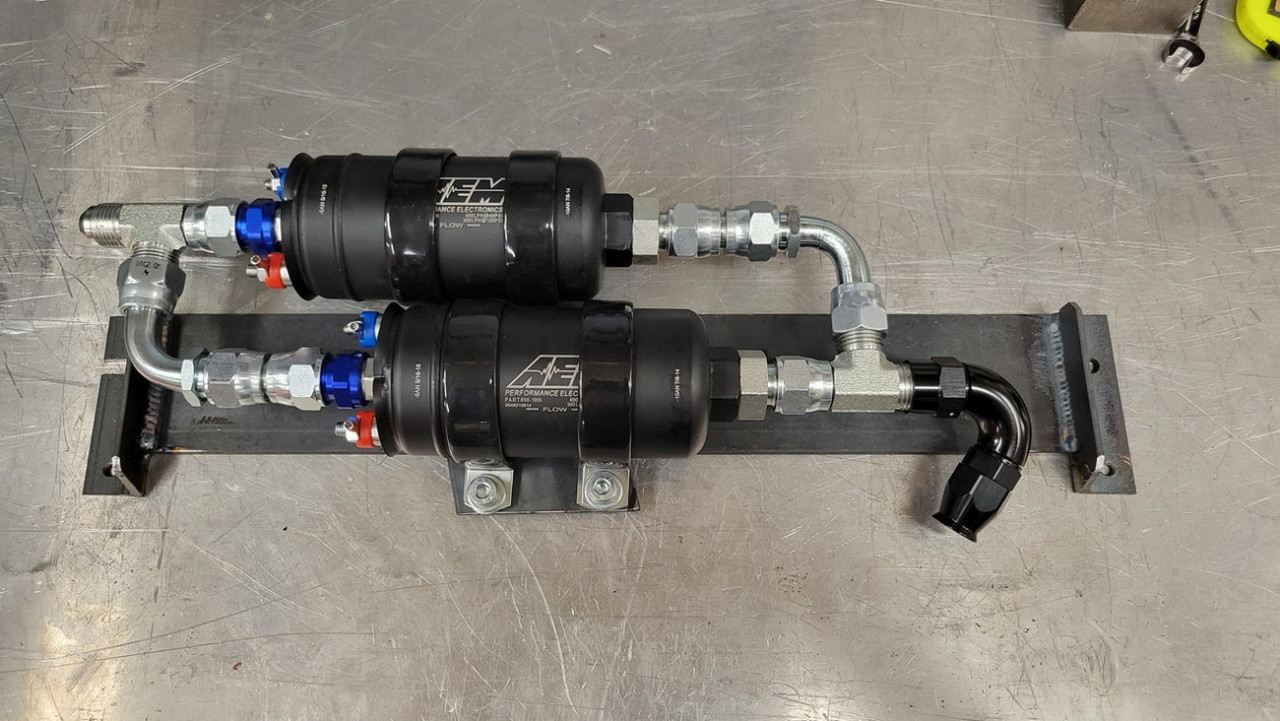
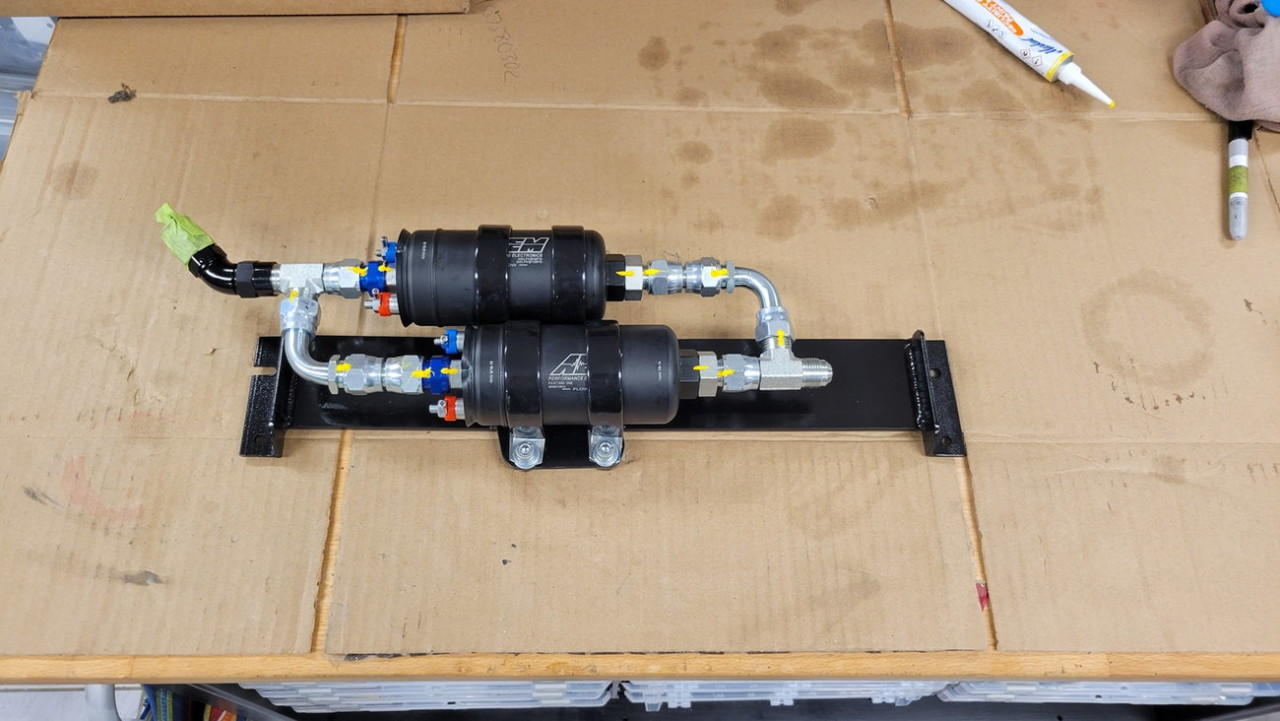
Next step in this exercise of "anything worth doing, is worth overdoing" was the lift pump(s). I sure as **** did not want to drop the tank again to service a lift pump, since even though a lift pump sucking air or performing sub-optimally isn't the end of the day.. if a single lift pump dies, then the surge tank will empty in time and I'll be stuck on the side of the road somewhere.
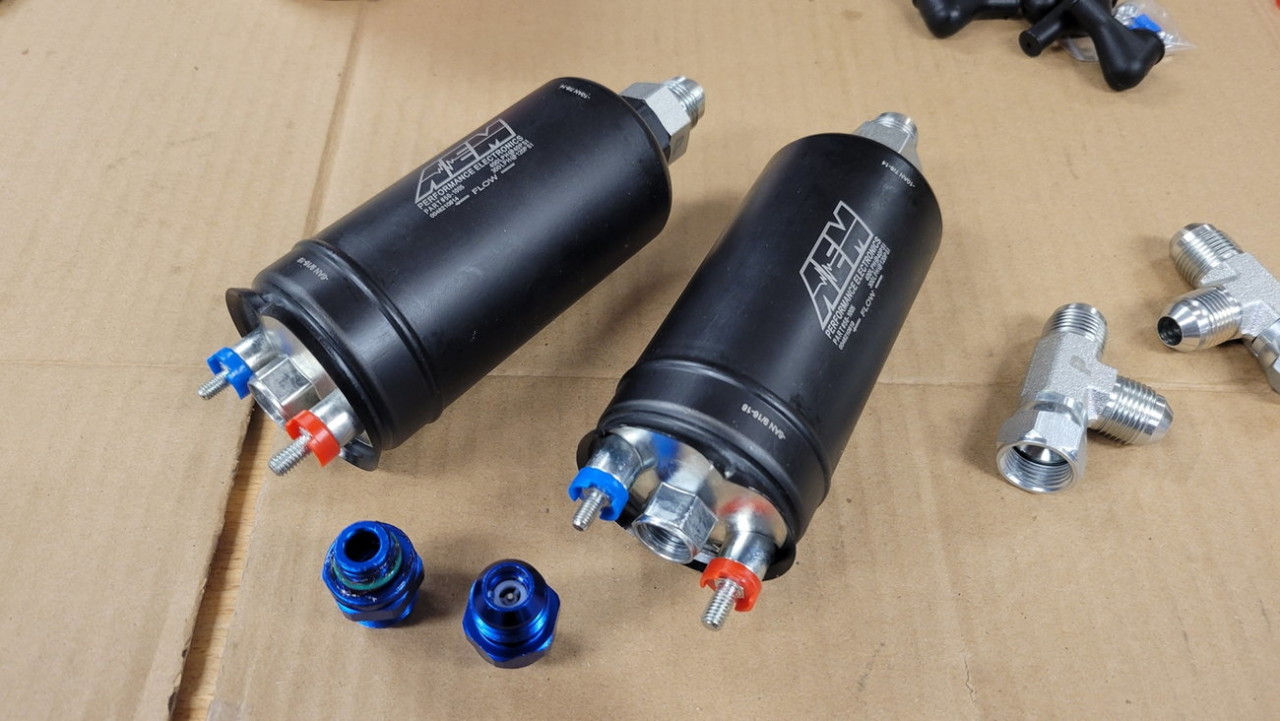
So... external lift pump. Pumps. Dual.. but to avoid heat and excess flow, only one will run at a time. These AEM 400 lift pumps fit the bill perfectly, since it really only has to "top up" the surge tank.. and because at the 1-2psi of flow pressure on the lift side, I would have to be on a max-boost pull for literally minutes upon minutes upon minutes before the engine would eat up the flow difference between the dual 450lph pressure pumps and the single 400lph lift pump.
These AEM 400's are designed to be run externally, and have thread-in inlet and outlet ports.. which means I didn't have to risk any hose barb and hose clamp leaks and can go full hydraulic fittings. They also came with a check valve on the outlet fitting, which lets them run in parallel with only one on at a time.

While I'm at it with re-plumbing everything, I'm going to try out this ChevyII gas tank breather, and see if it performs better than my previous tank previous setup comprised of a riser-loop of rubber fuel hose, to a K&N mini breather filter. I'll mount this can alongside the surge tank in the trunk, and the highest point I can get away with...
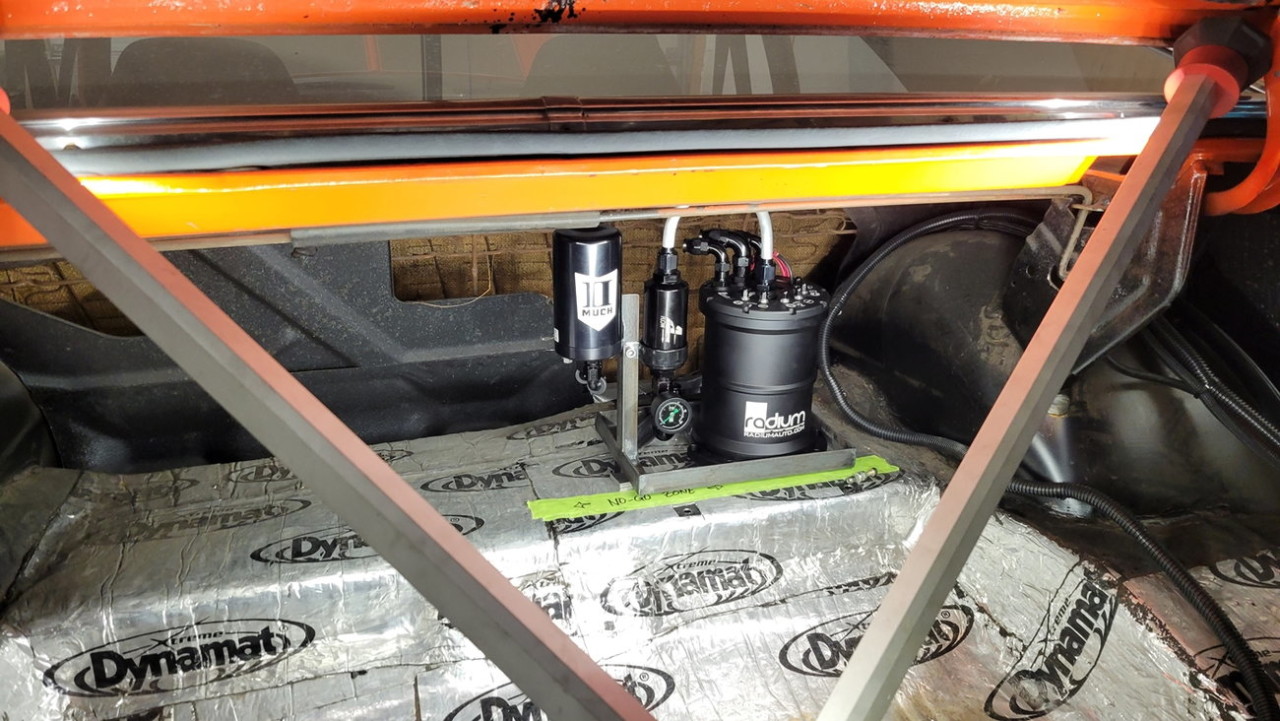
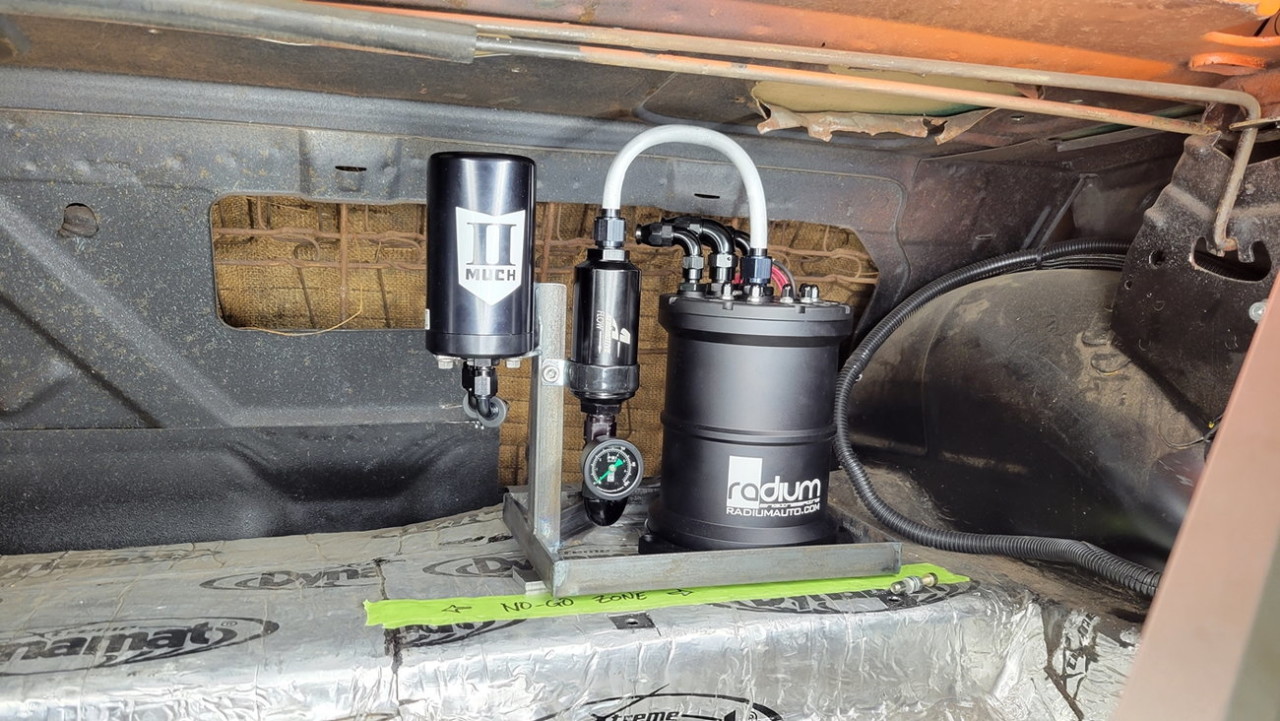
I bracket to hold the two lift pumps together, and under the car (above the gas tank, aft of the rear axle)...

Hydraulic fittings for the win, tying them together to make them plumbed in parallel...
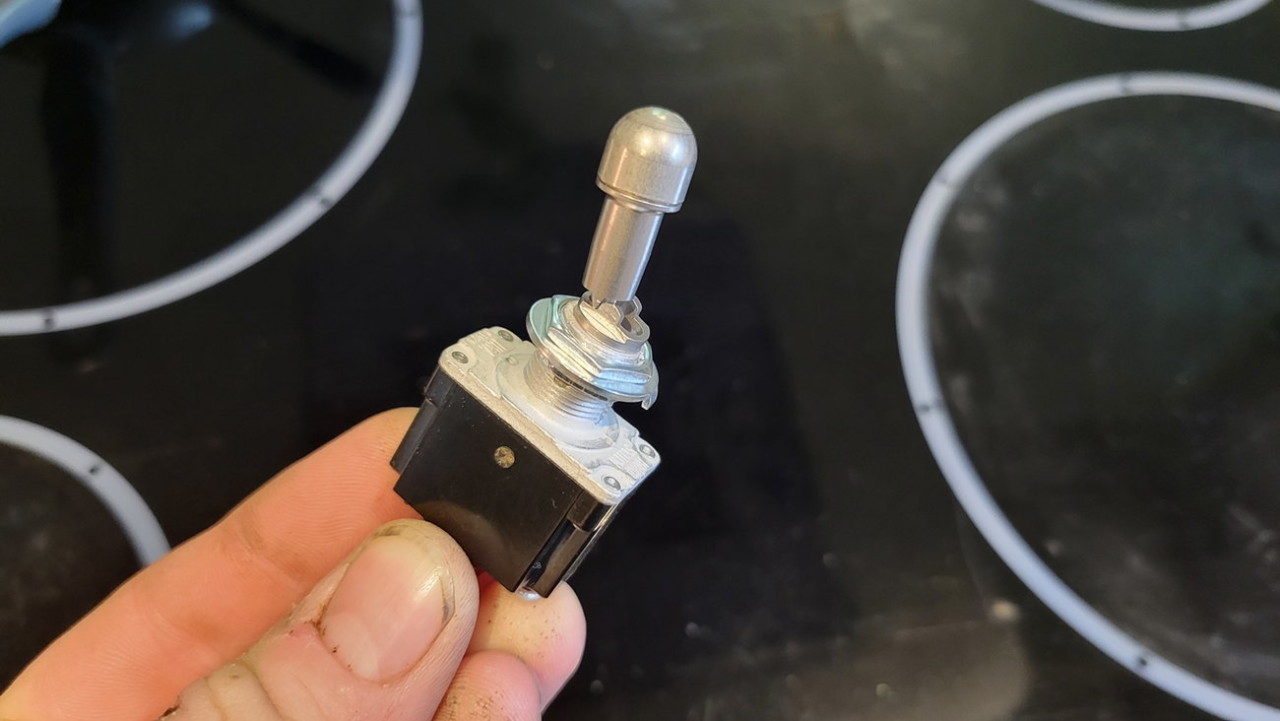
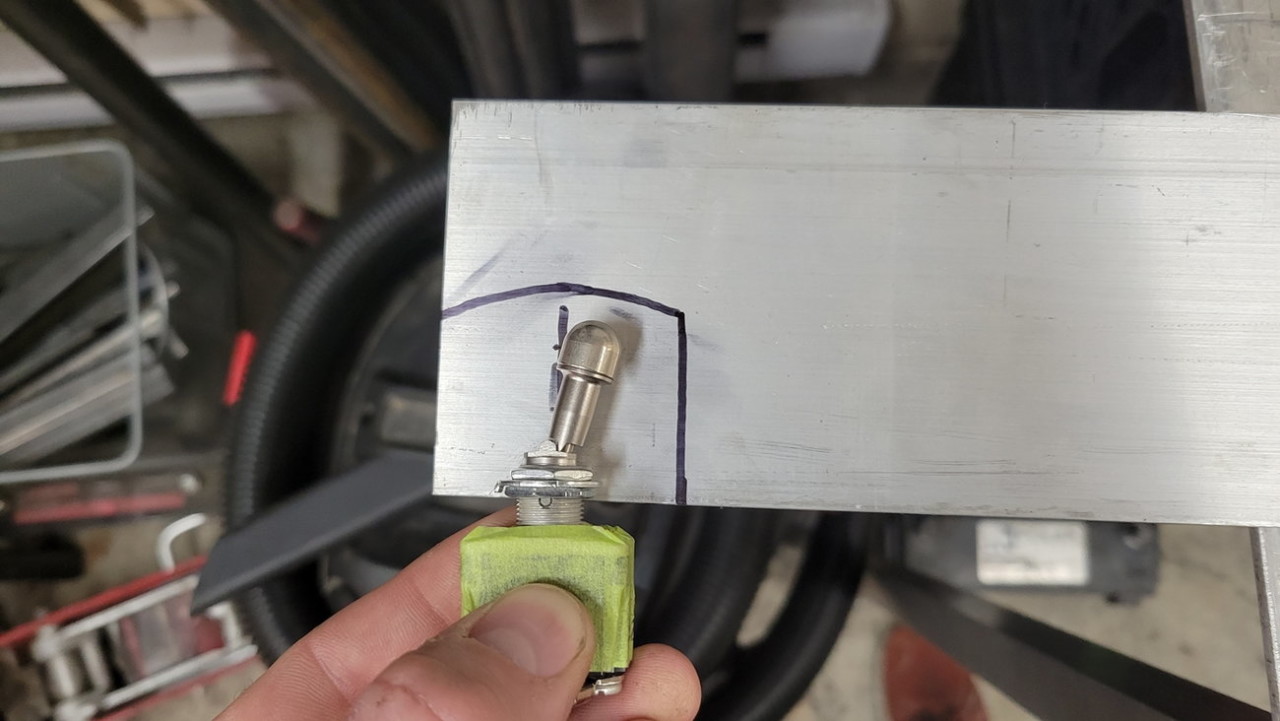
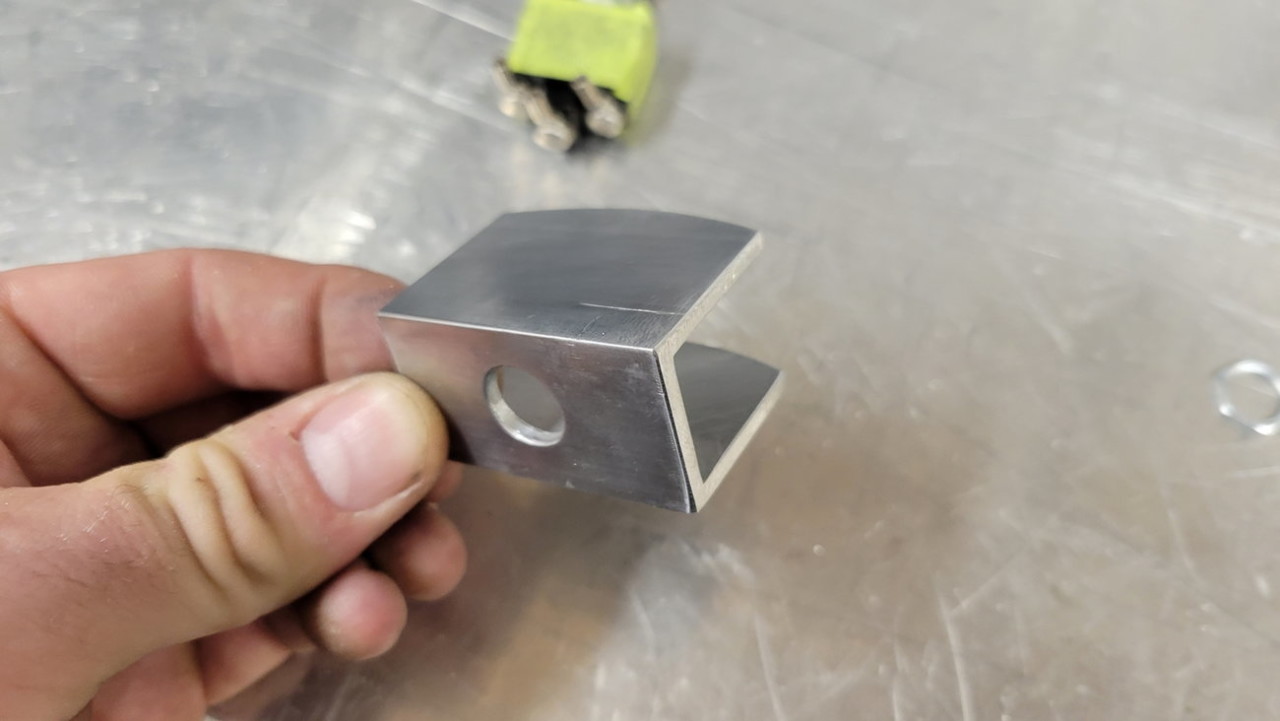
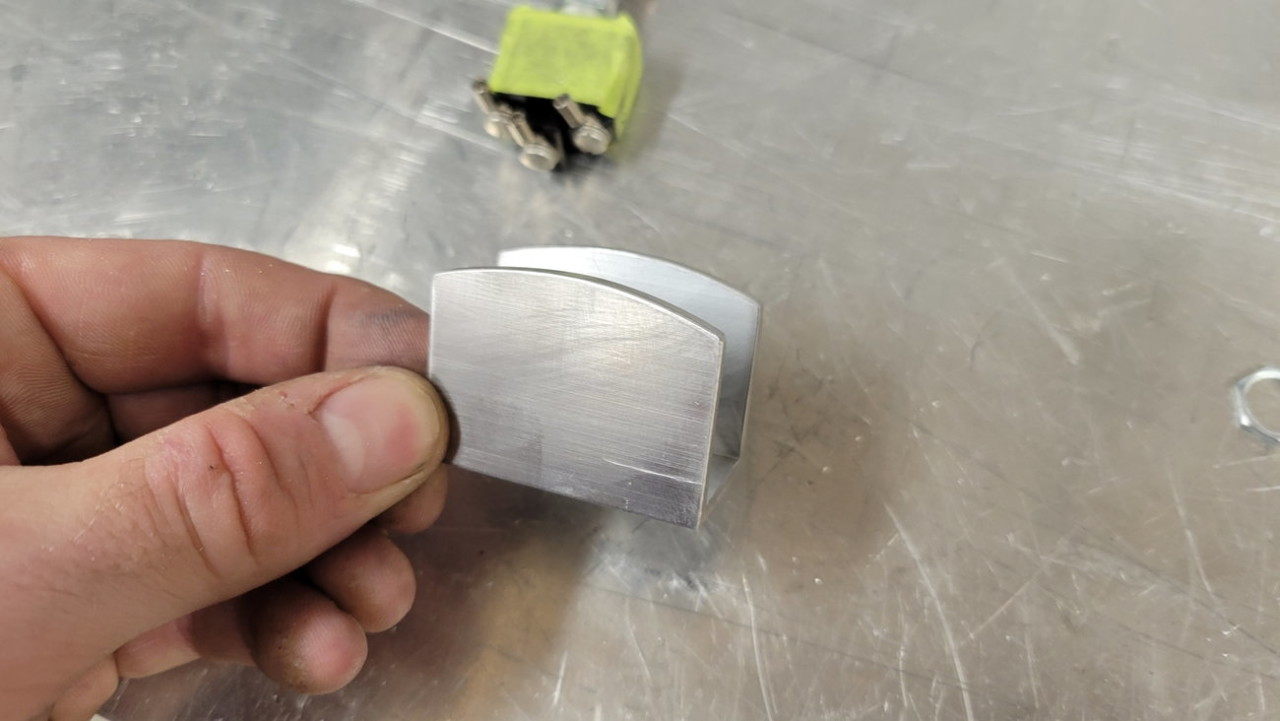
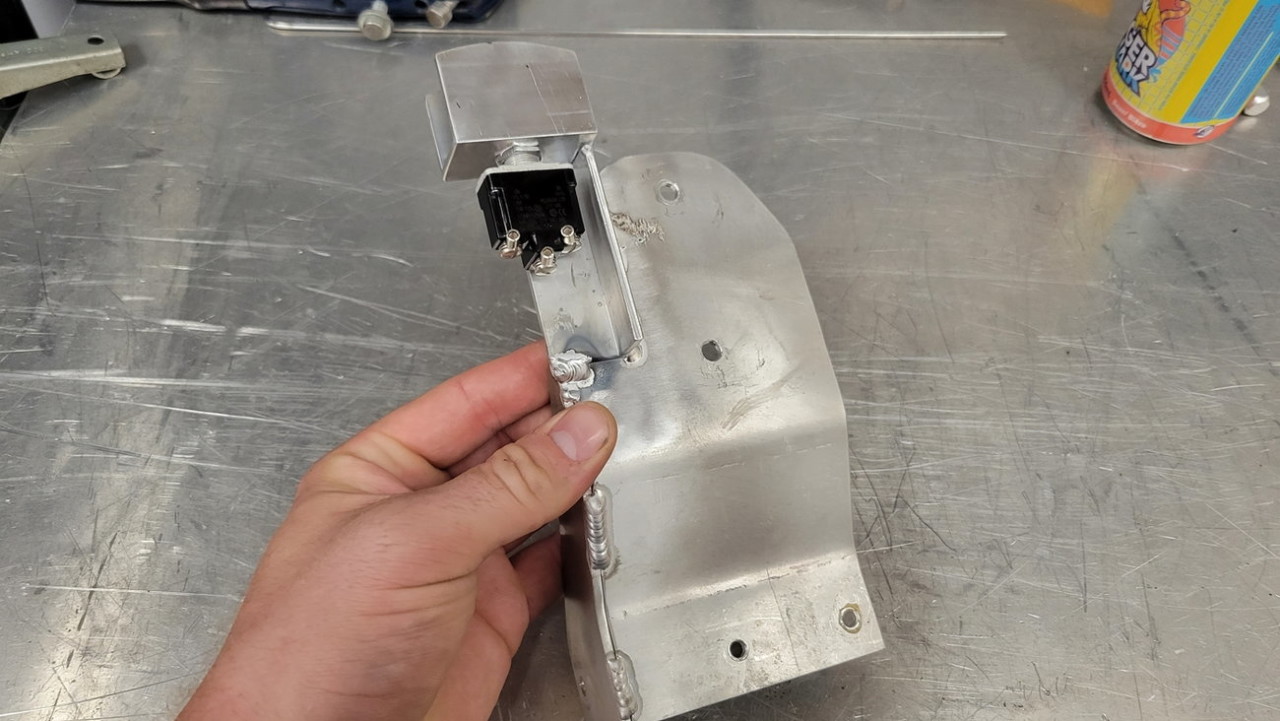
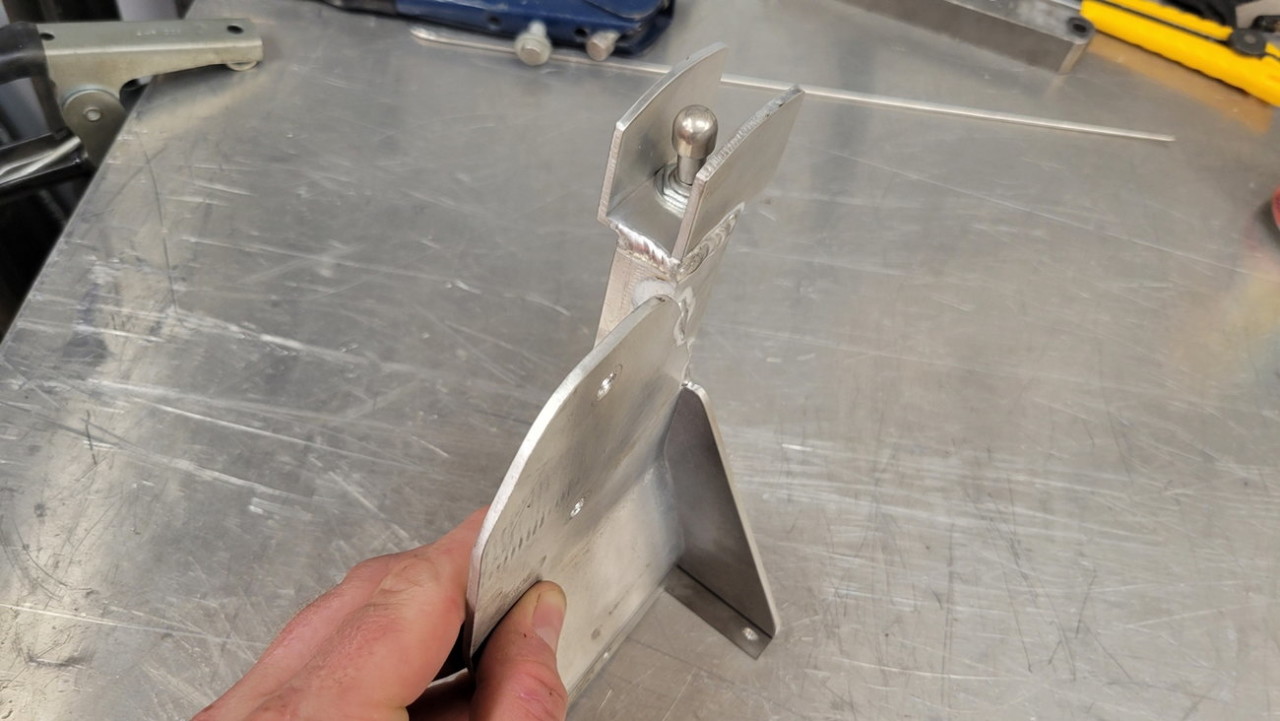
Now to select between the two lift pumps, I found a nice Honeywell 2-position locking toggle switch, and made a bump guard for it, to mount it near the fuel solenoid next to the battery.
There will be one "lift pump fuse" on my Blue Sea fused buss bar on the solenoid output, and this single fused wire will go into the 2-position switch and then get directed to either lift pump #1 or #2.


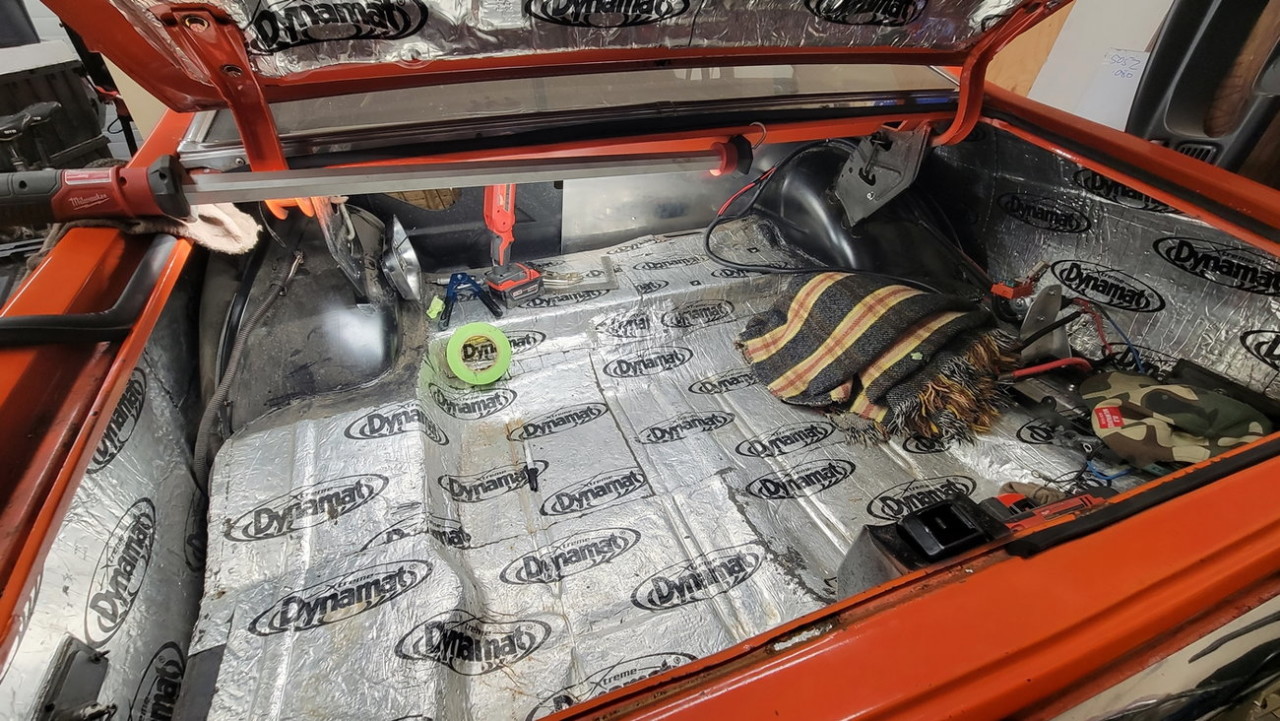
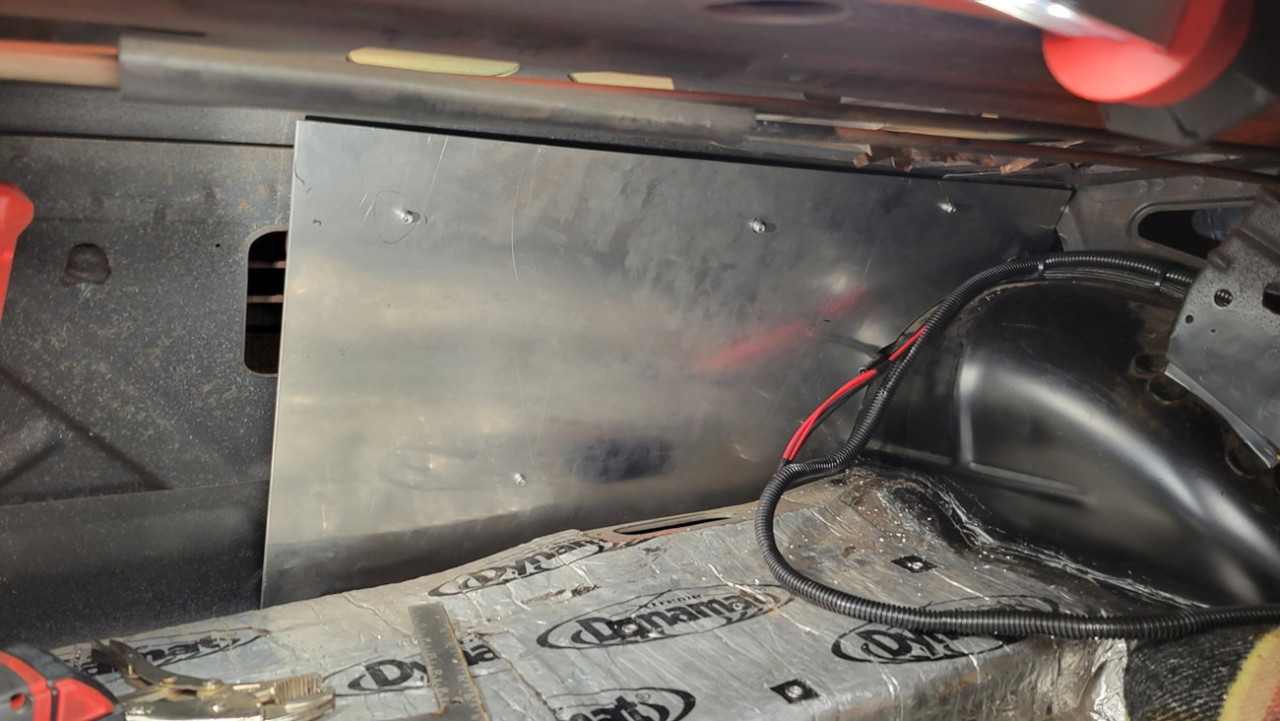
And next, some safety. Obviously having fuel in the trunk is an added risk, so I needed to make a firewall. I also wanted to use the new plating as a solid base to add some 1" sound insulation which seems to have also worked well underhood on my loud 24V Dodge.
When making the bracketry for the surge tank and filter+vent can, I added extra holes and rivnuts so that I can make a protective cage for the fuel surge tank assembly, to prevent something from sliding and hitting it from inside the trunk.
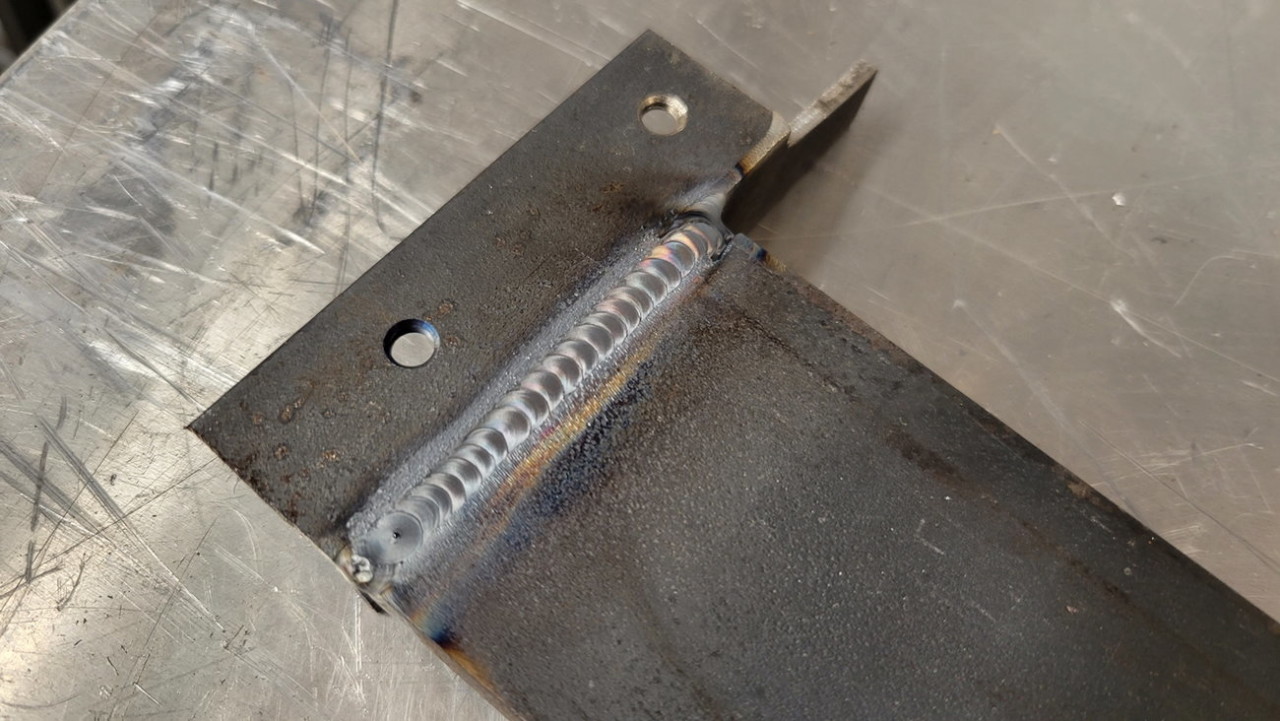
I made the firewall out of two pieces, so that I could have the ends extend over-width and seal above the wheel mini-tubs, which would have been an impossible size to jam behind the trunk hinge supports if made out of one piece.


Wow thanks for sharing!
Posted by Diggymart on 3/3/19 @ 12:40:25 AM