You must be logged in to rate content!
10 minute(s) of a 255 minute read
5-23-2021
I forgot to post these two...
This is the stop for the thermostatic enrichment lever. It's a bolt which normally has a single split washer, but in new cars it had an additional 0.5 mm flat washer for the running-in period of 1000 miles. For rebuilt engines too, it is to be installed and then taken out. The funny thing is that of the 4 injection pumps I have, two didn't have this additional washer and two did. The two that didn't were on my car and the one from the 404 KF2 Injection sedan I used to run in the eighties. The two spare pumps were from cars that lived their entire lives running too rich a mixture because whomever serviced them didn't read the workshop manual!
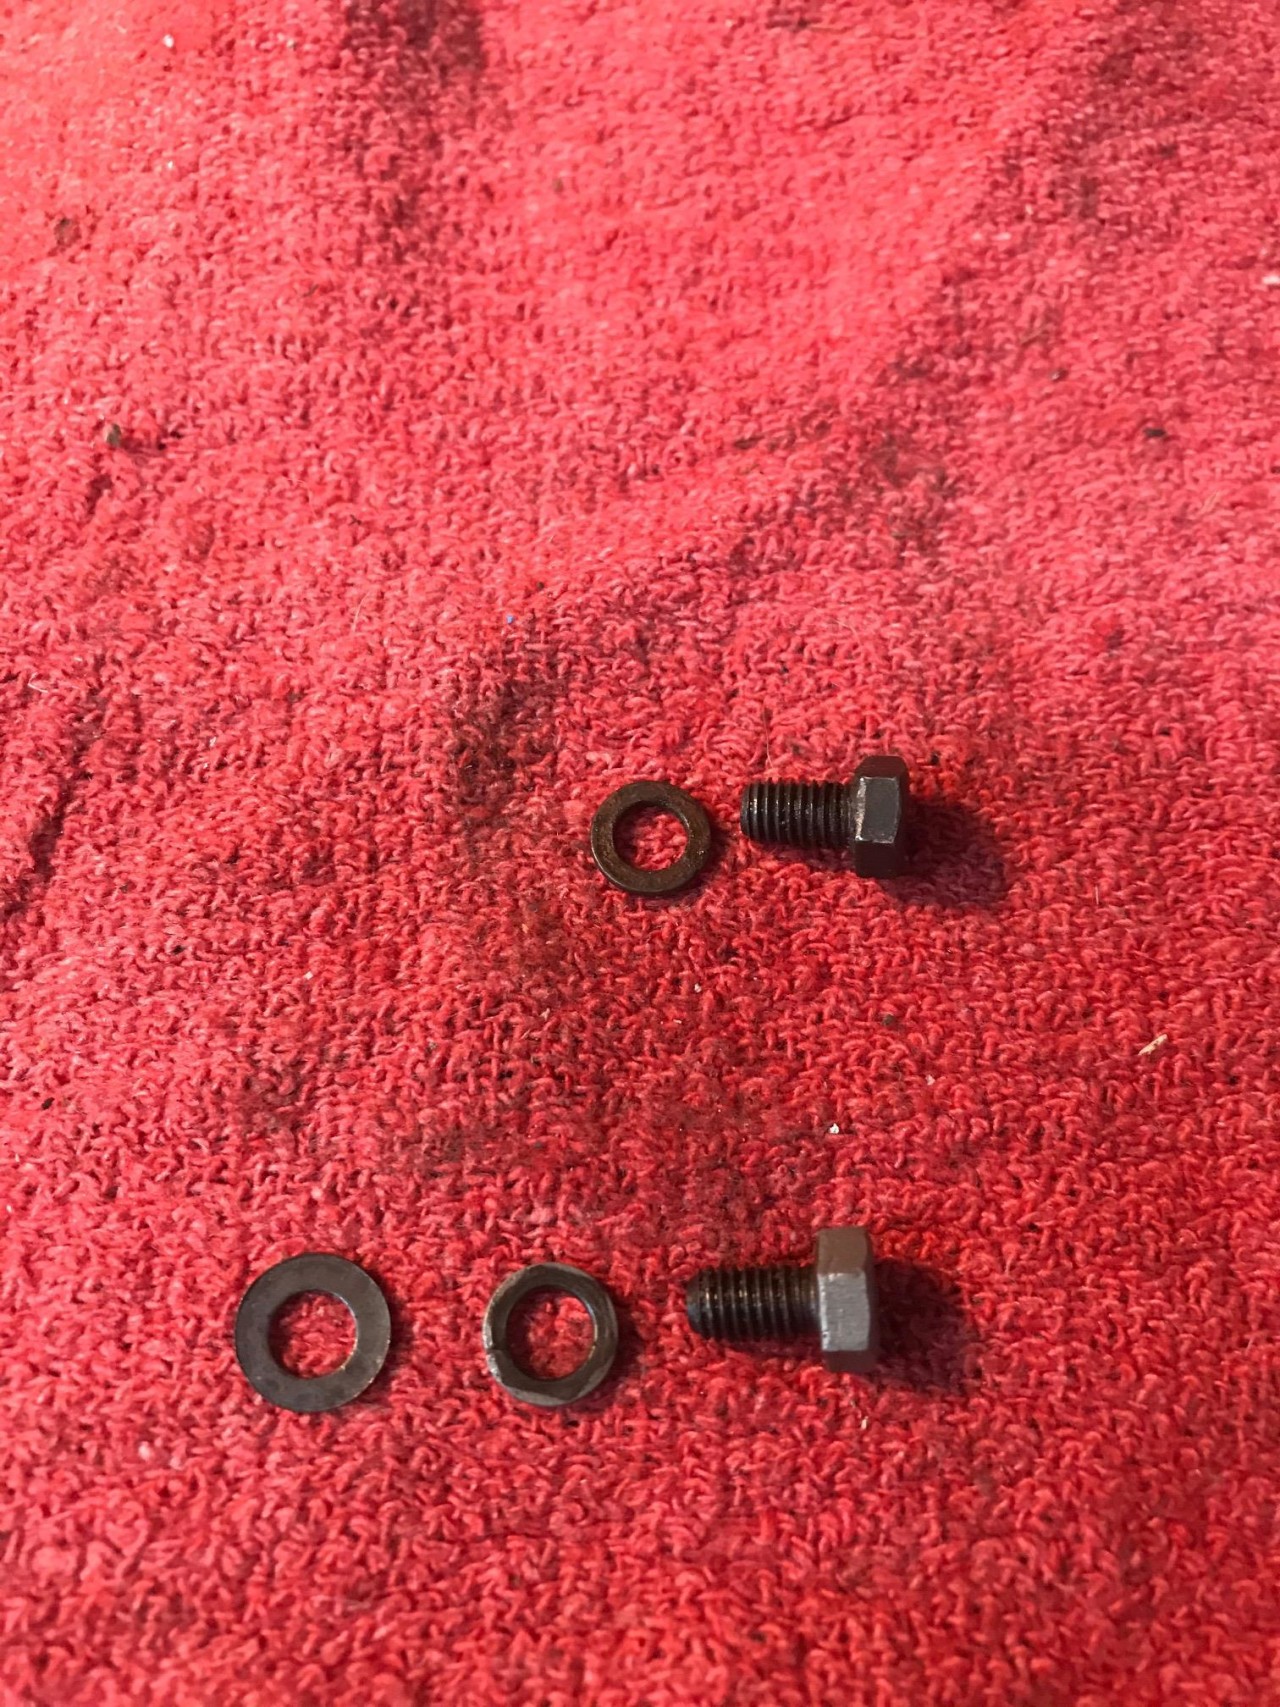
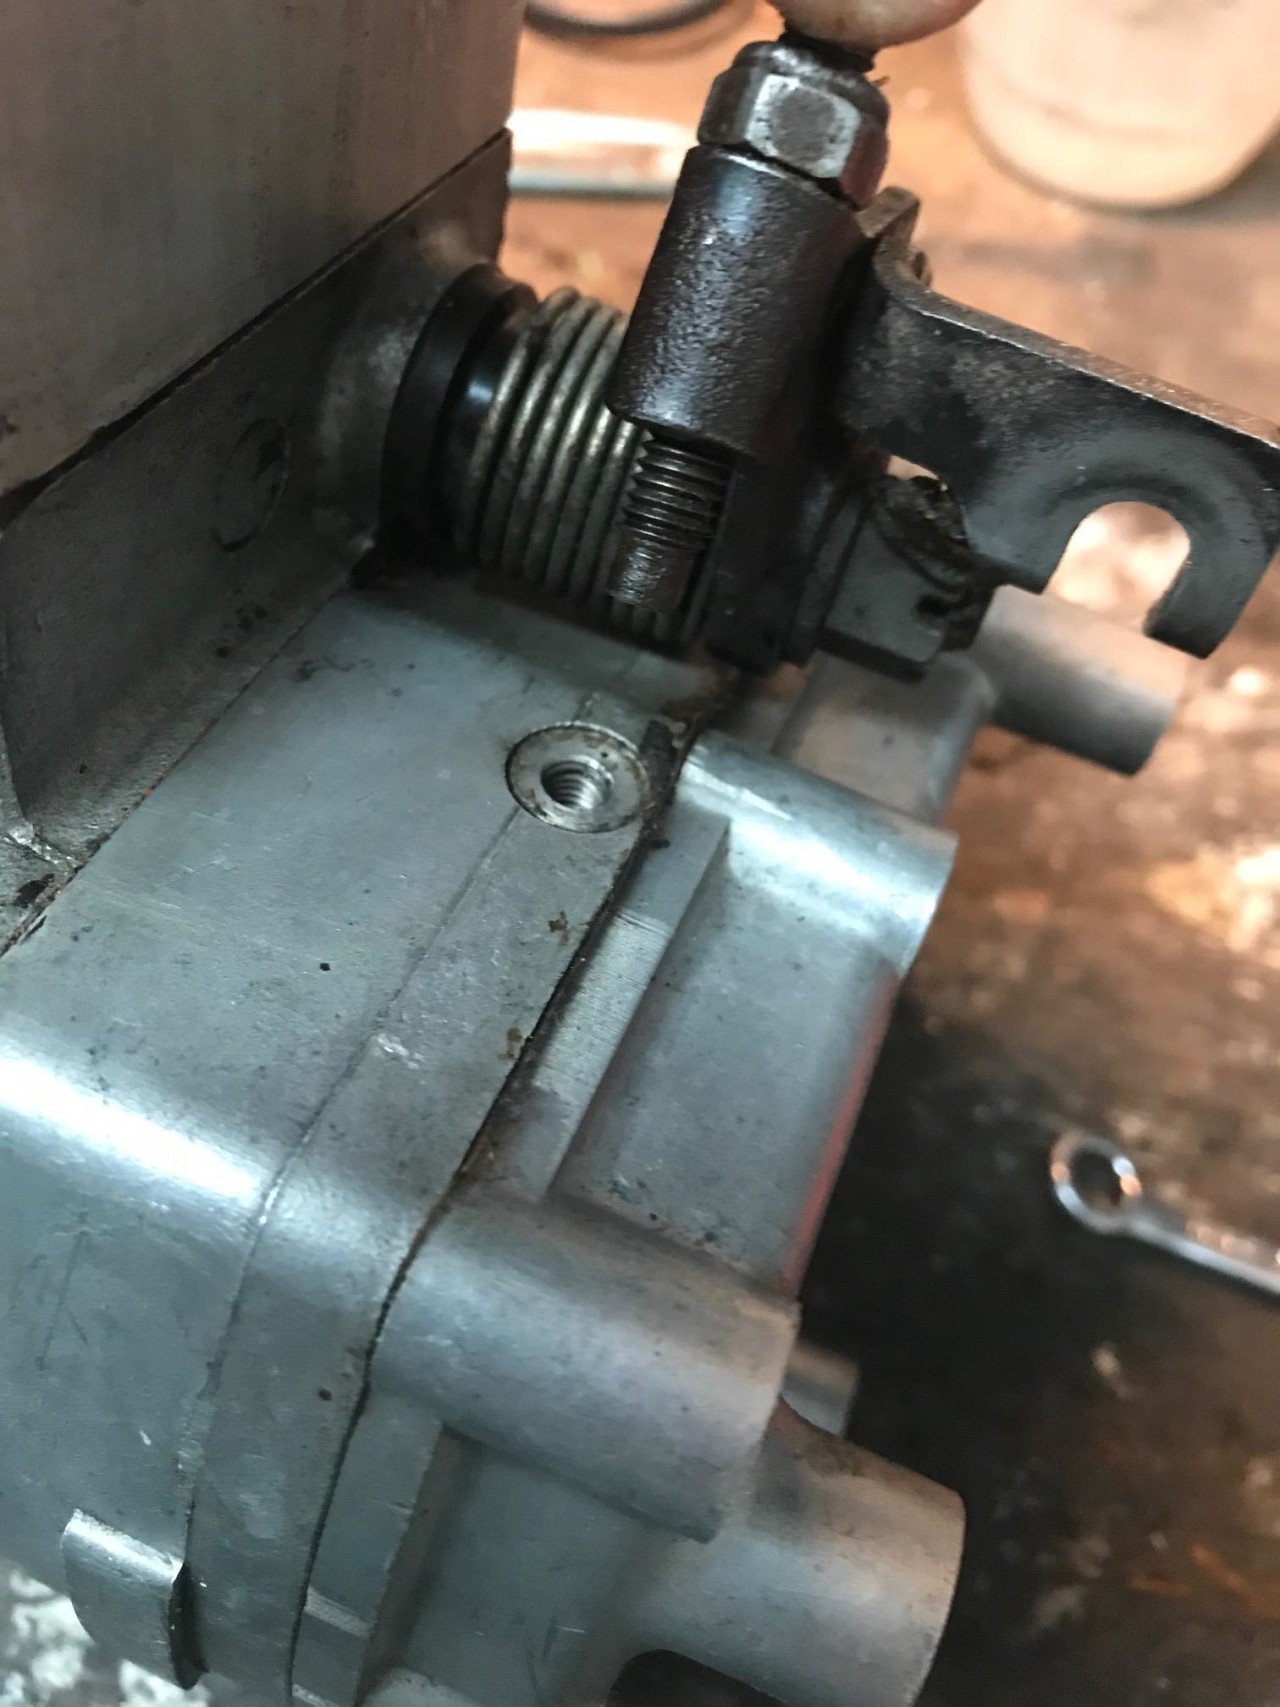
This threaded hole is where the stopping bolt goes. This is a spare injection pump, and I'm holding the richness lever up.
5-24-2021
All I did today was pump 20W50 racing oil into the gearbox. Messy job! Tomorrow I may do the brake fluid and coolant if the new lower radiator hoses arrive.
Then I'll have to do electrical checks, put a jerry can of Chevron 94 in and see that the fuel feed line's connected to the correct tank pipe, prime the pump, bleed the delivery valves on the injection pump and then it'll be ready for some cranking.
5-26-2021
Tuesday I filled as best I could the braking system with fluid. My Rock Auto hand pump vacuum bleeder was not so hot so I ended up getting my wife to pump the pedal (new master cylinder so no problem) and got fluid into most of the system. The pedal's still super soft though so either the Hydrovac is super toasted inside or there is just a lot of additional air in there. These systems are notoriously hard to bleed so I tend to think it just needs a bit more bleeding. The assistance ratio is 7:1 so the slave cylinder on the servo has a huge displacement compared to the master....a very powerful vacuum might do the trick. Will try again, possibly with the engine running, to get the slave cylinder to do its large displacement. The system was totally dry of course. The Peugeot 404 workshop manual says to set the ARC50 purge machine at 31.2 PSI, and the hand pump manufacturer recommends 10 PSI, never more than 20....I suppose that's the issue, haha!
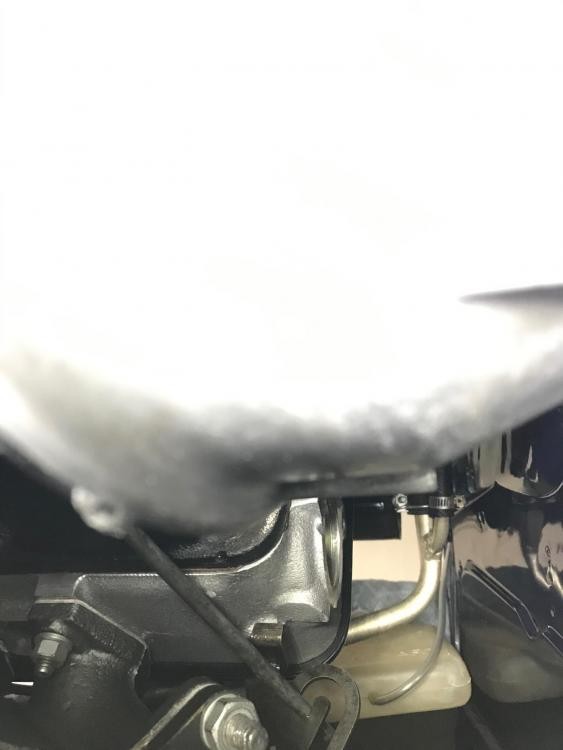
Made this cool bib for the master cylinder to catch spilled fluid, with a rag underneath.
...and then today these arrived after more than a month from Germany:
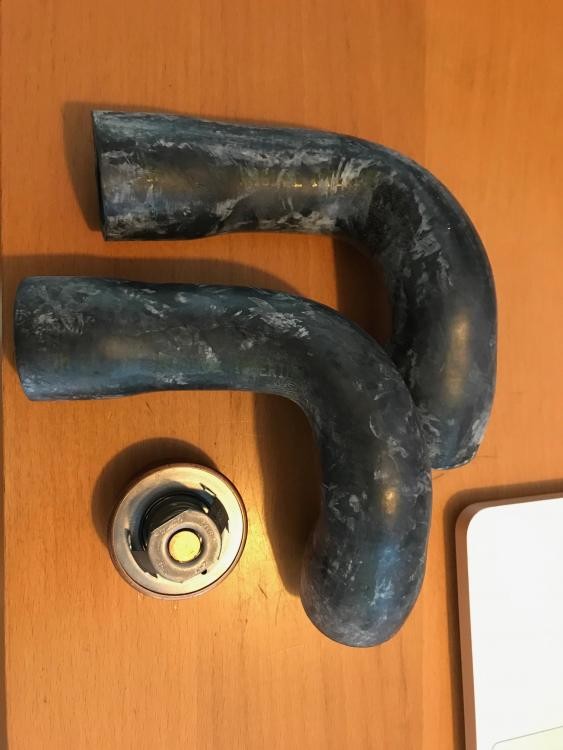
Two new lower radiator hoses and a new Calorstat thermostat set at 75°C. So I installed the lower hose, put the thermostat in and filled the coolant. For that I used the long life stuff used in Mercedes, pre-mixed. The system took about 6.5 litres so there's another 1.3 litres to go.
In theory I could attempt a start anytime, but I think I'll double-check the valve clearances and re-check the distributor positioning against Cylinder 4 compression TDC first. That should not take too long. Then I'll put a battery in and check the electrical system.
5-20-2021
Home issues have been taking precedence recently so there's not much to report. Our TV from 12+ years ago, after being used about 14 hours a day! gave up the ghost so plans today were altered to not only replace it but set it up in the house, which involved some rearranging....
Anyway the issue with the vacuum brake purger I have is not going to get better; it won't cut the mustard and a friend in California recommended using a MitiVac to generate more pressure. Well....I DO have a Pela pump that I use for oil changes and have used for 15 years.....why didn't I think of that?
So tonight I rigged up a spare vacuum gauge with it and three strokes pegged the vacuum gauge at -15 PSI (-30 in Hg). So 6-7 strokes should do about -32 PSI. Will try this soon!
In other news, I added just over 19 litres of Chevron 94 to its tank today. Will test the fuel circuit soon too.
5-30-2021
I need a break from this project. The coolant has been in for a few days and there were some puddles on the ground. Thought it was from a little bleeding I did. Maybe....
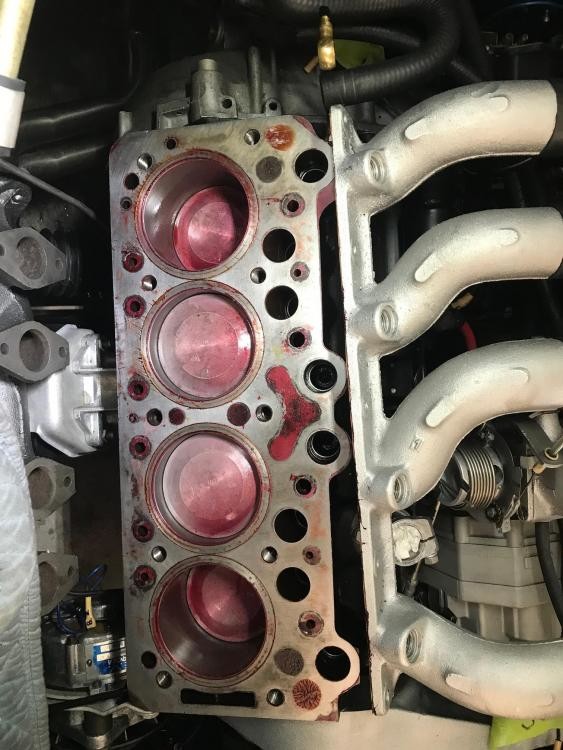
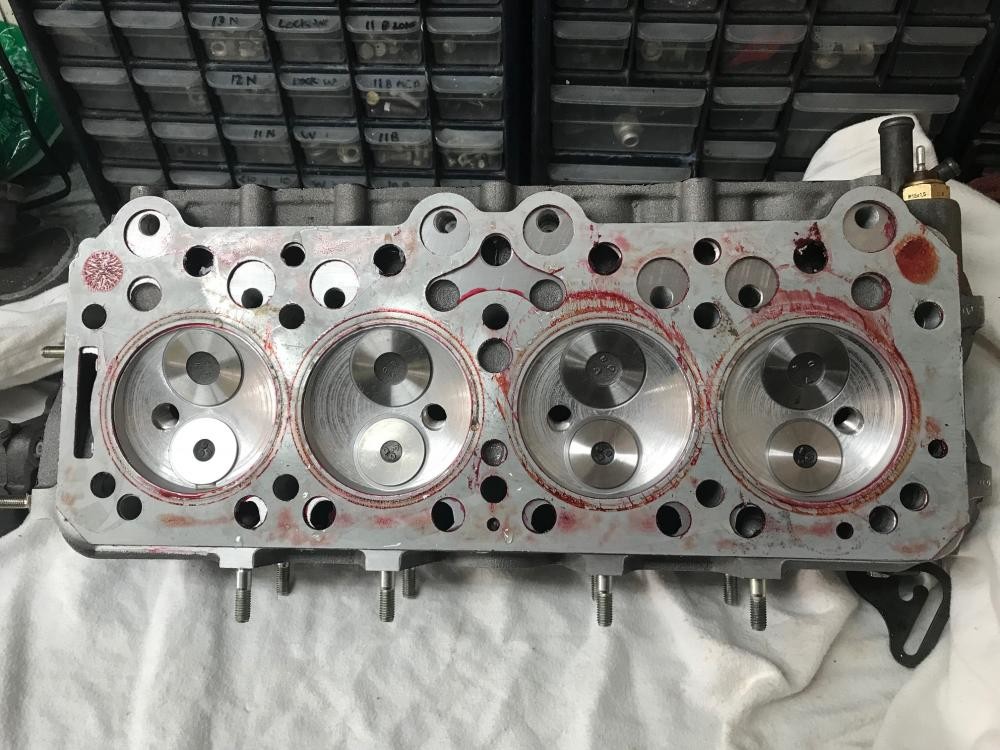
...but it's ALSO dripping from the head/block junction. The engine builder used a NOS bi-metallic gasket rather than the Reinz type I asked him to. This is the result. Head has to come off because who knows where else it's leaking. Project is set back a couple of months at least, I think.
6-6-2021
I do have to whip the head off and make sure the combustion chambers / bores don't have coolant in them. Perhaps tomorrow, or next weekend.
For the second opinion on the engine I may take it all to Lionel Hondier in Vancouver next year, because he builds lots of wet linered engines (Citroën). That is, if I can't figure out why it was leaking myself. Also have to find out where the brake line unions are sucking air....LOL!
I did tell Anderson's Precision Engines about this in an email last Monday, but it's been radio silence so far...and ever if they offered to do it again, the assembly only cost a few hundred and now I don't trust their ability to do one of these "weird furrin' engines".
6-14-2021
Today I whipped the head off, but not before spot-checking the torque applied to the head bolts by Anderson Precision engines. They were about 50 lbs-ft, which is just a bit light - should have been 54 with the metal clad gasket. With the Reinz or Curty gasket, the torque is 60 lbs-ft.
When using the type of gasket that the long block builder did, the metal surfaces of the gasket is supposed to be coated with boiled linseed oil. He used some sort of Varsol soluble red spray. Maybe that was the issue?? I somehow doubt it.
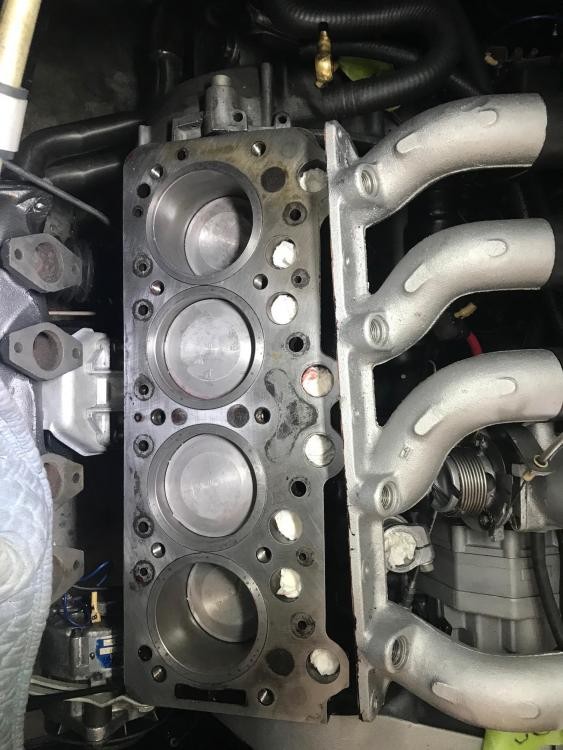
I could not see any obvious reason for the coolant drip, presuming the head surface is flat. There is no reason it should not be. Liner protrusion of 3 of the 4 cylinders was fairly perceptible but in 404 engines with the rubber seals, they often pop up a bit with the head off and this is a non-adjustable thing (the one protruding less likely was tighter in the block).
The red spray on the piston crowns is gross and to me shows a lack of attention (why not put paper towelling inside to protect them??) and I cleaned it off of course. Super sticky junk.
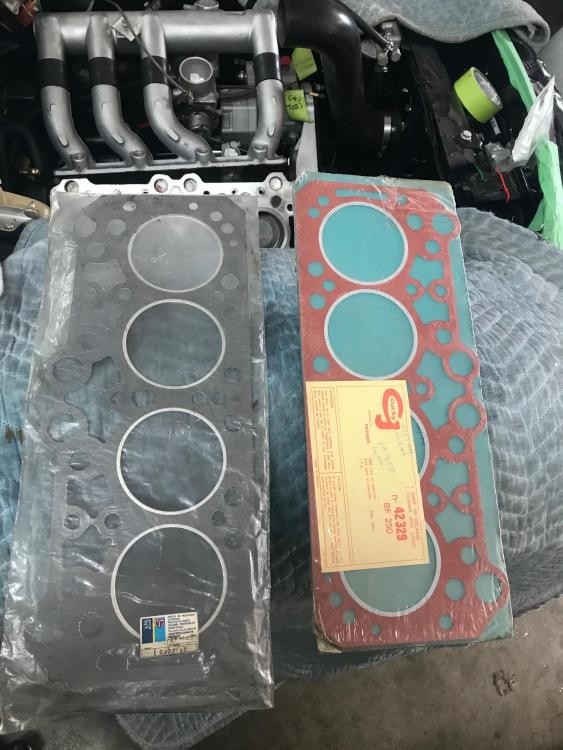
I'll be eventually using the Reinz or Curty gasket, leaning towards the Reinz, which is Peugeot OE and should seal well (as should the Curty). The Curty says it's pre-treated with stuff to make it adhere to the head and block, and to not use any spray or other treatment. I assume the Reinz is the same.
6-15-2021
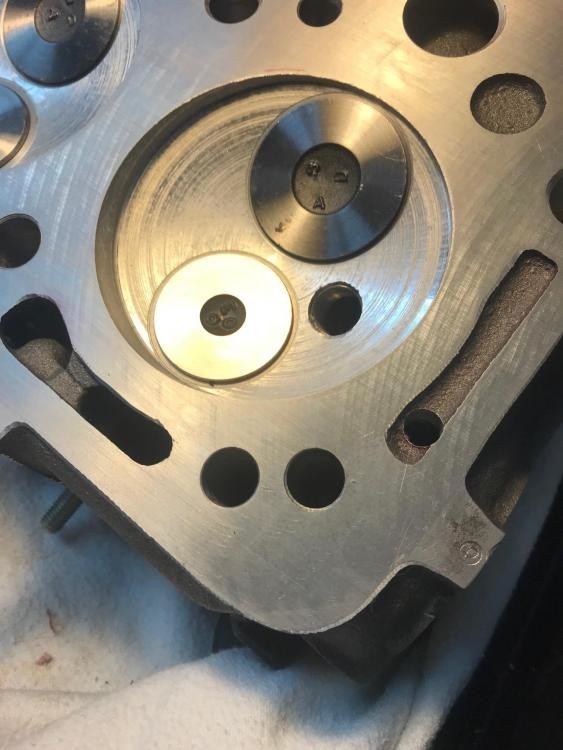
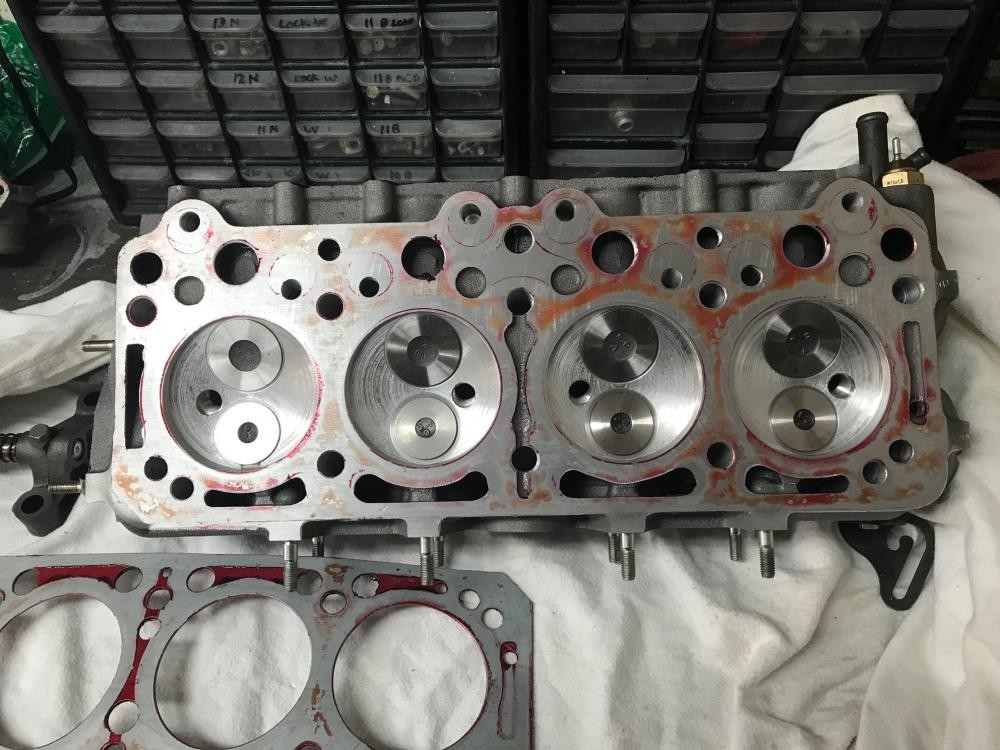
Not having a machine shop in my garage, I thought I should improvise and check the head for planarity. The best way I could think of doing this was to put the mating surface of the new head up against the same part of the old head. So far as I know, the old head was flat and it certainly did not drip coolant when parked.
Interestingly, the old head rocks diagonally against the new one when the two mating surfaces are together. So either one of both of them is warped. The warp is on the end where I noticed the weeping coolant....
Thoughts on this discovery?
6-16-2021
The machine shop has contacted me just now and asked me to bring the head(s) down to them for checking, the shop indicated that their records showed that it was not checked for trueness because it was NOS. So we should have a reasonable solution sometime soon.
In the event the NOS head is too warped to rectify (up to 1 mm can come off before compression ratio starts getting too high) then the old head will have to be redone with new guides and seats. I'll bring both down there soon.
6-21-2021
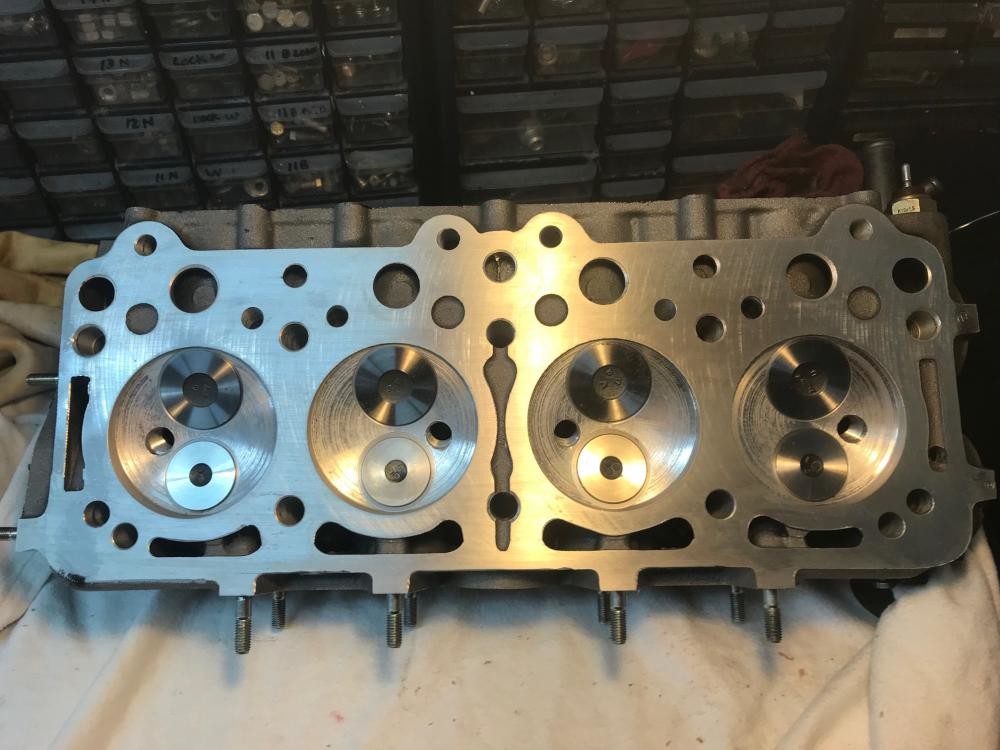
I took both cylinder heads to the workshop this afternoon and - surprise - the new head is perfectly flat. The rocking was caused by the original head. The old head is slightly crooked though Evan said it's not what he'd call "warped" but could use a skim.
He offered to fine-tune the surface on the new head at no charge to give the best possible chance for a good seal with the Reinz. I think I'll put the head back on after she's back....
And eventually have the original redone with new guides and seats and store it as a spare.
6-24-2021
I heard back from the shop today. When they were fine tuning the surface a couple of days ago, a couple of low areas were apparent around where the head was weeping. In the end about 0.38 mm had to be skimmed off to level it all up. So, that is encouraging news.
7-9-2021
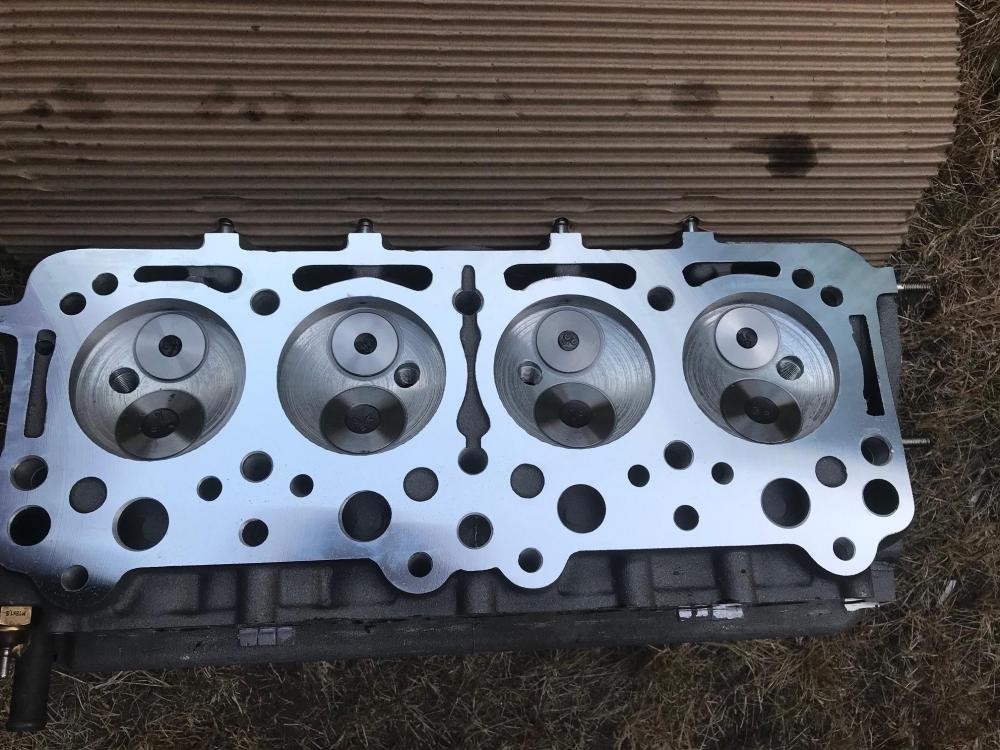
Got the head back today, it's very smooth, in fact I had to move out of the direct reflection so you can see it properly.
Wow a labor of love. Great!!
Posted by Diggymart on 9/7/19 @ 4:02:23 PM