You must be logged in to rate content!
5 minute(s) of a 255 minute read
7-17-2021
Well, the pause has been very good!
I've had a chance to look more closely than I did before at the preparation of the internal engine parts.
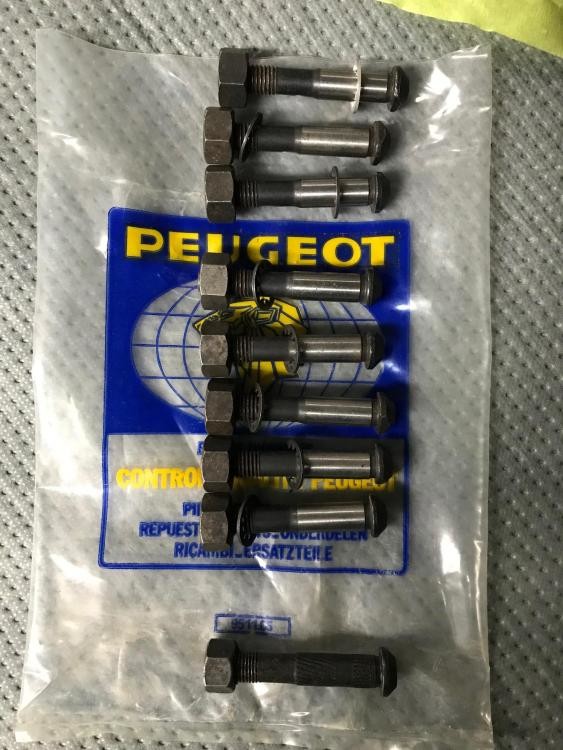
Basically, I need to pull the block out of the car again, put it on the stand, and whip put the pistons and rods....because I did not change the connecting rod bolts. I had read in a Peugeot service Bulletin many years ago that they were no longer recommending systematic replacement of rod bolts at engine reassembly because the rod bolts were knurled and mounting them in the rod would ever so slightly affect the position of the rod cap and therefore the bearing positioning, which is BAD. That is correct, but the bulletin was from 1973....and my car is from 1966.
In 1966 (and probably up to 1970+) the 404 rods did NOT have knurling in them, but rather tight smooth sleeves to fit them in the rod holes. So that Bulletin does not apply to an earlier 404. Further, the workshop manual for the 404 KF2 states that the bolts and washers have to be changed systematically after every dismantling. In other words, they are stretch bolts.
The good news is that I have a set of eight of them, new old stock, with new washers and nuts. The bad news is it means a fair bit of new work. But: better now than later!
In 1987 when I did a basic rebuild on another KF2 engine, I did not change the rod bolts IIRC but that was as I say a rather basic rebuild and even though it was driven hard for 100,000 more km and never seemed to have a problem, I'd rather do this engine 100% properly.
The eight top bolts in the photo are from a 404, NOS, and the bottom one is one of six (!) knurled ones I have from a later Peugeot engine, possibly a 504.
7-25-2021
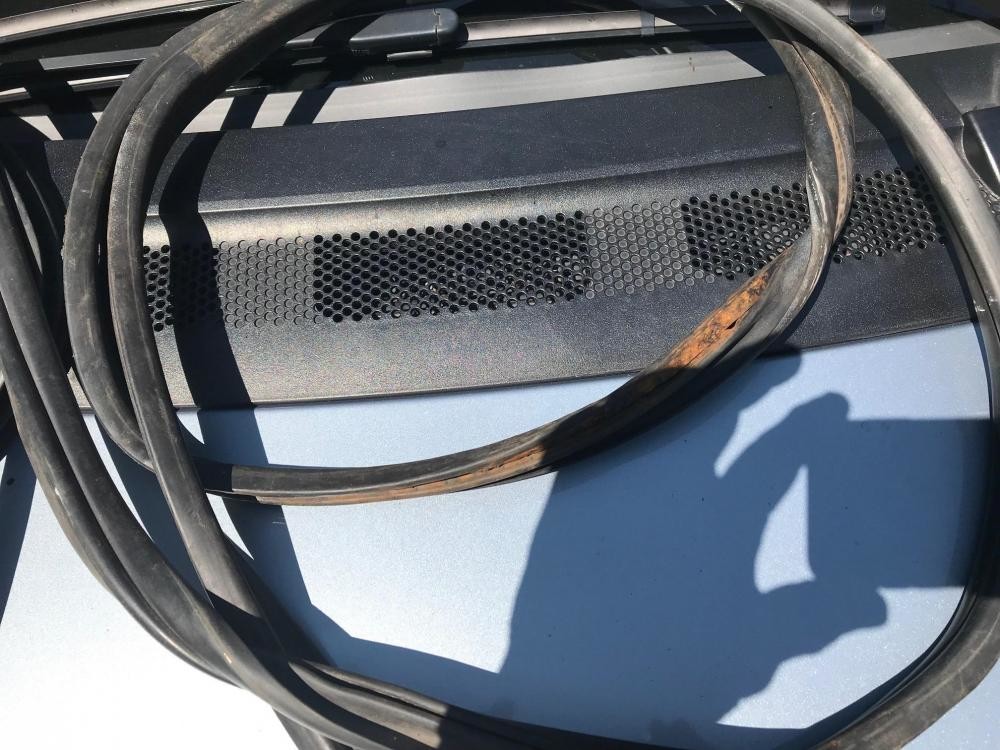
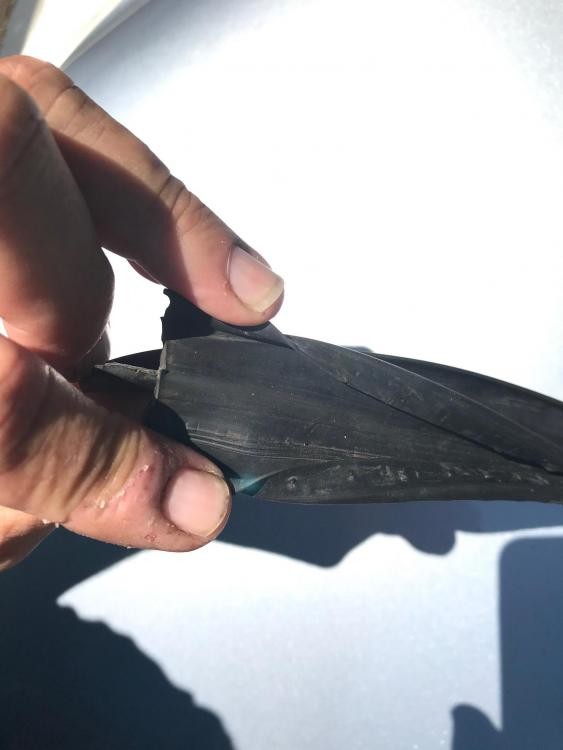
I took the advantage of the current pause in work to clean the old door seals. The new replicas available these days are too thick and press too hard against the doors when shut and because the rubber of the originals seems to be in decent condition, I thought I'd spend a few hours cleaning one up to see if my plan to reuse them would pay off....
Before:
Before (inside the seal where the metal clips are placed):
After:

After (inside the seal where the metal clips are placed):
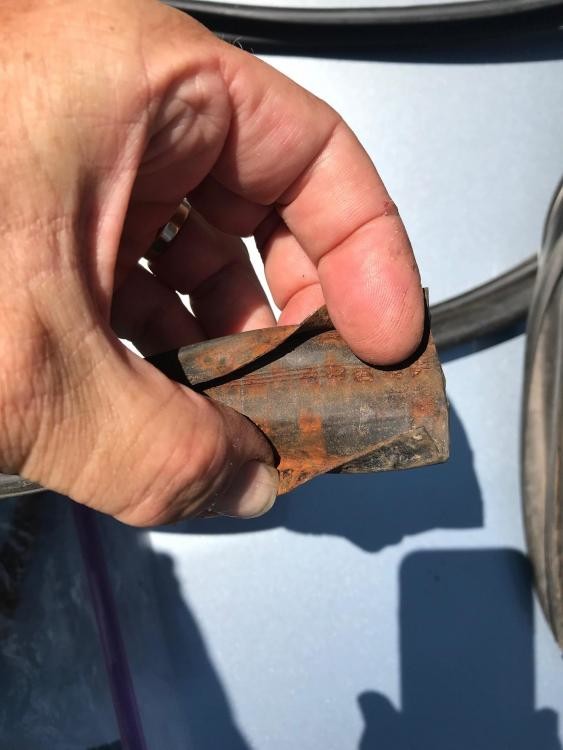
Thanks to Jérôme Roussel in France for giving me 1.5 metres of metal clip strips, to replace the 1.5 metres of my originals that rusted to FeO2 powder in the 5 years these seals from 1975 were on the car, and the car on the road. These will all be de-rusted and electroplated in Cadmium and painted, then reinserted into the seals.
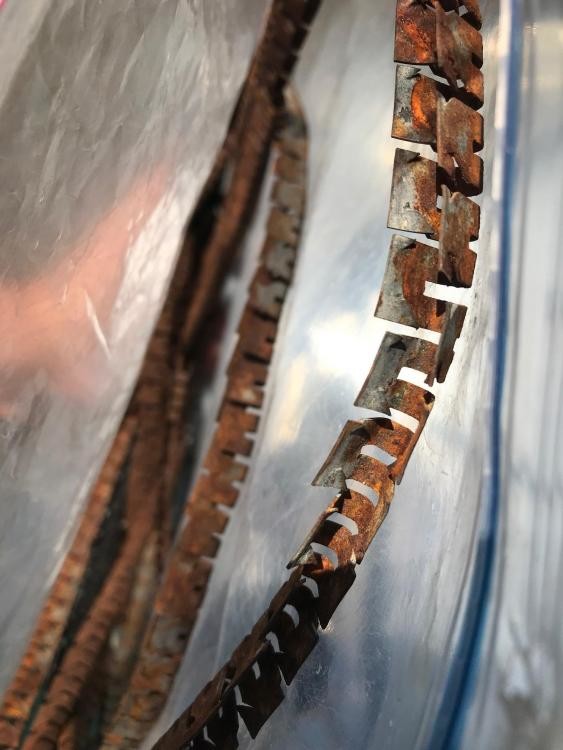
As I noted, the seals were bought by the previous owner in 1975 at Jay's British and European Motors - I still have the invoice - and they were on this daily driven car for five years. After that the car was in a garage and so the rubber is truly in excellent condition. Three hours or maybe a bit more with Flitz polish turned them from a rusted, dirty mess into what appears to be nearly new and very soft and supple rubber!
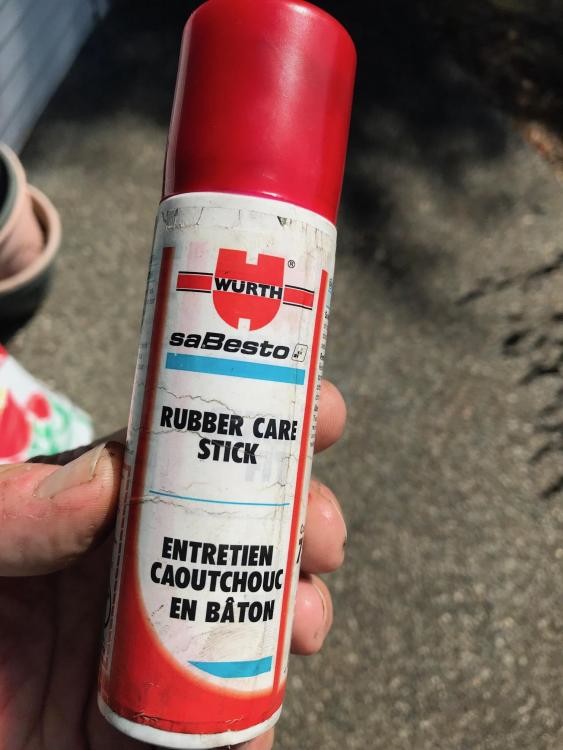
After a good wash with a nail brush, the cleaned seal was treated with this Würth stuff and wow did it make a huge difference!
The door-mounted striker plates are not as good looking as they should be so they too will be replated when the seal clips are done.
7-31-2021
So the rusty bits you see in the photos above are at the plating shop in Victoria now and I should get them in a couple of weeks. Meanwhile I ordered some new Flitz polishing paste to rejuvenate the other door seal's rubber and remove the rust stains and white paint overspray.
I ordered 8 rod bolts (NOS) from Joern Haarmann and those should arrive in a couple of weeks.
The garage is full of old kids clothes right now and those need to be washed and donated before I'll have room enough to do anything much on the car!
I also need to buy a piston ring compressor sleeve to remount the pistons once the rod bolts are changed....
Wow a labor of love. Great!!
Posted by Diggymart on 9/7/19 @ 4:02:23 PM