You must be logged in to rate content!
8 minute(s) of a 391 minute read
4-4-2010
Well today's first update is not a good one... Thursday I went to start her to get to a meeting. Nothing. Several tried later I realized that the fuel pump wasn't kicking on and a funny smell had me looking down at the fuse box to see plastic drip off it.
The fuse area for the fuel pump fuse had melted and deformed. The plastic itself came from the still unblown but completely melted fuel pump fuse.
I been dreading digging into it and left it alone for a few days. So this morning has me poking at it and well everything at the fuse-panel and breakers is working as its supposed to.
I am stuck at this point until I get another set of hands to test it out, or maybe jumper the EFI power on. I need to test power delivery down at the fuel pump. I have a bad feeling its not an electrical problem but a dead pump. Hoping for it begin an electrical issue... It so I will have the car back online today. If it is a pump I am likely in trouble.
April 05, 2010
So I got into it last night and got it back online and found a likely cause of the issue. First I hooked up a special little tool that for this type of stuff is invaluable!
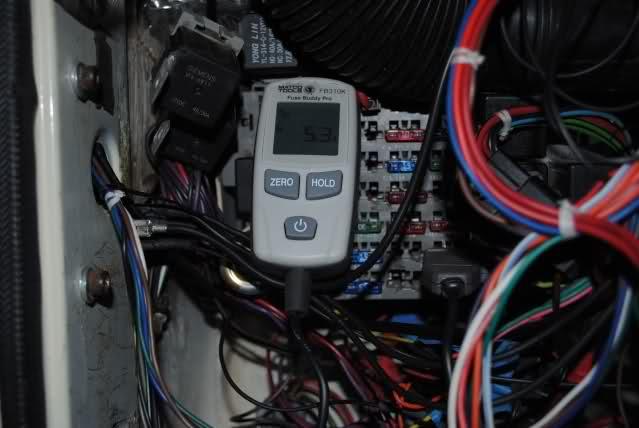
It plugs into the fuse slot breaking the circuit to do an amp draw reading on it. According to it we are only seeing about 6amps. This is well in the allowable limits. But looking closer at it revealed some corrosion issues occurring that could quickly cause the fuse to overheat, yet not blow. Pretty sure this is what had been going on.
I checked over the rest of the setup and had gone about it the smart way. The fuel pump on this setup is simply controlled via another relay setup. Then there's an EFI relay for injectors and coil, and of course the switched MS relay. The issues were likely just caused by the corrosion and increased resistance at that point. And the broken wire.
April 07, 2010
But I do have an idea... I am going to get one of the pictures of the blue bunny all cut up and stuffed onto the trailer printed out and like stick it in the car. As a reminder to what happens to "uncooperative cars" around here...
Today was a comedy of errors. Unfortunately I wasn't laughing. My cat fell in the toilet though, that was very funny.
So hopefully this nice new enclosure solves my parking lights shorting out.
Seems the power grid on my control board for flat-shift, CEL, shift buzzer, and sequential shift lights was shorting out to the steering column. It had gotten moved from its original safer location, and also unwrapped the last time I was in there. I am HOPING I am done back there now.
I have all my lights mostly working as they are supposed to. I still need to diagnose my dynamic oil pressure system though. I think its not getting an RPM signal as the high pressure/rpm switch isn't kicking the buzzer on.
Also want to get the brake and seat belt warning lights working... Overall lots of progress made, but it still doesn't feel like enough.
Oh I didn't mention the cool mod I made that will cause my car to fail emissions now (if the inspector is paying attention)! The OXS light hole now has the LED for my LC-1 stuffed into it. So the OXS light blinks during startup then goes solid once the LC-1 is heated up.
Thats okay cause next inspection time I will program the CEL to be on and see how much trouble that causes. Should ask them to scan it and tell me what code is in there...
Its come a long way, but I have VERY high expectations of where Kamei still needs to be, and she needs to be there in only a few more months.
The secrets to getting a build this far this fast are actually pretty simple. First off simply start with the best base you can get and collect everything you can before you start. I looked for several years for the right base before this one came my way.
Then go into it with a very clear idea of exactly what your going to do, and how your going to get there. ONLY change directions to suit something that's not going to work like you planned. Fortunately I have been wrenching on dubs long enough that this isn't usually an issue.
Know your limitations, but more importantly accept and admit your limitations.
Limitations.... Here is my hangup on this project. My sewing skills are fair, but once I calculate the amount of time it will take me to recover my seats, materials, and my own perceived skill level..... I am seriously liking the idea of some Wet Okole seat covers.
I do not have a clear and defined idea for the interior yet either. Nothing exactly felt right that I came up with. So this may well be one time I simply spend the money, and use those covers to help define the rest of the interior. Yeah I could do it all myself, but I really don't want to, or want my car down that long.
April 21, 2010
Lots of little behind the scenes stuff happening. My turbo wastegate actuator is crapped and no reasonable way to repair it. My fabricator could likely make a bracket and modify somethign to work but I also have an exhaust leak and two broken off bolts in it now. Time for a new one.
Got the engine bay cleaned up and tydied a bunch of little details up! Ran a bunch more wires. Including properly running and hidign the alarm antenna wiring. Its stuffed up in the roof so I lost some range I am sure. But I mainly have it for a remote door unlock/lock anyways. And for the funny looks people give it in a parking lot when it chirps.
Not posting any pictures of the alarm or some of my other "secret mods" I have in there for obvious reasons.
So she is back together and an oil loss disaster narrowly avoided. Now I need to go retune her for 20psi since the turbo isn't getting fixed properly anytime soon.
June 28, 2010
It was a very long weekend... I started in earnest on the remaining main front harness Friday morning. It took all day Friday and a good part of Saturday to get it sorted and out of the car. But it paid off!
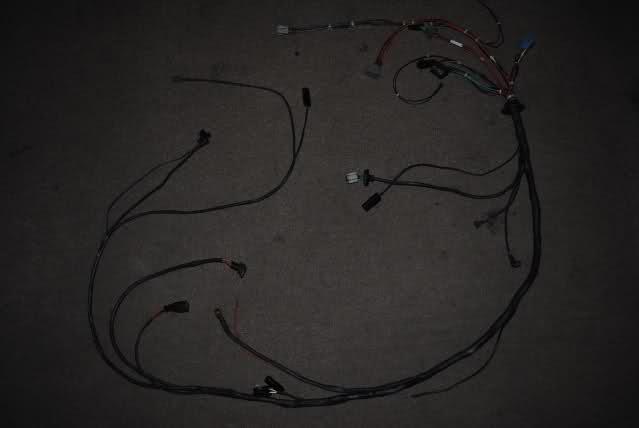
I absolutely LOVE using aviation ties to snug it all up and organize it! Almost everything not attached to the engine is run through this harness. The extra relay and fuse are for the high speed on the MK2 fan. Most of the rest of it is simply stripped down and organized OE stuff. I saved the gray plug as it has a diode and feed in it to kick the fan on. The stock fan setup is controlling the low speed. But I can easily use this to kick the fan on sooner via the MegaSquirt, or a manual switch. The other wires in the plug I retained for the power grid going to the Aquamist water injection.
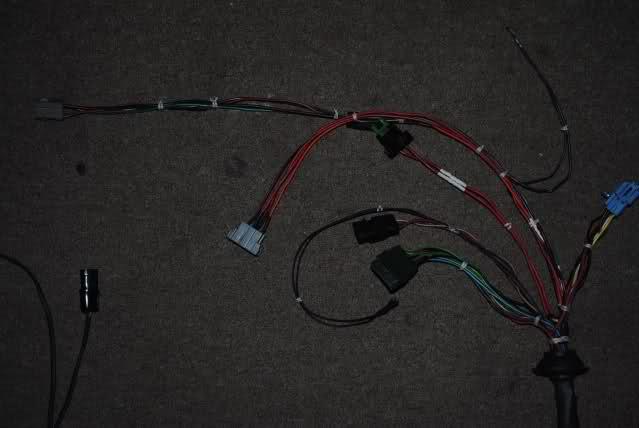
I still need to finish a few small ancillary harnesses for the lights and headlight relays. There are a couple more tricks in there. I setup the headlight relays so that I can unplug them and bypass them in a moment if I ever lost a relay. It has happened before...
Probably not the most exciting update for most of you... But it makes me very happy to get it 100% the way I want