You must be logged in to rate content!
10 minute(s) of a 391 minute read
5-29-2009
We are dead in the water. I have lost the whole day now. Got up early this morning and grabbed the head to take it over to The Mad Scientist for assembly of the valves and springs. My 8mm viton valve stem seals are missing. I had them yesterday morning and sat them on the kitchen table. Yep. She cleaned.
Nobody seems to have the right set. Even if they do, I am not sure I can recover from the lost day at this point.
On a good note, the engine and tranny are in. Not without misshap though unfortunatly. FalconFixer got into an argument with the drivers side mount and it slipped. His wrist is very unhappy now.
If anyone local has some, we are in dire need of 8mm valve stem seals, viton preferably so I only have to do it once... My valve stem pliers are also missing so pulling them out would be a pain once its all on the car.
The Mad Scientist came through for me. I have to give a shout out to him. Brent Savage over at TAS Goodyear is da man. And lemme give a shout out to the boys at Bug Craft for having a set of the 8mm seals sitting on the shelf and donating a killer EMPI sticker for the project. They are now known as BC Autoworks cause VW's marketing department sucks my.... Um never mind. And most importantly FalconFixer and the missus for putting up with my sh!t today when I was having a really bad day. Today sucked monkeyballz.
Anyways today was a comedy of errors from the beginning. Cept I wasn't laughing much. I am likely shelving the bunny for a few days. Unless a miracle happens there simply is no way the bunny can be together and running by the show on Sunday. I probably can, but at the cost and or possible risk of neither FalconFicer or I making it. We still have an ECU to setup on his baby and a little wiring to finalize here and there.
Whatever the case, I am wide awake and the missus and I are cleaning some G-60 forged pistons. I want to swap these in before I bolt the head on. If I bolt the head on before I go to sleep... there's still a good hope it can be online in the next 24hrs.
May 30, 2009
So I broke a piston oil control ring putting the nicely cleaned pistons together last nght.... The bunny is sadly shelved for the weekend at least. We need to get FalconFixer's caddy online for the GTG tomorrow than busting @$$ on a doomed bunny. I will get back to her early next week. Shes registered and I have 13 days left to get it all together and through safety and emissions.
I might post a teaser pic or two of this caddy later... If you guys are good lol!
June 02, 2009
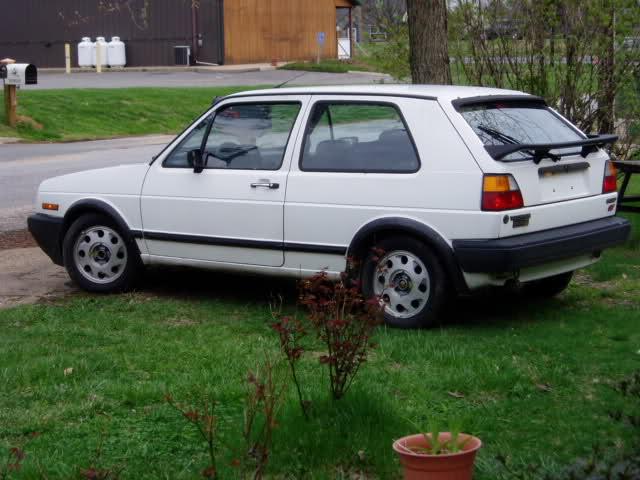
So theres been a lot of progress over the past few days I haven't gotten pictures posted for yet. Due to not having a garage and my apartment already being overrun, I was building the engine mostly "in the car" per say. No not an ideal method, but it works and I have had to work in worse conditions. I have actually had to rebuild a bottom end while it was snowing before... That sucked. That was actually my MK2 golf though. My rabbits have only killed fuel pumps and timing belts in the snow.
I miss that car....
Well anyways not MK1 content. So heres the engine right before slotting it into place. Check out that OLD SKOOL lower crank seal cover. The timing belt shields are just the thing needed. I was sad, we were all ready to drop in one of the 1.6 litter bottom ends I have sitting here. I have one stamped 1.6 and one with just an H on it (likely a Chrysler motor). Unfortunately neither were in good enough shape to inexpensively rebuild. So I stole off them what I could.
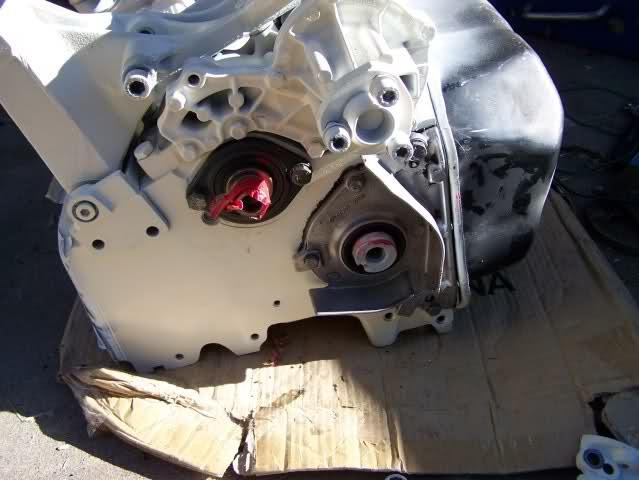
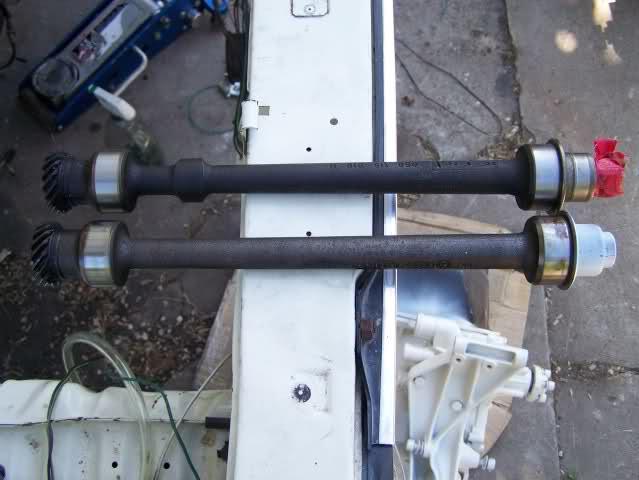
The block is a frankenstein. Its a 16V 1.8L with 8V 1.8L internals. Heres a comparison between the 16v aux shaft and the 8v one.
Now theres a few good reasons for doing this. Mainly because I can and have the motors sitting here and the 16V was rebuilt recently... But more importantly I wanted a better breather system, and its a cleaner way around the block off plate issue on the PG block. Oh and the 16v block also has the needed oil squirters and had already been cleaned and painted. Even though I repainted it...
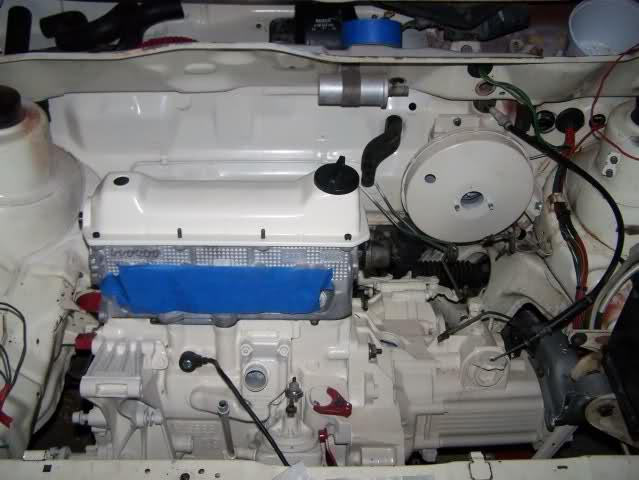
For simplicity and lack of garage, I set the block in resting it on a jack stand, hen slid the tranny onto it and bolted it all in. Then we had a solid "engine stand" to change out the rest of the stuff.
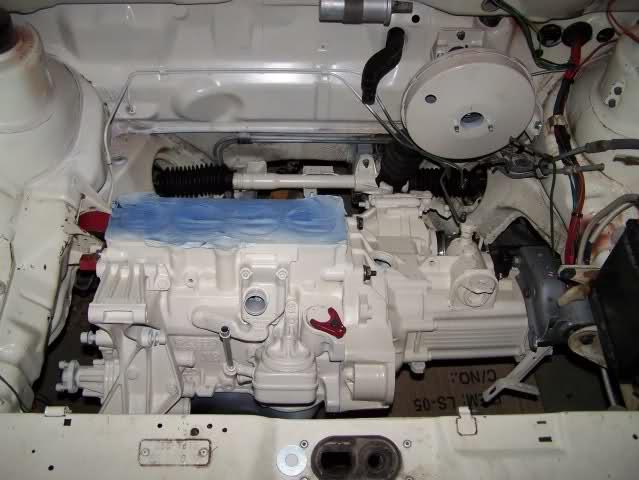
So here I am getting ready to set the head in with the ABA headgasket taped into location.
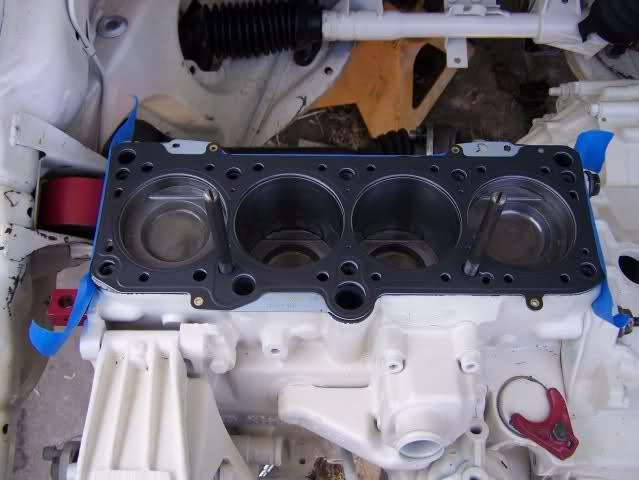
Freshly machined parts look so so nice! The ABA head needed to have the valve guides changed out so it can run the beefier 8mm valves from the PG head. These exhaust valves are sodium filled. Machine shop cleaned the head, cut valve seats and resurfaced it. I then hand lapped the valves and the Mad Scientist put the springs and keepers in. I finished up dropping the buckets and cam into it.

Bolting it on was easy enough. The tape trick worked pretty well to keep the headgasket centered, or at least it lets me sleep better thinking it did.
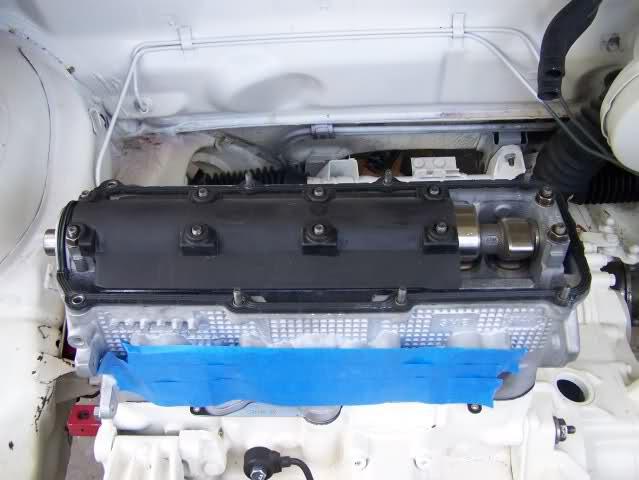
Normal M.O. on my cars is to cut down the splash guard where the oil fill cap is. I hate seeing those things when I fill with oil as they always look dirty and I can't see how clean the engine is... Retains most of the benefit and eliminates all the disadvantage of running them.
Cool, so finally onto "MegaSquirt" related goodies. When converting a MK1 over from CIS to EFI, the first thing obviously is removing all the CIS stuff. Long gone on here except for the fuel lines routed the wrong way. So the trick is to unclip the fuel lines on the drivers side and then behind the brake booster. A good yank sally pops this one. After doing that I pull the lines away from the wall far enough that I can get a pipe cutter into there. Use a good one, but keep it small.
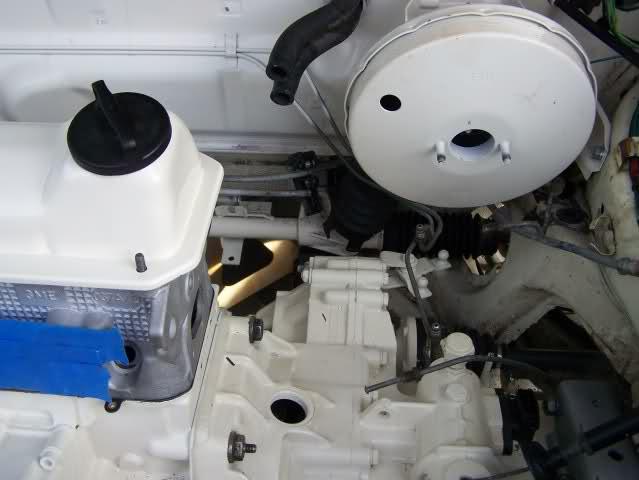
After doing that, carefully bend them up and over to the passenger side. I tuck them behind the brake lines. Theres a clamp down there PERFECT for catching the lines. I reused one of the rubber holders from the side we pulled them off of. Now getting the clamp around it takes creativity and is always a pain to do... Sometimes I have to go in through the hole for the tie rods. Usually it takes two people, one holding the lines in place and the other finagling the clamp and pulling it over with an assortment of weapons. Pliers, prybar, screwdrivers (that of course are NEVER to be used for "prying')...
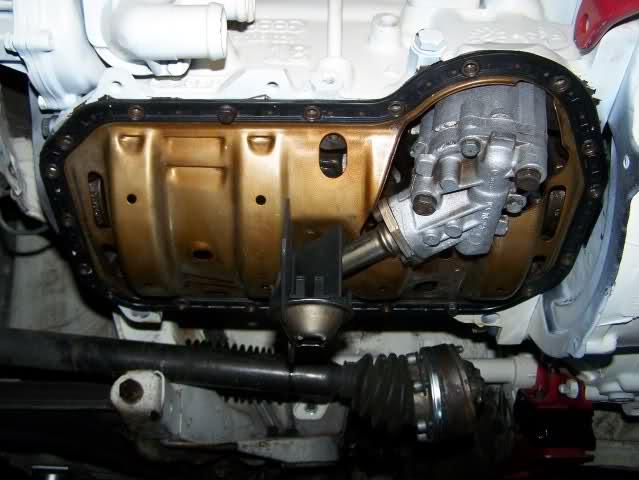
So after sorting out fuel line routing, down to the bottom of the motor to finish up a few more things. Contrary to what I have seen elsewhere online, you CAN run a windage tray gasket setup and a baffled oil pump pickup. You just have to use the right pickup! I am not sure what engine this one came out of, but I have been abusing it for a few years now. Hope it doesn't rattle as I broke off the final clip... Now it will just be held in by being pressed against the windage tray.
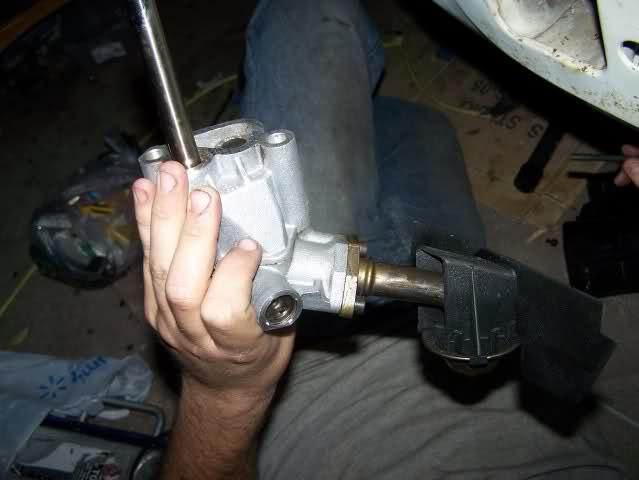
When I do this, I spin in 2-3 bolts to hold the tray up and out of my way so bolting the oil pump in is a little easier. Then its time to bolt in my modified 8v oil pump! Its made with a 2.0L 16v oil pump with the shaft swapped out for the 8v one. This was the trick I used a few years back for the most flow and pressure... But I think theres actually a bolt in 8v pump that would do the same. Again parts I had on hand I made do with. And here we are all bolted up!
Engine bay is really starting to look like something finally!
Not sure what if any progress will happen on this today. I got work, and some other projects, to attend to. I am hoping to have the final bits ready to be bolted to the engine though.
We didn't make it to the GTG last weekend for those who aren't local and watching this. FalconFixer's caddy is all online and ready to go, but having issues getting the COP setup to work. We have a really crappy RPM signal going into the ECU that needs to be sorted out. Unfortunatly my dialy driver Audi 90 has also developed what sounds like a rod knock at low load and rpm. The bunny pretty much has to be driving by the end of this week or I am likely to be carless...