You must be logged in to rate content!
13 minute(s) of a 391 minute read
6-3-2009
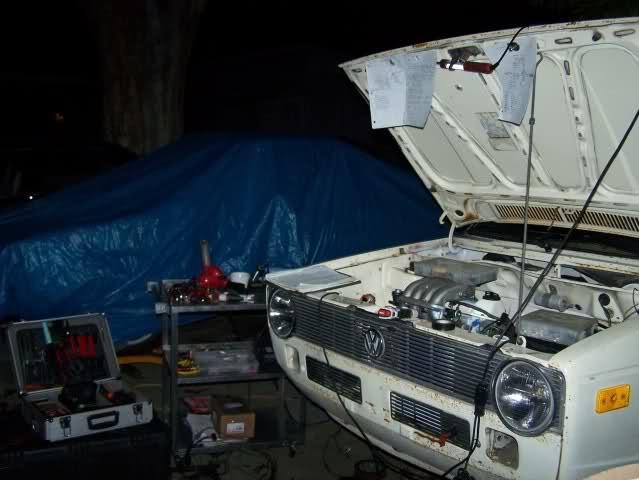
Lol yeah I wanted to be a little different. Besides in all the installs I have done, my harnesses just disappear into the engine bay. I WANT it to pop out and be all "BAM here I am!" I like the color on the car (for now anyways) and figured that color matching most of the engine bay to the car would give me that extreme minimal look I am going for. I want the minimal look without actually smoothing the engine bay and removing anything. So far its defiantly working.
Later on I would LOVE to change the whole car to panama brown, when I get around to a perfect body restoration. But the white works and works well. The Panama Brown would detract from the old Euro GTI, turned Kamei theme I am going for.
So amazingly enough yesterday was super productive! With a few questions rapidly answered by fellow texers, I got my front brakes sorted out. I am not 100% sure what these came off of, but I think it was a scirocco 16v as they bolt right up. I do remember I got them on ebay a few years ago for under $50 shipped! Calipers and carriers. They been in storage since I really had no need for them.
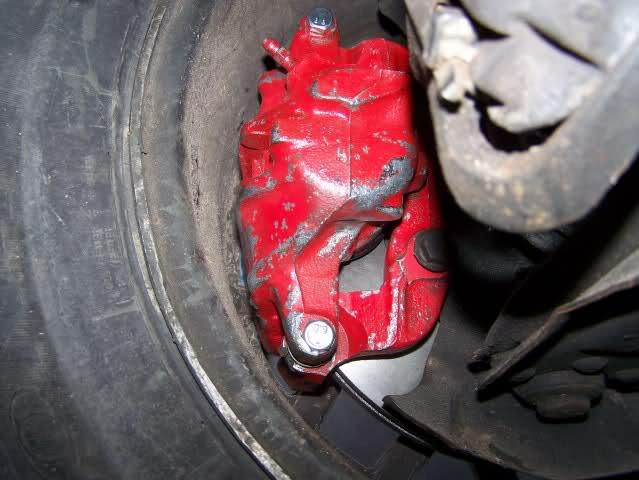
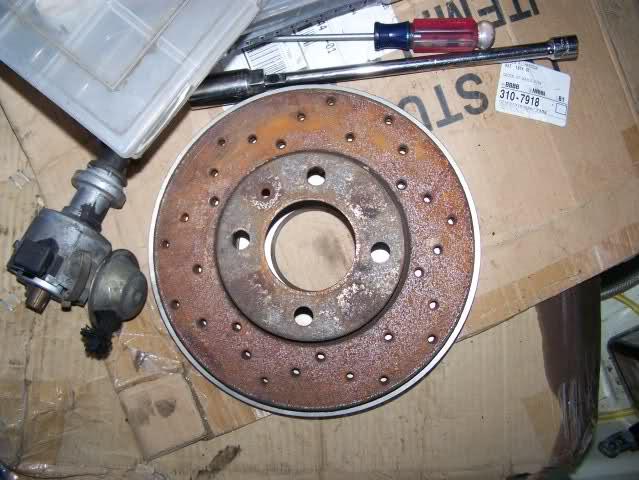
Honestly though I can see why I never bothered to upgrade to the 10.1". I had crossdrilled zimmermans all the way around. These are a really minor upgrade in size when set together. The calipers look a bit meaner, and possibly even bigger. I just might see if they fit on the smaller carriers and 9.4" disc setup... Dunno yet.
So onto other details. The OE fitment turbo setup, didn't fit so well! I am probably missing the one piece needed to make it work perfectly. The OE drain tube setup. I had to tweak, cut and grind, pulling the turbo on and off 5 times for a couple hours before I got it to fit well enough. Ended up grinding a good chunk off my drain fitting flange and the back retaining bolt so it would rotate far enough to let me put the drain fitting on. Its hitting the wastegate. Overall not too bad though. I can pull the turbo off in less than 30 minutes I estimate when everything is hooked up and completed. Takes about 5 minutes now.
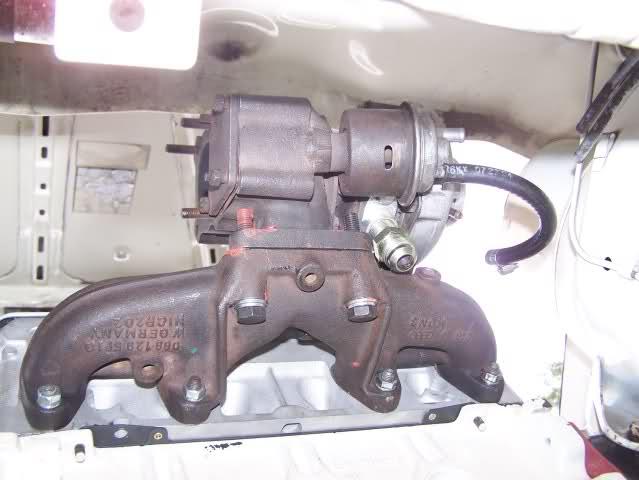
I need to purchase a fitting and have a line made up for the drain. Its going to be a nice straight drop with a 90 going into the pan. Simple and clean. I already have the oil feed line made up and ready to go. Actually going to be reusing the one from my turbo cabby setup. The fitting on the top of the turbo? Its a 1.8t adapter I just happened to have kicking around that I bought from ATP Turbo 3-4years ago when I turbocharged the cabby. Props out to ATP! Love those guys!
I know, not running proper exhaust nuts. Thats fine for now. The washers will do most of it. I hammered 7mm washers onto the 8mm studs. Should hold nicely until I have time and money for the proper nutz. And lemme tell you, those washers aren't coming off then!
So turbo is in and looks pretty nice sitting there. I am ready to bolt on the final bits and fit the harness. Its going to be a full harness setup as I am running all the OE engine wiring through it. I will separate out the starter, reverse lights, and power though as I have seen this section get fried before.
Anyways I am hoping to have the harness fitted today and to finish re-painting the brakes. Maybe even get as far as getting the radiator and fan shroud cleaned and painted.
Whats left? Lets see.....
1) Got to button up lots of minor suspension things. The damn OE fuel lines will have to be moved I discovered last night. They are going right through where the bracket for the front swaybar goes. And this car has larger studs holding the rear control arm bracket in. So I have to drill out the swaybar/control arm bracket holes to fit on this car. Surprised at this...
2) Need to fit in the harness and finish it. Getting the MS system online after that will only take a couple hours. But I still need to sort out and run any extras in the engine bay I need now.
3) Finish painting everythign I need to have painted that can't wait until later. IE most of the engine bay stuff going in. May wait on things like the alternator and starter for now that are quickly removable.
4) Finish installing whatever brakes setup I will be running. I need to clean the rear aluminum calipers still. Sort out rear brake lines for the lightweight calipers. Paint and install the master cylinder and reservoir, and decide if I will run a warning style brake cap or not.
5) Cooling system sorted and installed. Probally fairly easy, but I am not sure how the earlier system without the overflow tank is setup. And I am running the OE oil cooler setup for now since its simple and clean.
6) Fan wiring upgraded. I am running the MK2 fan setup to compensate for running the cleaner but not quite so efficiant earlier radiator with cap.
Once the car is online, the final stage of cleaning the OE wiring up will commence. I want everything in the engine bay integrated into the engine or main harness. No seperate harnesses running in and out. All the alarm wiring will be in the main harness. The main one will be left “raw and openâ€Â for a little while to make sure I have it all sorted out and together.
Alarm you guys ask? Hells yeah, the look on peoples faces when they hear the alarm beep on a beat to crap looking car is just way too priceless NOT to do it. Besides I integrate a few other evil tricks into my alarm systems that make my life easier. Girlfriends really shouldn't "borrow' my car... I did alarm installs for a few years and hate living without those little conveniences and amusements they add. Besides, again, I already have all the parts... Except a programable talking alarm module. I need that one.
Dude you RULE! I am sitting here having a stupid moment trying to remember what question I had to ask.... Thanks for the reminder!
So no unfortunately not. I am actually wondering about the downpipe I need to run. Making up a flange to fit right onto the turbo would be cake though. And I have a feeling that ATP Turbo either has this, or can make it quickly. I want to run OE style here though as the ball joint toiletbowl setup does work nicely. Even if it doesn't flow the best. My car needs boost sure, but its not really going to be about ultimate power. I want daily driver and OE reliability more than extreme power.
June 04, 2009
Didn't get a lot done yesterday, but enough to be happy something was done.
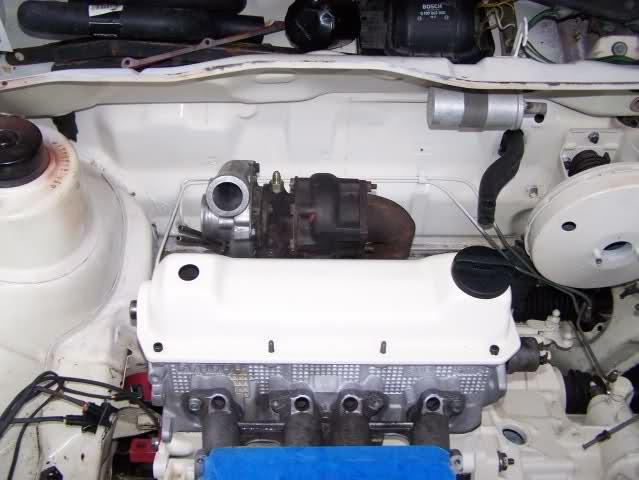
So first thing was fitting the harness and getting a few more items set into the engine bay. As always a perfect fit.
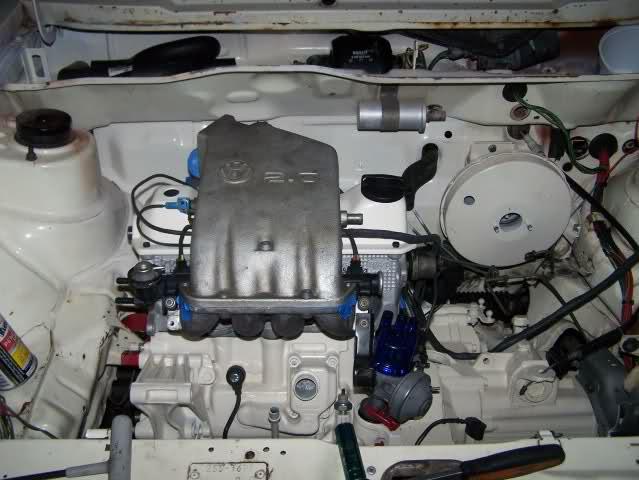
What I am not happy with is the nasty intake manifold. The 2.0 on top has to go and it just looks out of place on an otherwise clean engine. Don't feel like putting the effort into welding it clear and polishing it down though as its gong to get cut out soon enough anyways. I am thinking JB-Weld and painting it white...
Yep theres a vacuum advance dizzy with the hard to find retard can sitting in there. And yep that is an EMPI beetle cap! I am very tempted to run that dizzy mainly because I can. While a locked dizzy is required or recommended for MS, an unlocked one simply means the timing maps are left at zero except where you need to change and modify the timing.
Well fitting the harness and MS required putting some of the interior back in. So I tackled this little project. I have fallen in love with this little tool from Harbor Freight!
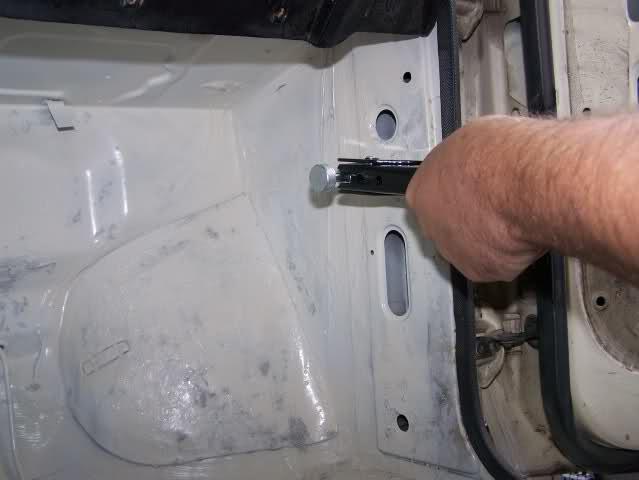
Wish it came in metric, but since its Harbor Freight it comes in cheap. I like cheap even more than Metric. Its a nut-rivet tool. My car had the spots for mounting the kneebar, but nothing in the holes.
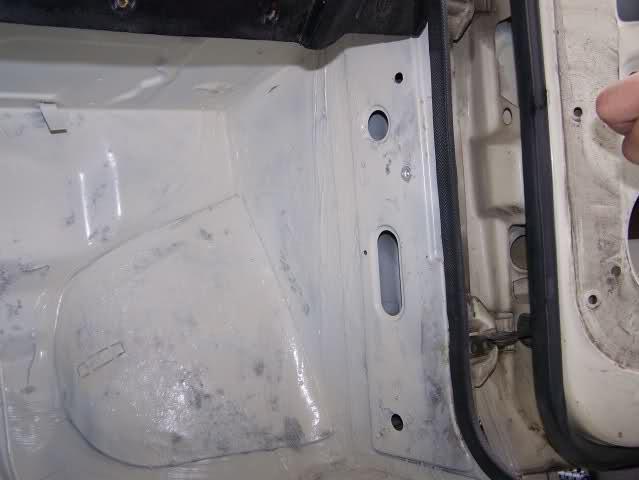
So after a good cleaning and some vinyl painting I had this.
About this time Rein shows up since he was in the area. He suspected I was holding out and wanted to see some of the goodies I had in store. I am hoping he was properly rewarded for his efforts. While it may seem I post up everything, I do have a few tricks and surprises in store still! While here he helped my put the kneebar in. Its a fiddle to do with one person. Still a bit of a fiddle with two but so much easier...
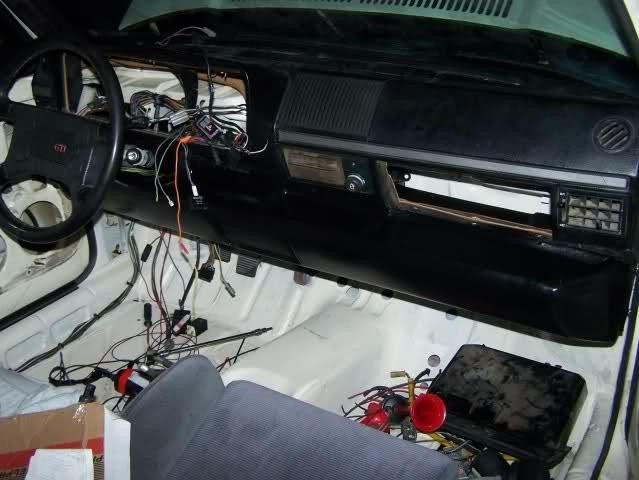
Pretty stoked about how nice it looks sitting in there! Going to HAVE to paint everything else now though... Oh well. No its not a perfect kneebar, but neither is the dash and its just beat up enough it doesn't look out of place.
Today will hopefully see the secondary engine harness installed and the MS powering up. I need to check the fuel pump and see if it works. If so, might even be starting her today or tomorrow.
MMmmm I DIDN'T know about that one. Theres a rare (so I have been told) one with the VW logo and no size stamped on it. My buddie has one of those. He says hes seen them go for $200 and more in the classifieds here though. Cutting that up would be criminal if so.
This might simply be a case of run with what I have, unless somebody local has one they don't want. I have JB-Weld and paint... And if it loos bad, more incentive for me to get the top manifold half over to myk fabricator and let him... Nevermind.
June 05, 2009
This evening saw me busy finalizing and building the secondary harness portion.
Harness is out now and sitting on the bench. I have to wire the relays in and sort out how I am running some interior stuff like CEL, Shiftlights, flatshift, and a few other things.
Shes coming along nicely! Theres a lot of small things to sort out now, but really nothing major. I will be powering systems online tomorrow most likely. Should have everything online and by Saturday be buttoning up the final details before first start.
Not sure if she will be driving as of this weekend, but it will be due to running out of budget as opposed to running out of time.
Only things left to sort out that I need to still get/purchase are:
1) Water outlet on the side of ABA head. Might cause issues too with the VDO pressure sender/switch...
2) Rear brake caliper lines for the lightweight calipers. Can run whats there for now though.
3) Alternator setup. Need a belt and a VR6 waterpump pulley.
4) Might need a coolant hose or two, but I seriously dought it.
5) Engine oil, tranny oil, and coolant.
6) Turbo drain line
6) A downpipe... This is going to be what screws me most likely. Supposedly we can hook up to a regular gasser DP for the time being. But nobody seems to know for sure. Techtonics Tuning claims the MK1 gasser will match up, but ETKA claims the gakets are differant. We shall see soon enough...
Seems like a lot but the only thing on that list that will require more than an hour to sort out is the alternator setup. I could and may well have to run a regular type belt setup for now. I have a few older 8v setups if I can make them work with the ABA head. Almost there! Or at least to running/driving stage anyways.
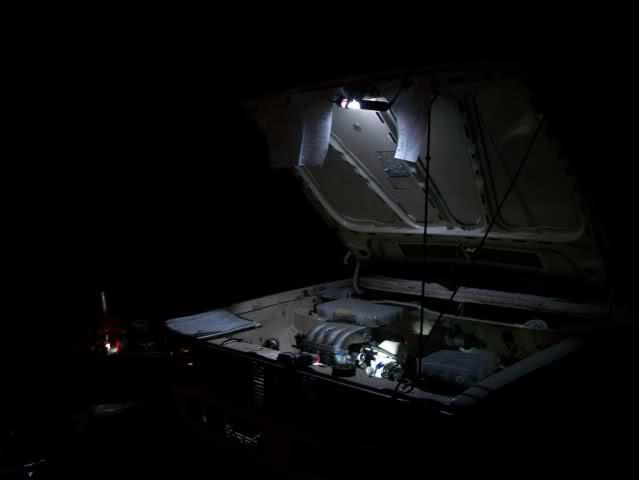
And just because this picture as soo cool, I have to post it up! For some reason final stages of any of my projects and tuning always seem to occur in the wee hours of the morning.
June 07, 2009
UPDATED LIST!
So made a junkyard run yesterday. Scored a complete second heaterbox with heatercore, blower fan, wiring, connector section, cables, and heater control sliders all attached still. I was just in need of the connector between the dash and box and the wiring section. Also got a spare ABA intake upper half with OBD-1 throttle body attached. A couple piles of random hardwares for the above items. All this for $20!!! Oh, and there was a cardboard/vinyl cover for passenger side I got too. Its rough, but in good enough shape to use as a template for a new one.
I also snagged all the necessary fluids needed for startup today, other than gas.
What I forgot to get though sucks and kills the car from being truly running today... The damn head water outlet. So my updated list is as follows...
1) Water outlet for head, will swap the sensors out for the ones I need most likely at the JY.
2) A downpipe of some sort
3) Alternator setup sorted out
4) Still need all rear mounting bolts, hardware and hose lines for the MK4 calipers. But not really mission critical... Just easier to do now before I button up the brakes.
I will probally be making another trip to the scrappy tomorrow or in the next few days.
The harness is 90% done now. I am going to go get on that now and get it finished and maybe even installed tonight. I will post up some pictures of it for you guys before I install it.