You must be logged in to rate content!
12 minute(s) of a 391 minute read
6-9-2009
So first and now the second stage of the wiring is all done. First stage was getting all primary systems in the OE wiring online. Second stage was the engine wiring and management.
FINALLY finished the harness tonight! Its taken me longer than usual since I am running EVERYTHING for the engine through this one harness. And I don't want to be opening it up later to add stuff into it or have additional harnesses running everywhere in the engine bay. The only additional harness the engine bay might see would be the water injection stuff. But that will most likely be added into the main lighting/horns/other randomness harness.
So a couple pictures!
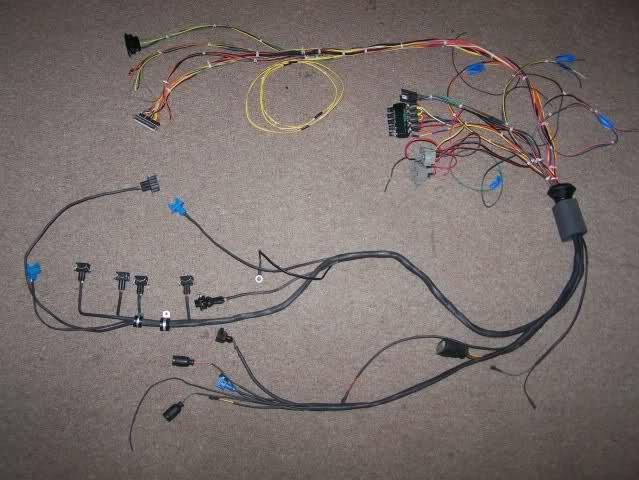
And a closeup of the injector section.
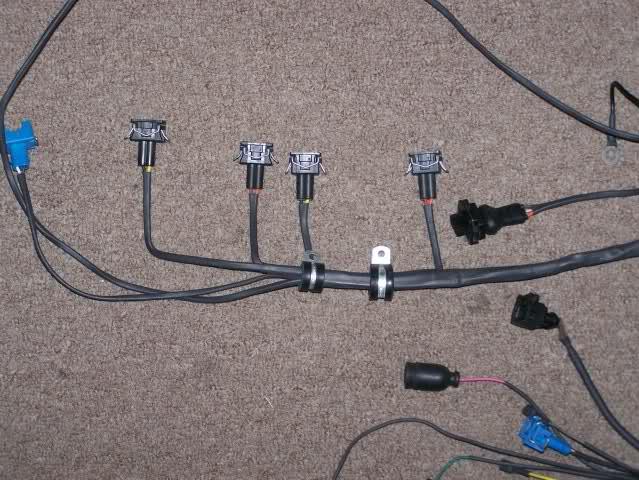
This is actually a pretty simple harness compared to many others I have made. But in some ways its made more complex by the compleat integration with the OE setup. I did separate out the power section for the engine management though.
In building this harness I have taken a few cues from a couple aviation mechanics I know, my cousin Franz and FalconFixer. I have always been intrigued by the Dutch company Spyker. Tin their cars they have replaced all the normal automotive fuses, with aviation breakers. Spyker was originally an airplane manufacturer.

Anyways, I managed to find some aviation style breakers and wired the engine management up with those. Then FalconFixer taught me how to lace the wires together. Took me a while to get the lace knot correct and tight, but I finally managed to get it! Its a fairly simple clove hitch, but then its secured with a double knot on top. And both of those have to be placed in the correct orientation... I also found this really interesting document online that explains that and a few other lacing procedures. http://www.casa.gov.au/rules/1...8.pdf Not sure it will entertain anyone else as much as it does me, but hey.
Stage 3 of the wiring will be to get harness installed and ALL SYSTEMS fully online. I will be driving it for a while with the engine bay and interior harness left open. Mainly to get all additional wiring in and sorted. Once thats done, I will close it up. Under dash wiring will be loosing all the OE crappy tape and lacing it instead, after I pull out all additional excess wiring.
Stage 4 is going to be getting rid of the rest of the fuses, and placing a nice big order with Aircraft Spruce for some more breakers! Since I can, I will go OTT wth the wiring.
EDIT: Psst ignore the few remnants of electrical tape on the harness. I usd that to get everything laid out first. That section is for the electronic boost controll and will have the tape removed and heatshrunk. I have to install and route the harness first though.
June 10, 2009
Got the harness in last night... It was not fun.
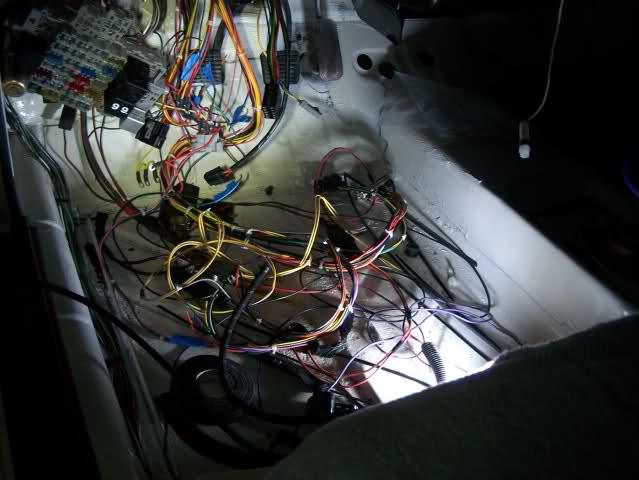
So yeah my harness fits perfectly. The OE one? I had to pull it out and reroute it twice.
The worst culprit is the steerign column stalk plugs. And the OE tape wrap coming off everywhere. And getting it properly routed. And the mess where somebody installed the radio....
To make it even more fun, the heater duct interfears with installing the engine managment relays up on the top of the box. I ended up breaking the clips on both of the relay sockets. I may actually have to rewire those and just mount them to the side. I really didn't want to do this as I liked how clean it was looking with the OE setup.
So in a nutshell, I am unhappy with the fusebox area and the OE wiring in general.
Oh and before this I got my butt kicked by the cooling system. All the bottom hoses are easy enough until the upper radiator hose comes into play messing it all up. I wanted simple and clean. The only hose that seems workable for the upper though is an ABA hose. And that uglifies the engine bay fast.
Not to mention thats the one hose I don't have, its spendy, and then I will have to still cut it to make it fit in there right. Painfull.
So heres what I want to accomplish.
1) I want a close fitting hose first off.
2) I will need the heater online.
3) I want to be able to quickly eliminate the VW oil cooler.
4) No overflw tank.
If I can find the upper ABA hose without the oil cooler branch off, I will use the waterpump to heaterpipe hose with oil cooler branch off. Run the other oil cooler line over to the heaterpipe outlet by the head. Easy enough to cap this off and swap out that hose to remove the oil cooler.
This leaves the upper waterpump inlet, the upper rad hose and the side of the head to contend with. For this I will probally just have to cutup an ABA hose without the oil cooler line on it.
But then I want to "clean up and minimize" the look of the ABA hose. Getting rid of the big ugly tee section would do wonders here. And if I cut that out I saw a tee section somewhere on E-Bay for another VW application that would allow me to solve the finall problem. Straightening the hose out and shortneing it to fit the narrower radiator.
Does anyone know where I can find an aluminum version of that tee junction? Mmmm I see another idea here now too. I could run my coolant temp sensor in this tee and possibly clean up the outlet on the side of the head this way... Mmm fabrication.
June 11, 2009
No progress today... Other than I found these sitting happily in pile as if they had been there for months. And they probably have. I also discovered I have a complete set of bolt in wing windows! I completely forgot I had them.
To wipe or not to wipe? I can't decide if I will run rear a rear wiper on the bunny. While I love the uber simplified version of this car, some things like vent wings just are too nice not to have. And a rear wiper might also be one of those. The '83 harness is already got the wiring in it.
This is going to end up being a battle of style, versus weight, versus convenience. Since I don't have a white rear hatch sitting around with rear wipers, probably not going to run them. The other small issue to sort out would be how to activate it. I discovered that the programmable wiper relay doesn't work well with the newer rabbit stalks, so I will be changing to the Porsche ones once the car is fully online. Doing this will probably mean I loose the switch in the stalks.
June 17, 2009
Last week I have been fighting constant rain.
Shes really close to the first startup now. Got the bad fuel pump out and just have to replace the short 90 hose from the tank to pump and put the replacement one in.
The worst part of whats left is simply trying to get all the small pieces that are left painted and put back on the car. Shifter levers, some brackets, alternator. Small stuff.
Unfortunately its the small stuff that can just drag a project down and kill you.... The GF can't understand why everything needs to be painted and cleaned...
June 18, 2009
Almost ready now! Finished painting everything today, sorta. Went to install the new fan shroud and fan, didn't fit. I had randomly grabbed one from my cabby not realizing it was about an inch too long. Got another one and cleaned it up. Ran out of paint.
The MadScientist ordered me a couple replacement head outlets. We will see which one fits tomorrow. I am hoping I can get the newer style to work, its nice! Its likely I will have to pull the harness out and open it up though. Where I put the dual pressure and low switch sender can on the side of the head though simply doesn't fit. Or look very clean. We will see what works with the new housings.
So all thats left before startup is bolting on a bunch of little parts. Possibly some minor reworking of the engine harness (but may simply wait for later here). Bolting down the ECU and ICM. Reinstalling the fuel pump. Bleeding brakes. And then initial power up and systems checkup.
Oh and final color coat on the damn fan shroud....
Once its all online, I am going to probably roll with it like that for at least a couple weeks. Not to worried about interior being perfect yet, that will come. Main engine bay harness will be the next thing tackled as soon as all systems are sorted and cleaned up. Still planning to run alarm wiring and everything else through the one harness.
I will HAVE to relay the headlights before buttoning it all up anyways. I also need to run the 120amp VR6 alternator....
Soon as engine bay wiring is all prettied up, then I am tackling the rest of the interior wiring. Thats a MUCH bigger project as I got some pretty cool things going on in there.
All in all she should be driving by this weekend. Hopefully Friday as she still needs her safety inspection. Hahaha no emissions needed! But she will likely go onto the emissions machine anyways... I like to still have my cars run clean and its only a few mouse clicks away with a MegaSquirt installed.
About the only holdup right now is my downpipe... Still waiting for it to arrive.
June 19, 2009
Stumbled across mostly issues today. Got everything ready to go with only super small things left until I went to time up the timing belt.
Wheres my timing marks? Oh they are about 15-20 degrees out they are. Apparently the damn flywheel can go on in more than one direction. I had lined everything up before buttoning it all down, but had to pull it back apart to fix something.
So either I am dropping the tranny to fix the flywheel, or having to remark the flywheel... Since the next bit puts it out of commission for at least the weekend, I am probably dropping the tranny out.
So I got all systems powering up and went to power the fuel pump up to verify feed and return lines. Nothing. Go get gas and pour it in, vent tube seems to be clogged as the gas doesn't want to drain down the filler neck after a short fashion. Since I drained the old gas out, I wasn't too concerned. It came out nice and clean, just SUPER stinky. Smelled like it was about 2 years old.
I am getting worried though cause I can't get the pump to bleed and pressurize the system. After a couple minutes I go take another look at the filler neck. Only put about 1 gallon in and its still not dropping down.
So I open the access hatch. Had to fight with it for a couple minutes and when I finally open it pressurized air poops out at me and I almost throw up the gas smells so bad. Wait did I say gas? I meant jello....
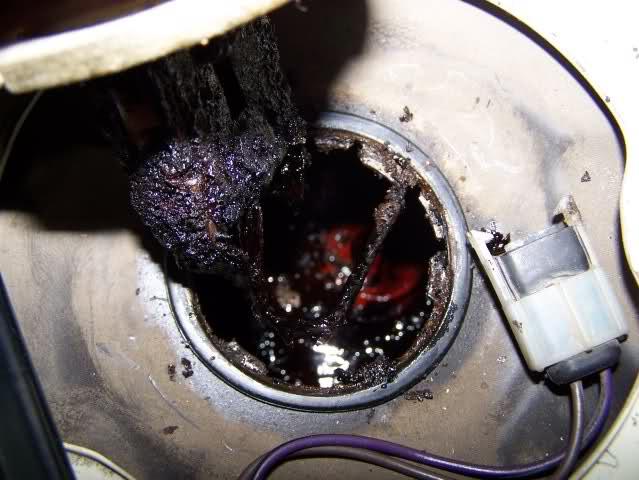
So I am hoping that I can retrofit a newer cabriolet style tank into her. Otherwise I have run out of funds and am dead in the water for a few weeks. I need a car for work to obtain said funds. And my daily driver Audi is HATING life right now with gods know what ailing her. Shes dead in the water until I decide I no longer hate her and go figure out whats wrong there.
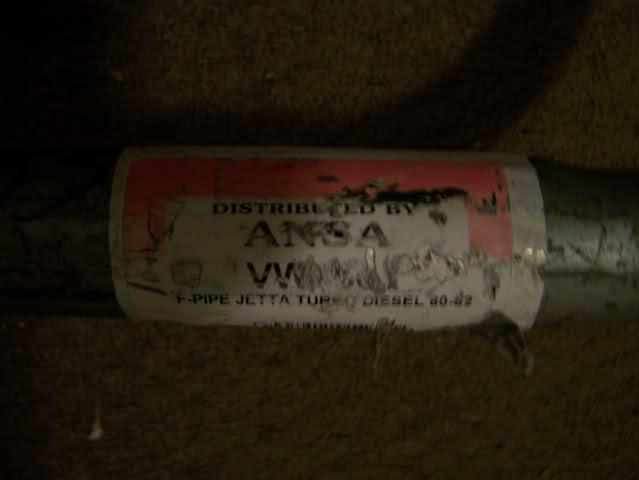
But on a good note goodies arrived today! The company is called PartsPlaceinc and I am impressed. They were recommended to me by deathhare when he found out they carried the TD downpipe.
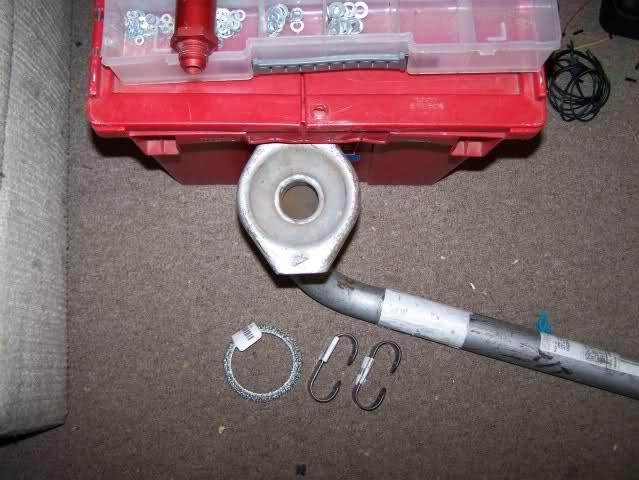
And this takes me back..... My car may never run now.... ANSA makes exhausts for many italian cars too. they made the performance exhaust that was on my Fiat Spyder 2000.
Yeah that ones not very "performance" though... Deathhare is waiting for his TD DP to arrive also from another source. Its going to be a better performance option. In the meantime I just might drop that one off at my fabricator and have him chop the top off and use the rest as a template to make up a bigger flowing one. But I am sure it will suit my needs fine for now anyways. Besides with a clogged up gastank I am not going anywhere anytime soon...
If only I could share how bad it smells.... Three showers later and I can still smell it. And I didn't get anything on me other than a few drips.