You must be logged in to rate content!
12 minute(s) of a 668 minute read
1-16-2015
Very slow going lately, only one picture to update the progress. Perhaps I'd be further if I'd stop being such a fuss.

There are some weather seals that fit around the vent window and in the door to seal the large window. If there is one thing that I find a pain, is dealing with vent window seals. On the other hand, if there is one area that can stand out as a fail on fresh paint jobs is old rubber seals, so I had to deal with them.
Next up was tinting the side windows, once the rear window came tinted I knew immediately that I wanted to tint the side windows. This is the first time I ever used window tint. As with most everything you do on a vehicle, there is always gonna be certain characteristics of every product, once you learn these characteristics, the product will usually cooperate and you'll end up with a professional finish.
I practiced with a small vent window, it did alright but not as nice as I wanted. Of course, the biggest fear when doing tint is getting rid of the bubbles under the tint. The biggest rule to follow is written in the directions but where they say to wet the glass, it should say, really really wet the glass just before applying the tint.
Seemed the more you wet the glass, the finer and smoother the tint went down when done. Once I figured out the wet, wet, glass situation I think it looks great and all new weather seals brings a more detailed finish to the truck.
The fenders are back off again, part of the plan. There are seals between the cab and fenders and the inner fenders and the fenders that need to be installed along with rubber bushings between the cab and frame. Temporarily installing the fenders gave me a chance to check alignment. Next time the fenders go back on, everything will be sealed and tightened.
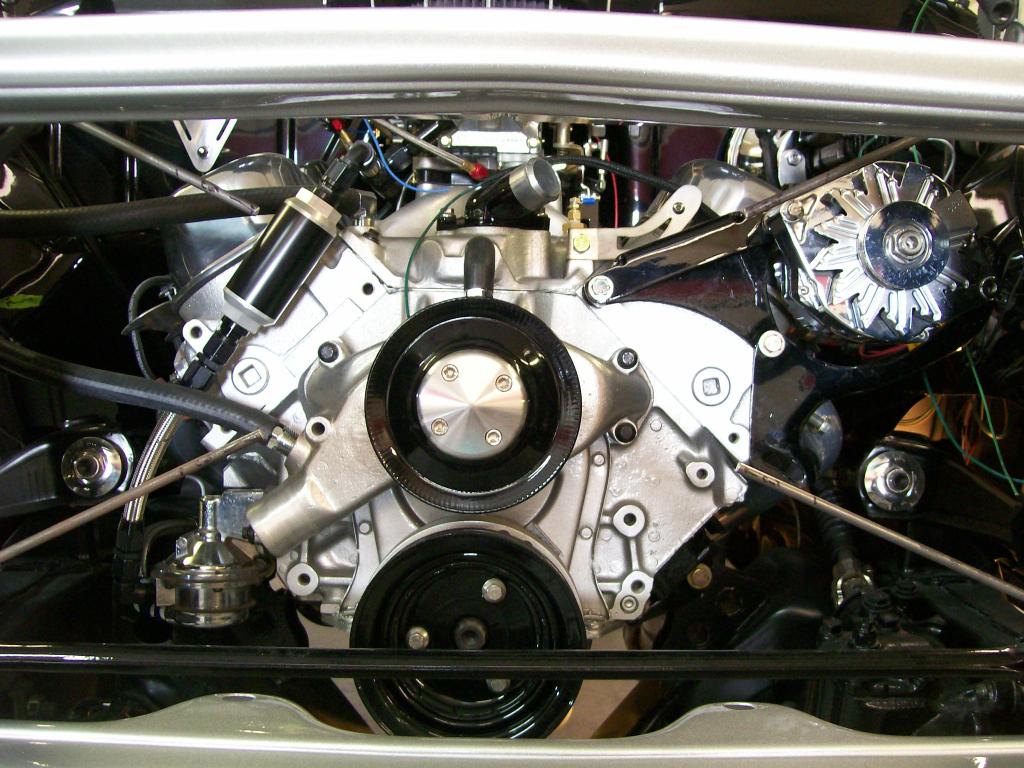
This week starts the Painless wiring kit, not long after that I get to fire up the engine that has sat on the engine stand for 2 years, I can't believe it's been that long.
On the paint redo, Verbal descriptions are tough to evaluate. With that being said, I always first consider what was sprayed on the bare steel. Was it a quality primer for bare metal? Is it still holding well.
If the bare metal first primer is still good, when I sand the paint, does it feather edge back nicely like a well cured paint does, or does is leave a ledge at the edge of the sanding?
Long ago it wasn't uncommon for enamels to be sprayed without using a hardener/catalyst. Even after many years there can be uncured solvents still lingering under the top hardened layer that could not escape. When sanding back an edge of this enamel you expose the uncured solvents. Once you spray a fresh coat of primer there will be a wrinkle reaction, not on the top coat of paint, not where you sanded through to the old primer, just around the sanded edge of inner old paint. If this is the case, strip the paint off and start again.
Any place that sands through to bare metal, clean and spray epoxy primer for adhesion.
If all is well with the primer and paint, they will make a fine sand able surface to scuff for a couple coats of high build primer for block sanding. High build has two choices. Polyester base and Urethane, the Polyester builds faster but some say could shrink after years, I used it, fingers crossed. Urethane doesn't build quite as fast, but still fills well and sands well.
Paint..... what ever your painter says, he has to guarantee the work and the finish.
It all starts with a good base, the paint is only as good as the work and materials to get there.
On the Chevy truck, correct, the bed still needs paint. It is ready for final sanding and sealer then paint, it will continue the same two tone finish when done.
I have weeks involved in the cut and buff process, if I had also painted the bed and fenders, by time I got to cut and buff of those I would have had a hard finish to deal with, spring will work great.
Always trying to be aware of the seasons and temps while painting I knew I was almost out of time when I did the front. My main concern was to get the front painted so I could do all the wiring, drive train, ect over the winter time. If I focused on the bed this fall I might not have gotten the front ready for assembly and all I could do is sit back a be frustrated because I have to waste away the winter months waiting for spring time warm weather.
Tomorrow I start the wiring, once done, in goes the radiator and odds and ends and I might hear the beast run again.

Three years, I absolutely never imagined I'd be on this that long. On the other hand, I absolutely never imagined it would turn out this nice. I suppose the payoff is worth it in the long run.
1-19-2015
You're welcome.
I mentioned the wiring and it has now started. I went with a Painless wiring kit. I have no idea how it compares to other brands, I just know they've been around for some time now. There is no wiring kit that won't need some modification, we all have unique stuff in each vehicle but the wiring kit does give you a good clean foundation to start with.
I found the first thing to do is identify and label the wires. The kit has most of the wires bunched together for front lights, rear lights, engine compartment, ect. On top of that each wire has a number and it's placement printed on every wire.

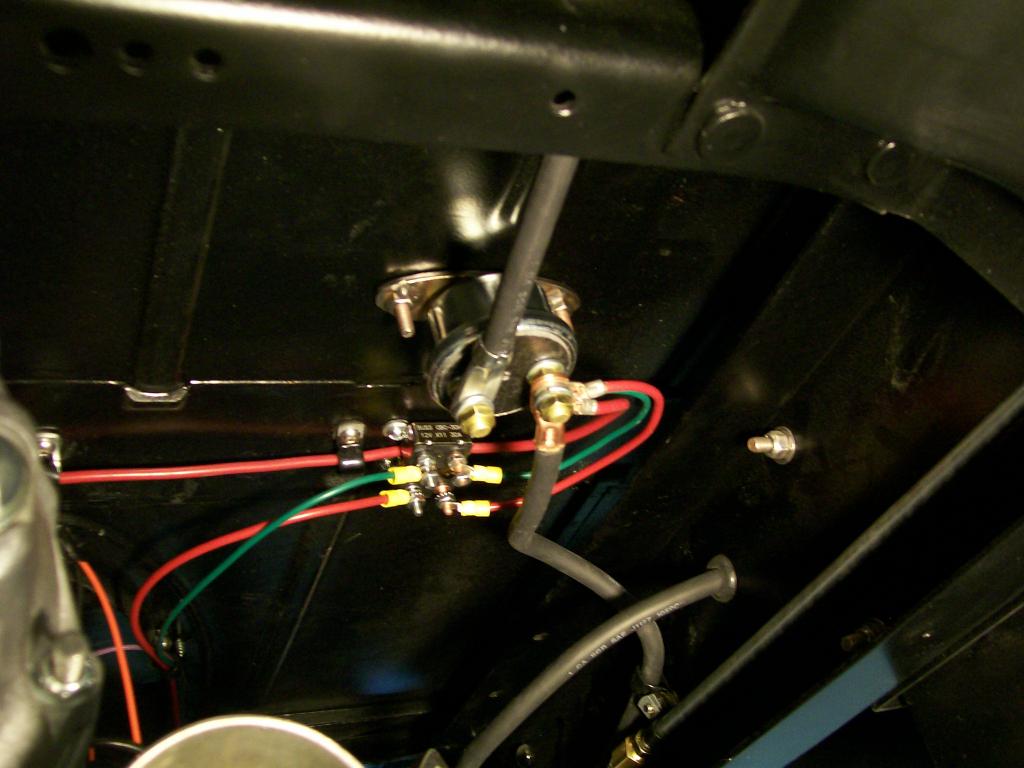
One of the unique items to this truck is a Nitrous system. I thought it would be cool to mount the solenoids in the open. I ordered the needed steel braided lines then made a mounting plate on the side of the air filter housing.

Ok, back to the wiring, it's gonna be a slow process, I want to hide as much of the wiring as possible. With the buffed firewall and inner fender panels I don't want to have any wires attached to them, so it's time to be creative.
3-15-2015
Once again let's get caught up on progress
I wish there was a lot to show but I'm spending tons of hours on the truck without picture worthy progress.
As I've mentioned before, I'm really trying to pre-think as many possibilities and upgrades I can do now that I may wish I would have done when this truck is finished.
One is the exhaust, although it fits fine right now, it is a rigid system, meaning once it is bolted to the headers it does not move or provide a way to adjust the system in any way. Lets say perhaps I need to raise or lower the rear of the transmission to alter the drive shaft angle, if I do I will be changing the exhaust exits out the side steps of the bed.
I remembered an episode of Gears where he mentioned ball sockets for exhaust, I decided they were a good idea, I found them and installed them. Now I can loosen the clamp, adjust my angles and re tighten.

Lol, yes, the inspector dog is giving it a thorough check over.

I've managed to get most of the wiring and it's components up under the cab.
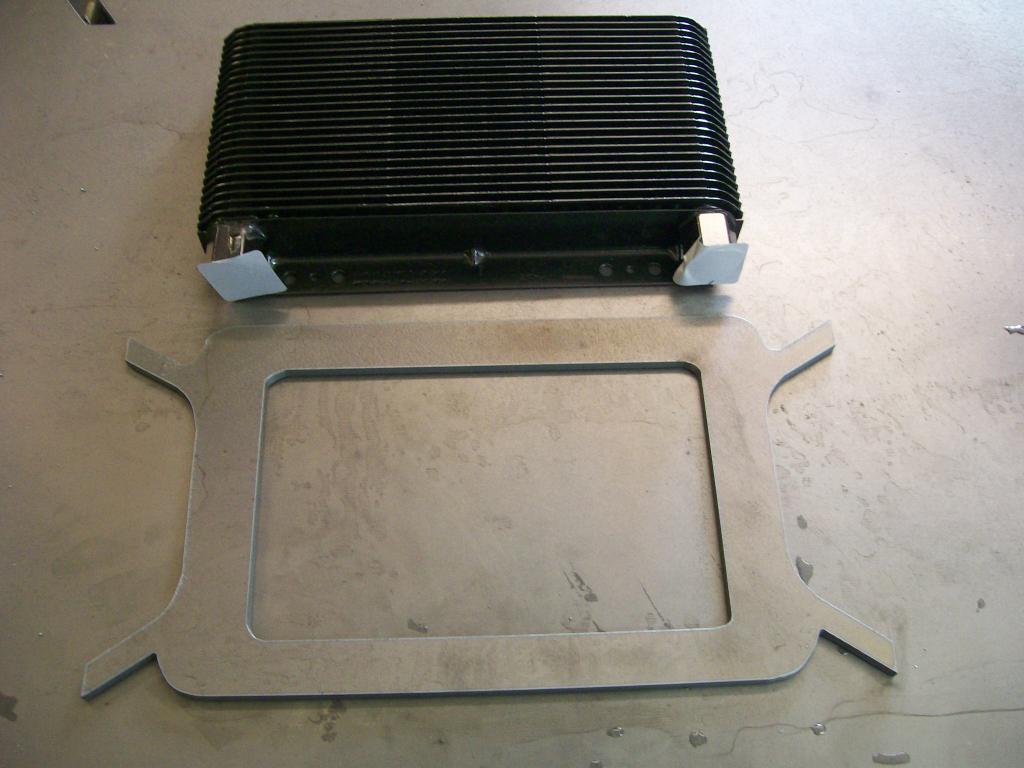
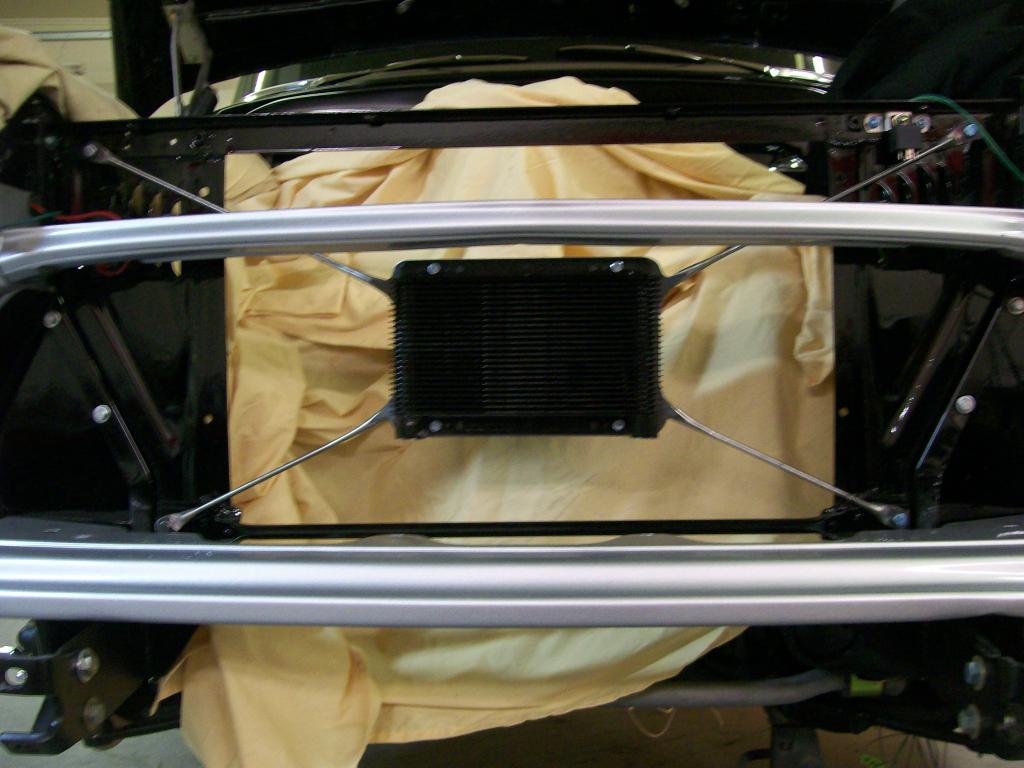
Transmission cooler is a must. I really like this new design, strong, good mounting tabs and I believe a smaller one can cool as well as a larger one of the old style. I'm running the fluid through the radiatorthen through the extra cooler then back to the transmission. Space is tight between the grill and radiator plus there is an X brace there also.
I have an idea, use the X brace as the mount. No don't add to the X brace, integrate the mount as part of the X brace.
Look closely you can see I cut the four legs of the X brace.
I cut a mount for the cooler.
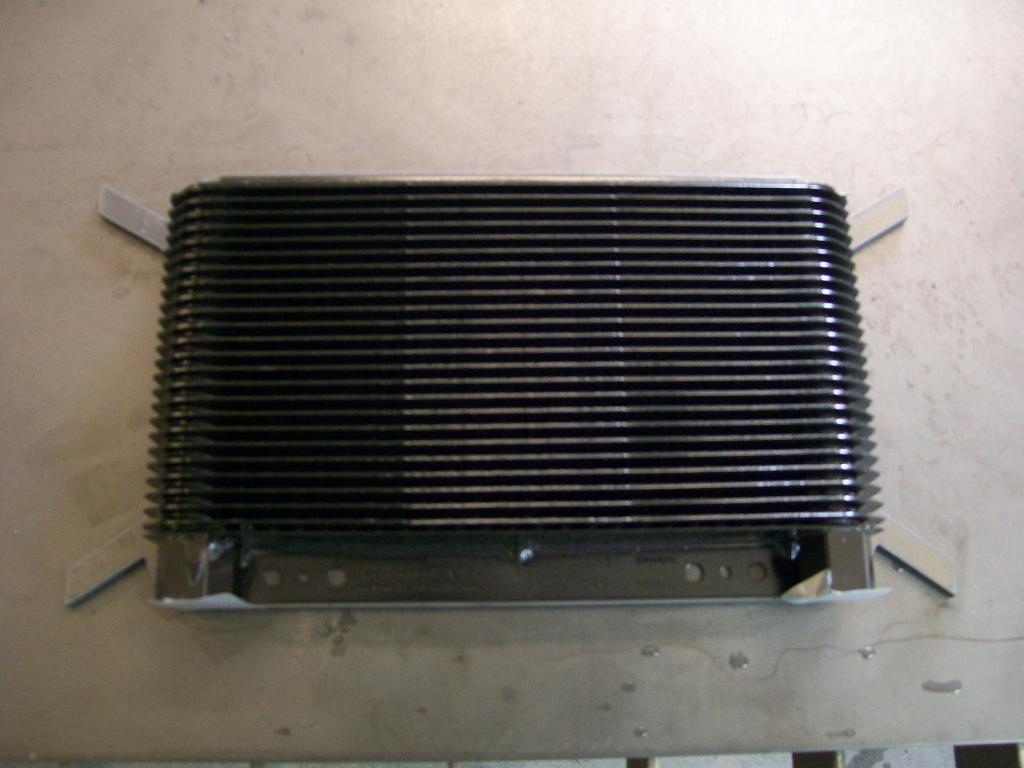
Ahhhh, how cool is that.
Well all was fine til I installed the braided hoses, They were rubbing on the grill and I will not allow that. So I bent the 4 legs trying to recess the cooler back slightly, it looked bad and I felt it would be a weak link, back to the drawing board.
Remember what I've said in the past, don't get emotionally involved in each piece, it maybe just a stepping stone to the finished product.
This time I cut the legs, and welded them to the front of the cooler mount, this made about the 1/4" difference I needed and I didn't have to bend the legs.

Now the lines just clear the radiator support and the grill.

How to get the metal lines to the front. I wanted a neat job, and I wanted them supported by rubber somewhere along the way. When I built the engine frame mounts I used 3/4" tubes to inner gusset the engine frame mounts, perfect....
Rubber grommets, stainless steel plate, all is secure. I have some finishing work yet on it but very pleased with how it all fit.

Hmmmm, what's taking so long, I can't help it... here we go.
My original accelerator cable was a stock GM one, it used a snap it piece to the firewall, it was a rectangle hole 1/2" by 11/16". It was not adjustable in length and I noticed it would bind the inner cable and I don't want that.
I got a Lokar adjustable one, problem is it only needs a 5/16" round hole to fit to the firewall, I have to either use a big washer or cobble something. I want to have a rectangle piece to fill the hole then drill a 5/16" hole for the new cable.
Then I got an idea, I made a rectangle piece to fit the firewall, then cut a "57" plate, then tack welded the rectangle to the back of the "57" plate, then drilled the 5/16" hole through both, perfect. What's a "57" plate........ I just can't help myself.

So here I am, if time was a major issue, this truck wouldn't have the details it is getting. Then later perhaps I would have saved a couple of months, for what? I would not have been able to fully express my potential when finished.
Thanks for checking in, Jim