You must be logged in to rate content!
10 minute(s) of a 224 minute read
8-22-2009
.....for you guys who know your automotive electrical systems.
I'm running some 4th-gen F-body fans, they're an OEM replacement made by Dorman (P/N 620634).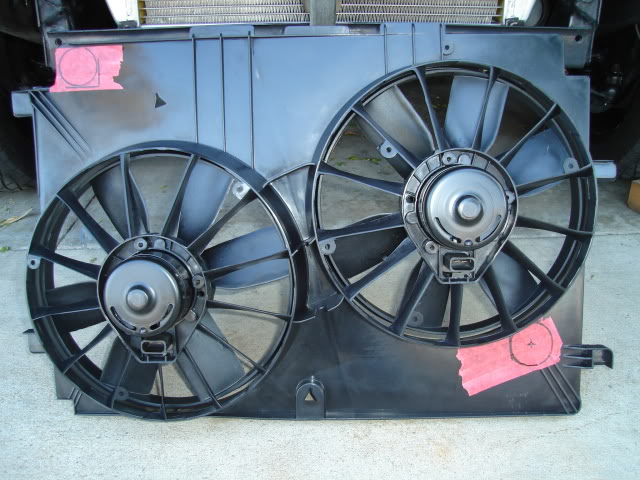
Would these require the use of two 30 amp relays or two 40 amp ones? I have two Bosch 30 amp relays (0 332 019 150) here that I might be able to use.
My custom Speartech wiring harness already has provisions for computer control of the fan relays, the loop of pink-dark green-dark blue relay control wires are shown at the bottom of this pic:
Where would you recommend that I source the relay plugs and harnesses from, or some new relays if I need to buy some?
Would also be nice to find the OEM connectors that plug into the fan motors.
Any help you can offer on this would be very much appreciated.
Bart
9-6-2009
.....for my twin trans coolers.
They tuck right behind the bumper way down low, the top half of the coolers will be exposed to fresh air coming in from the slot in the bumper.
After removing the front bumper this is what I have to work with.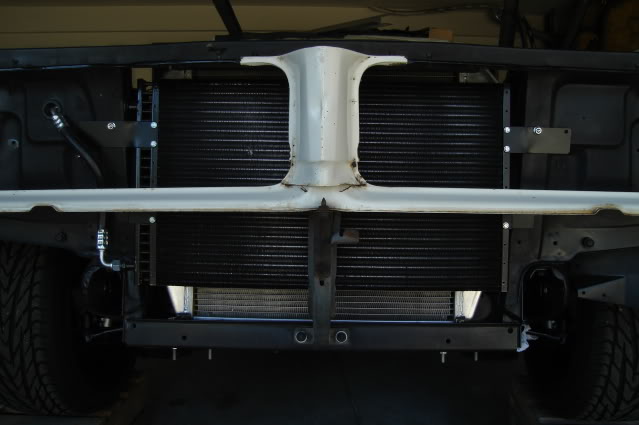
Both coolers are mounted to a piece of 1" wide X 3/16" thick X 29" long mild steel bar. The bar mounts to a pair 1-3/4" long standoffs (spacers), the bar is about 3/8" from the front of the condensor fins. I was able to use two existing 1/4" holes in the core support to mount it, worked out just perfect!
Down below I still need to fab up a pair of lower support brackets from the same mild steel bar, they will bolt to the two lower 3/8" studs that mount the hood latch support in the center and two exisiting 3/8" holes at the bottom corners of the core support channel.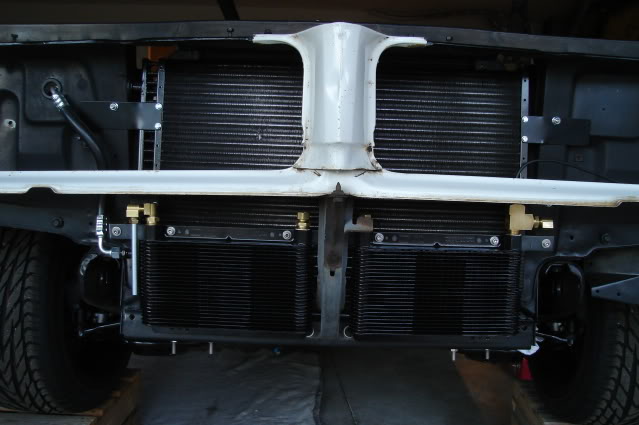
I used a large 1/2 NPT run tee at the top outlet of the second cooler so I could install a trans temp sender for the Autometer trans temp gauge. This should give me a pretty good temperature reading of the cooled fluid before it heads back to the transmission.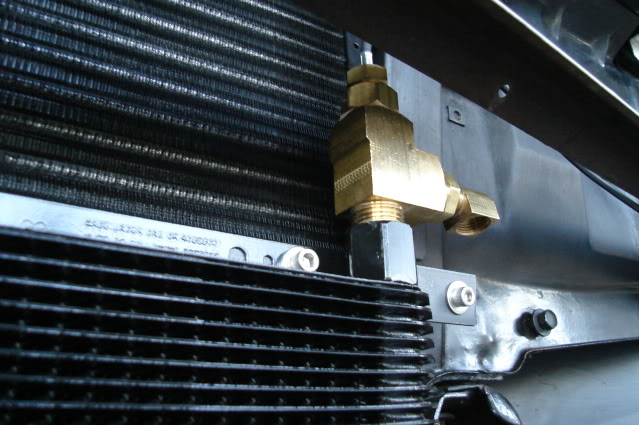
A shot of the 3/8" tube loop that connects the outlet of the first cooler to the inlet of the second cooler. There's plenty of clearance between the tubing loop and the hood latch lever so I won't burn my fingers on the hot tubing. All of the tube fittings are brass inverted flare, already proven to be reliable by the OEMs.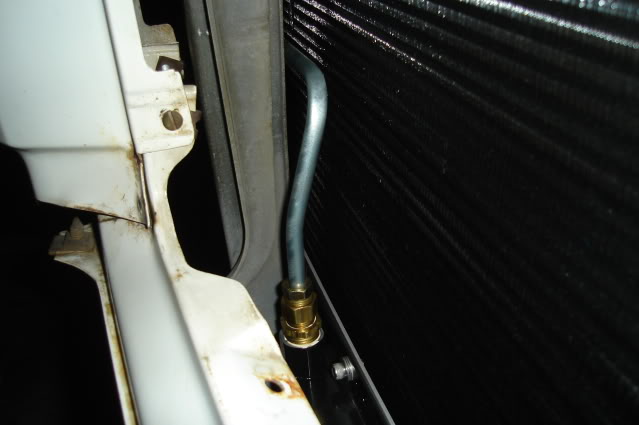
None of the brass fittings or the tube loop can be seen with the bumper and grilles in place, the rest of the cooler plumbing will be hidden behind the bumper as well.
Tomorrow I hope to finish up the plumbing on both coolers and the lower mounting brackets.
Thanks for looking.
9-7-2009
.....on the twin-trans cooler installation today.
I put the front bumper back on and adjusted it as closely as I could to where it will be on the finished car. After checking the clearance between the coolers and the bumper I found they needed to be shifted upward by one inch. This puts the top of the cooler fins right at the top of bumper slot, a little bit more ideal for catching cooling air and adding some much needed clearance at the bottom of the coolers to the bumper.
I put the driver's side grille in to check for clearance too. The brass fittings and tubing are hidden from view in the grille area.
With the bumper removed again and the various component clearances confirmed it was time to bend up some 3/8" steel hard lines.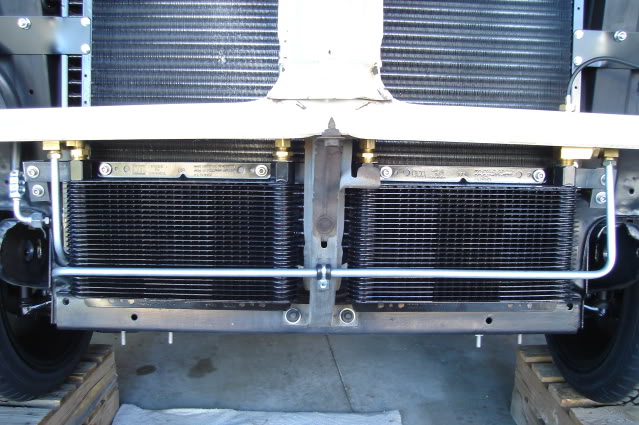
There was a small 'window' of space for both of the cooler lines to pass through the core support at the bottom corner.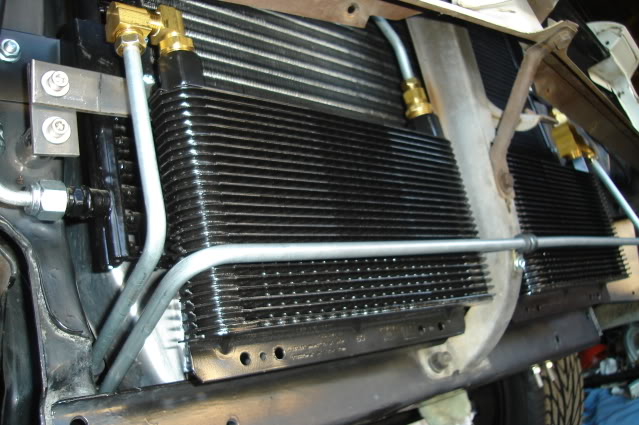
Both lines terminate a few inches past the core support, the 3/8" inverted flare unions were staggered to make it a little easier to swing a line wrench on them. I bent the lines so as to leave access to the hole in the frame for the front bumper bolt.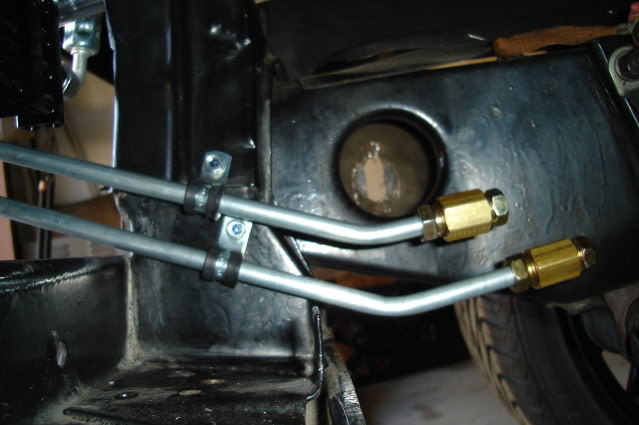
I still need to make up the bottom support brackets, but I did manage to get all of the plumbing finished on the front end.
Hope everyone had a great Labor Day weekend!
9-13-2009
Thanks guys for the kind words, it really helps me to keep on this thing and not let up on it for too long.
I pulled the trans out today so I can make up more of the cooling lines.
There will be zero access to the cooling line fittings on the side of the trans with it installed, so I need to make up some short lines that will be considered part of the complete transmission assembly before it gets installed for the final time.
Here's what I have to work with. The 90-degree inverted flare fittings are the key to making this work. The fittings have 1/4 NPT threads but the trans is made for a straight thread fitting.
The thread diameter and pitch is the same for both, but the pipe thread is tapered to make it seal. Before installing the fittings I used a 1/4 pipe tap to try to taper the last couple of threads in an attempt to help out with the sealing for whatever it's worth, I used a little teflon paste on the threads and got 'em good and tight.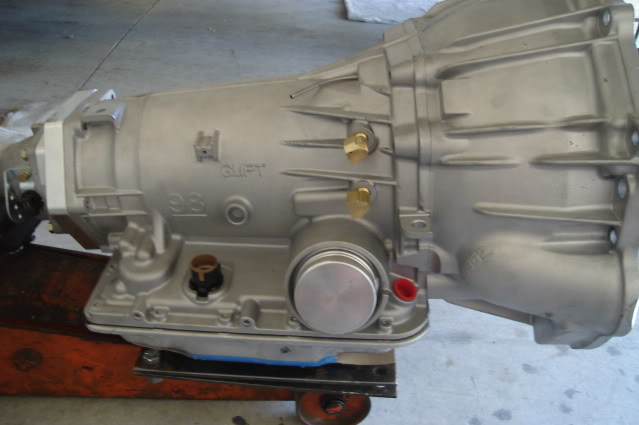
A shot of the finished 3/8" steel lines before installation.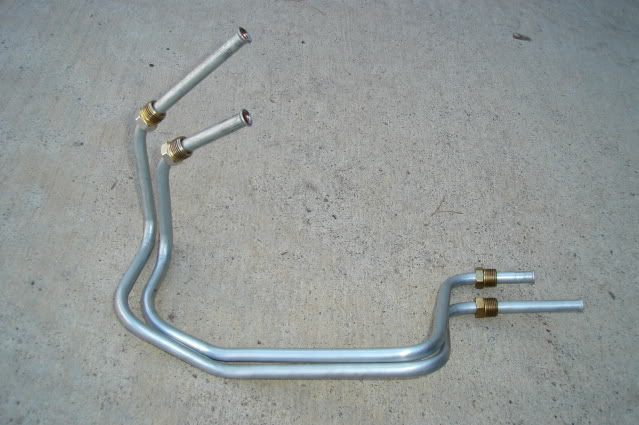
Lines are now installed. I had to run them towards the rear then down and forward because there's no room to run them forward right off the fittings, the trans dipstick tube will be in the way.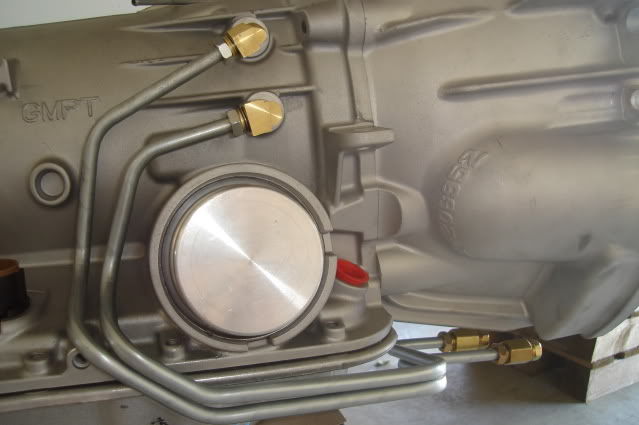
The trans wiring needs to travel right next to the lines and right around the circular servo casting projection before it plugs into the large connector (just to the left of the lines in the above pic), everything is a tight fit in the trans tunnel. Rather than bash the trans tunnel out another inch or two for clearance, I packaged it all tightly to keep the tunnel as small as possible so my stock rubber interior flooring will still work.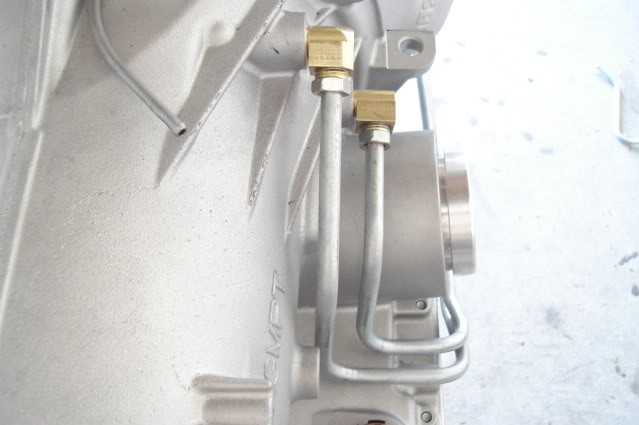
Shot from the bottom where the lines terminate underneath the bellhousing. After the trans goes back in and the headers and starter motor are installed on the engine I can make up the 2 lines that will connect the front twin cooler lines to these short trans lines.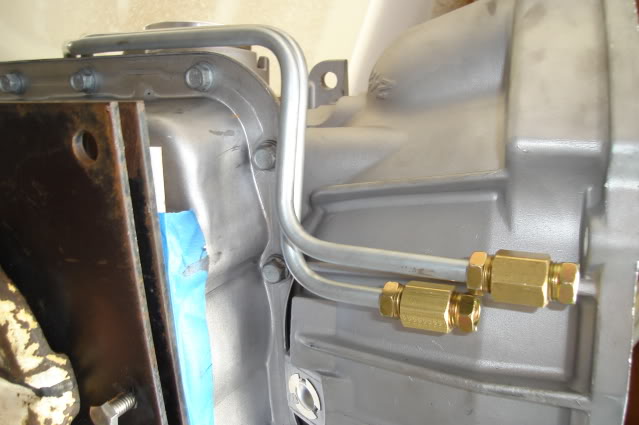
The weather was beautiful today in the mid to low 80s, so I took advantage of that.
Gotta keep moving on this.
9-24-2009
Chris,
To be honest not even once did I consider putting an aftermarket frame underneath my car. The suspension mods I'm doing were not really even planned for at the beginning of this build. Since this car is mostly just a good-handling and stopping canyon cruiser and won't be used on the track, the stock somewhat flexible A-body frame will get by just fine.
I'm trying to keep this car as original as I can but still get in as many modern upgrades as possible within my (ever expanding) budget, if that doesn't sound too silly. Incorporating some nice bolt-ons is all I ever wanted to do with this car.
Here's a cost listing of the various chassis and driveline componets, some of these parts can't be bought for the same prices now:
C6 Z06 front brake kit - $1136.50
C6 Z06 rear brake kit with internal parking brake - $1759.00
Lokar parking brake cables and hardware - $175.00
SPC front upper control arms - $340.00
SPC front lower control arms - $548.00
Cast aluminum lower spring seats and shim kit (ride height adjustment) - $58.00
Progressive Rate Jounce Bumpers - $26.90
ATS AFX forged aluminum spindles (less hubs) - $585.00
ATS billet aluminum A-body steering arms - $215.00
SKF racing hubs - $760.00
Moog upper ball joints - $50.00
Moog outer tierod ends - $70.00
H-O Racing Specialties front springs - $0 (20+ years old with 40K miles on them)
Currie Currectrac adjustable upper rear control arms - $299.95
Currie Currectrac lower rear control arms - $389.95
Global West S-60 rear springs - $60.00 (unused new parts from private party, $125.99 retail)
Hotchkis rear mounting braces - freebie ($145.95 retail)
Pro-built 8.5 corporate 3.42 posi rear end complete - $1734.00
O.Z. Racing Ultraleggera 18x9" wheels - $358.00 X 5 (spare wheel included) = $1790.00
5 new tires - $660.00
Front wheel adapters - $125.00
Bilstein shocks - $300.00
Energy Suspension polyurethane body to frame mounts - $120.00
That's covers most of it, add in about 500 dollars or so for shipping all of this stuff.

The Tempest!
Posted by Diggymart on 3/26/21 @ 3:09:22 PM