You must be logged in to rate content!
10 minute(s) of a 224 minute read
10-3-2009
.....today, my starter won't fit!
Today I was test fitting some things. I put both headers on the engine, at first leaving them loose to help make room to slip the transmission in place between the header collectors. The engine must be tilted forward slightly from it's 'normal' position so the headers will slip into place.
Next I mated up the transmission so I could finish up making my trans cooling lines. The engine must be tilted rearward slightly from 'normal' to mate up the trans, by leaving the 2 engine mount through bolts loose and supporting the engine under the oil pan with a block of wood it's easily done using one of my floorjacks.
With the trans now installed I tried to install the starter and there's absolutely no way to get it in there.
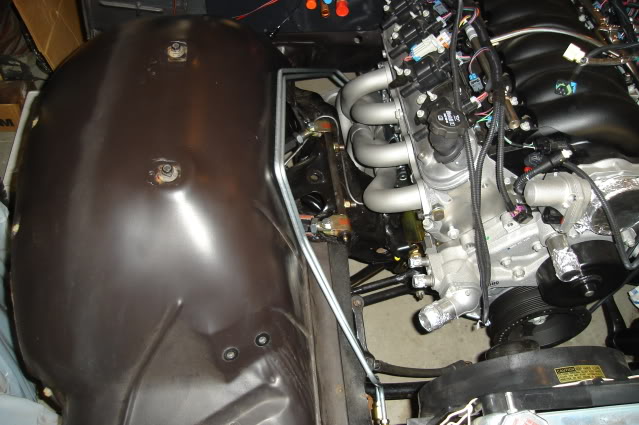
I loosened up the passenger side header and was able to pull it about 1" to the side to try to gain some room, I pulled it as far as it would go because at that point it was resting against the inside of the frame.
After taking a look at things I thought that maybe my Autokraft pan with the side kickouts could be the possible culprit. However I had test fitted the starter previously without the headers in place and it went in fine, although the access to the inside mounting bolt was limited a little by the kickout and I needed to use a flexible extension to get to it.
The way these headers are designed limits access to the outside starter bolt as well. Not that having limited access to that outside bolt makes much difference, I can't even get the starter in there!
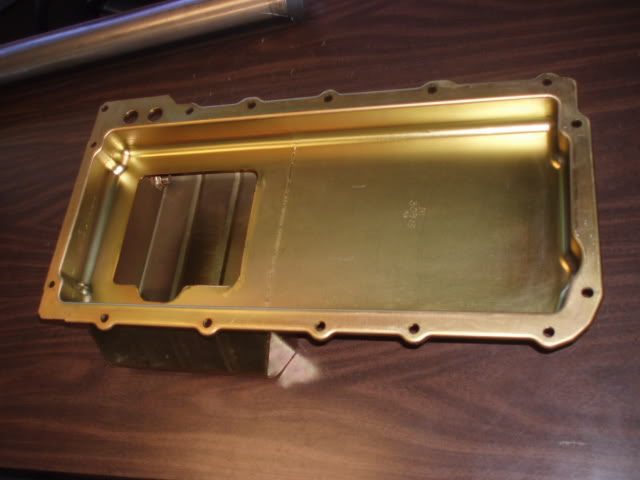
The pan kickout is 1-3/8" wide from the side wall of the pan sump itself, but only extends 1/2" past the pan rail on the block: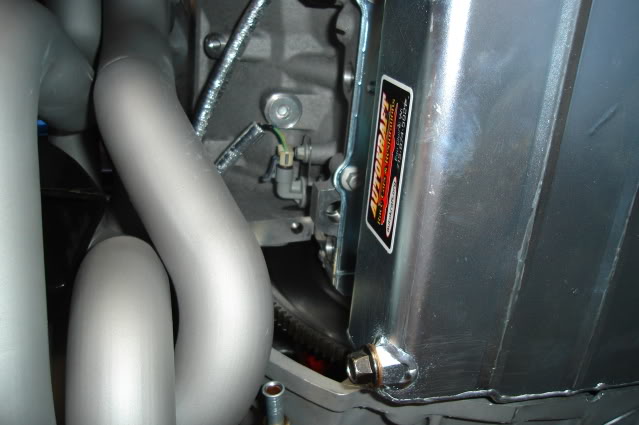
Promotional pics of the Autokraft pan to help add some perspective: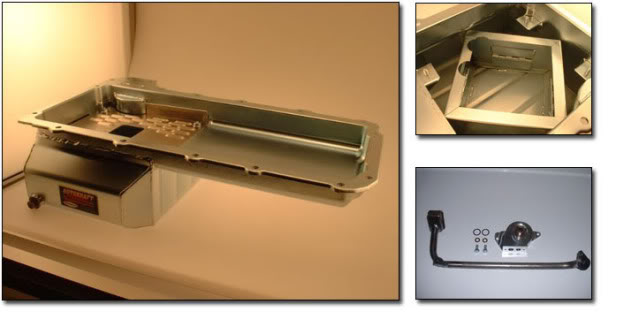
Milodon 30915 pan that is recommended (but not required) by Edelbrock for use with their engine mount adapter plates that I'm using. The Edelbrock swap headers do mention they highly recommend that they be used with their engine mount adapter plates, but they don't go so far as to tell you which oil pan to use in their header installation instructions.
Note the very similar kickouts on this Milodon pan as compared to the Autokraft pan, I seriously doubt my starter would go in using this pan versus the Autokraft pan: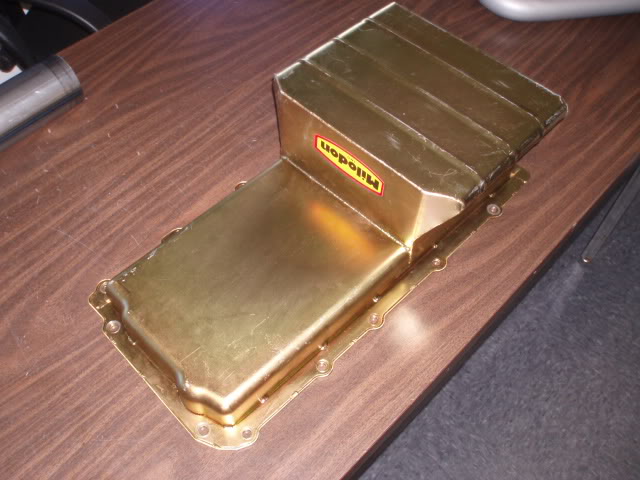
No way is this starter going in, in this shot the starter solenoid is right up against the front crossmember: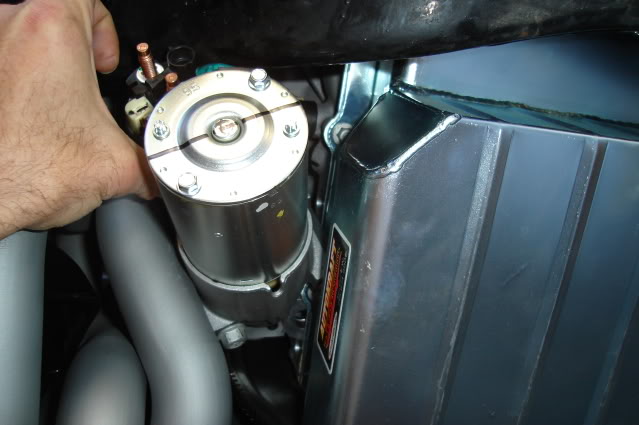
Not a lot of room here, keep in mind this shot was taken with the headers loosened up and pulled outward against the frame rail:
Well, I was determined to get that starter in there as I have a lot of money invested in my headers and oil pan. I figured that it might go in if I pulled the trans out, it has to come out right now anyway so I can reconfigure the cooling lines coming out of it.
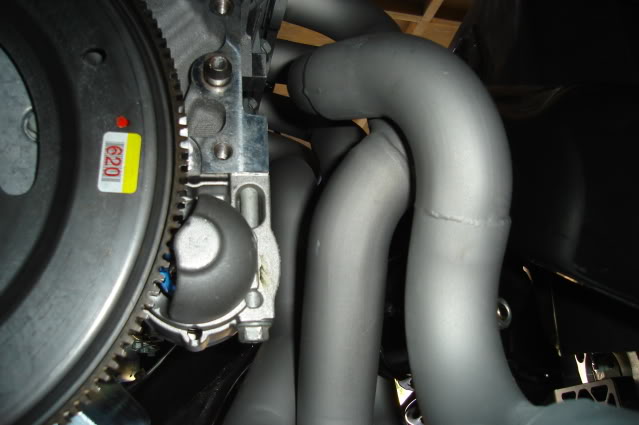
It fits: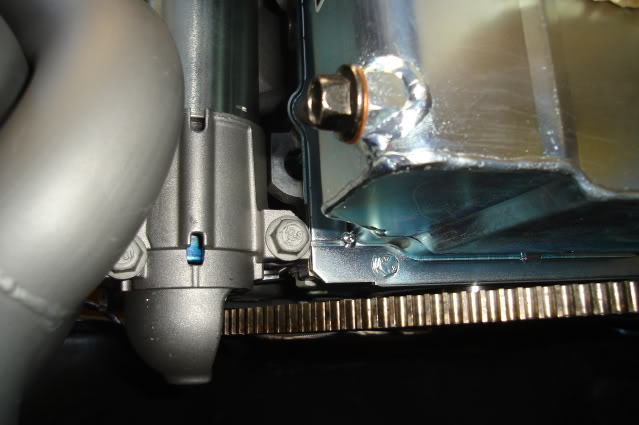
Unfortunately in order to service the starter in the future I will have to take following steps:
1) Drop the 3" X-crossover exhaust between the header collectors and the mufflers.
2) Loosen the passenger side header and pull it against the frame.
3) Remove the driveshaft.
4) Disconnect the trans cooling lines at the trans.
5) Disconnect the Speartech wiring harness on the trans (2 connectors - VSS and trans control) and the passenger side of the engine (3 connectors - crank sensor, knock sensor, O2 sensor + 1 ground lug on back of the cyl head) and pull the harness up out of the way and lay it on top of the engine.
6) Remove the top 2 engine to trans bolts.
7) Disconnect the torque converter from the flexplate.
8) Loosen the two long 7/16-14 engine mount bolts.
9) Support the trans with a trans jack and remove the trans crossmember. Tilt the engine and trans rearward slightly for access to the bottom 4 engine to trans bolts and to gain enough clearance at the firewall to pull the trans off the engine.
10) Support the engine under the oil pan with a floor jack and block of wood while separating the trans from the engine.
11) Remove starter after disconnecting the starter wires and cable.
I'm seriously thinking of running '01 -'02 F-body LS1 exhaust manifolds now. I'll probably take a 30+ HP hit though, but it might be worth it. One of the header tubes is less than 1/4" from from the starter motor with them tightened down.
However I really want to have the added power that the headers will unleash.
I'm guessing that the guys running manual transmissions haven't run into this issue. I do realize that the '64 -'67 A-body swap headers differ in design compared to the '68 -'72, maybe the early cars are the only victims of this issue.
Well anyway, I did find time after scratching my head half the day dealing with this starter nonsense to do a little work on the trans lines.
I knew that my first try with the cooling lines would be a bit of shot in the dark. Now that I have everything in place (trans, headers, starter) I could see they aren't going to work as-is.
I cut them off shorter and redid a couple of the bends:
The trans is now back in the car, tomorrow I'm hoping to make up some lines to connect the trans lines coming off the trans with the ones coming off the front mounted trans coolers.
Thanks for looking, and for any helpful advice you can offer.
10-4-2009
.....this weekend despite my troubles and disappointment with the starter motor access.
The one thing I really wanted to get done this weekend was to make up the rest of the transmission cooling lines. I dropped by my local NAPA and picked up a couple more 60" pre-made lengths of 3/8" steel brake line this morning while doing my weekly food shopping.
I started out making up the lower line that will return the cooled fluid to the transmission, starting at the trans since this looked like the easier tubing route to start out with.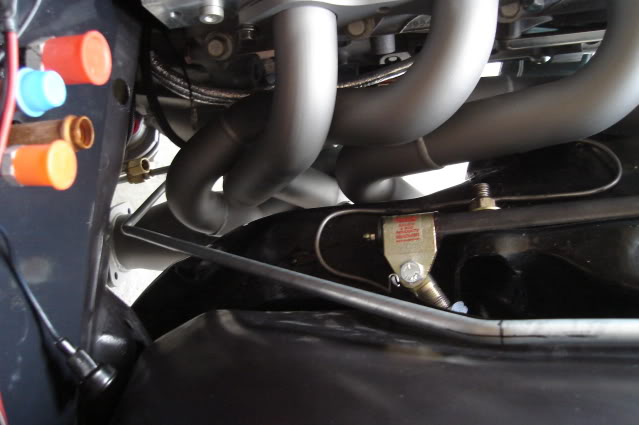
I continued working towards the front and made up the final connection. Bending up this first line took the better part of 2 hours, it takes a bit of time to remove and replace the line over and over along with making some minor adjustments of the bends to get things fitting just right. The steel tubing is soft enough that you can tweak it a little by hand to make minor adjustments, you certainly will end up making a lot of small adjustments before it's right.
I used all 60" of the line except for the last 1/2", I had to cut off that last little bit in order to make the last bend in the line as the flare nut would have been in the way of the tubing bender itself. After making the last bend I double flared the end. Making sure to put the flare nut on the line before making up the flare is something that's easy to forget to do sometimes!
Using some short scraps of tubing I made up a pattern to follow to get started. You can't easily manipulate the "60 long line with all of the obstacles in the way, using scraps like this helps you avoid mistakes that will scrap out the longer line you're trying to work with.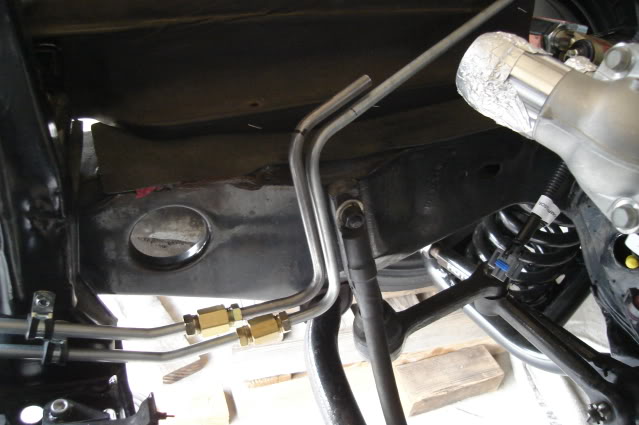
Here's the second line that brings the hot trans fluid from the converter to the coolers almost halfway finished.
Bending up the second line will go twice as fast as the first one since I now have a full-length pattern to follow. I'm just about to make the second to last bend here.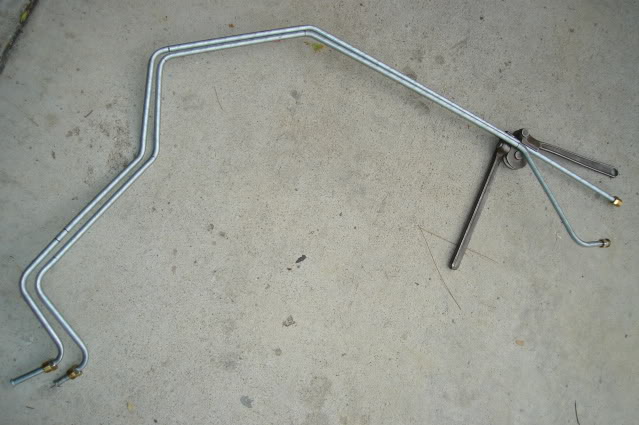
Again I had to cut off the flare to get the flare nut out of the way in order to make the the last bend and terminate this one at the trans. I cut off about 1/4" of line which puts the tubing cutter as close to the old flare as possible. The line on the top shown here is the second one I made up.
I just barely had enough tubing length to make up these lines, everything worked out well for me today. I did rethink the routing of the lines a little halfway through making up the first one and eliminated one bend near the front in order to conserve some line length, I could see that I was close to not having enough.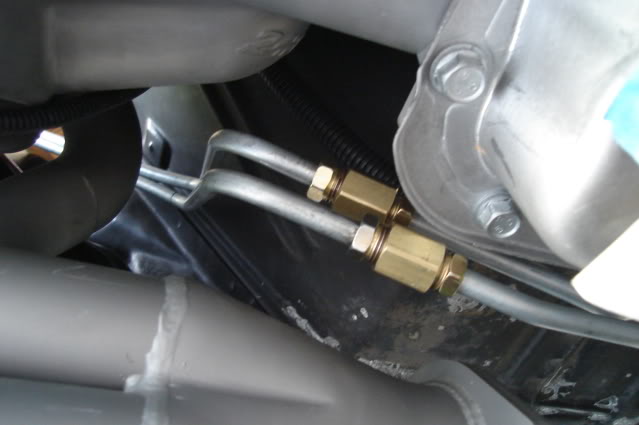
I still need to fasten the lines down in a couple of places using some 3/8" Adel clamps, I did my best to make them run parallel to one another. Without the fender on the car it makes little sense to fasten them down, the inner fender will move a little from where it is now with the fender installed.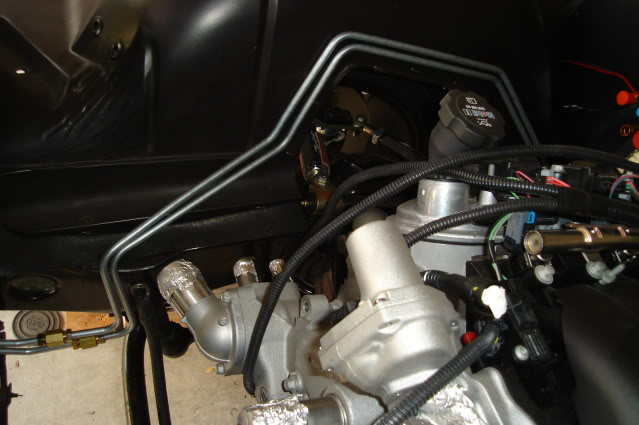
Plenty of room between the lines and the header tubes, both lines can easily be removed from the topside without having to tweak them.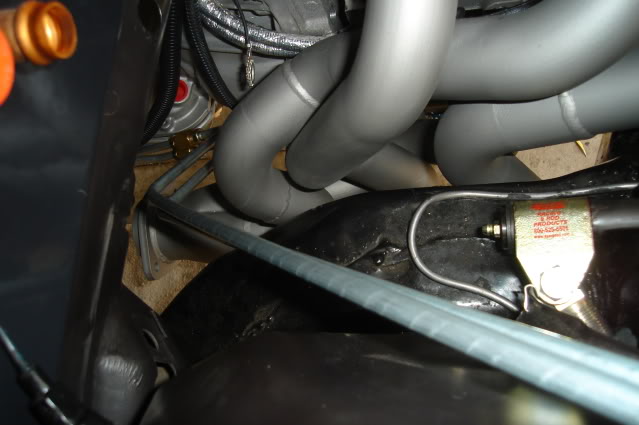
Finished for the weekend.
Thanks for looking.
The Tempest!
Posted by Diggymart on 3/26/21 @ 3:09:22 PM