You must be logged in to rate content!
5 minute(s) of a 224 minute read
10-10-2009
.....for a while today and made some decent progress.
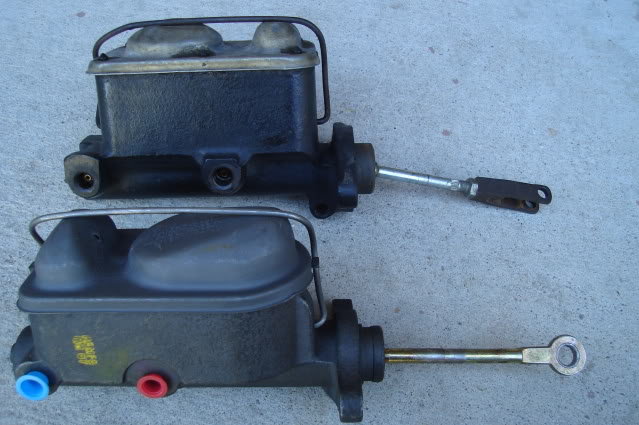
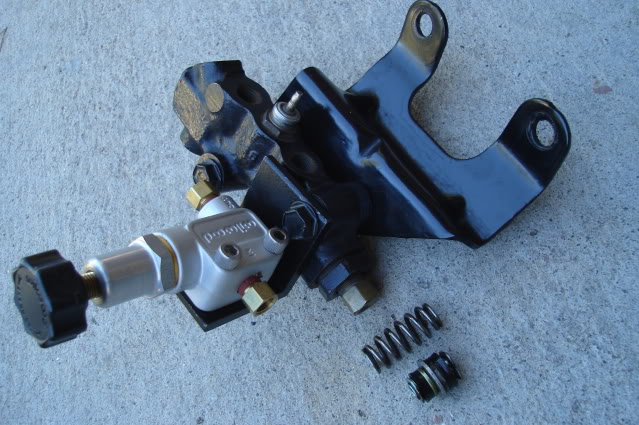
I removed the old master, it's a 1-1/16" bore 2nd-gen F-body disc/drum manual brake unit that worked very well with the single-piston B-body calipers. I'm replacing it with a 15/16" bore 1977 Monte Carlo or Malibu disc/drum manual master that comes complete with the pushrod, a $35 item with an $11 core charge (pictured below in the foreground). That's right, no power brakes.
Of interest is the two masters are configured backward from one another. The F-body master has the front brake reservior in front, the Monte master has the front brake reservior located in the rear. This means I will have to remake the lines from the master to the combination valve.
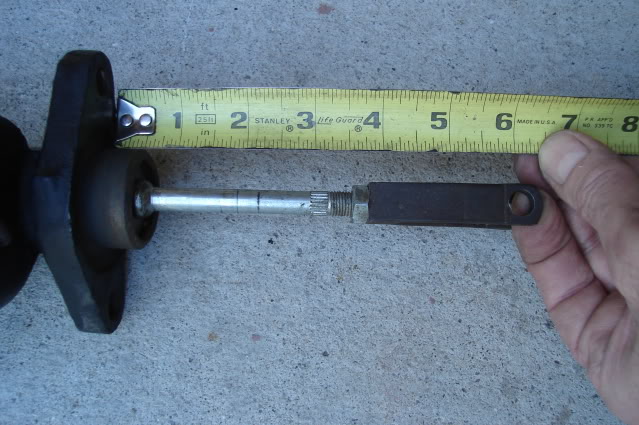
I was able to use the old 1964 Tempest single-master pushrod with the F-body master. For reference I measured from the mounting surface of the master to the center of the pushrod pivot pin, it looks to be right about 6".
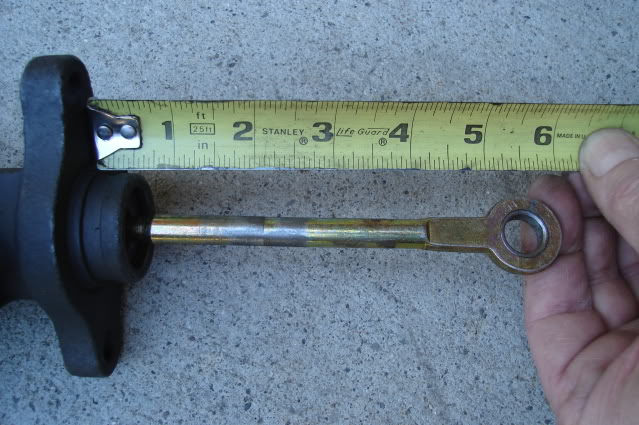
The new Monte Carlo master pushrod won't be quite long enough nor will it fit up to my brake pedal. It fits deep into the piston, by about an inch unlike the F-body master.
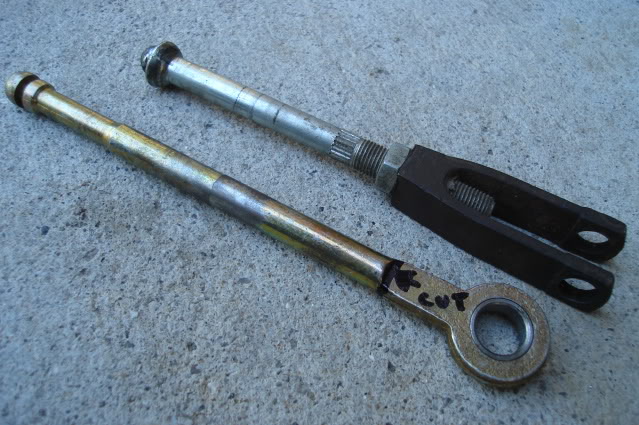
I will cut the new pushrod off at the cut line shown and thread it with a 3/8-24 die so it will screw in to the original Tempest brake pushrod clevis. It's just long enough to work.
I will reuse the 2nd-gen F-body combination block and mounting bracket, the bracket has been slightly modified by bending the mounting tabs to tuck the combo valve up close to the master cylinder.
The combo valve has been modified by removing the cartridge and spring (shown next to the end cap), they can be accessed after removing the end cap. The Wilwood adjustable proportioning valve ($42) will connect to the 3/16" brake line adapter fitting in the end cap, it's mounted on a simple angle bracket. I will adjust the front to rear brake bias using the Wilwood prop valve to prevent the rear brakes from locking before the fronts, especially under wet road conditions.
I made up some new lines from the master to the combo valve, plus a short loop to connect the adjusable prop valve to the combo valve. I was able to reuse the original 3/16" line from the front brake reservior to the combo valve, but had to make up a new 1/4" line from the rear brake reservior to the combo valve. All these lines were bent by hand, the tubing is pretty soft so it's not too hard on your thumbs. There's no way to use a tubing bender on these with the bends so close to the tube nuts.
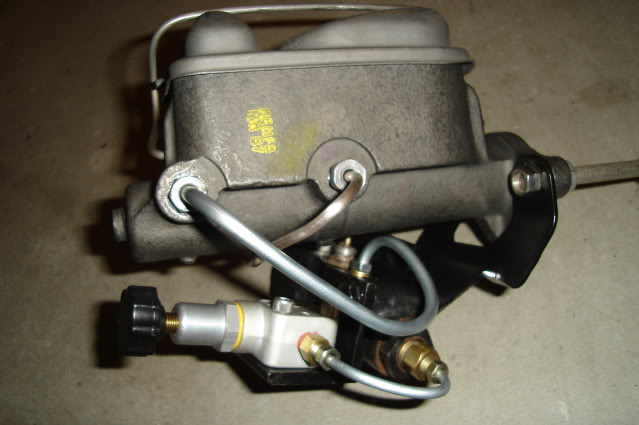
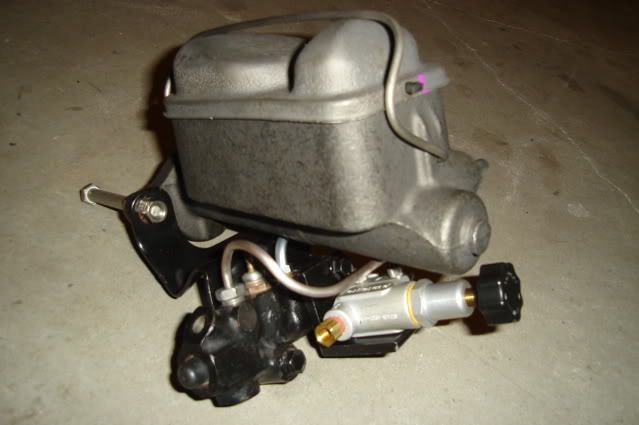
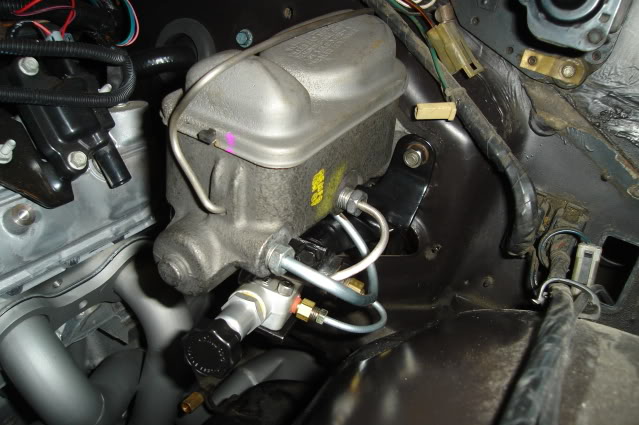
The completed assembly test fitted in place, the short loop from the combo to the prop valve clears the inner fender by about 1/2".
That's all for today.
10-11-2009
Today I finished making up all of the hard lines for the brakes. Again all of the bends were made by hand, making for some pretty sore thumbs by the end of the day.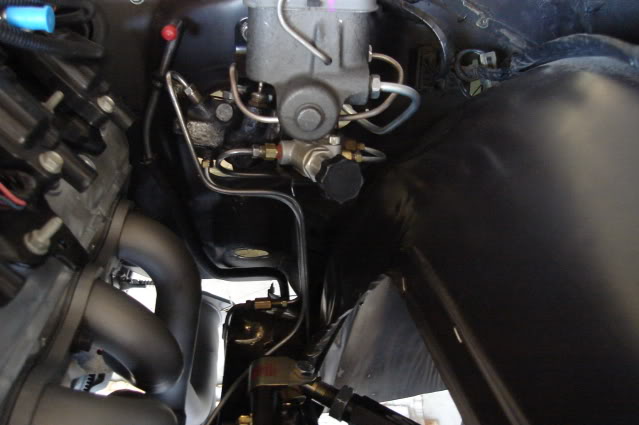
The lines coming down from the combo and prop valves were bent this way to leave room to pull the steering column in and out of the car. The line in front leads to the left front brake, the next one (60" long) goes under the engine along the front crossmember to the right front brake and the rear line coming off the prop valve connects up to the original rear brake line.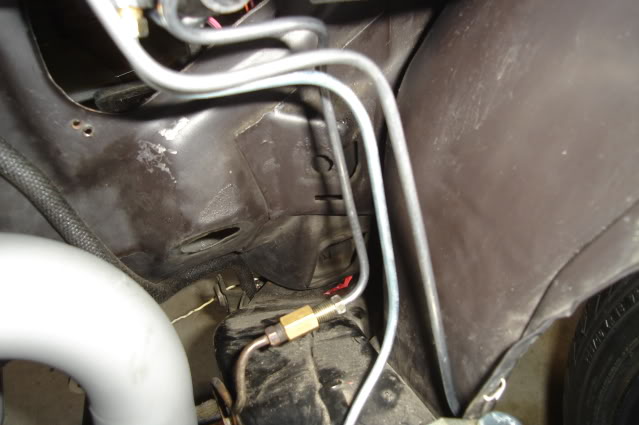
The 60" long line running under the engine terminates here, getting this line bent and routed was made a little easier with the inner fender out of the way. The engine will come out once more later on, I will tidy up the bends a little and fasten it down better at that time.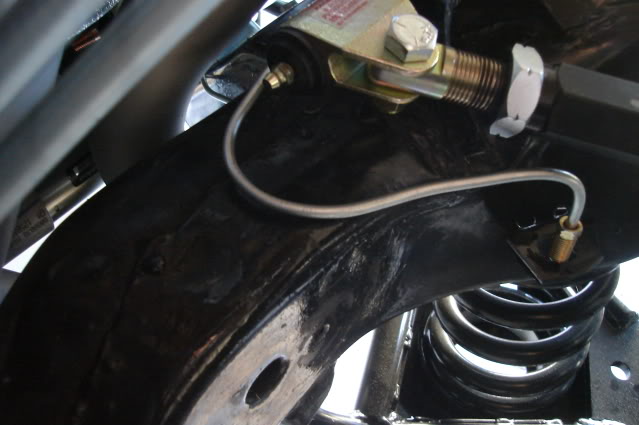
Another job out of the way that will bring me a bit closer to driving this old heap.
Keepin' on it.
The Tempest!
Posted by Diggymart on 3/26/21 @ 3:09:22 PM