You must be logged in to rate content!
7 minute(s) of a 206 minute read
8-22-2009
I've seen those before. The stock taillights are one of my favorite things about the early second gens. I love the round lights. Those are to expensive and just not my style.
I finally rewired my headlights today.
BonzoHansen has a write up that can be found HERE.
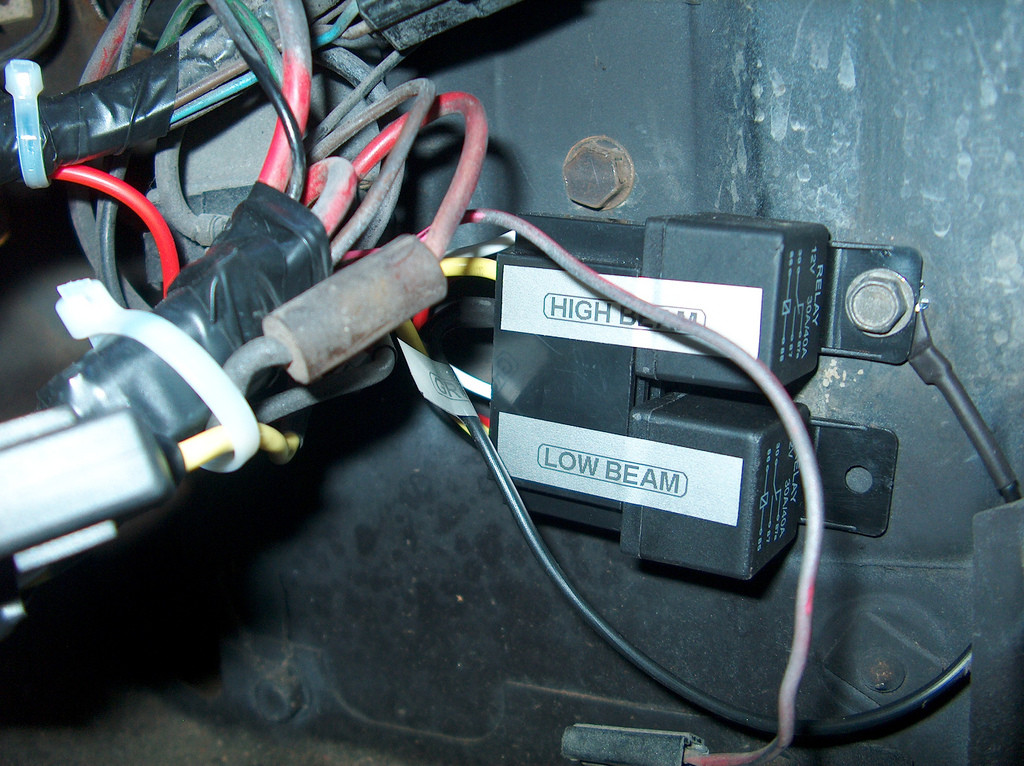
The wiring diagram in that link pretty much explains it all. A while back I bought a two relay plug at a swap meet. These can be found on the net, also on eBay. I modified mine by wiring the 12+ together and the ground together.

Here is a pic of the driver's side headlight plug. The stock wiring on the passenger side headlights runs to the driver's side headlight and then into the harness. I removed part of the wrapping off of the factory harness. The green wires are the high beams and the brown wires are the low beams. The black is ground, but we wont be messing with that.
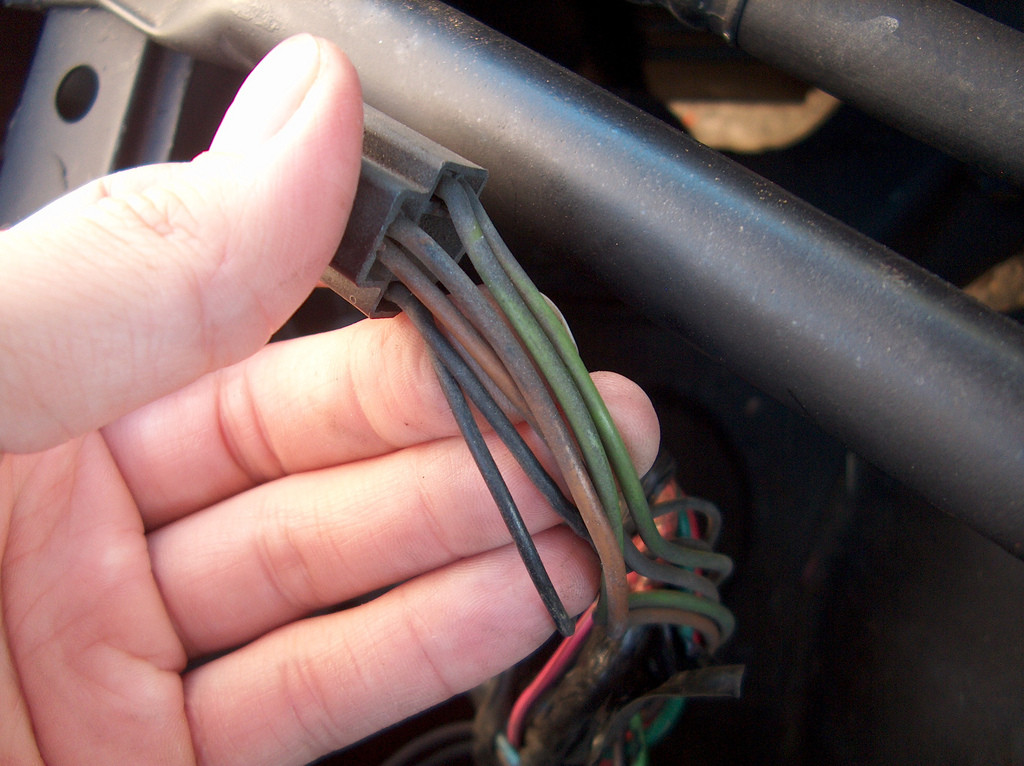
Look right there in the middle. See where one pair of green and brown wires heads to the left (to the other headlight) and another pair heads to the right (into the harness). The pair that head into the harness are the ones that we want to cut.
I chose to cut right here, about in the middle.
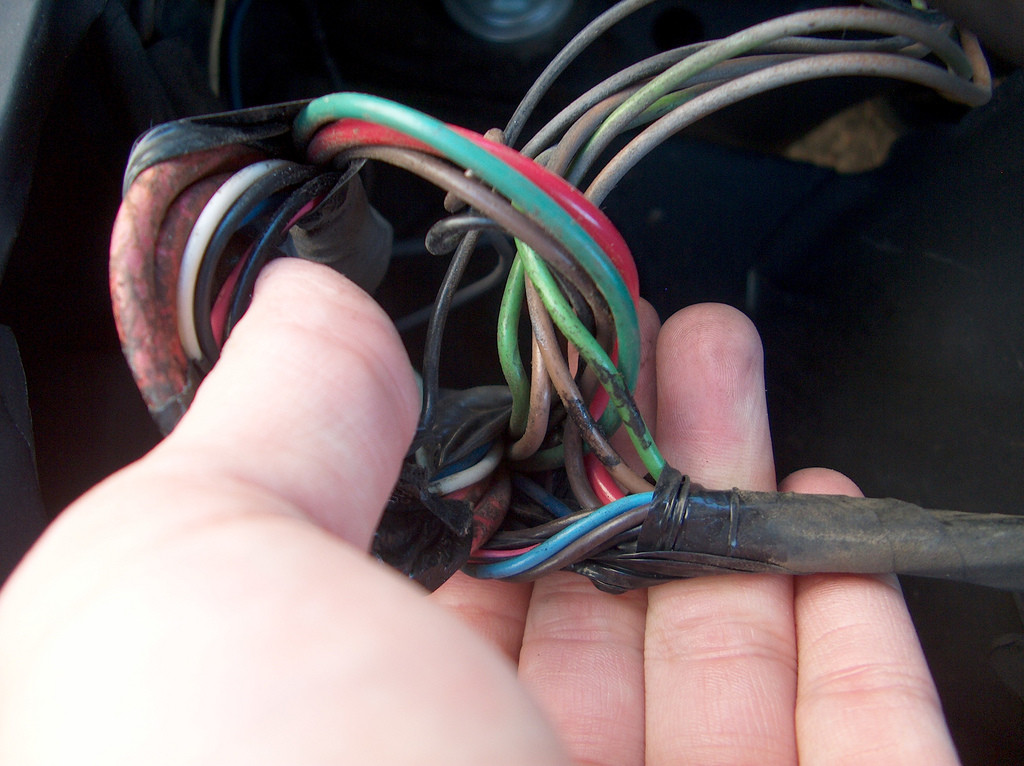
You're basically intercepting the stock wiring harness and rerouting through some relays. Ignore the color's of the relay's wiring. If you order your own, you can wire them any color you want so it all would match.
I soldered the wires together, and slid the shrink tubing over the exposed wire to protect them.
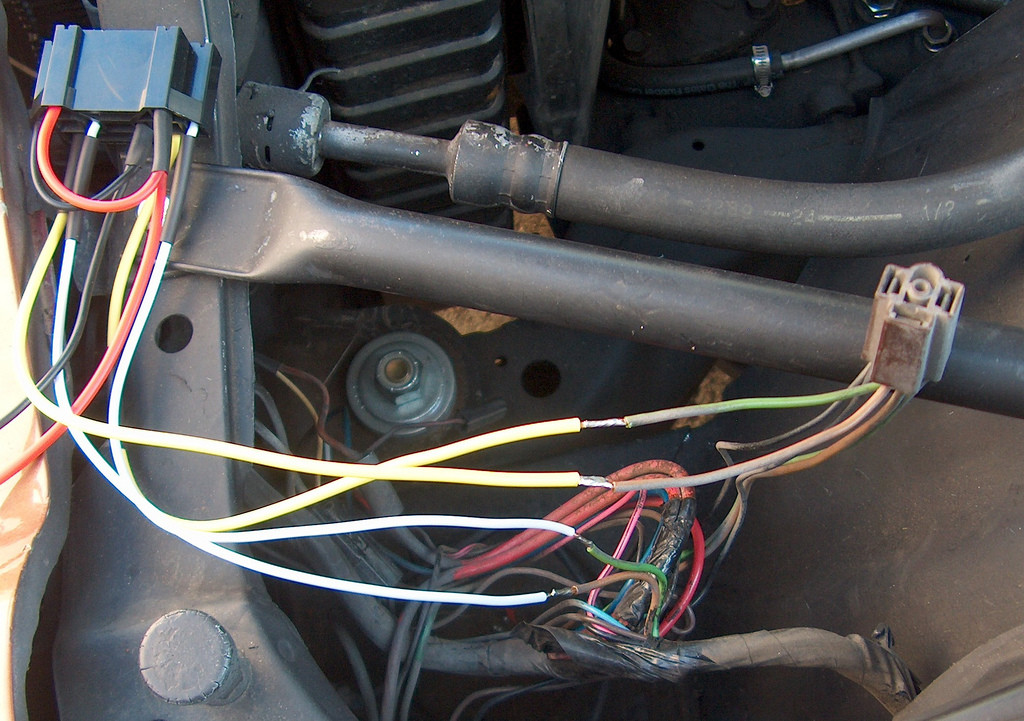
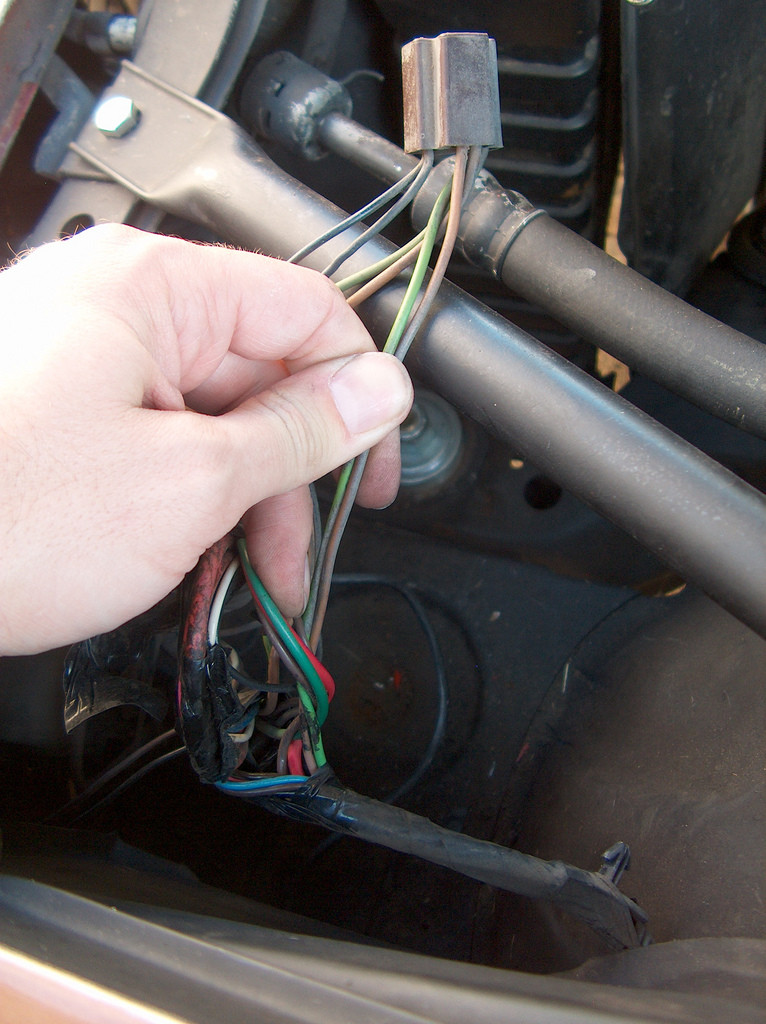
I bolted one of the relay's down to where the regulator used to be. (I currently have a CS130 alternator). I also ran my ground to that bolt. You can see a little bit of the star washer poking out. I connected my fused (15A) 12+ to the horn relay. I made sure everything worked and zip tied and wrapped up the wiring. It's not show quality, but neither is the car!
Also, I fixed my passenger side RS light. It wasn't working. Turns out there was a bad connection the the factory plug. I removed the plug and installed a new one. Works good now. I just have to figure out why the blinkers don't blink. I've already replaced both flashers. The funny thing is the emergency flasher works fine, but the blinkers don't.
11-3-2009
They are inexpensive and they do the trick. I haven't gotten around to actually hooking up the halos though.
I've been pretty busy lately. Also, I haven't been very good about taking pictures but I will tell you guys whats been going on.
Oil Pan Problems
Okay... I took Cindy for a spin around the block and noticed that the pan was leaking in the front and in the rear. I used a Felpro one piece oil pan gasket. Every person I talked to said that they were great. Leaps and bounds ahead of the four piece. Well since mine was leaking I figured I didn't use enough silicone in the corners. The instructions say not to use much, so I didn't.
So I dropped the pan and took off the gasket. I cleaned the surfaces up with brake cleaner and installed another silicone gasket. This time I used more silicone in the corners. I installed the pan and torqued everything down to where it was supposed to be. Cleaned everything up and took Cindy for a spin. No leaks! WooHoo! I let her idle and went inside to wash my hands and stuff. Come back outside and its leaking.
Well this made me realize that the pan must be bent. I started an new thread asking for some advise.
http://www.nastyz28.com/forum/showthread.php?t=164983
So I ended up buying the Summit aluminum oil pan. Since I am actually replacing my oil pan instead of just the gasket, I had to lift the engine up to get the pan out. This consisted of pulling the carb(which ended up not really being necessary), unbolt the headers, motor mounts, removing the fuel pump(to get the pass motor mount bolt out), and removing the AC compressor.
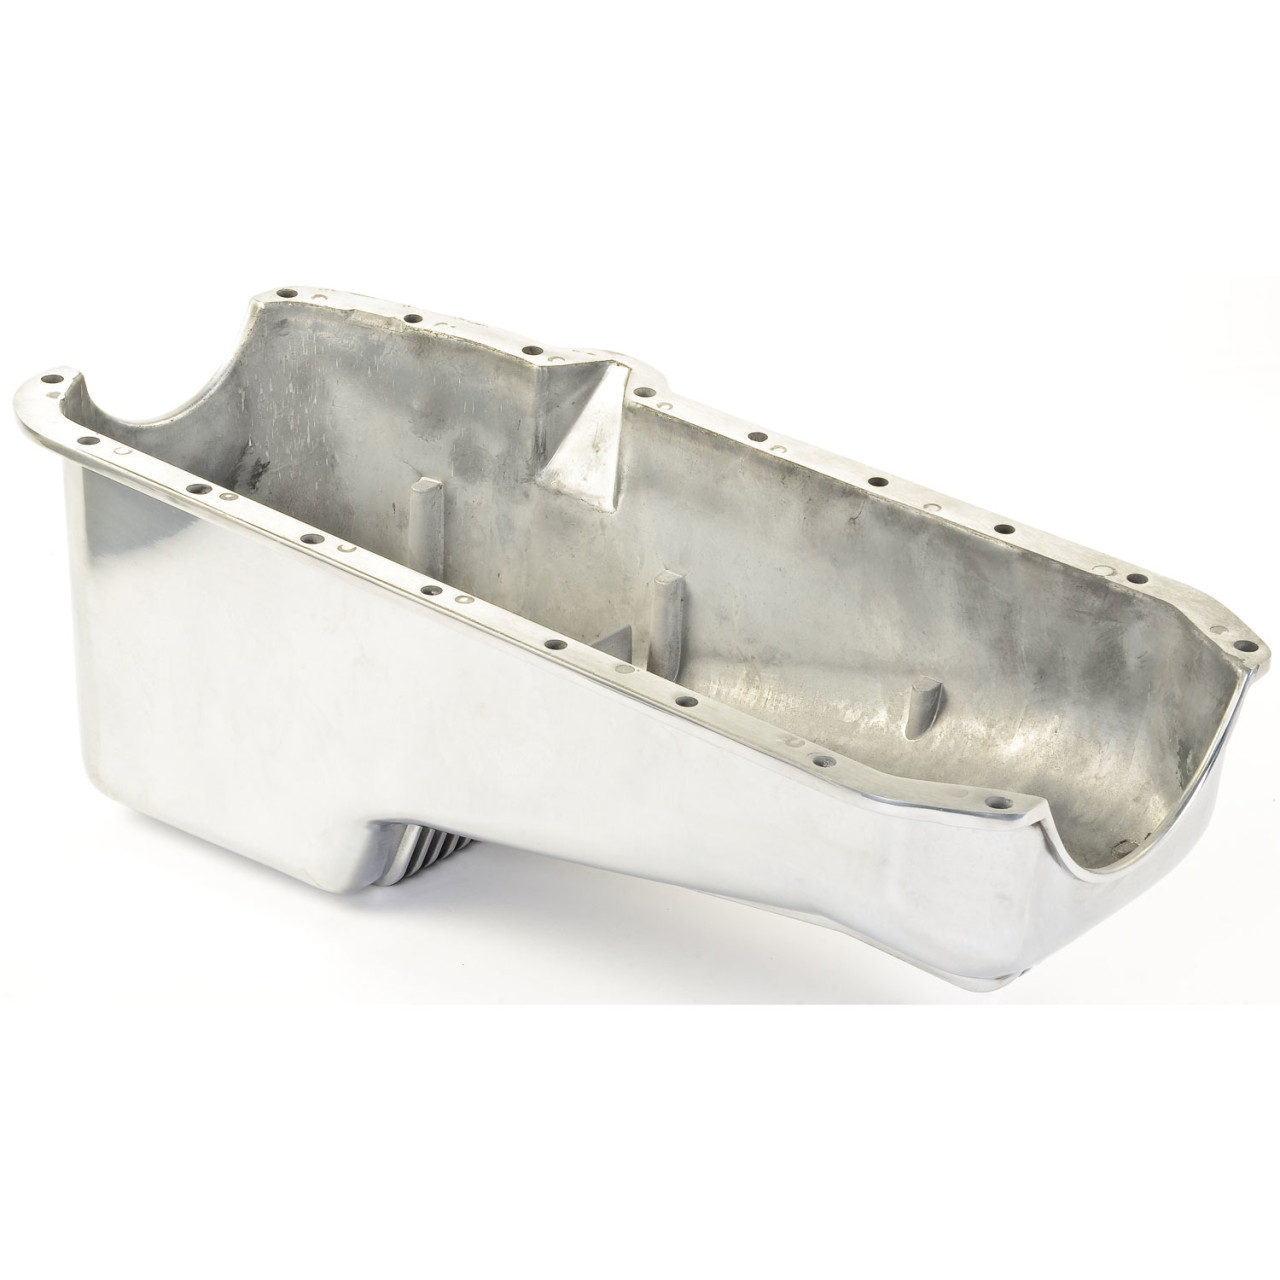
I ended up lucking out a bit and was able to lift the engine high enough without taking the hood off. So, once I got it up in the air, I pulled the pan and gasket and cleaned the surfaces again. I had to remove the oil pump pickup and replace it with a stock one. After everything was all cleaned up I siliconed the gasket in the corners and stuck it up in place. I lifted the summit pan up and it wouldn't seat!!! It was like a 3/8 from meeting the block. (In hindsight I should have pulled the silicone gasket and wiped the silicone off of it.)
This made me lose my temper. I mean REALLY lose my temper!
I put all my tools away and called Summit. I asked tech support if i need a special pickup or oil pump. They said no, and that I may have to clearance the pan or oil pump a tiny bit to make the pan fit.
WTF? Really? Was this pan not made exactly like a stock one??
So what I ended up doing (not taking pics, sorry) was grinding down the pan and the oil pump. This pan has two support ridges near the sump part. I had to grind down the passengers side a little bit, and grind down the oil pump as much as possible. There are four bolts that hold the oil pump together, the one nearest the support ridge was grounded down until I met the actually head of the bolt. After all this was done the pan would seat.
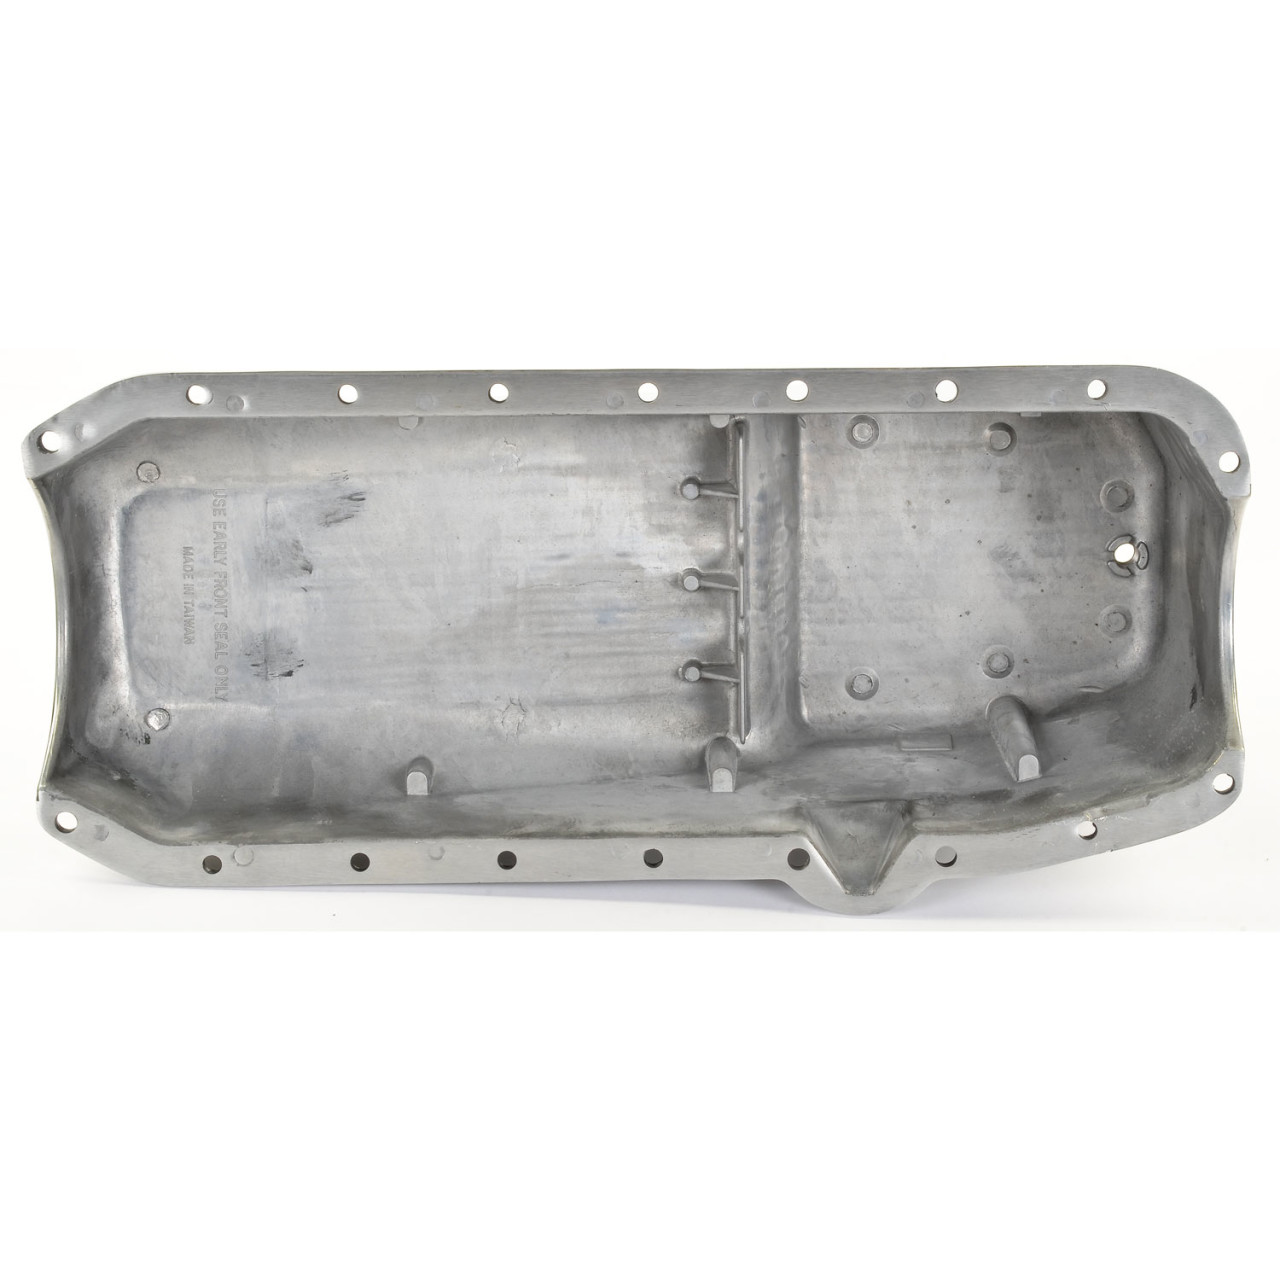
So back to Autozone for another 40.00 gasket. I reassembled everything and we're all good now.
Here's what I figured happened. When I originally built the engine, I had the machine shop assemble the engine for me. They had a guy there that asked me if he could paint the engine. I didn't really care so he painted it orange for me. I think since he was the one painting, he probably installed the oil pan gasket. I think the oil pan was severely over torqued. The instructions say that you are to only tighten down the corners to 20ftlbs and the rest to 8ftlbs. I think they were tightened down so tight that the pan was bent.
I am also waiting for my door panels to arrive. I ordered them in August.
Love the old camaros
Posted by Diggymart on 4/27/20 @ 2:39:52 PM