You must be logged in to rate content!
12 minute(s) of a 668 minute read
2-22-2012
I've been through this spark plug holder issue in the past.
I have a car with a small block chevy. I'm using tight tuck headers. Basically a set of tubes that go right to the center and drop down into a collector. This set-up creates a plug wire issue. There isn't much room or variances for the wires, if they move, they'll probably touch a header tube and burn.
I'm using a homemade holder similar to what I'm making here. My first holder was for just the two center cylinders, then I changed my mind and created some that held all four cylinders on each side.
My first design is the top one in this picture. Then the one I'm making for this big block project. Then an aftermarket holder. One thing I don't like about some aftermarket products is there nuts, bolts, and brackets to assemble. I have no problem with the assembling process, what I don't like is a couple years down the road, the odds and ends aren't available seperatly, so you got to start all over with a new holder if a piece is missing, or broke.
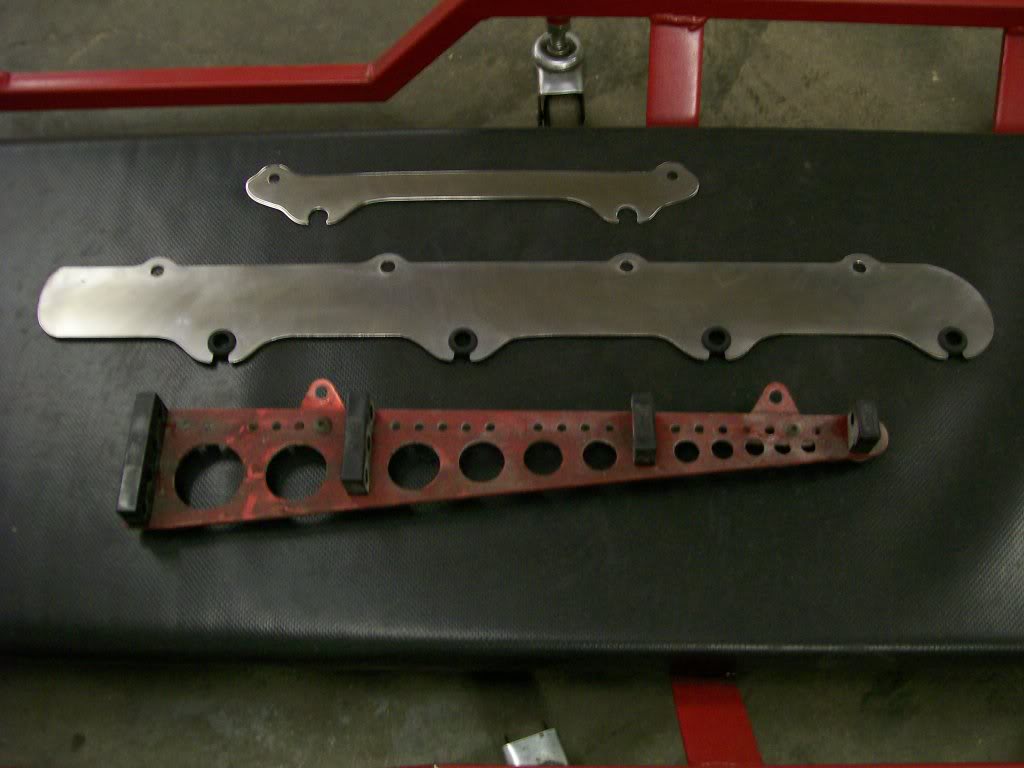
I got the first stage of polishing done, and the grommets fits the holes great.
Just to get an idea of how the wires are gonna look I did a preassembly. Ok, ok, I complained about aftermarket stuff. . But I did order some simple wire separators from Jegs. They are gonna be 4, 3, 2, 1 wire holders with a screw through them. I'll be able to attach all the wires to my holder in perfect alignment all the way down to the single front wire.
Here it is so far.
2-23-2012
Your question is quite proper. I wondered if anyone would ask.
The headers are the ceramic coated headers which is the only reason I don't mind buying headers now a days. I can't stand how non ceramic coated headers look after a while, all rusted and burnt. I'd have to mess up the ceramic coating to either cut and weld, or to heat the tubes and force, bend them.
These headers are the shorties, I got these because they stop right at the bottom of the oil pan. With this truck and it's frame being altered, I didn't want to get the long tube headers. The long tube headers would be calling the shot as to how to fabricate the crossmember. With these short ones, I could fabricate the pipes to work better with the crossmember.
The oil filter issue is because the block is from 1966. Many of the older fellows will remember the canister type oil filter. It had a canister with a long bolt you had to remove, then change a filter inside the canister.
Inorder to go to a spin on filter you have to first bolt on an adapter that now allows a spin on to work. It is the extra space that this adapter, only about an 1 1/4", that has lowered the filter just enough to tangle with the collector flange as you remove it.
It would seem I come across this goofy stuff all the time. I suppose if I didn't have these situations, I wouldn't have to dig deeper to solve problems and better my ability to fabricate and adapt.
2-24-2012
oldtime_ironman, I knew you were a Q-jet guy. . I do still have a Q-jet on one vehicle, the Willys, after 27 years, still working just fine.
If I had a Holley on it, I'm sure I'd be rebuilding it a couple times by now. Not that the Holley isn't a long time carb, it just has alot of gasket material doused in gasoline, the older gasket material just broke down over time.
Comparison wise. With the much smaller primarys, the throttle responce on the Q-jet is more precise. On the vehicle I'm gonna work on had a Q-jet for a couple years then I went to a vacuum secondary Holley. It also had an automatic transmission. The change from the Q-jet to the Holley's off the line responce was very noticable. The Q-jet was the winner.
Then I went to a tremac 5 speed manual transmission. Now with the clutch I can control the take off RPM, the off idle responce wasn't as important, so I kept the vacuum secondary Holley. But with the 5 speed, it geared my 1 gear to being like a 4.56 ratio, in a matter of 2 or 3 seconds I was at 5000 RPM. The vacuum secondary Holley couldn't respond fast enough to keep up with the sudden RPM change. I changed the vacuum diaphram spring to open the secondarys faster, but you can only open them so fast before you get a hesitation. As would be the same with the Q-jet, since it also opens it's secondarys off the vacuum/air flow.
Then I went to a machanical secondary, double pumper 750 HP series Holley. Absolutly fantastic. Did it work great right out of the box?? Heck no. Jet changes, primary and secondary accelerator pump changes, squirter nozzles had to be changed, squirter nozzle screws changed, accelerator cam changed, power valve changed.
Listen up everybody... oldtime_ironman likes his Q-jets, I also use and will for some time yet. If I put the mechanical secondary double pumper on my car with the automatic transmission, it would not have worked as well as the vacuum secondary Holley carb. As with all aftermarket products, bigger is not always better. What works great on a high performance street car, will not bolt onto an off road truck, and give the same results.
One thing about the Holley is... Just as I listed about 6 or 7 changes, there are many changes within the changes. For instance, jets, yikes, they have a bunch to choose from. The Holley is soooo adaptable, but you first have to have the right one to begin with, then start to fine tune it.
As for the remote oil filter, great idea, there is no reason not to use it, just a path I did'nt go down.
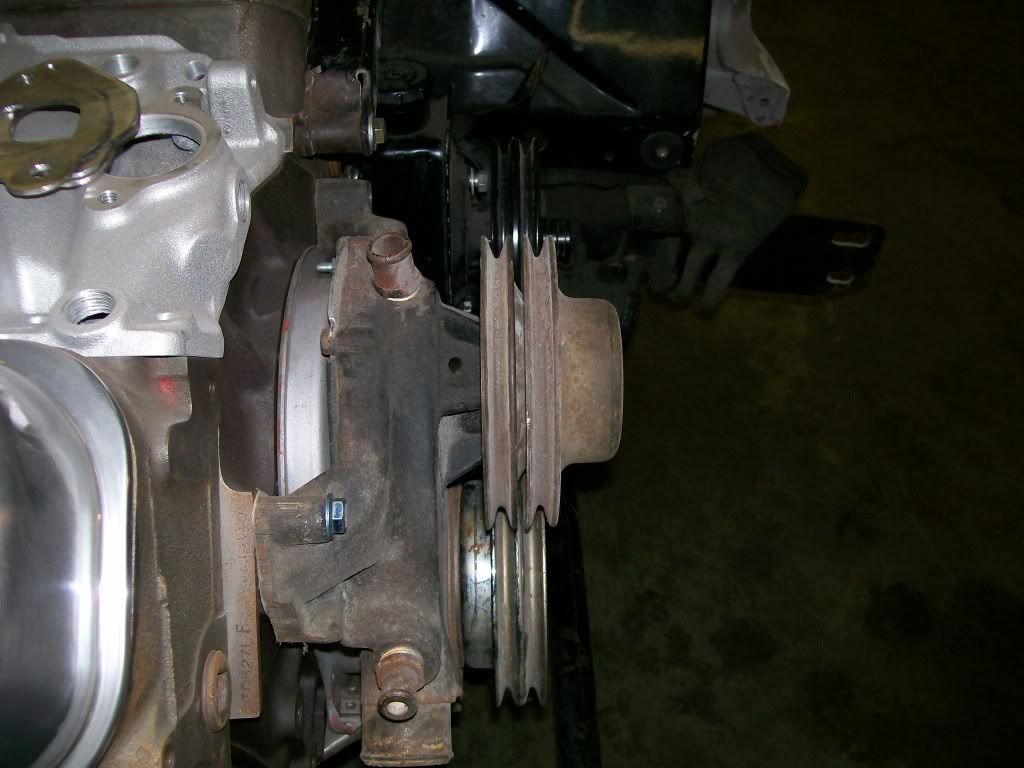
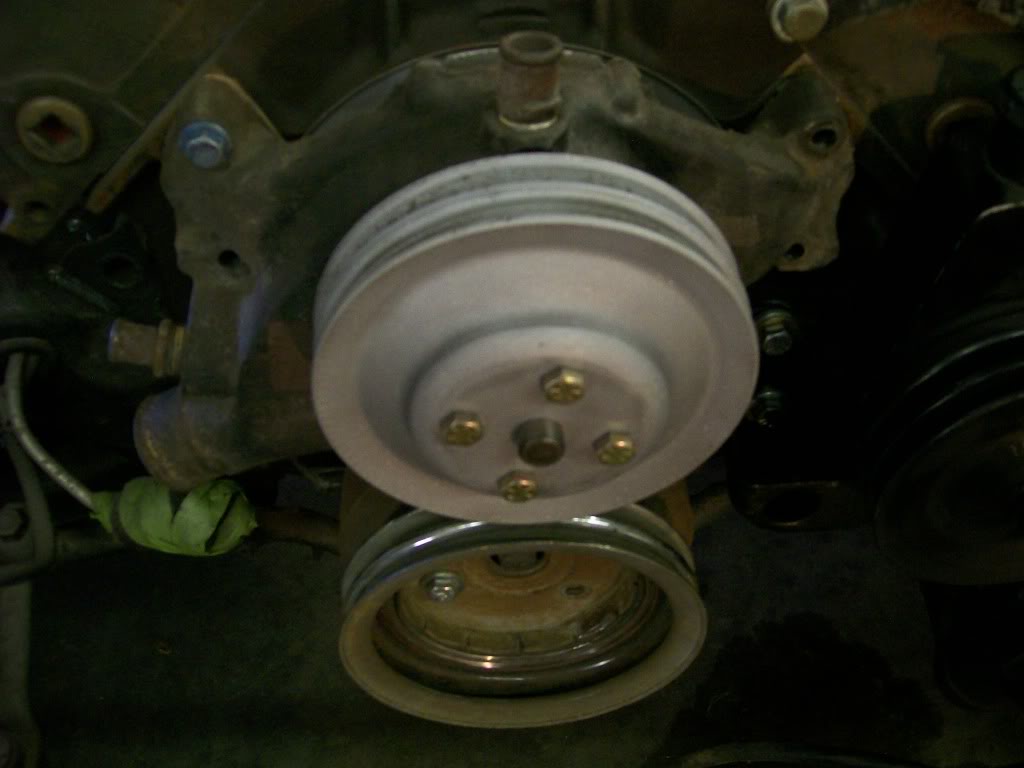
Back to the '57 for a minute. Back in the late 60's - early 70's chevy changed the depth of the water pump flange. They moved it forward around 3/4". This allowed them to mount the alternator more infront of the engine vs having the alternator way off to the side. Good thing is, when building a hot rod, the pulleys are still fairly interchangeable, just sometimes you still have to modify.
In this picture, I'm happy with the power steering pully in the far image. The crank pulley at the bottom was a three groove, I cut off the third groove, now I'm happy with it. My issue is the water pump pulley. I need a two groove, one pulley is perfect, but I need two grooves. I've checked around, maybe not in the right catalogs, but I can't find a two groove shallow, they all want the second groove deeper. Grrrrrr.") Figures.....
Figures.....
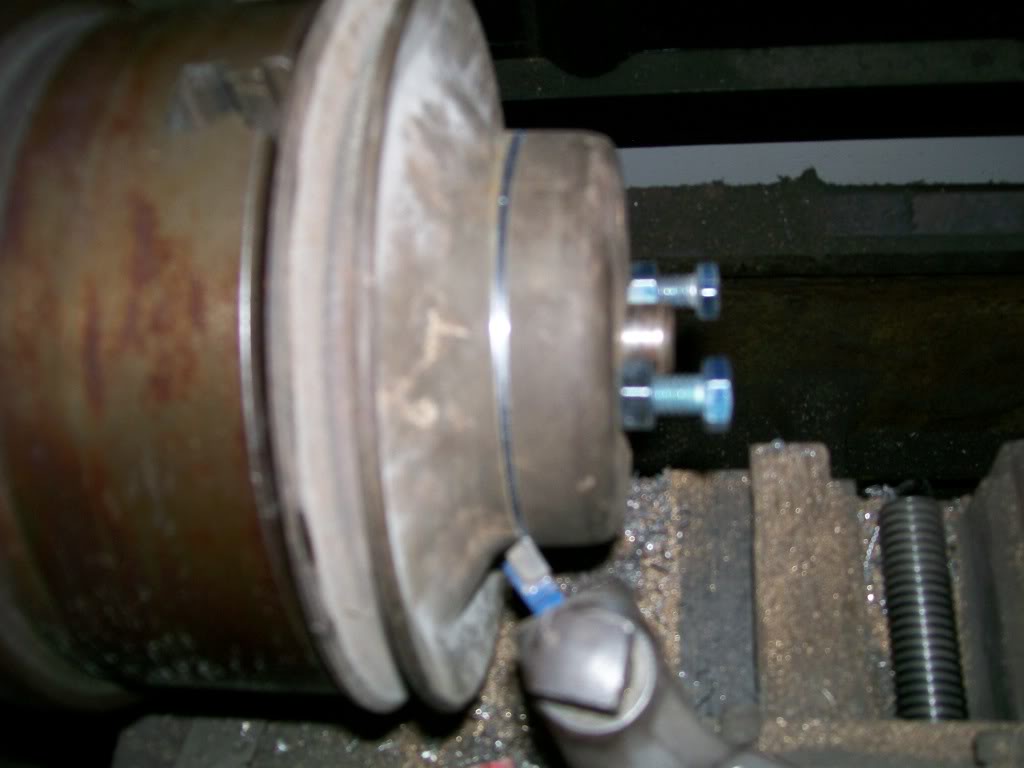
Now if I stack a second same pulley I get what I want, but I can't bolt it up this way. I have no choice, over to the lathe. With two identical pulleys, there will be a point of interference that will make contact when I stack the two pulleys if I do this right. The pictures will explain...
Here's the two water pump pulleys, and the line up with the others. The interference is noticable. The space between the two water pump pulleys will be eliminated once I'm done.
The lathe work. I figure if I cut this one and leave just a little bit of the flat of the hub, this will interfere with the other pulley. Why do I want interferece?? One) I will use the press to joint them together, nice tight self aligning fit. Two) having them press fitted I eliminate some possiblity of them moving while welding them together.
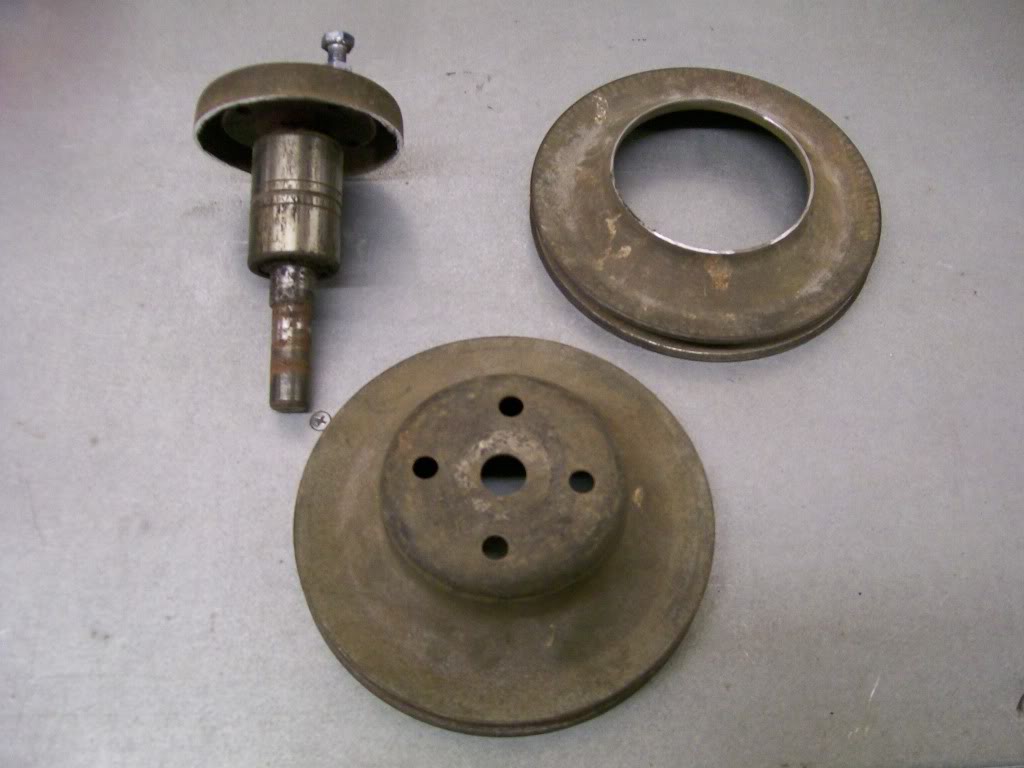
Being older and a fabricator, I knew to keep a water pump shaft and hub around for just this reason, it creates a perfect mounting for water pump hubs in the lathe. Here is the pulley cut in two pieces, and the non-cut pulley. Imagine placing the cut one on to the front of the non-cut one, looks like a fit to me.
2-25-2012
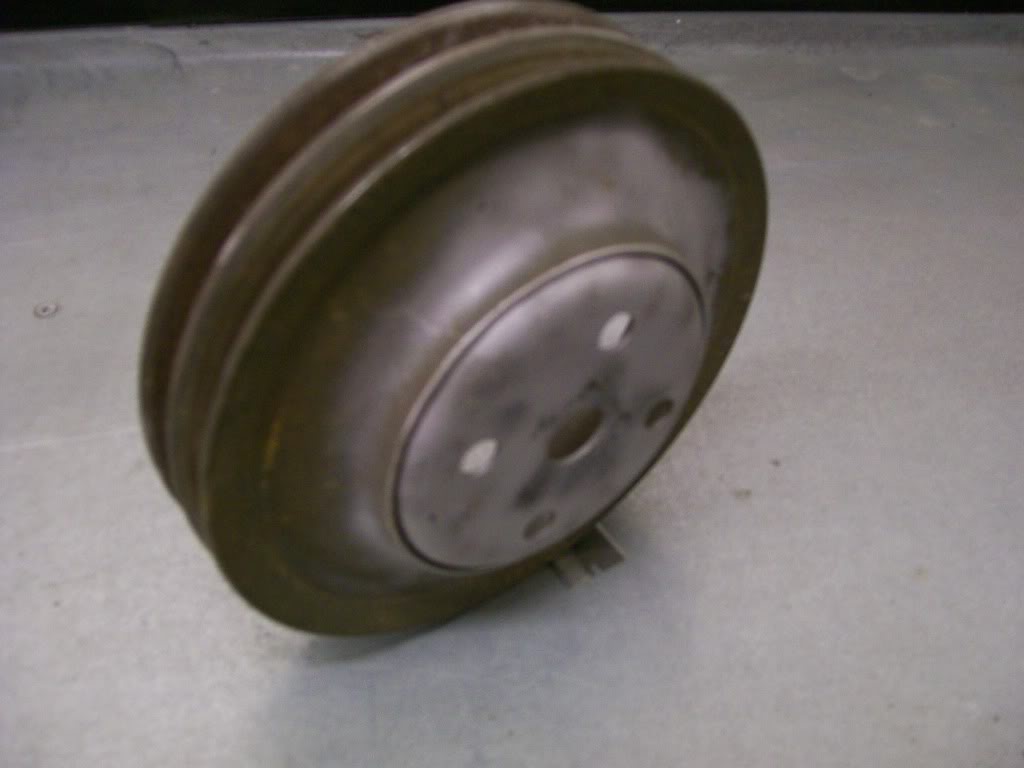
Getting this water pump pulley assembled and ready for duty.
Here is the two main pieces pressed together. The fit of the two pressed together really fit well and the edges of pulleys came right together nicely.
Welding the two together. Yeah, I know, my tig welding need practice. I keep doing the welding with tig for a weld that I know the penetration from start to finish . Once again, the mig is a great welder, I just know with the tig where I can quarantee a good deep weld is reassuring on something like this pulley.

No more looking trough a catalog for the pulley I need. Two pulleys turned into the exact one I need.
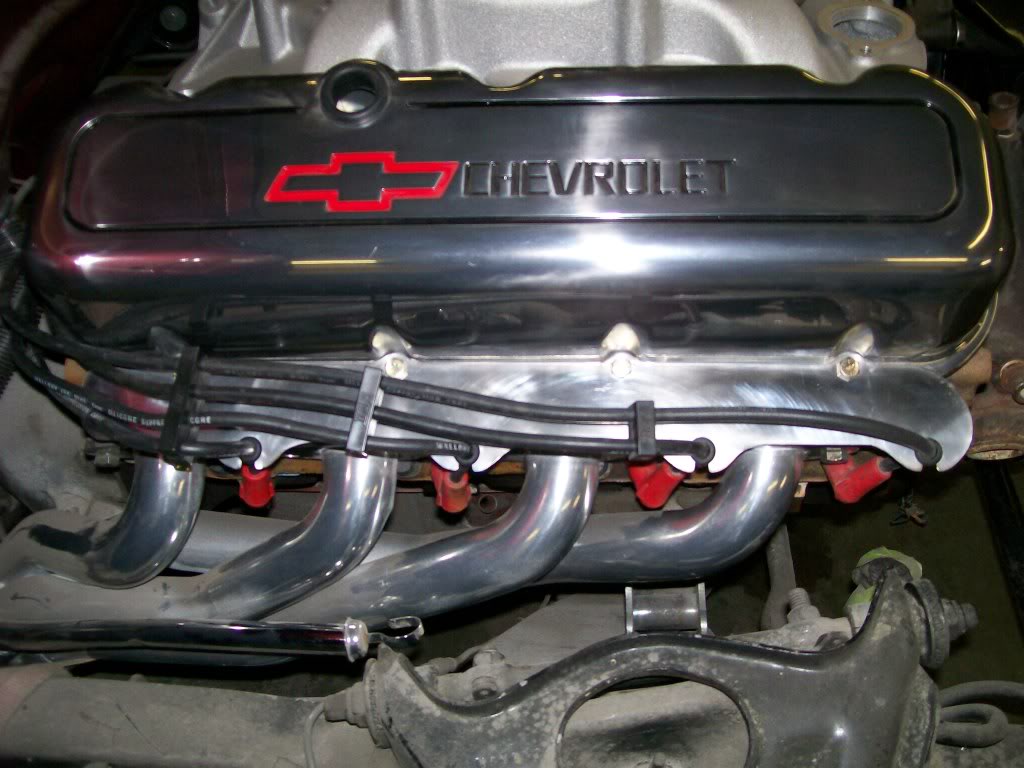
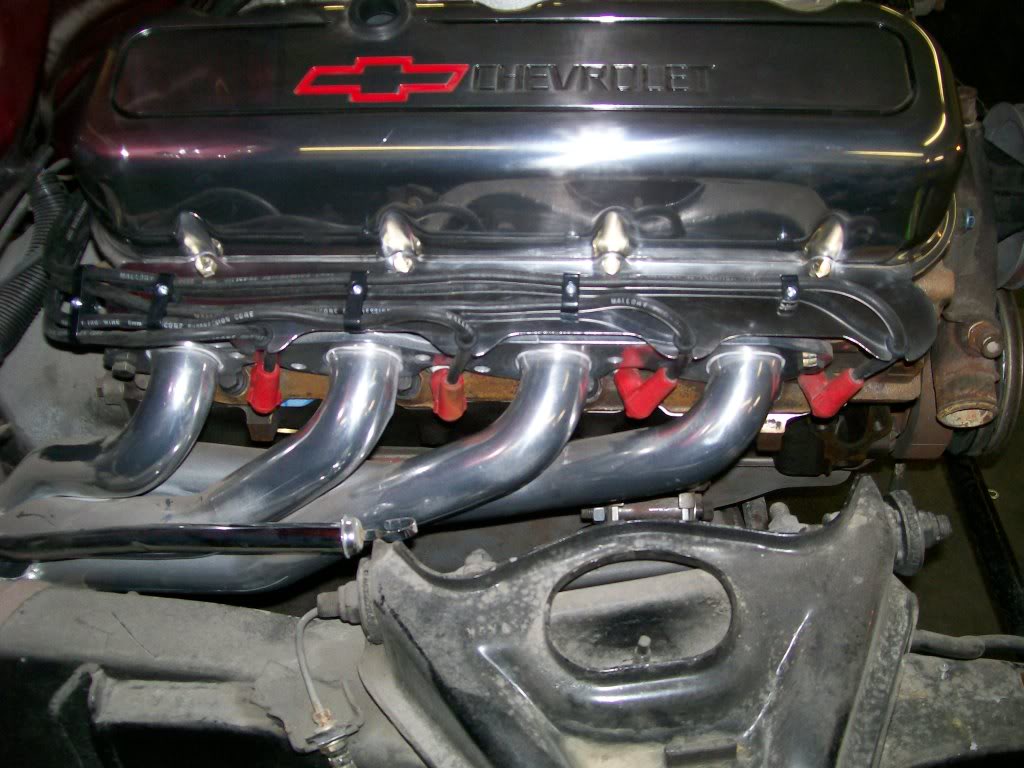
I got the wire holders from Jegs. I was looking for a way to separate and at the same time, hold the wires to the stainless steel covers I made.
During this time I did one more buffing to the stainless and I still will buff and polish at least one more time. I like the stainless over chrome if I can, it simply lasts longer.
The wires I'm using are just some I've had laying around and they have some prebends in them so they don't settle as straight as I'd like for them to, but the overall look is evident.
I also like this set up because it leaves the top of the engine without the extra clutter of the wires hanging over the valve covers. They'll drop behind the valve covers then down the side. When I do buy the wires set I will buy the ones that do not have both ends already attached, this way I can cut them to the length I want.
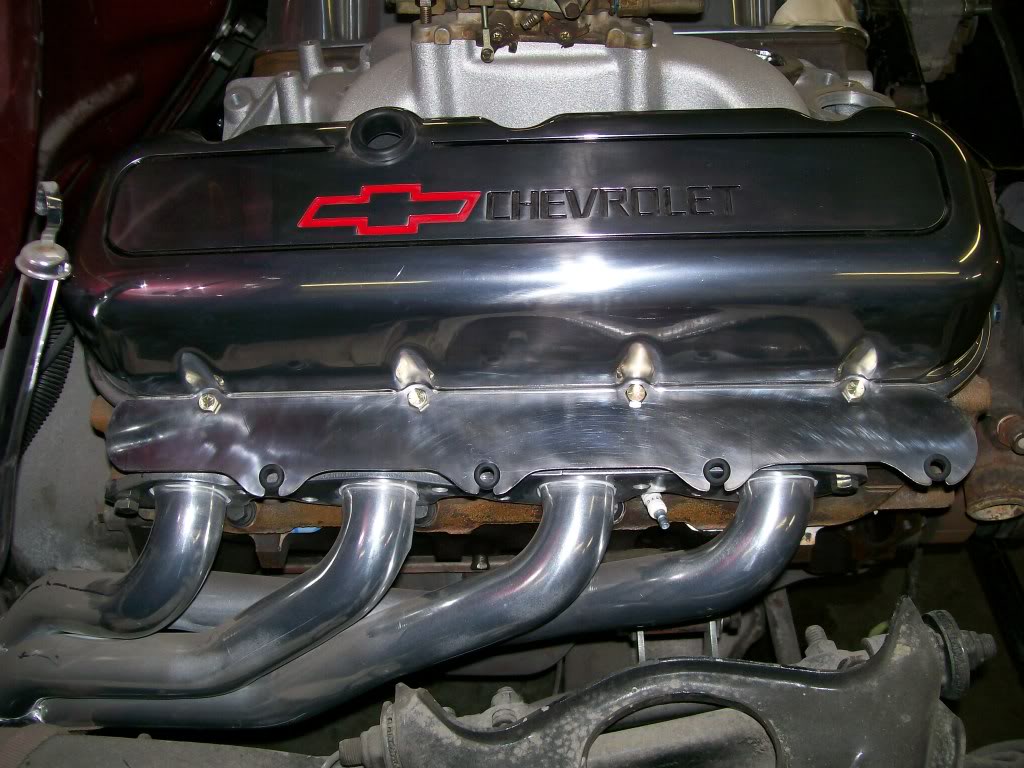
I took two pictures, one with no flash, and one with the flash. I kinda like the no flash better, I suppose it's because there's no refection from the flash to distort the image.
No flash.
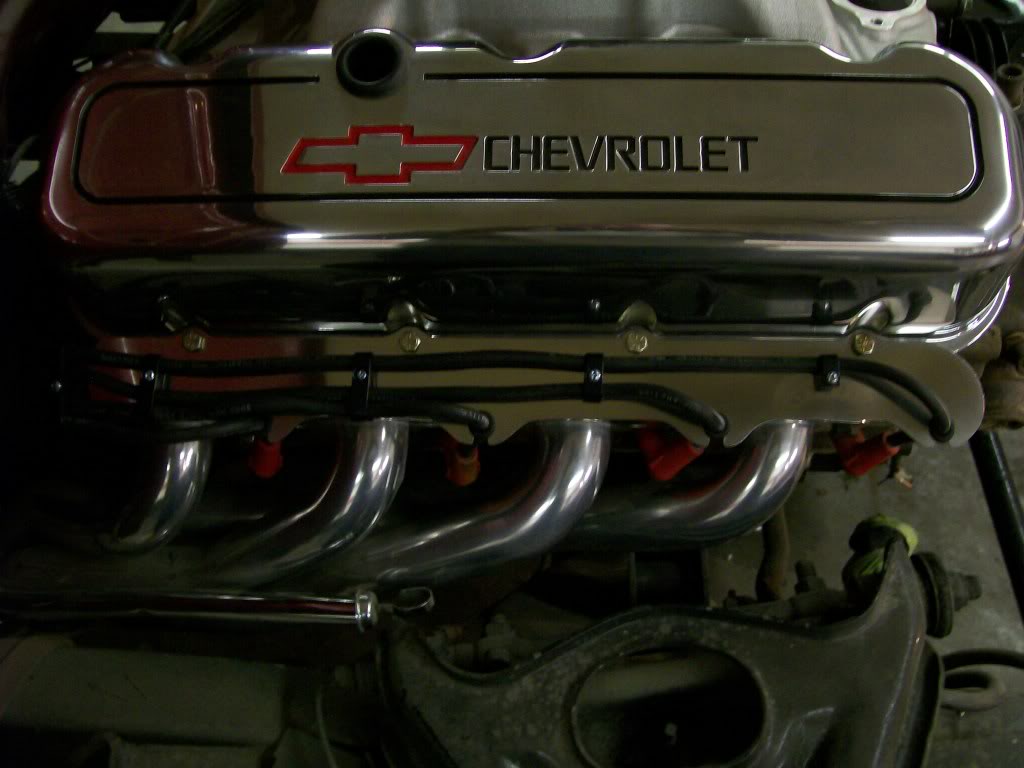
Yes flash.
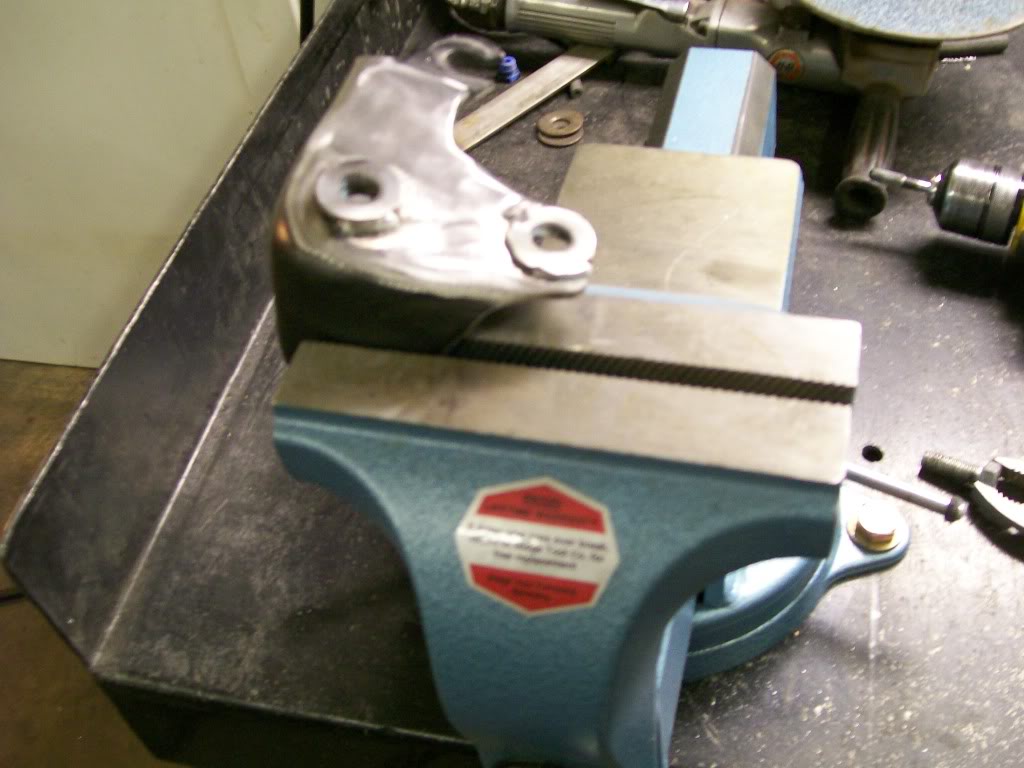
Other than the pulleys being in alignment I had an issue with the bottom power steering bracket. This bracket is a main structural bracket but it didn't hold the pump just right to center well with the other pulleys.
Thank God I take to time to deal with this now other than doing it after paint. I want to paint, assemble, smile then drive.
I found that by placing one washer behind the upper mount, and two washers behind the bottom mount I get a perfect alignment. Do I want to remember this set-up later? No, I just want to assemble. I will simply tack weld the washers in place, then paint, then assemble as if they are a part of the bracket. There is gonna be enough odds and ends to deal with later, try to eliminate what you can now.
You'll notice a different vise, yes the old one did it's job, and it was like a movie star with all the pictures that were taken of it, but it had its issues. I found this one sold by Rigid, what a beast. The jaw width is 6", but it opens to just over 9', wow. Very, very solid feel to it.